




Whether you call them do overs, Mulligans, or second chances, we all need those opportunities to go back and fix something we botched. If only the rest of life had something like Photoshop’s History panel, where you can freeze any moment in time by taking a snapshot, and then return to that state whenever you like.
Here are two ways to create snapshots in Photoshop:
1. The one where you get to set the options: Hold the Option/Alt key and click the New Snapshot button at the bottom of the History panel.
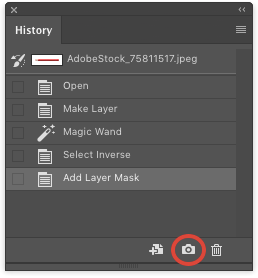
This method gives you the opportunity to name your snapshot something descriptive (always a good idea), and choose whether to make the snapshot of the full document, merged layers, or just the current layer.
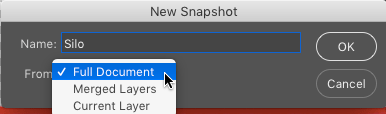
Or you can omit the Option/Alt key and create a snapshot with default settings.
2. The one that’s (almost) totally automatic: Go to the History panel menu and choose History Options. In the dialog box, choose Automatically Create New Snapshot When Saving.

Then every time you press Command/Ctrl+S, a new snapshot will be saved, named with the time it was saved.
To make a snapshot be the current state of your document, just click it.
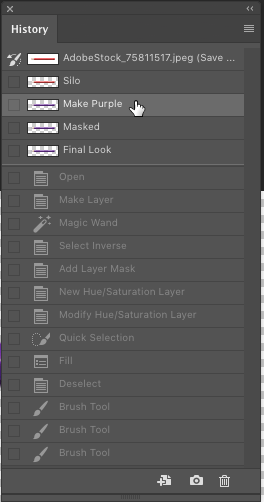
Just remember that snapshots only last for as long as you keep the Photoshop document open. Once you close the file, snapshots are deleted. If you need something more permanent, use the other button at the bottom of the History panel, which allows you to save states of your document as separate files.
This article was last modified on January 12, 2026
This article was first published on March 20, 2017
Commenting is easier and faster when you're logged in!

Recommended for you

Using Photoshop’s Generative Fill to Remove Objects
Learn how to simply remove items from an image in Photoshop, without extra conte...

How to Adjust Colors in Photoshop Using Hue and Saturation
Learn how to manipulate an image’s colors using Photoshop’s Hue and Saturation s...
Tips to Control Photoshop Layers
Khara Plicanic shares smart Photoshop Layers panel tips to help you find and man...