

The “Creative Thinking” approach to working in Adobe Photoshop encourages you to start a new layer whenever you get to a stage that you like. Collecting zillions of layers is wonderful for your creative workflow, but some things, like filters, can only be applied to one layer at a time.
This project will start with a way to apply filters to multi-layered files and move on to cover some of the ways to colorize an image without using Layer Masks or Adjustment Layers. In the first part of this project, I showed you how to boost the contrast of a badly exposed photo by duplicating layers and changing the Blending modes. This second part is self-contained, so you don’t need to revisit the first. (If you’d like to see what I did, though, check out “Creative Thinking in Photoshop: Improvising with Layers.”
But in order to follow along, begin this phase of the project by downloading a Photoshop file. (Right-click or control-click to download the base image. Because of a database convention, the file name will appear as “jump.”)
You should be able to replicate these techniques even you are using an older version of Photoshop or Photoshop Elements 2.0. (For my next “Creative Thinking in Photoshop” piece for creativepro.com, I’ll focus on some of the great new features of Photoshop CS, including my favorite, Layer Comps.)
Flattened, Merged Copies
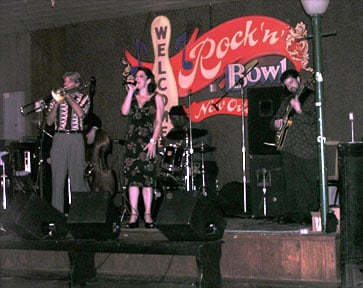
When last we checked in with the Ingrid Lucia and the Flying Neutrinos project, the working file contained seven layers (see Figure 1).

:
Figure 1: An in-process version of the Ingrid Lucia and the Flying Neutrinos image (top) and the Layers palette showing seven working layers (bottom).
Although there are a number of ways to apply filter effects to your image, perhaps the easiest way is to create a flat “Merged” copy of your visible layers. (NOTE: Making a Merged Copy is probably the fastest way to make a quick, flat, rasterized copy of any of your visible files — including Shape and Type layers!)
To make a flat copy of your currently visible layers, make sure that your current (active) layer is one of the visible ones, then choose Edit> Select All (Command-A/ CTRL-A) and Copy (Command-C/ CTRL-C). Next, click on your topmost layer to “activate it” and choose Edit> Paste Merged (Command-Shift-V/ CTRL-Shift-V), which will paste a flat “merged copy” of your layers into a new top layer (see Figure 2). Rename the layer “Copy Merged of below” by double-clicking on the Layer name (in some versions of Photoshop you may need to hold Option/ Alt when you double-click to rename a layer).
 Figure 2: The Layers palette (with icons enlarged from Palette Options) after the Merged Copy of the visible layers is pasted on top and renamed.
Before you begin experimenting with the Merged Copy, make it easy to return to this merged stage: Duplicate the Merged Copy layer by dragging it over the New Layer icon. Now you can freely experiment with applying filters to this duplicate of the merged layers. Even “boring” filters (like Unsharp Mask) can do cool things if you exaggerate the settings.
Playing with Layers and Filters
In my final version of the image, I used Filter> Sharpen> Unsharp Mask, with settings of Amount: 200, Radius: 15, Threshold: 0. Try experimenting with the Unsharp Mask settings to see the effect of various settings (see Figure 3). Make notes of the settings you use, and rename your layer with those settings. If you don’t like what you see, you can trash this layer and make another duplicate of the Merged Copy.
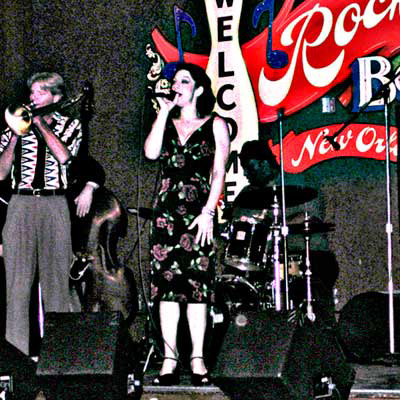 Figure 3: Unsharp Mask applied to the duplicate of the Merged Copy layer.
If you want to continue to experiment with other filters, duplicate either this last layer or the original Merged Copy layer. Depending on which layer you duplicate, you may have to use the Layers palette to either hide layers above, or reorder your layers (drag one layer above another).
To replicate the Flying Neutrinos image, duplicate the layer with Unsharp Mask applied, then apply Filter> Artistic> Film Grain with the settings set to Grain: 5, Highlight: 10, Intensity: 5 (see Figure 4). Try experimenting with other settings.
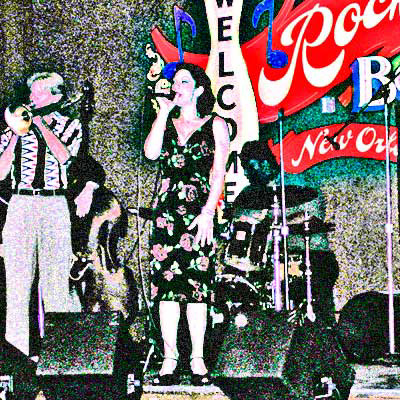 Figure 4: A detail of the image with Film Grain applied to a copy of the Unsharp Mask layer.
You can also adjust the Opacity of the various layers. See what happens to the effects you’ve applied if you vary the opacity of different layers. To replicate the effect in the Flying Neutrinos image, reduce the opacity of the Film Grain layer to 33% (see Figure 5).
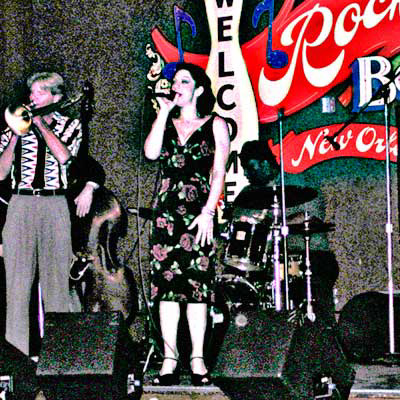 Figure 5: A detail of the image with the Film Grain layer reduced to 33% Opacity.
Coloring and Lightening Layers
In the first half of this project, we were able to color the background of the “Rock ‘n Bowl” sign (and not the letters) by setting a layer to the Lighten Blending Mode, and then painting with a bright red that was darker than the lettering. There are a number of other blending modes that help you color or colorize your images. Make sure you start by creating a new layer for each kind of coloring you intend to try.
Above the Merged layers that have filters applied, the Flying Neutrinos image used one new layer set to Multiply blending mode to create a classic “colorized” look (see Figure 6), and another new layer set to Screen blending mode to colorize while slightly bleaching the image lighter (see Figure7). The layers palette shows the basic construction of the image (see Figure 8). Each of these blending modes allows you to work fairly loosely and quickly, but you’ll definitely have more control and work more easily by using a graphics tablet (such as a Wacom tablet). If you do use a pressure-sensitive tablet, set your painting tools so that in Brush Options the Opacity control is set to “Pen Pressure.” (If you use Photoshop more than occasionally and you don’t have a tablet yet, then get a Wacom tablet now!)
 Figure 6: A detail of the image with the top layer set to Multiply Blending Mode so that colors painted in that layer create a classic “colorized” look.

Figure 7: A detail of the image with the top layer set to Screen Blending Mode so that colors painted in that layer bleach the image slightly as they color.
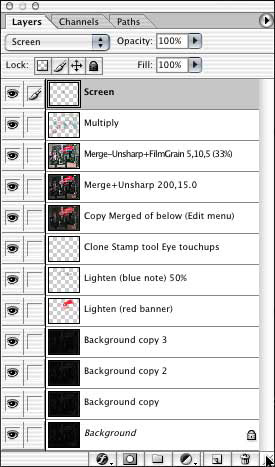
Figure 8: The Layers palette with the image complete, but before the finishing details.
Finishing the Image
The finishing touches for the image were created with a combination of “live” type and object layers (see Figure 9).

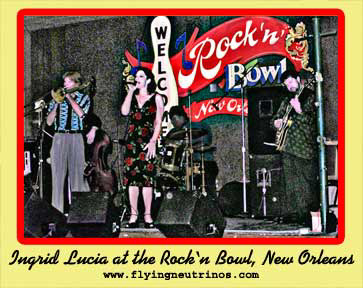
Figure 9: The final layers palette (top) and the final image (bottom).
There are two versions of the same finishing touches layers:
- As a Layer Set (looks like a folder)–this will only be visible as a Layer Set in later versions of Photoshop;
- As individual layers — since Layer Sets aren’t accessible from all versions of Photoshop, the finishing touches are also in the file on top as individual layers. If your version of Photoshop doesn’t show a folder-like icon with an arrow indicating that you can expand “Layer Set Finishing touches,” then hide the “Layer Set…” and then view the separate individual layers above.
To examine the specific settings for any of the type or object layers, double-click the layer.
Want to see the actual Photoshop file that resulted? The final version of the image that contains only the ultimate successful layers (and none of the experimental junk I threw out!) can be downloaded here (Right-click or control-click to download the final image. Because of a database convention, the file name will appear as “jump.”)
Note that the Type layer includes two typefaces: Swing and Courier. If you don’t have those typefaces and want to see what the type should look like, hide the layer “Ingrid Lucia at the Rock ‘n Bowl” and instead view the “ALT: Rasterized type” layer.
That’s it!
This article was last modified on January 3, 2023
This article was first published on January 27, 2004
Commenting is easier and faster when you're logged in!

Recommended for you

Create an Amazing Escher-Like Face in Photoshop
The technique of “unwinding” a face was first explored by the Dutch...

Working With Dynamic Symbols in Adobe Illustrator
Symbols have always been a powerful tool in Adobe Illustrator. With symbols, you...

3D Printing from Photoshop
3D printing is the technology of the year, but few people realise you can create...