
Creating Social Media Assets with InDesign
How to speed up, streamline, and simplify social content creation with your favorite page layout program.


This article appears in Issue 148 of InDesign Magazine.
Whether you create social content for clients, for your own business, or just, you know, to be social, there’s no shortage of tools to help you out. You can create posts within the various platforms themselves, use an assortment of tools from social media marketing services, or take advantage of targeted solutions like Adobe Creative Cloud Express (formerly known as Adobe Spark) or Canva. But few solutions offer as much flexibility, customization capabilities, and overall efficiency as InDesign.
Yes, InDesign! It’s easy to think that using InDesign for social media would be like using the Hubble Telescope for backyard birdwatching, but the truth is that InDesign is uniquely positioned to offer a number of advantages—without overcomplicating things. This is especially true if you already have it and know how to use it.
The advantages are many. With InDesign, you can create multiple assets in a variety of sizes within a single document and export them all at once. InDesign also makes it easy to repurpose your existing layouts—with your existing fonts and branding—without having to reinvent the wheel. InDesign is also, at heart, an aggregator and layout tool: You can easily combine (and precisely position) text, vector graphics, and pixel images, no matter their size, resolution, color mode (RGB vs. CMYK), and so on.
And, of course, because it’s part of Creative Cloud, you can save even more time by working with native file formats and leveraging your CC Libraries. (You are using CC Libraries, right?)
To help you create your first social media posts in InDesign, we’ll tackle two tasks: designing a single post in multiple formats and creating a five-part seamless design for an Instagram carousel post.
Fire up your best meme ideas—and let’s jump in!
How to Design a
Post in Multiple Sizes
InDesign makes repurposing a single layout for different sizes and formats a total breeze. To show you how slick it can be, we’ll create a CC Library specifically for social content and use it to create a single, one-page document in InDesign. Then we’ll reformat the layout to three additional sizes before exporting the whole kit and kaboodle for Instagram, Pinterest, and Facebook. (If you listen carefully, you can almost hear your engagement stats climbing already!)
Setup your document, presets, and library
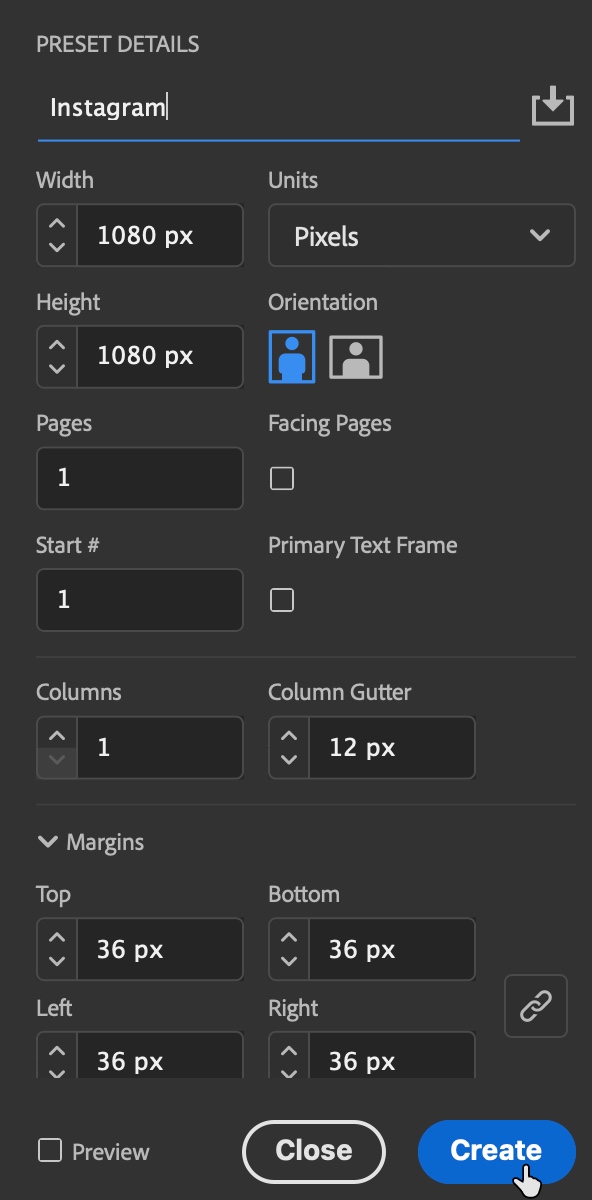
For this example, we’ll get the party started by creating a new document. Be sure to save yourself some time and hassle by clicking the Web button at the top of the dialog box first. That way, your units are set to pixels, and your swatches and Transparency Blend Space will all be in RGB. Set the Width and Height to a sleek 1080 px × 1080 px (the size of a traditional square Instagram post). Make sure the option for facing pages is off, and set your margins as desired. To save this as a document preset to use again later, click the Save icon to the right of Preset Details at the top of the dialog box, enter the name Instagram, then click Create (Figure 1).
Because we know we’ll be using a load of different page sizes for all the different platforms and their various format options (new ones keep cropping up all the time), let’s take a minute to get them out of the way by creating a preset for each right now.
Keep in mind that you can create as many presets as you need in as many different sizes as you can find the file specs for. In this example, we’ll create presets for four popular formats: Instagram story, Pinterest, Facebook, and traditional Instagram.
Socially Sized
It seems like the major social media platforms are always tinkering with their image sizes, just to drive you batty. To stay on top of the inevitable changes, bookmark this guide to social media post sizes from Sprout Social.
To create the first of four new page size presets, click the Edit Page Size button at the bottom of the Pages panel and choose Custom from the menu. Enter the name Instagram Story, set the dimensions to 1080 px × 1920 px, and click Add to save this as a new page-size preset—but don’t click OK yet (Figure 2).

Next, enter a width of 1000 px and height of 1500 px. Type the name Pinterest, and click Add. Two down, two to go!
Create a third page-size preset with a width of 1200 px and a height of 630 px for Facebook (don’t forget to click Add). And finally—because the Instagram document preset that we created earlier is separate from the page size presets we’re making right now—create a fourth preset of 1080 px × 1080 px for a square Instagram post. Then, click Cancel (Figure 3).

Wait, Cancel?! Yep. After all that work, we’re canceling. But never fear—our efforts will pay off shortly. For now, we’re still working with our single, square Instagram page.
Build your social media asset library
Before we move on, to really turbo charge your efficiency and get the most bang for your buck, gather your most frequently used social design elements into a dedicated CC Library. Logos, icons and other graphics, copy taglines, and color swatches are a good start, but it doesn’t have to end there.
The social media aesthetic (for better or worse) lends itself to oodles of fun details and design elements like stickers, arrows, and trendy word art overlays. And because the built-in interactivity of some formats (like Instagram stories) allows users to “swipe up” for more—you have the opportunity to design your own custom elements to serve as interactive icons or buttons. So, do yourself a solid, and take a few minutes to round up your most frequently used social design elements. Let’s add them to a brand-new library.
Open the Libraries panel by choosing Window > CC Libraries. Click Create New Library, give it a name like, Social, and click Create.
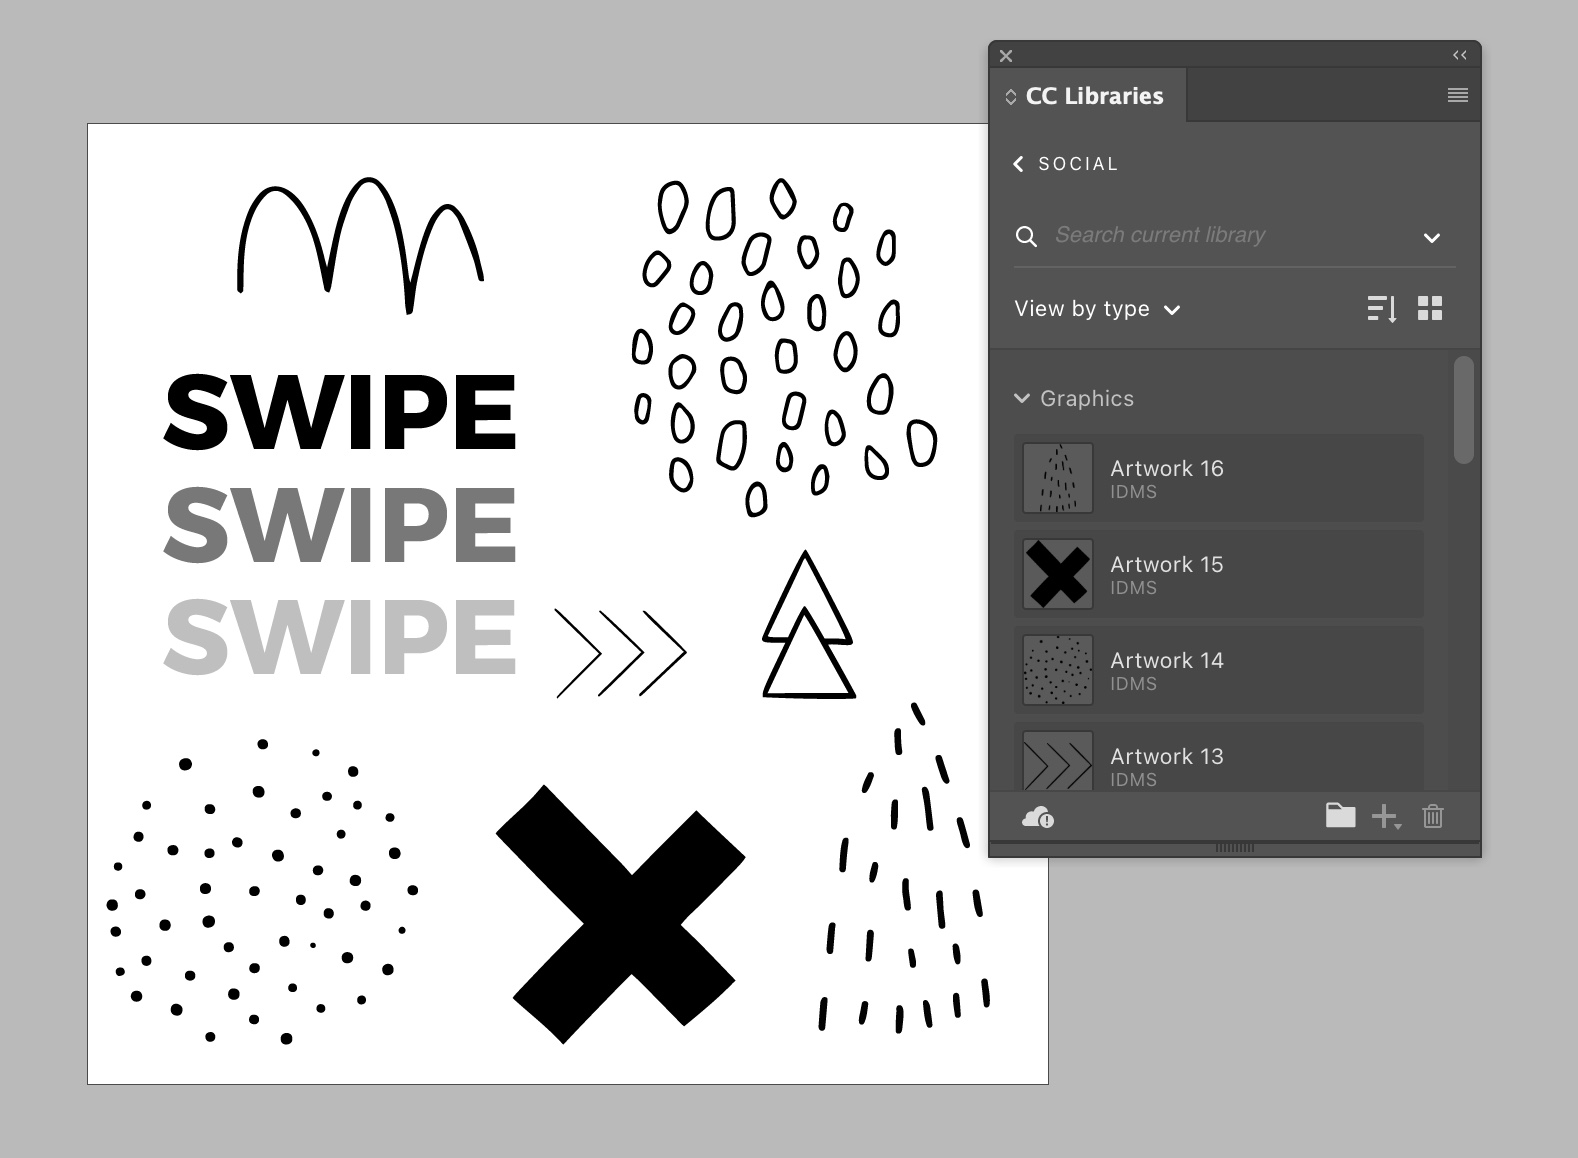
Before you can add content to your new library, you first have to add the content to your InDesign document. (My favorite technique is to select the desired content in Bridge, then choose File > Place > In InDesign.) Once the assets are in your document, drag each item to your new library (Figure 4). Note: If you drag multiple items to the library at a time, they will be grouped together as a single item, regardless of whether they’re actually grouped in InDesign. If you want them to be stored as separate elements, drag them in individually.
Changing Colors on the Fly
If you find yourself frequently needing to change the color of certain elements in your posts (like changing the color of an arrow graphic or simple logo from black to white for different design needs)—and you have access to a vector version of that element—instead of placing the file into InDesign, open it in Illustrator, select the item, copy and paste it directly into InDesign, and then drag it to your library. This brings it in as if you created it natively in InDesign—allowing you to easily change the strokes and fills as needed.
Design your first post
Now comes the fun part: creating the design! Whether you’re creating inspirational quotes, client testimonials, marketing messages, or the world’s next viral meme, InDesign makes it easy.
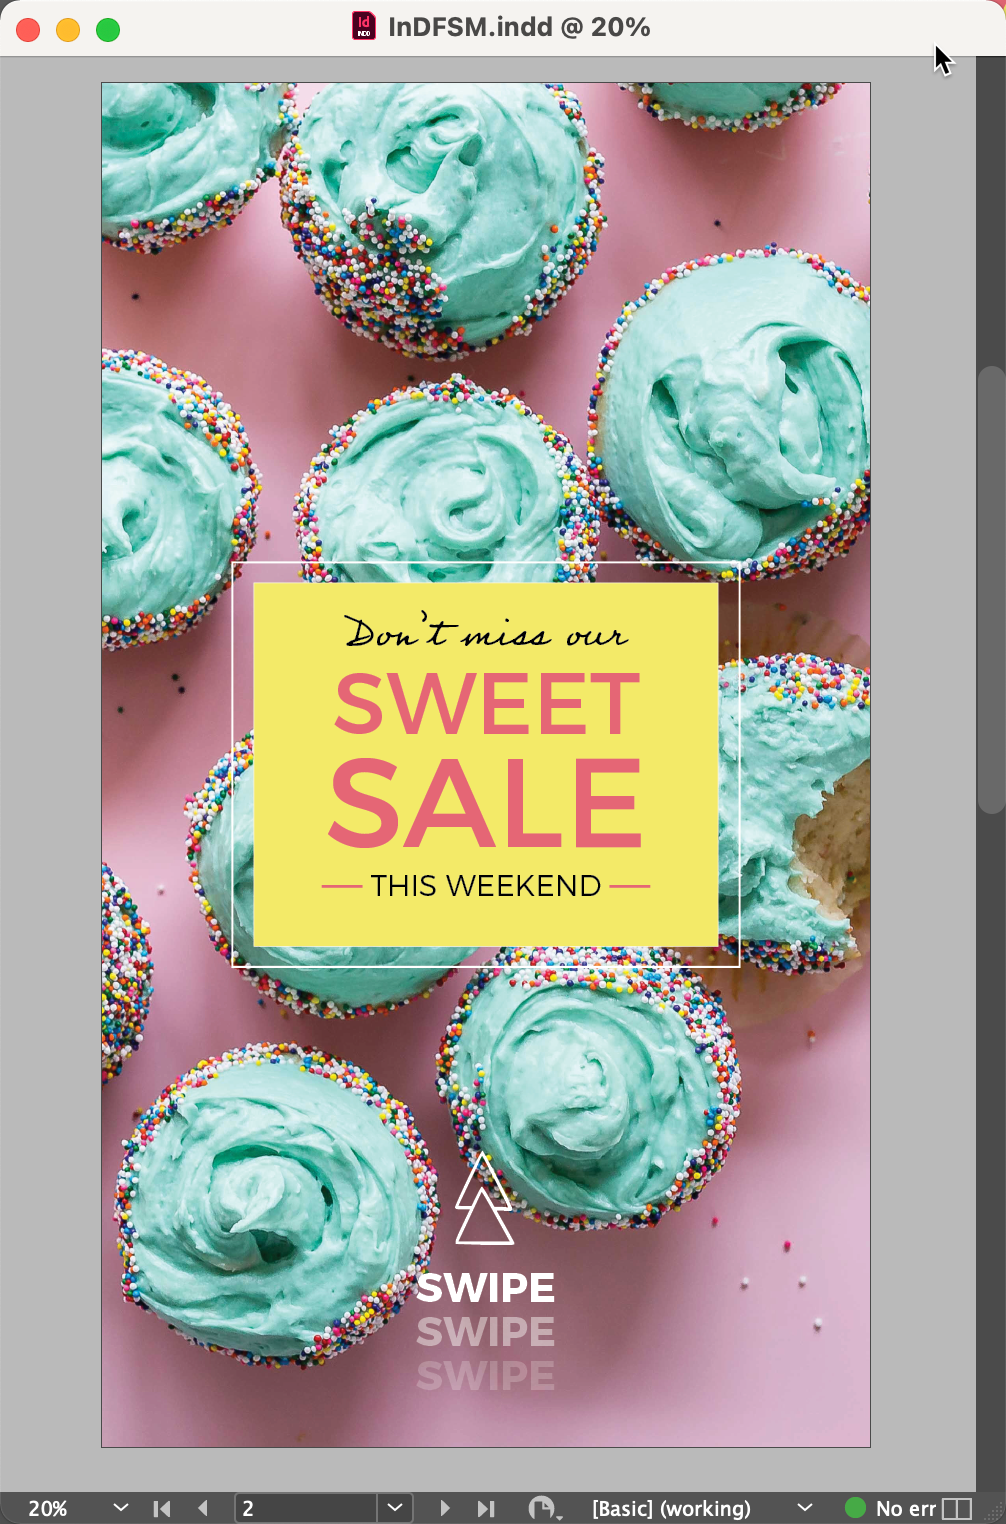
For this example, I’ve created a simple promotional post for a fictitious sweets shop (Figure 5). Because the document is formatted for a traditional Instagram post, it’s square. But—assuming our fictitious sweets shop is killin’ it on social—we’ll also want to create vertical versions (in two sizes) for Instagram stories and Pinterest, as well as a fourth, horizontal version for Facebook.

Reformat the design for different platforms
Now that we have the initial design, we’re ready to reformat it for different platforms. First, duplicate Page 1 by dragging it to the Create New Page button at the bottom of the Pages panel. (Alternatively, you can also right-click the Page 1 thumbnail in the Pages panel and select Duplicate Spread, or Option/Alt-drag the page over to a blank spot in the document area of the Pages panel.)
Next, click the Edit Page Size button (from the bottom of the Pages panel) and choose Custom from the menu. From the list of page size presets, choose the Instagram Story preset we created earlier, then click OK.
Astute (and not-so-astute) observers will notice that while the page size has updated—the layout (most likely) has not (Figure 6). Thankfully, InDesign offers several options for handling layout adjustments, including a pair of semi-automated features known as Adjust Layout and Liquid Layout.

Adjust Layout is more suited to situations where you’re changing the layout of an entire document (as opposed to our case where we’re simply using a variety of different page sizes). It can be a life saver if you just found out that the annual report you thought you were finished with actually needs to be printed at an entirely different size.
InDesign’s Liquid Layout feature is another powerful option much better suited to adapting the layouts of individual pages. It works based on a series of what it calls “rules” that govern how certain adjustments are handled. As such, it takes some time and forethought to set up before it can be useful. (To really understand and appreciate the power of InDesign’s options for intelligently handling layout changes, check out Erica Gamet’s in-depth look at adapting layouts and her four-part deep dive on the Liquid Layout feature specifically.)
Because our project consists of only a single-page layout with few elements and even less text, it’s easy to make the argument that the quickest and easiest route to adjust such a simple layout would be to just do it manually.
Of course, you can still take advantage of options like Auto-Fit to adjust framed content on the fly. To enable it, choose Object > Fitting > Frame Fitting Options and select Auto-Fit. Note: To apply this option as the global default, you’ll need to first save and close your file, then make the change while no documents are open—or use object styles to define your fitting preferences.
After manually adjusting the layout, you’ll repeat the process of duplicating the page, changing its size, and adjusting the layout twice more; once for Pinterest and again for Facebook. So, to summarize, it’s just three easy steps:
- Duplicate the page.
- Edit the page size.
- Adjust the layout as needed.
Don’t forget about instances where you can incorporate interactivity, like inviting users to swipe up for more content when posting to Instagram stories, for example. In Figure 7, you can see how I used the vector arrow elements from my Library to encourage viewers to swipe for additional engagement.
Just to be clear: When I say “interactivity,” I don’t mean using InDesign’s interactivity features; those won’t work for these kinds of social media images. I just mean inviting your audience to interact through swiping, liking, and so on. In fact, there are lots of fun and clever ways to visually encourage engagement using the designs themselves. Check out Pablo Rochat’s Instagram feed for some brilliantly hilarious examples.
Labeling and File Naming
It can be easy to forget which page is formatted for which platform (especially when some platforms feature posts of different but similar sizes). If you’re working with a large number of posts (or you’re just a type-A personality who really likes organization), here are a few options for keeping track of which page is intended for which platform.
You can apply InDesign’s color-coded labels to page thumbnails by right-clicking them in the Pages panel and choosing Page Attributes > Color Label. You might choose pink for Instagram posts, red for Pinterest, and light blue for Facebook, for example (Figure 8). However, this adds a visual indication to the thumbnails in the Pages panel only. It does nothing to help you differentiate the individual JPGs after they’re exported. But there’s a script for that (for Mac users).

Dr Scripto has a script called Instant Named PDFs and/or Images with several impressive options for auto-generating custom file names for individual pages upon export. The free version works for up to 10 pages at a time. (The full version is currently available for $14.99.)
Because I don’t have a related CSV or text file to automate the file names for these social posts, my file naming method of choice is to create a non-printing layer and add a text frame (containing the desired file name) to each page. As long as you tag the text frames with a paragraph or character style, the script can use the contents to name each exported page (Figure 9).

Export your posts from InDesign
At this point, we have a total of four pages, each one a different size. To get these posts out of InDesign and ready for everlasting internet glory, we’ll need to export them.
Choose File > Export. Decide where to save the files (I like to create a folder for them, otherwise they’ll be loose in whatever location you choose), assign a base file name (or not, see related sidebar), select JPG for the format, then click Save. In the following dialog box, choose your desired settings and click Export (Figure 10).
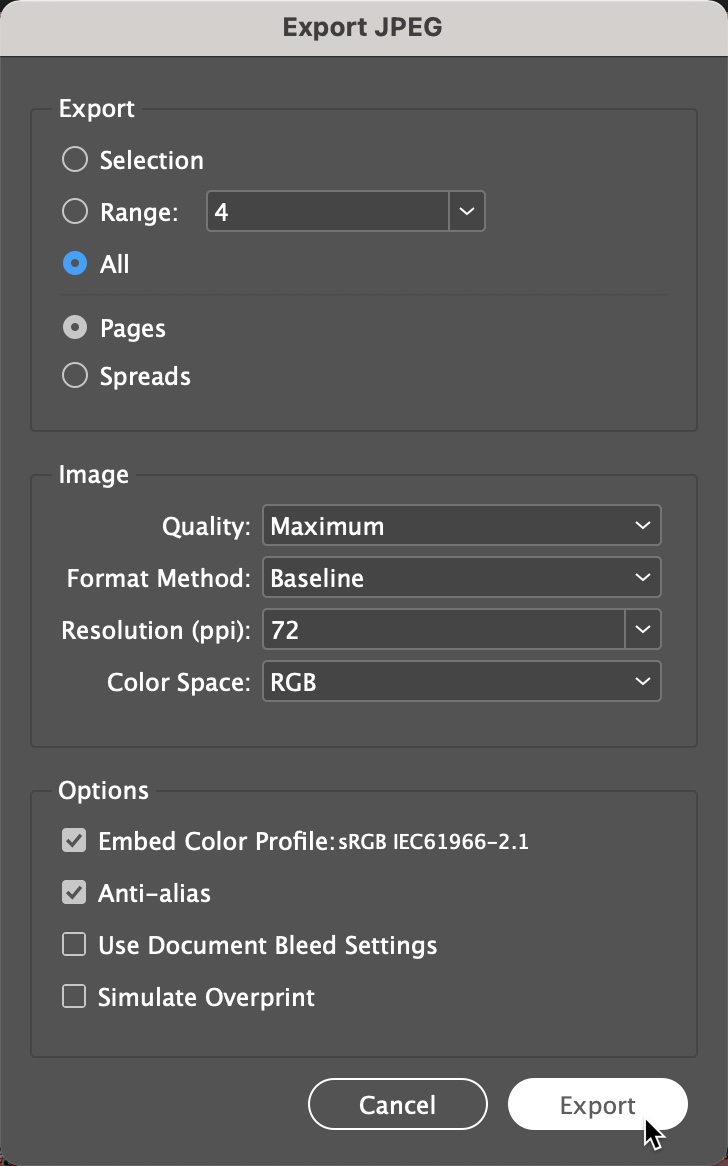
You can also experiment with PNG as the export format if your graphics are simple and mostly composed of areas of solid color. But when you’re exporting detailed graphics or photos, you’re better off sticking with JPG. PNG file sizes will be larger and image quality may suffer in those cases. When it comes to resolution, remember that our document page sizes were based on the image size guidelines for each social platform. In order to match those image sizes, we simply need to export using a Resolution setting of 72 PPI.
It’s true that Photoshop and Illustrator have more robust features for exporting content to the web in crisp and compact files. But we’re talking about social media here, not a coffee table book, so people’s expectations are generally more forgiving. And, of course, your design is rasterized (turned into pixels), so you don’t have to worry about fonts, or anything shifting or changing.
Congratulations, you’re now on your way to going viral! (And hey, if your posts don’t land, you can always go back and try adding a cat.)
How to Create a Seamless Carousel for Instagram
So now you know how easy it is to use InDesign to create a typical social media post in a variety of sizes. Let’s keep this party going by taking what we’ve learned so far and applying it to another popular format: the Instagram Carousel.
One spread, many pages
Carousel posts allow you to post up to 10 images at a time on Instagram, where users swipe through them to access the content one “slide” at a time (Figure 11). While you can certainly create individual, separate layouts for each frame in the carousel, you can also—just as easily—take it up a notch by using InDesign to create a seamless experience.

To do so, create a new document with the Instagram preset we created earlier (1080 px x 1080 px, Facing Pages turned off). The number of pages you choose will depend on how many frames you want your carousel to contain (you can have up to 10). If you want your carousel to use 8 of the 10 available slots, you would set the page number to 8. In this example, I’ll create a carousel with just 5 images.
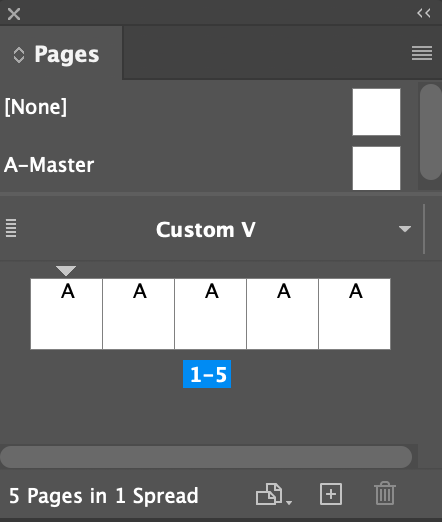
To achieve the look of a long, panoramic-style seamless post, we’ll need to move InDesign’s pages around. First, from the Pages panel menu, select Allow Document Pages to Shuffle (to disable it). This lets you line up all the pages side by side in what is essentially one big spread.
Skipping the Page 1 thumbnail, select the others (click on Page 2, then Shift-click on the last page) and drag them into position, on the right side of Page 1, where they should (more or less) snap into place (Figure 12). Now that you’ve moved all the pages into a single spread, we can get to work on creating a seamless design.
Seamless design considerations
The idea of a seamless design is that when users swipe through the individual pages in the Instagram carousel, the uninterrupted flow from one page into the next creates the look and feel of a single image. This simple delight can be used to enhance the viewing experience—or even to have some fun with a design gag or two. (I keep picturing the entry parlor to Disney’s Haunted Mansion where, as the ceiling raises, the innocent looking wall portraits reveal themselves to be quite a bit more precarious than they first appeared. It was a vertical format, but you get the idea.)
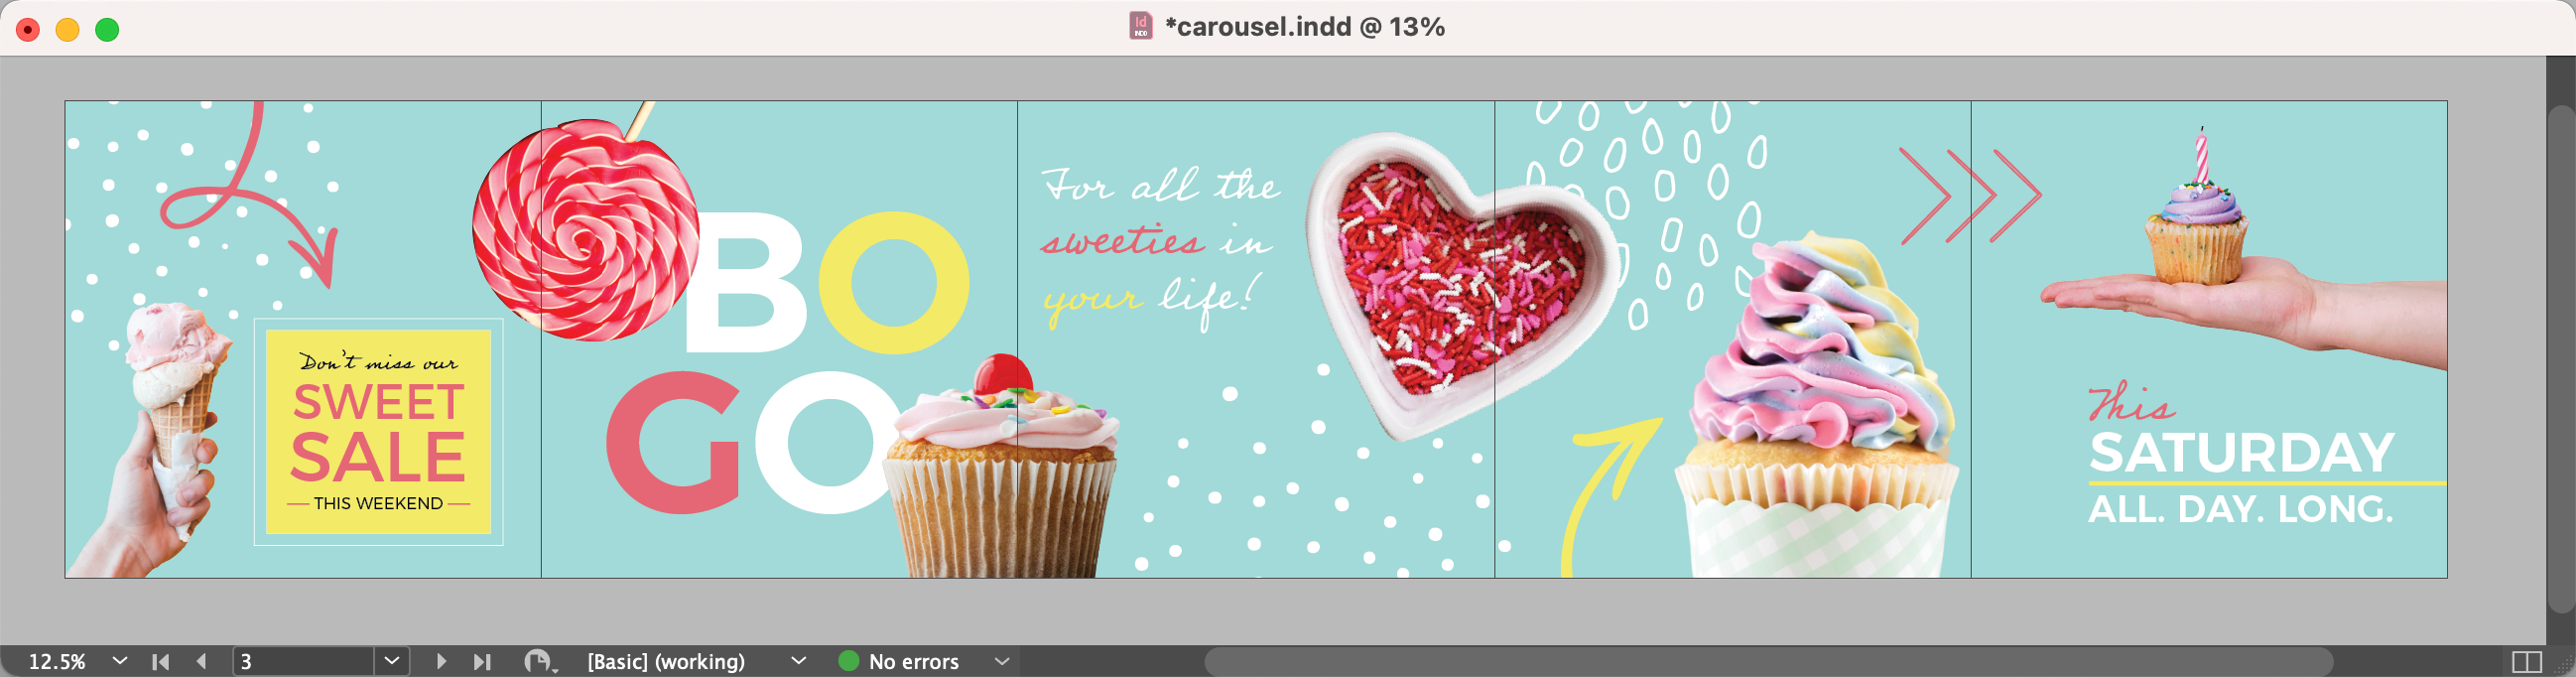
In this example (again for our fictitious sweets shop), I created a single, solid color fill for the background. Then I added images from the CC Library we created earlier, intentionally placing the photos to span the virtual gutters between the pages. However, I made sure to keep the text contained within each page (Figure 13). When it came to the vector elements, I took full advantage of being able to edit their strokes and fills on the fly, making it easy to experiment with color (see the Changing Colors on the Fly sidebar).
Once the design is complete, repeat the process of exporting to JPG, this time making sure to select the option for exporting individual pages and not spreads. (In the last example with all the different sized pages, this setting didn’t matter because the document had no spreads, so regardless of which option was selected, the pages would be output individually.) In this case, we want InDesign to chop apart the different pages and export them separately so they can be uploaded to the carousel individually—creating the illusion of a single super-wide image when users swipe, providing a fun surprise for viewers.
Using InDesign for Social Media Is the Cat’s Meow
Whether creating a single promotional post or 12 entire campaigns for 8 new platforms in 10 different formats—InDesign is uniquely positioned to speed up the process. The sooner you set up your document templates, page size presets, and asset libraries, the sooner you can build your layouts and go back to scrolling your favorite #catsofinstagram.
Commenting is easier and faster when you're logged in!

Recommended for you

Editor’s Picks for The InDesign Conference 2025
Our Editor in Chief lists his must-see sessions for the InDesign Conference 2025...
InDesign Magazine Issue 148: Designing for Social Media
Issue 148 has articles on designing for social media, dielines for creative fold...

How to Make Multiple Social Media Posts in One Photoshop File with Artboards
Here’s how you can use artboards to make social media graphics perfectly s...