

Ever need to create a graphic that shows where to cut something out of paper, like coupons, cards, or game pieces?

Of course, you can just apply a dashed stroke to a frame and find a piece of scissors clip art or a glyph from a font like Zapf Dingbats. Position the scissors somewhere along the dashed stroke and you’re good to go.
See also: Making Numbered Tickets
But if you need to make a bunch of cut out graphics of different shapes and sizes (and especially if you think you might need to change the design at some point), consider a more structured solution. Place the scissors graphic as type on a path, and then create an object style (to apply the dashed stroke, fill color, frame fitting options, paragraph style of the text inside the cut out, etc),
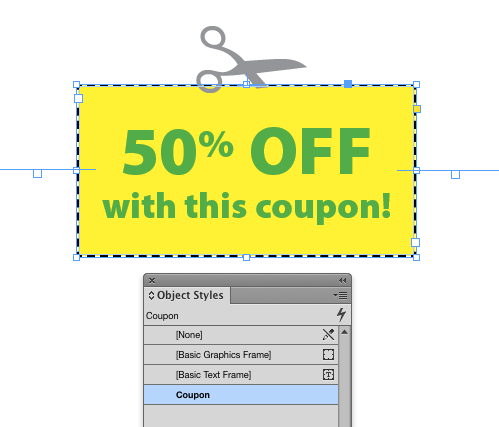
plus a paragraph style to apply the font, color, and positioning of the scissors.

See also: Setting a Dash Stroke with Exact Gap and Dash Values
You can also move the scissors along the cut line by dragging the type on a path margins.

If you want to rotate the scissors graphic, place it in its own frame, and then paste that frame as type on path.

See also: Putting Images on a Stroke
That way, with just a couple clicks, you can turn any frame into a cut out graphic.

Just beware of any deals that seem too good to be true ;)

This article was last modified on December 28, 2023
This article was first published on September 10, 2015
Commenting is easier and faster when you're logged in!

Recommended for you

Finding Type on a Path
When you’re exporting a layout to reflowable EPUB, InDesign will warn you...

How to Put a Stroke Around a Group of Objects in InDesign
You can make text wrap around a group, so why not a stroke?
Type OFF A Path
Moving text between paths and/or frames is easy, once you know the "in" and "out...