

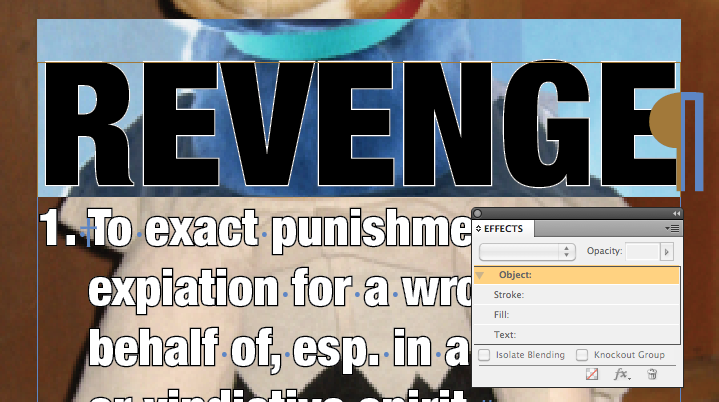
QuarkXPress likes to brag that it can control transparency at the color/character level while InDesign can only control effects on of all of the text, stroke or fill. If you try to change the opacity or add an effect when you have text selected the effects panel will be greyed out.
Create an inline anchored object
Normally when creating outlines of text it is recommended to select the text frame with the selection tool, but if you create outlines of your text while you have it select (type menu > create outlines) it will be come an inline anchored object. This will allow you to now apply whatever effect that you wish to ?word or letter? since it is now an object.

Now that the text is an object you can apply effects to the former text (now an object).

Keeping the text editable (In CS4)
The main problem with this creating outlines is that you will no long be able to edit the text. To prevent this from happening you can create a copy of your text and apply a condition and hide it. If you ever need to edit the text you can delete the anchored object and turn on the hidden text to get it back.

Obviously this is not the simplest method for applying effects, but hopefully this will help you out. Maybe on April 12th we will find out that this work around is no longer needed.
This article was last modified on December 17, 2022
This article was first published on March 29, 2010
Commenting is easier and faster when you're logged in!

Recommended for you

Leading Edges in Directional Feather in InDesign
We talked about Leading Edges in the podcast, but this is really one you just ha...

Fun with the MakeGrid script
Keith wastes way too much time playing with the handy MakeGrid script that's inc...

How to Make Multiple Graphics Flow with Text
InDesign makes it easy to insert a single graphic so it flows with text. But wha...