Create an Artificial HDR Effect in Photoshop

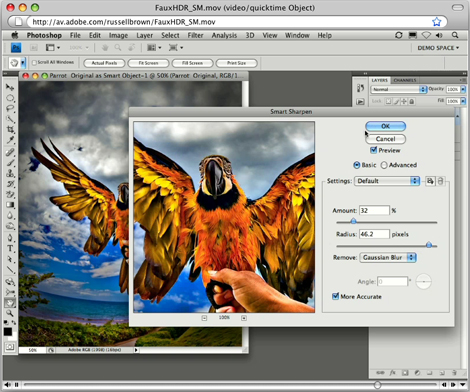
HDR is cool, but because it requires multiple takes of the same scene that are nearly identical, you might think it’s impossible to achieve when you’re shooting objects that move.
However, with Adobe Photoshop CS4 and this tutorial, you can create a faux HDR effect that adds an oversaturated, illustrative enhancement to underexposed images.
Stream the 10MB QuickTime tutorial in a separate window by clicking the image below.


Bookmark
Please login to bookmark Close

This article was last modified on January 5, 2023

Comments (12)

Leave a Reply

Your email address will not be published. Required fields are marked *

  1. Justin Taylor
    March 11, 2013

    I think this effect is becoming a bit overused. How about a good old decent exposure?
    Chris Hall Photography

  2. Anonymous
    January 25, 2011

    nice

  3. Anonymous
    November 20, 2010

    I have to say the information was very good. The delivery is exciting, though just a little over the top. Other than – a great tutorial. Thanks

    https://www.tomhallphotography.com.au

  4. Anonymous
    July 22, 2010

    me gusta mucho esta pg

  5. Anonymous
    June 5, 2010

    Many interesting things and can do with this program. You just know how to use it. so you must learn in time, unfortunately, with a lot of practice.accesorii auto|auto occasion|rca ieftin

  6. Create8
    January 15, 2010

    Thanks for this very helpful tutorial. The parrot looks absolutely amazing, I didnt know this could be done.

  7. Anonymous
    December 12, 2009

    Actually, this is a pretty common topic on the web. I think a better website overall for stuff like this would be cambridgeincolour.com

  8. Anonymous
    August 20, 2009

    Thank you so much for this! I have tried several tutorials for making HDR like images and none come close to this one. I saved your video because I never want to lose this!

  9. Anonymous
    August 20, 2009

    Russell Brown has created the BEST TRAINING VIDEO OF THE DECADE! Even if you don’t plan to use his specific effect, seeing the range of possibilities out of RAW is incredibly valuable. Most videos — understandably — are trying to make it look “right.” In that most are alike! But Mr. Brown spreads his wings and soars with his parrot over mountains, Asian gardens and more. Beautiful. More!
    Hawai’i Bill

  10. Anonymous
    August 3, 2009

    Of course it’s always best if you start with a raw image, but you can open a JPEG image in Adobe Camera Raw and get the same effect. Assuming the camera didn’t throw out too much necessary detail when creating the jpg, of course. Thanks for the great tutorial!

  11. Anonymous
    July 17, 2009

    I think ‘Russel Brown HDR Effect’ works fine just for parrots :-) Anyway I watched and learned your many tutorials: thank you very much.

  12. Anonymous
    July 16, 2009

    Absolutely awesome, Mr. Brown!!! Thank You! :)