
This is an excerpt from “The Photoshop User’s Guide to Motion and Video” published in Issue 18 of CreativePro Magazine.
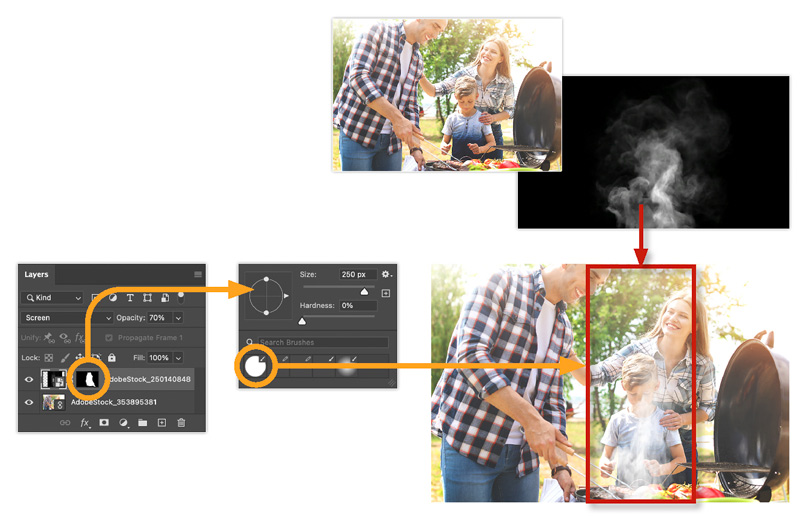
One of the great things about working with video and motion graphics in Photoshop is that you can use the same editing and compositing tools you currently use for your projects. For example, Figure 1 shows how I composited a video of smoke against a background with a flattened Photoshop image of a family grilling.
To try something like this yourself, first create a video timeline in the Timeline panel. Next, choose File > Place Linked to import the video into your layout without creating a video group. Scale the placed video to fill the screen and press Return/Enter. Photoshop imports the video as a Smart Object, which enables you to transform the video in the layout.
The goal is to create an animated photo in which the moving smoke appears to be coming from the grill. First, let’s change the video layer’s blend mode to Screen (which makes the dark pixels transparent), then nonproportionately scale the width to get the smoke to align with the edges of the grill. Next, set Opacity to about 70% and apply a layer mask to the video layer.
On the video mask, paint with a medium-sized soft brush with the foreground color set to black to conceal the video in areas of your layout. For my example, I painted with black to mask the video at the bottom edge of the image (up to the food on the grill), around the family’s faces, and toward the top of the canvas. As you make adjustments to your mask and layer opacity, click the Play button in the Timeline panel to check how the overall effect is looking. As with any project, continue to refine your mask until you’re satisfied with the results.
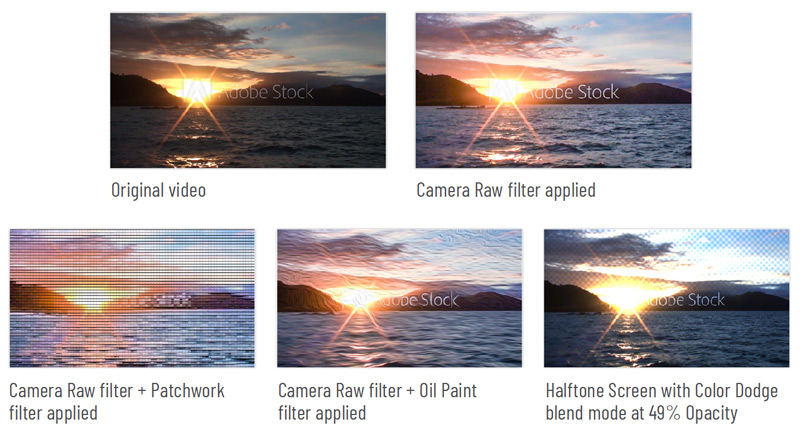
You could also apply a motion blur to the smoke layer. Because that layer is a Smart Object, Photoshop applies the effect as a nondestructive Smart Filter. What makes Smart Filters so amazing is that they are applied to every frame of a video.
In Figure 2, I imported a video of a sunset from Adobe Stock and applied various filters as Smart Filters. Using this technique, you can achieve some beautiful effects that can transform your video into a work of art.
This article was last modified on May 29, 2025
This article was first published on May 27, 2025
Commenting is easier and faster when you're logged in!

Recommended for you
InQuestion: Masking Objects and Color Palette Inspiration
The best Q&A from the InDesignSecrets Facebook group.

Review: Crazy Talk 8
CrazyTalk 8 by Reallusion is an application that brings photographs to life, ena...

InDesign How-to Video: Create a Duotone Effect
In this week’s InDesignSecrets video, Mike Rankin shows off a great technique to...