

Photographs of figures from the past, shot in black and white, always have a historical distance that can make them harder to relate to. Here’s a straightforward way to bring color into those images, making them seem that much more immediate and relevant.
There are two tricks to making this technique work: color everything, including elements that are supposed to be either black or white; and add all your colors on separate layers, so you can adjust them at the end of the process.
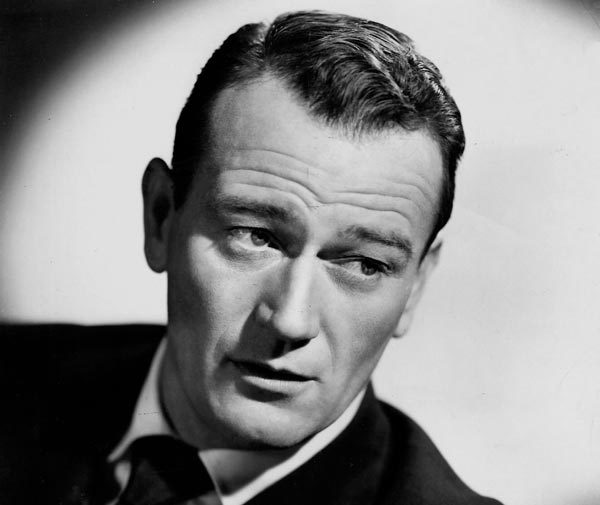
Step 1: The starting image
This studio portrait of the actor John Wayne was shot in 1952. You can download it from here.

Step 2: Lose the white
The trouble with most black and white shots is that they tend to be highly contrasted: the light areas are just too bright, which means they won’t hold a color tone well. Use the Levels adjustment to lower the output white amount a little, to bring some tone back into the highlights.
Step 3: Paint the skin tone
Make a new layer, and set its mode to Color. Using a hard-edged brush, paint a skin color over the face and hair. A good color to start with is 255R – 214G – 188B. Don’t worry if it doesn’t look exactly right; because it’s on a separate layer, you can always adjust it later.
Step 4: Add some blush
Change your foreground color to 216R – 99G – 66B, and make another new layer. Set the mode of this layer to Multiply, so the color can deepen the tones. Choose a small soft-edged brush, and set the opacity of the brush to just 5%. Now paint the lips, and enlarge the brush to paint some blush on the cheeks, as well as a little on the forehead. With the brush set to this low opacity, you can build up the color as needed.

Step 5: Paint the eyes
Set the foreground color to a very pale cream – I used 246R – 230G – 215B. Make another new layer, with its mode set to Color, and paint in the eyeballs. Then choose a pale blue (or whatever color your subject’s eyes should be) and paint the irises.

Step 6: Add some beard
To make John Wayne look more masculine, you need to add some five o’clock shadow. Choose a pale blue for your foreground color (I used 167R – 193G – 209B) and make another new layer, set to Multiply mode. Again, use a soft-edged brush at just 5% opacity to paint in the beard area. It’s best to use a low opacity and build up the color in small stages.

Step 7: Tint the hair
Rather than painting the hair with a color, it’s more controllable to use an Adjustment Layer. Start by selecting the hair area using QuickMask or even the Lasso tool. You don’t need to be accurate; you can always paint on the mask later to refine it. Then make a new Curves Adjustment Layer, and it will use your selection as a mask. Darken the hair slightly, and adjust the colors to make a rich brown.

Step 8: Don’t forget the clothes
One common mistake people make when coloring black and white images is to leave white shirts and black suits untouched. They’ll seem all wrong; you need to add a little color to prevent them looking monochromatic. Make new layers for the shirt, tie and suit in Color mode, and paint in subtle colors to add some depth to these areas.

Step 9: Consider a new background
Adding a real, photographed background can make all the difference. When you look at the original portrait, you an see that John Wayne’s ears are slightly out of focus. This means the background needs to be even more out of focus to match. Choose your image, then use Gaussian Blur to soften it.

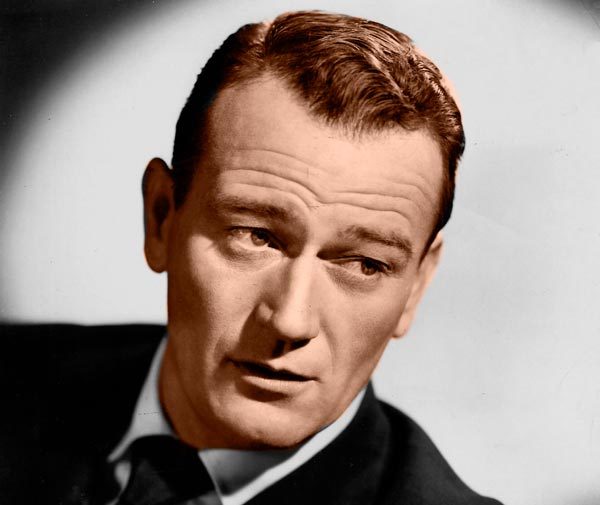
Step 10: Final adjustments
Because all the elements are on separate layers, it’s easy to adjust them once you see the final image. Here, I’ve darkened the skin color a little, as well as the beard. I’ve also painted on the hair color Adjustment Layer mask in white over the eyebrows, to make them match the hair.

This article was last modified on August 1, 2018
This article was first published on August 1, 2018
Commenting is easier and faster when you're logged in!

Recommended for you

Free Webinar: Photoshop Power Hour
Learn the latest Photoshop techniques and pro-level tips to help you work faster...

Using Color Fonts in Photoshop with Fontself
Color fonts have been touted as the Next Big Thing. They aren’t universall...

Integrating 3D Text into Images with Photoshop
This is a technique you’ll have seen in countless films and TV shows, from...