
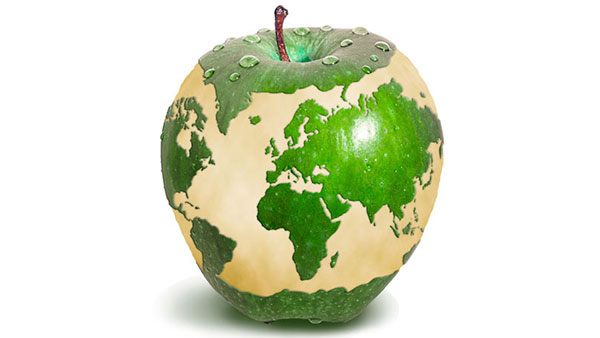
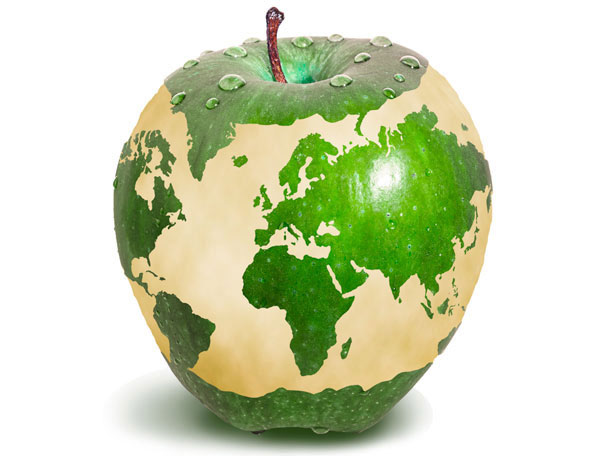
Visit a really good Japanese restaurant and you’ll often find the food decorated with vegetables carved into exotic shapes. But you won’t often be served an apple with the countries of the globe carved into the skin, because it’s far too complicated for a lowly sous chef. With Photoshop, however, you can achieve the effect in less time than it takes you to say Nigiri Sushi. In a decent Japanese accent. Here’s how to carve any shape you want into the skin of an apple.
Step 1: Pick your apple
Photograph an apple if you have one, or fall back on Google if you don’t. This apple comes courtesy of the free image library pxhere.com, and all I’ve done is to recolor it from its original deep red, cut it out from the background and paint in a shadow beneath it.

Step 2: Find a map
It’s easy to find a map of the world – once again, Google is your friend here. Drag the map into your image and position it so it overlaps the edges of the apple. If your map has a white background, use the Background Eraser tool to delete it so only the countries remain. Delete any small islands – and my apologies if you happen to live in the Shetland Isles. You’ve been erased.

Step 3: Wrap the map
To make the map look as if it’s wrapped around a globe, use Filter > Distort > Spherize and set the slider to its maximum value of 100%. Position the map so it overlaps the edges of the apple, then load this new map layer as a selection by holding Command (Mac) / Ctrl (Windows) and clicking on its thumbnail in the Layers Panel.

Step 4: Add the top and bottom
To make the apple more realistic, you want to keep the top with the stalk, and the bottom where it rests on the ground. With your selection active, hide the map layer and switch to the apple layer. Enter QuickMask mode by pressing Q on your keyboard, and the map will appear clear, with the area outside it showing a red overlay. Use a hard-edged brush to paint in white at the top and bottom – painting in white extends the selection area, painting in black reduces it.

Step 5: Make a new layer
Exit QuickMask by pressing Q again, and your painted area will turn into a selection. Make sure you’re on the apple layer and use Command J (Mac) / Ctrl J (Windows) to make a new layer from the selection, and then hide the original apple layer.

Step 6: Make the inside
To make the interior of the apple, first set your foreground and background colors to two slightly different shades of light brown. Make a square selection on a new layer, large enough to just cover the apple, and use Filter > Render > Clouds to fill the layer with a random texture based on those colors. Then, with the selection still active, use Filter > Distort > Spherize once more.

Step 7: Add a Layer Mask
Load the original apple layer as a selection by holding Command (Mac) / Ctrl (Windows) and clicking on its thumbnail in the Layers Panel. Then, on the new texture layer, choose Layer > Layer Mask > Reveal Selection. Your texture will now exactly match the shape of the original apple.

Step 8: Get carving
Because part of the apple has been trimmed away, you need to reduce the size of the interior. Using a small hard-edged brush, paint in black on the layer mask slightly inside the original apple’s edge to hide it. It doesn’t matter if your outline is a bit wiggly – that’s what happens when you carve apple skin. Switch from the Mask to the Layer and use the Dodge and Burn tools, set to Midtones, to add a little darkness at the bottom and edges, with a couple of highlights as well: it makes the interior look more realistic.
Step 9: Add a bevel
Switch to the countries layer, make sure it’s directly above the new texture layer, and use Command Option G (Mac) / Ctrl Alt G (Windows) to use the underlying layer as a clipping mask. Then use Layer Styles to add a small bevel to this layer, which will make the skin look much more three-dimensional.

Step 10: Add a shadow
While you’re in the Layer Styles dialog, switch to the Drop Shadow section. Uncheck the box marked Use Global Light (or you’ll mess up your bevel), and set the Distance to zero so the shadow is all around the countries. Increase the Spread of the shadow to make it thicker, and lower its Opacity to around 40% for a subtle effect. Good enough to eat!

This article was last modified on April 9, 2018
This article was first published on April 9, 2018
Commenting is easier and faster when you're logged in!

Recommended for you

Creating a Color Burst Montage in Photoshop
Try this colorful collage idea the next time you want to convey imagination, vib...

From Paper to PDF: Vectorizing Hand-Drawn Artwork with Photoshop and Illustrator
I have a close friend, Mike Manoogian, who is a brilliant lettering and logo des...