Animate and Schedule Your Content with Adobe Express
Maximize your marketing productivity while staying on brand.


This article appears in Issue 37 of CreativePro Magazine.
In today’s fast-paced world, are you juggling multiple software applications while designing content, racing against the clock, trying to stay on brand, and hoping you don’t get burned out? Staying on top of this is a necessity nowadays, but the heightened sense of pressure to create compelling content doesn’t help.
As a brand strategist and designer, I’ve helped hundreds of people leverage the power of Adobe Express to grow their brands while maintaining peace of mind.
Adobe Express—which has actually been around for a lot longer than most people realize, first as Adobe Post and then as Adobe Spark before taking on its current identity—was redesigned in 2023 as an all-in-one app where you can design content, make animations, presentations, videos, and more.
With Adobe Express, you can do it all: create animated content, share it with your team for collaboration, and even schedule posts on social media (Figure 1). And the best part? This service—which you can use via a mobile app or a web app—seamlessly integrates with Creative Cloud Libraries, Illustrator, and Photoshop files, making your workflow smoother.

Figure 1. The Adobe Express home screen
Adobe offers both free and premium versions of Express, and you can access your files on desktop and mobile devices. If you already have a Creative Cloud subscription, Express is included in your plan. Otherwise, you can get a premium subscription for individuals ($9.99 per month USD) or teams ($49.99 per person annually).
In this article, we’ll walk step by step through how to set up a brand kit in Express and use it to take your marketing project from concept to reality. (You’ll need a paid version for this project.)
class=”p3″>It All Starts with Brand Kits
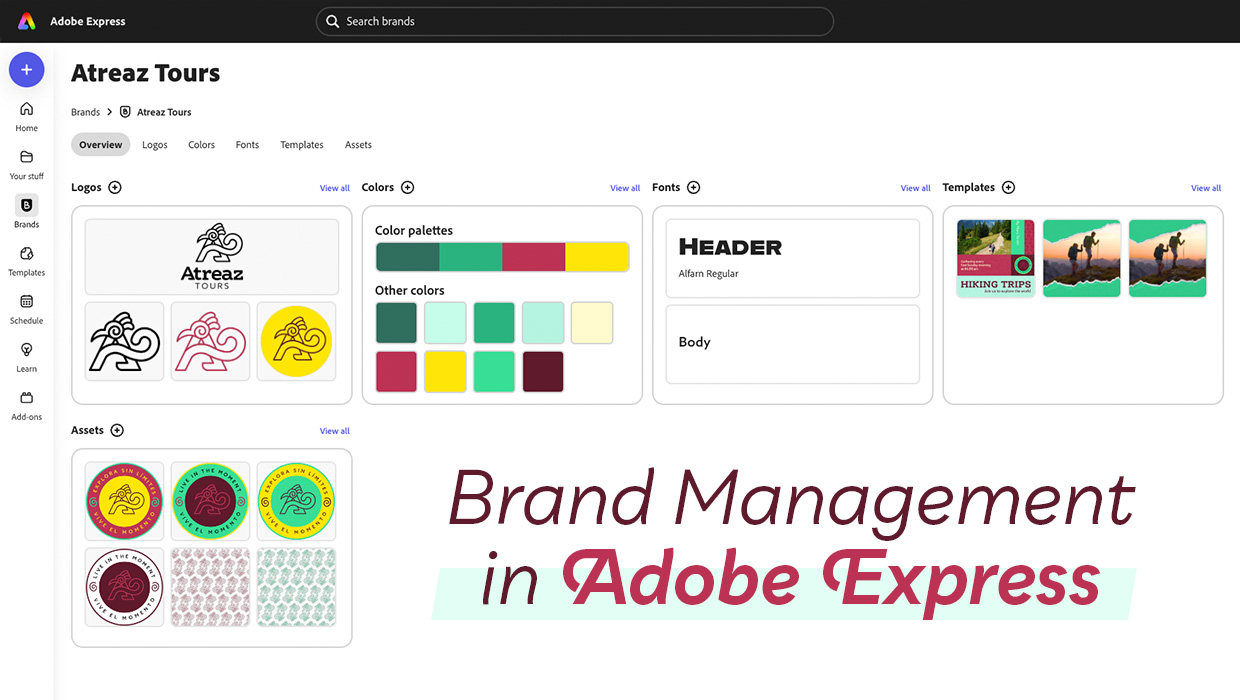
A brand kit is essentially your central communication hub—a place where you can add all the digital assets that give your brand its consistency and cohesion, so you can collaborate with your team or with others. What are these assets? They include your logos, fonts, graphics, icons, patterns, colors, and templates.
The process of creating a brand kit is straightforward. On the main desktop view of Adobe Express, head over to the left tool bar, select Brands, then click Create Brand (Figure 2). Give your brand a name.

Figure 2. A brand kit consists of logos, assets, colors, fonts, and templates.
Next, click the Add button (Figure 3) to start uploading your logos and defining your brand colors, fonts, and other assets to your brand kit. If you have any Illustrator or Photoshop files, you can include them. We’ll come back and use the brand kit while creating your marketing project.

Figure 3. Build your brand kit by uploading your files.
Finding and editing templates
There are several ways you can get started with Adobe Express. You can start from a blank page or a template, or you can even use AI to create a template based on a prompt.
Let’s start from a template and customize it to fit your brand. Your first step is to select Templates from the main landing page in the left tool bar (Figure 4).
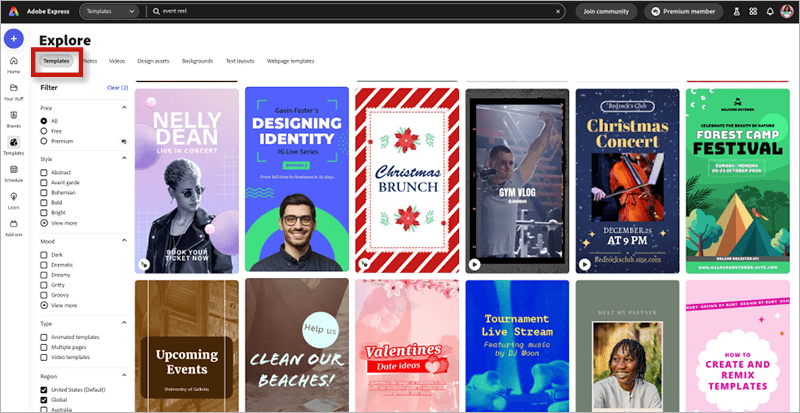
Figure 4. Adobe Express offers dozens of templates that can give you a head start.
Because video content is in high demand, let’s look for a vertical video to promote an event. Click Search, enter event reel, and several templates show up. If you need to refine your results, the left menu panel lets you filter them by Price, Style, Mood, Type, and Region.
Once you find a template you like, click it to use it for the basis of your design. A new window opens, offering more options to edit your design.
Applying your brand kit to a design
If you have already set up your brand kit, you can apply your brand styling with one click! This head start of automatically adjusting templates to use your brand’s fonts and colors will save you a lot of time.
To apply your brand kit, head back to the left tool bar and click Brands. Find the brand kit you need to use and click the Apply Brand button. Are the results not quite what you’d hoped for? Keep clicking the button to cycle through possibilities until Express offers a combination you are satisfied with (Figure 5).
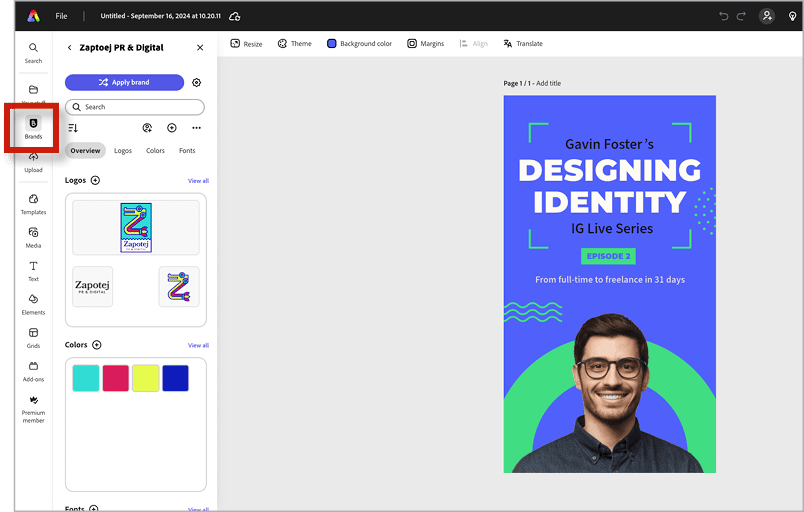
Figure 5. Click Apply Brand to apply colors and fonts from your brand kit to the selected content.
When you get close to a look that you like, you can start refining. Simply click an element you want to change. With text, for example, you can select a type family, style, or weight from your brand kit (Figure 6). You can also set other attributes like text layouts, flow, shadows, shape, and animations.
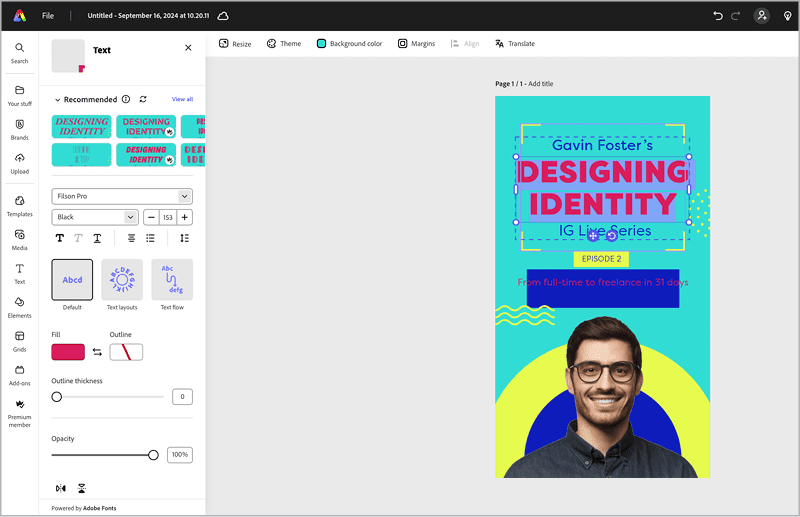
Figure 6. Refine your text with easy access to all the fonts from your brand kit.
If you click a photo element, you can apply a number of effects to the image or group (Figure 7) or even change the image by clicking the icon to the right of the image thumbnail in the upper-left corner of your screen (Figure 8).
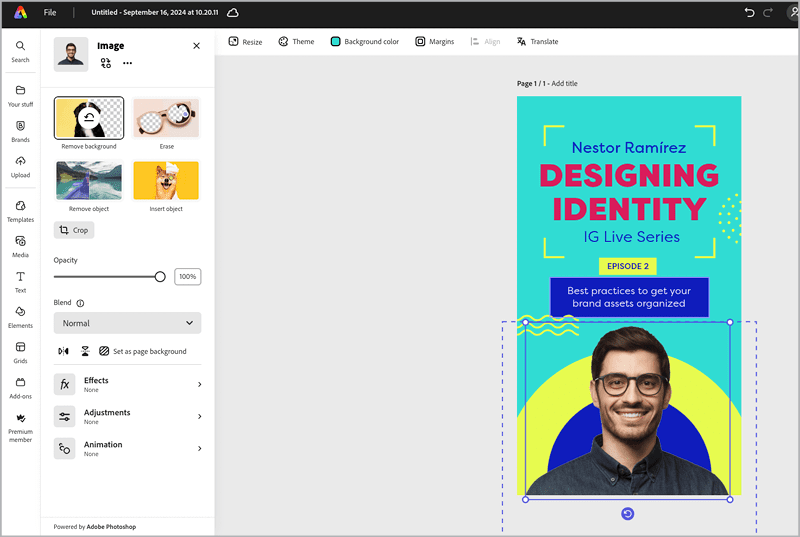
Figure 7. Apply effects to a selected image or group of objects.

Figure 8. You have options for swapping images.
Adding animations and sound
Now, let’s work on the exciting part—animations. You can add animations to any element you want. For example, let’s add a bungee effect for the speaker’s image. Select the image or a group of elements, then click Animation on the left sidebar (Figure 9). From the options that open, you can choose to animate from three states: In, Loop, or Out (Figure 10). You can further customize the duration and intensity for each option you select.

Figure 9. Access animation effects from the left sidebar.
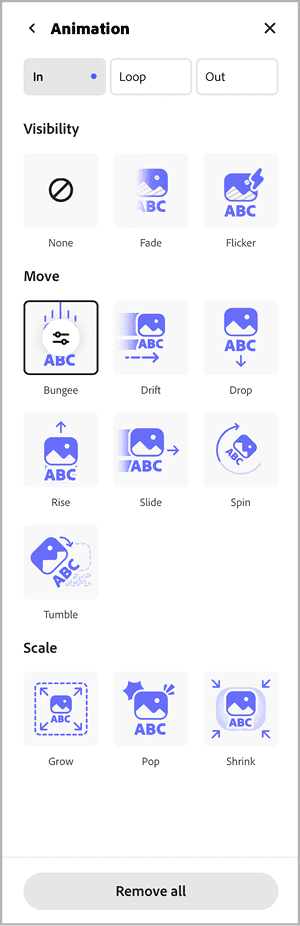
Figure 10. You can apply options from three animation types: In (at the start of the clip), Loop (the whole clip), or Out (at the end of the clip).
Click the Edit Timeline button to open a timeline at the bottom of your screen where you can adjust the timing of your elements. Toggle on Show Layer Timing (Figure 11), and each animation element will show up as a purple dot. Hover over a dot to see a preview.
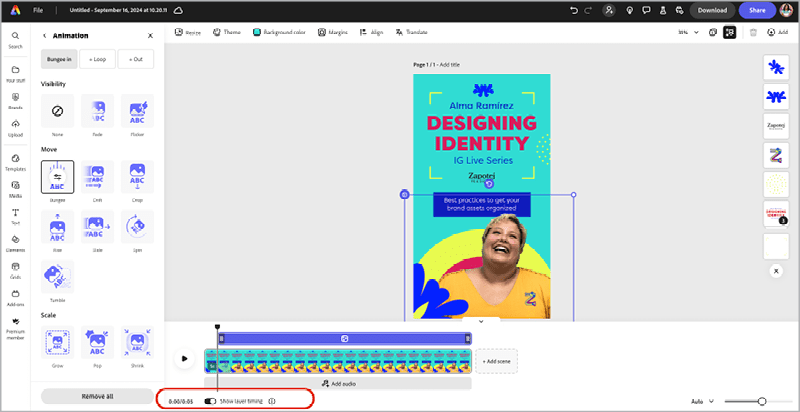
Figure 11. Turn on Show Layer Timing to adjust the timing of your animation effects on your selected objects.
Now, for the final touches, let’s add some music or voice-overs. Head to the left tool bar and click Media, then, at the top of the left sidebar, click Audio (Figure 12). When you are ready, click the selection to add it to your timeline.

Figure 12. When you add music or voice-overs, you can search for a genre of music or type of sound effect and preview your selection.
Share Your Design with Your Team and the World
Your graphic is ready for approval! Instead of jumping to email, you can share a link with your team to preview the design directly from Adobe Express. Click the purple Share button (top right). You can share a link that only specific people can access via an email invitation, or you can create a link that you can freely share with anyone.
Then, you can decide whether people should be able to edit the file in Express and whether they may leave comments (Figure 13). The commenting option is a helpful tool that your clients can use to give feedback and ultimately approve your projects.

Figure 13. Control who has access to your project and whether they can change or comment on your work.
In other workflows, after this step, you would have to jump into a third-party app to schedule content to post to social media. Adobe Express has a built-in scheduler, so let’s get this content scheduled!
Use the same purple Share button (top right), but this time click Share to Social (bottom right, Figure 14) to set up your social media channels (Facebook, X, Instagram, LinkedIn, Pinterest, and TikTok) or to go right to scheduling your post if you’re already connected and good to go.
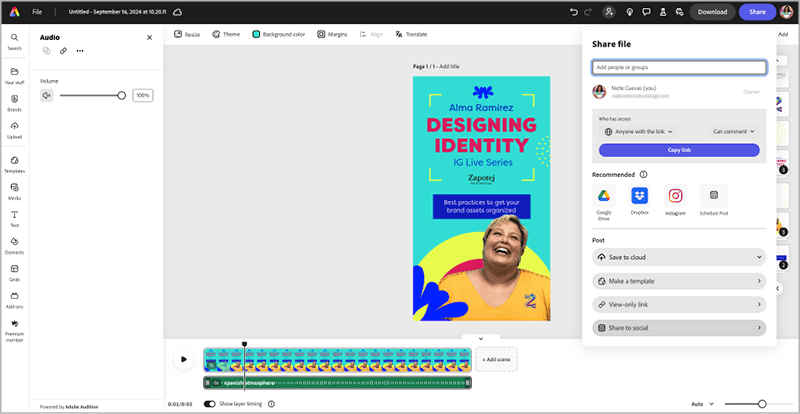
Figure 14. Use Adobe Express to directly publish your work to social media.
Now, you can add your copy for the post that will accompany your video. You can get some help with Generative AI. Set the day and time to post your content, and you are ready to market your event (Figure 15). To see a how-to overview of the process, check out this video on YouTube.
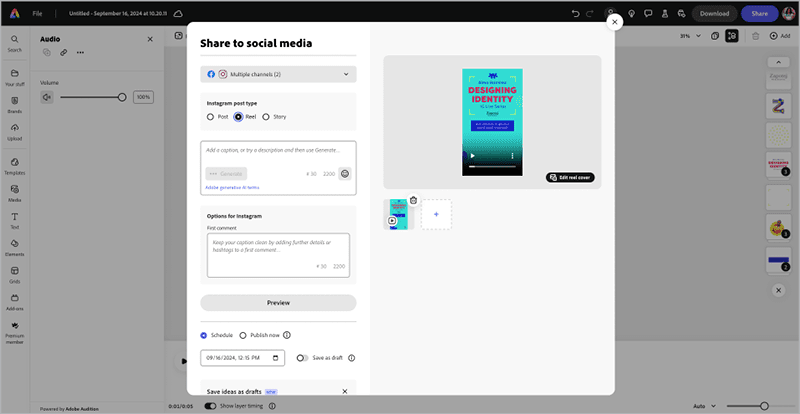
Figure 15. You can include text for the posts that accompany your share.
Stand Out with Simple Animations
Using Adobe Express to create your marketing content will help you stay on brand, plus you can collaborate seamlessly to design content that enables you to connect with your audience and stay top of mind. Adding simple animations will give your designs a better chance of standing out in a saturated market.
Commenting is easier and faster when you're logged in!

Recommended for you

It’s a Brochure! It’s a Poster! It’s the Bookster!
Need an idea for an attention-grabbing print piece? Then you have to check out T...
PageProof Launches Adobe Express Add-on for Fast and Structured Creative Approvals
PageProof brings fast, seamless feedback and structured approvals straight into...