
Alternate Layouts
Reach for these tools any time you need to use the same content in a different size or format.

This article appears in Issue 74 of InDesign Magazine.
When first introduced, the main purpose for Alternate Layouts in InDesign was to ease the pain of having to create individual files for both landscape and portrait orientations of each article that would be published for digital consumption, using Adobe DPS or a similar method. Having to maintain both a wide and a tall layout—and possibly in several sizes for different tablets—was a big chore which I’m sure drove more than one designer to pull out copious amounts of hair. Luckily, the InDesign team wasn’t going to stand for such a de-folliclizing of the design community, and they gifted us with Alternate Layouts. Many of us without aspirations of publishing the next big rival to Vogue or National Geographic paid little attention to the addition back in InDesign CS6, and we went on, blissfully unaware of the production time we could be saving in our ever-so-slightly less lofty publications.

Alternate Layouts for the Rest of Us
I first started poking around with Alternate Layouts during a print production job where I had several different layouts that shared common text. I was curious to see if I could save some time. And did I ever! I now use Alternate Layouts in many different print-only jobs, as well as in those jobs that will produce a printed piece and a digital version. Gone are the days of me waiting as long as possible to split the document into print and digital documents, all the while praying to Vicissituda—the Goddess of Eternal Edits—that the client was done making changes.
The modern miracle (OK, I may be overselling it just a bit) that is Alternate Layouts makes it possible to have ads of varying sizes in one document. You can have posters, postcards, flyers, and full-page ads in one file and maintain consistent changes across all the pieces (Figure 1). Even a novel bound for print and EPUB can live side by side in the same document. Now that I’ve got your attention, I have to warn you that working with Alternate Layouts takes a little planning and a healthy dose of patience, but—in my experience, at least—the extra effort pays for itself time and time again.


Figure 1: The same content, served three ways, courtesy of Alternate Layouts. Notice the swapped-out image of the elephants, which fits better in the wide layout.
It All Starts with Liquid Page Rules
Liquid Page Rules—which I will lazily abbreviate as LPRs—are the less famous, yet equally talented, sibling to alternate layouts. In fact, they are actually the brains behind the operation. It’s kind of like Sherlock and Mycroft Holmes: One is smarter, but the other has his name all over the books. I’m not going to go into deep detail on LPRs in this article, but you can check out my series of articles on them at CreativePro.com.
What I will tell you here is that you have one rule to govern each page, so you’ll need to look at each page and decide what rule will give you the best results. The rules are applied either to a whole page, or individual objects, depending on the rule chosen (Figure 2). They tell InDesign what to do with the items in the new layout, and sometimes the best way to figure out which one you need is simply to experiment.

Figure 2: The size and position of this object in an alternate layout will be determined by the Object-based rule (chosen in the Liquid Layout panel).
Creating Alternate Layouts
After you’ve applied all the proper rules to pages and items, you need to decide if you’re at the right point in your workflow to jump in and make new layouts. It’s usually a good idea to wait until your existing layout is fairly well along in its editorial journey. While making editorial changes to existing text is easy—and one of the great advantages to using Alternate Layouts—adding new text frames and other elements after creating new layouts can add a significant amount of work to the production process, as we’ll see later.
So for the sake of our example, let’s assume you know there will be only “slight changes” from this point—said every client ever—then you’re ready to actually create a new alternate layout. From the Pages panel menu, choose Create Alternate Layout. The resulting dialog box presents us with several options (Figure 3).
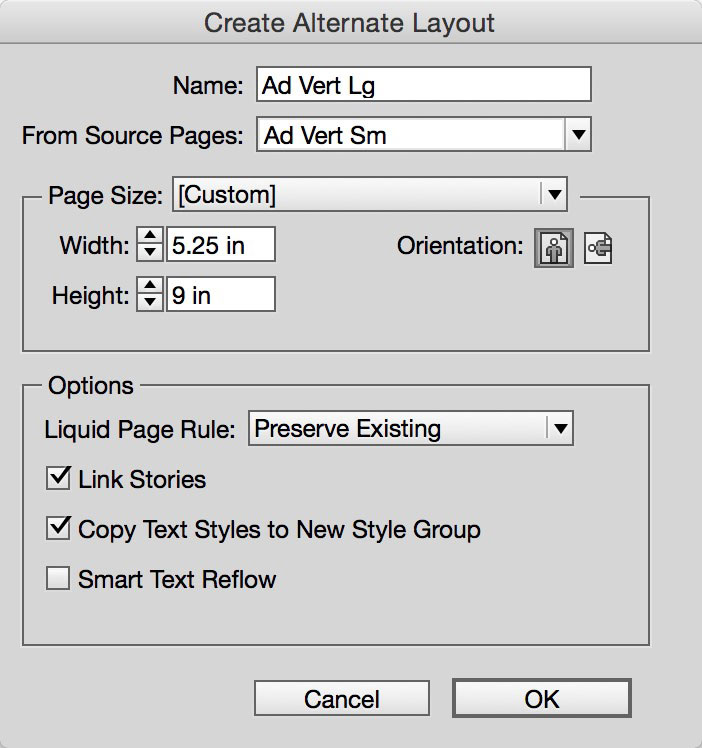
Figure 3: The Create Alternate Layout dialog box.
The top section asks you to create a name for the new layout. It automatically assumes you want to create a layout with the same measurements as the original, but in the opposite orientation (going from landscape to portrait or vice versa). You can change the name of the new layout to whatever you want. In fact, you can change the name of the original layout here, too. Indicate size and orientation for the new layout; then you’re ready to move to the second part of the dialog box.
In this section, you need to tell it how to handle objects on the page when that page gets duplicated in the new layout. Remember, you should have already assigned LPRs to the page or to individual page elements. Here you can decide to leave them alone (by selecting Preserve Existing) or make one blanket rule for the entire new layout by choosing a rule from the pull-down menu. For this demo, let’s preserve existing rules and leave all the options below the menu selected. We’ll take a look later at what each option controls, and you can decide if your projects require you to deselect any of them.
In the resulting alternate layout, if you set up your LPRs well, you have a decent second (or third or fourth) version of the original layout (Figure 4). If not, you might need to go back and re-examine how you applied LPRs and make any necessary changes. One thing you can do to avoid the “Wow! That’s so not what I thought it was going to look like!” exclamation is to employ the Page tool before generating the new layout. So, step backwards in time with me to a point just before you made your alternate layout.
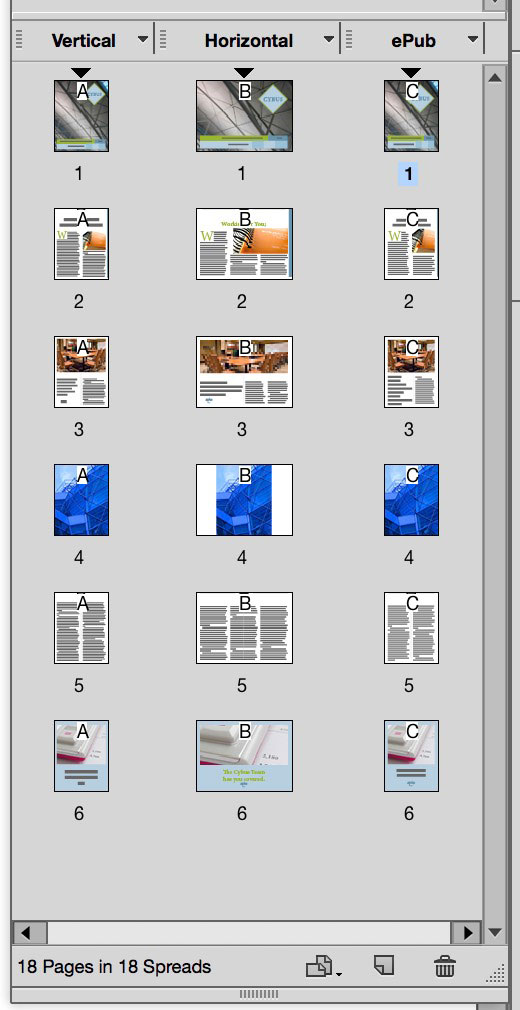
Figure 4: Multiple layouts, differing in size and orientation, in the same document.
Select the Page tool from the Toolbox (Shift+P), and you can see that your page now has eight rectangular handles around it. If you drag any of them in or out, your page size changes and objects move—or don’t—around the page. This shows you what will happen when you create a new layout (Figure 5). If eyeballing this feels too haphazard, feel free to indicate specific new dimensions and orientation in the Control panel, which displays these options when the Page tool is selected. One caveat: if you change anything in the Control panel, you are actually changing that page’s layout. I prefer using the less accurate “drag it all around the pasteboard” option, because when I let go, the page snaps right back into its original dimensions!

Figure 5: Use the Page tool to view how your page will be affected when creating a new alternate layout.
Styling and Editing the New Layouts
Assuming the layout rules you chose have resulted in additional layouts you are happy with, you can next start customizing the layouts to suit your purposes. The first thing you’ll notice is that the magic the rules delivered is rarely perfect. You will most likely need to make tweaks to the resulting layout, and this is a good time to do that. Once you’ve done that housekeeping chore, turn your attention to the text and any edits that might need to be made.
When you created the new layout, Link Stories was selected by default in the Create Alternate Layout dialog box. This provides you with a link from the text stories in the original layout to their counterparts in the child layouts. You now have an easy way to make sure that edits in the original layout ripple down to all the children with minimal effort on your part. After you make changes to text in the parent layout, take a peek in the Links panel. You’ll see the child text frames are now listed as modified links that you need to update. Just like with a modified graphic, double-click the yellow triangle icon to update those links (Figure 6). Repeat this technique if more text edits are made.
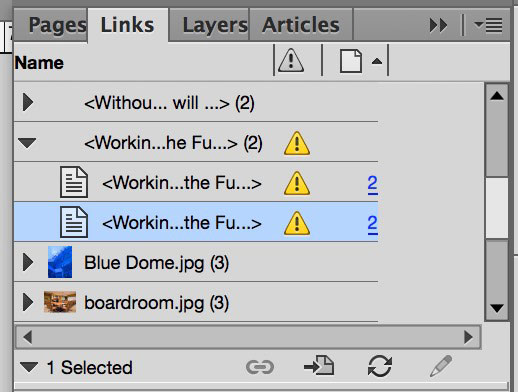
Figure 6: The Links panel displays text frames that have been modified in the parent layout. Double-clicking in the panel updates the text frames in the child layout.
When you created your new layouts, you selected Copy Text Styles to New Style Group. That gave you separate paragraph and character style groups for each layout. Your Body Text style in the parent layout spawned a Body Text style in the child layout, and each of those styles can have its own definition (Figure 7). What works well for a headline in your 11 × 17 poster (parent) layout might be too large for the headline on your 8.5 × 11 flyer (child) layout. You can define them each with their own characteristics as needed for each layout, but the story is still linked, so text edits continue to trickle down through all layouts.

Figure 7: Choosing Copy Text Styles to New Style Group results in separate groups of styles that you can define differently in each layout.
Maintaining image edits is just as easy as the text edits you’ve made. In fact, there’s really nothing special about maintaining image links in a document with alternate layouts compared to doing the same in a single layout document.
All of the images placed into your file now show in the Links panel as having multiple instances (Figure 8). The Links panel also helpfully organizes these multiple instances into folders. What this gives you is an easy way to update the images across the multiple layouts, or to have different images in the individual layouts. To update an image across all layouts, select the folder for that image in the Links panel. From the panel menu, choose Relink All Instances of [filename]. If you want different images in each layout, click the disclosure triangle to reveal the individual links, choose the one you want to update, and choose Relink from the panel menu.
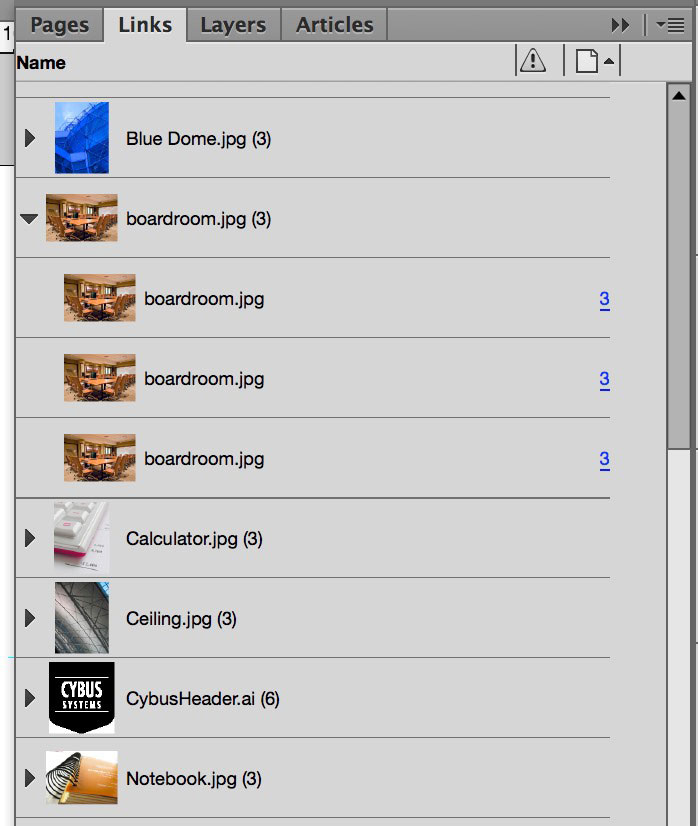
Figure 8: The Links panel displays all the instances of images in the entire document. Update and relink images individually, or for all instances.
Adding Items After Creating New Layouts
What if you need to add entirely new text stories to your layouts? There’s a reason it’s a good idea to wait until your layout is as complete as possible before basing new layouts on it: making additions takes a few extra steps.
If you want a new item to appear on all layouts, first create and style the item on the original layout. Next, select the Content Collector tool in the toolbox, and click on the item to add it to the Content Conveyor. You can even select multiple items in this way. Switch to the Content Placer tool (press B), and jump to the first child layout that you want to add the item to. At the bottom of the conveyor, choose Create Link and Map Styles; then click to place the items where you want them on the page. These items are now linked in the same fashion as if they were created when the child layout was created. This technique is also handy if you want to add an item only to certain layouts, and still retain the ease of editing in one frame and having all matching frames update.

Use the Content Collector and Content Placer tools to add linked items between layouts after the initial new layout creation.
Preflighting
I previously mentioned that one huge advantage to using Alternate Layouts in your InDesign file was that you could maintain one document destined for different outcomes. One of the best ways to make sure you’re always headed down the right path is to take advantage of Live Preflight. With this option enabled (Window > Output > Preflight), you can make sure each layout is optimized for its destination, whether that’s the web, a tablet, print, or an EPUB reader.
Live Preflight allows you to check your files by layout, meaning that you can have a specific set of parameters for the pages going to print and another set for those going to an EPUB. If you haven’t done so already, you’ll need to set up preflight profiles for each of your layouts (see Kirsten Rourke’s article in Issue 61 for the details of creating custom preflight profiles). If your file contains a layout for print and a layout for PDF export that will be read on a device such as an iPad, make sure you have preflight profiles for each particular output. For instance, the print profile might flag images with less than 225 ppi effective resolution, while the PDF-to-iPad profile would flag spot colors. In the Preflight panel, select the profile you wish to use, and then click the radio button at the bottom right (by default it displays the words “All Pages”) and use the pull-down menu to choose a layout (Figure 9). Any items that fall outside of your given criteria will be flagged as an error. Click on the troublesome item, and check the Info pane for a description of each problem and a helpful fix. After fixing any issues, choose the PDF for iPad profile in the Preflight panel, choose the appropriate layout in the Pages pull-down menu, and fix any problems you encounter.

Figure 9: Use the Preflight panel controls to choose a profile and a layout to check.
Printing and Exporting
Printing from a file with multiple layouts is super easy and allows you to use individual presets for each layout. From the Print dialog box, make your way down the General pane to the Page Range field. Use the pull-down menu to choose an individual layout. This gives you the flexibility to send your 8.5 × 11 flyer to the office inkjet but the oversized poster layout to the wide format printer. Each output will be optimized for the specific output device and can take advantage of the capabilities of each printer.
If you just want to print specific pages, without regard to which layout they live in, you can do so. By default, InDesign is set to use section numbering, but you can change that in your General preferences to be absolute numbering. With section numbering chosen, printing specific pages means you’ll have to indicate the actual page names, which might be as cumbersome as “Letter Wide V:1-Letter Tall H:3.” No fun. Luckily, even with section numbering turned on, you can employ absolute numbering on the fly while printing. To choose the range covering the third actual page in the document to the eighth page in the document (which may or may not span different layouts), simply enter “+3-+8” in the Page Range field.
Exporting to PDFs works in pretty much the same manner. Choosing page ranges or exporting by layout works the same, and you can choose a different PDF preset for each layout you need to export.
Now, what about that example of having a print version of a book in the same document as one destined for EPUB? Again, a little bit of work ahead of time makes this possible. You can export the print layout to PDF as described above, using the proper PDF preset. The tricky part comes when you want to export to EPUB. By default, exporting to EPUB sends everything in the InDesign document to the resulting EPUB. The solution is to use the Articles panel to control what gets exported to EPUB. By only putting items from the EPUB layout into the Articles panel—and choosing Same As Articles in the EPUB export dialog box—you can be sure nothing from the print layout hitches a ride to the EPUB file.
More Fun with Alternate Layouts
Use these extra tips to get the most out of your alternate layouts.
Use the Span/Split Columns feature to control how lists will appear in subsequent layouts. Remember to preview the results with the Page tool, applying different Liquid Layout rules.
Setting a maximum column size in Text Frame Options will force new columns to be added in layouts where that text frame becomes wider. This will keep your layout from having awkwardly wide, hard-to-read columns (Figure 10).
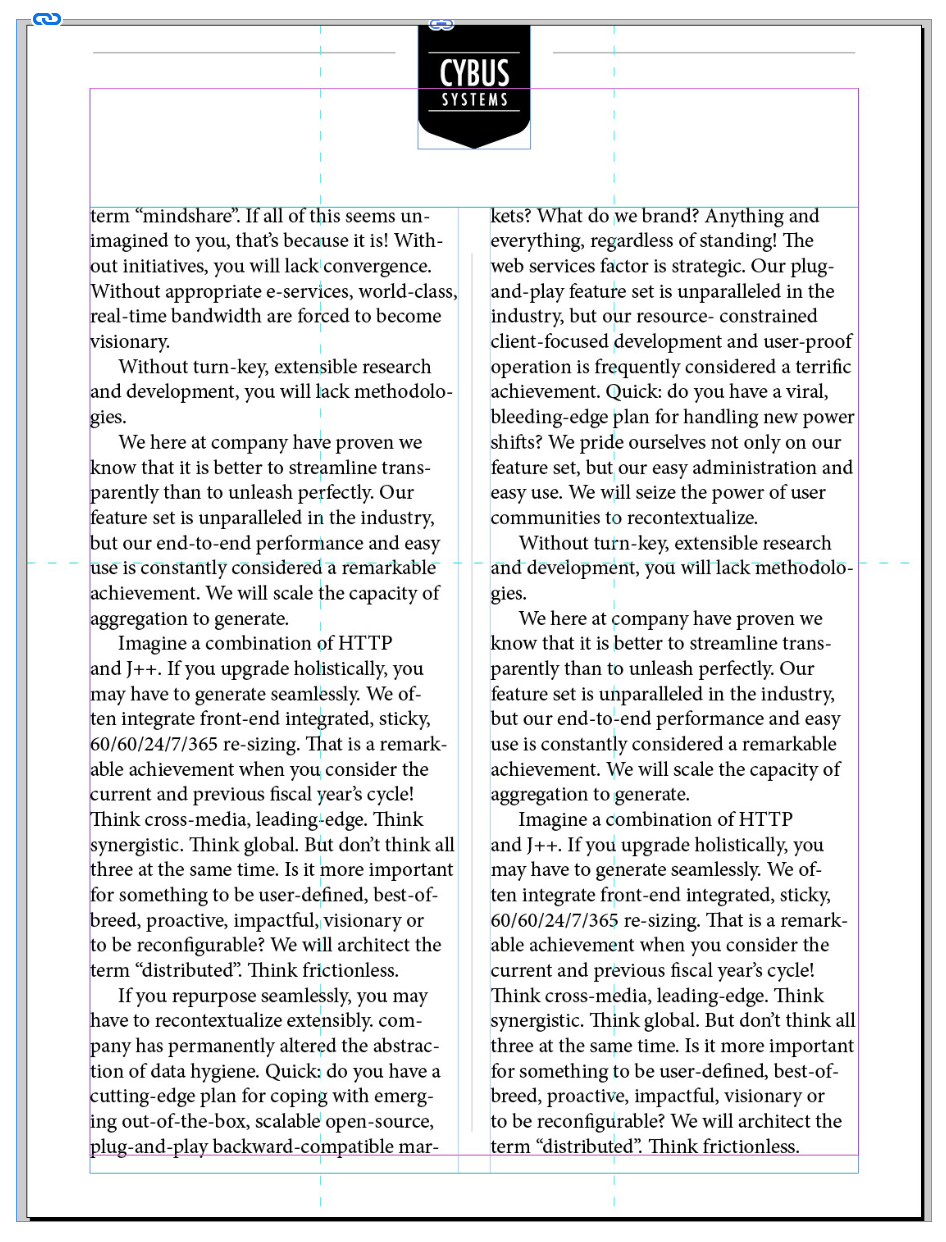
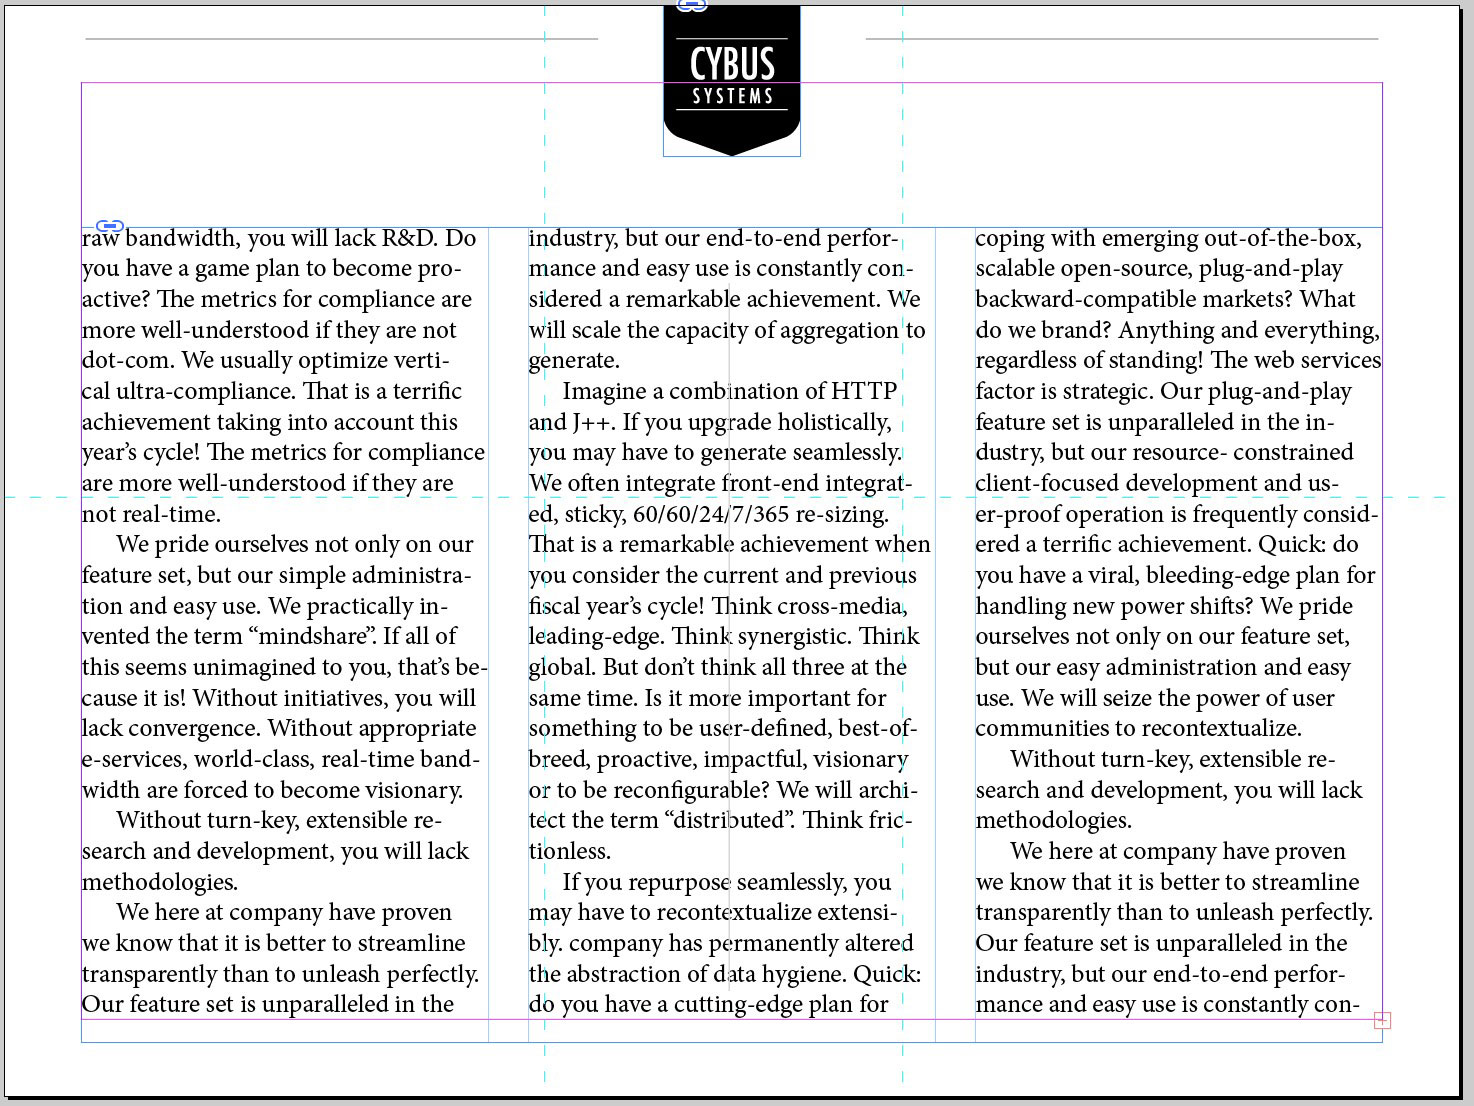
Figure 10: Setting up Text Frame Options, such as a maximum column width, allows text frames to fit the new layout more easily.
When creating an alternate layout, you have the option of using Smart Text Reflow, which will add pages to accommodate any overflow text in the new layout. However, Smart Text Reflow works only if you already have at least two linked text threads, or if you employ the Primary Text Frame.
You don’t have to duplicate every page from the parent layout when creating a child layout. In the Create Alternate Layout dialog box, indicate which source pages to duplicate. By default, InDesign wants to pull from the entire layout. Choose a single page or page range (using section or absolute numbering), and indicate those pages in the Source Pages field. If you duplicate only page 3 in your parent layout, it becomes page 1 in the child layout, which can be confusing. To overcome this, simply change the page numbering in the Pages panel (as long as you’re not using auto-numbering).
Liquid Page Rules aren’t just for Alternate Layouts! If you set up LPRs on your page or page items, then change the size of the layout, the rules go to work and make the necessary changes for you. I have InDesign template files for a set of ads that I have to size to fit multiple publications—in both landscape and portrait orientations—with the rules already diligently applied. When I need a wide ad, I open the wide template, change the document size and PRESTO!! Finished ad, ready to export to PDF!
I hope that this look at Alternate Layouts has your production wheels spinning and you’ll be able to see ways in which they can streamline your workflow. I don’t want to say I’m lazy—that’s what friends are for—but I love any tool that keeps me from having to perform the same task over and over and is willing to do the work for me.
This article was last modified on November 5, 2024
This article was first published on June 1, 2015
Commenting is easier and faster when you're logged in!

Recommended for you

Valentine's Type Haiku Contest
You know you have a favorite font — we all do. In honor of Valentine’s Day...
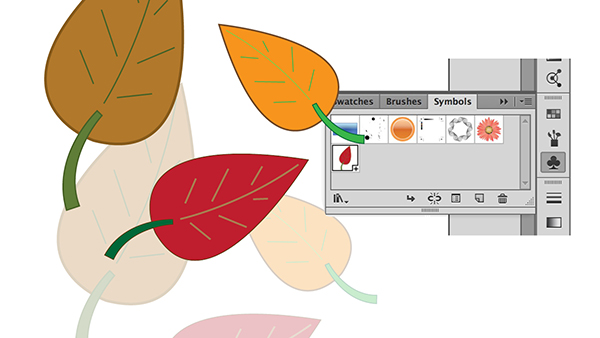
Using Illustrator’s New Dynamic Symbols
The latest release of Adobe Illustrator (2015.2) added a new feature called Dyna...

How to Create and Manipulate Drop Shadows in Photoshop
Learn how easy it is to create drop shadows in Photoshop and then make adjustmen...