This article appears in
Issue 58 of InDesign Magazine.
It’s just not enough to learn a new cool new InDesign tip or technique that helps make our work go faster—no, we have a weird need to share these tips with other users as well! That’s why we’ve been publishing a free InDesign tip almost every week for years, alongside even more tips in the pages of CreativePro Magazine and on CreativePro.com. We were going to try to pick our #1 favorite tip, but there are so many good ones that it’s impossible. So instead, we decided to distill all those tips down to a dozen favorites from each of us! Of course, “favorite” is subjective—ultimately, our favorite tip is whichever one will save us time and make our work easier right now! Nevertheless, you’re almost guaranteed to learn something in these pages. Enjoy!
Mike’s Favorite Tips
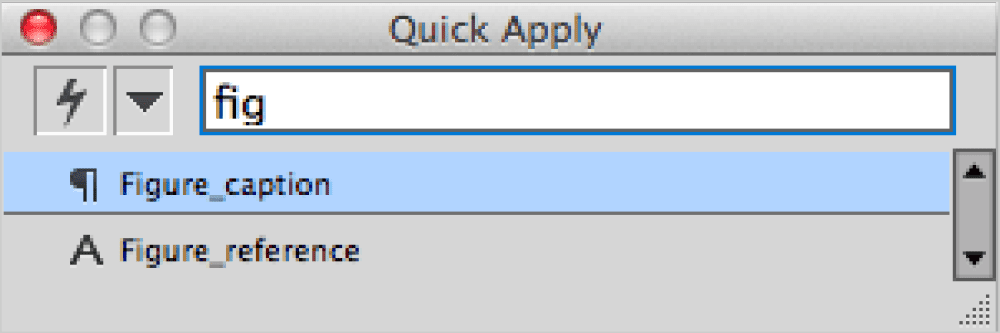
The Wonders of Quick Apply Quick Apply might be my all-time favorite InDesign feature since it’s the fastest way to manually apply menu commands, scripts, styles, and more. And when it comes to formatting text, you can do even more with a few added shortcuts. To begin, place your cursor in the text you wish to format. Press Command+Return (Mac) or Ctrl+Enter (Windows) to open the Quick Apply panel. Now you can type a few characters of a style name (they don’t have to be the first characters). If more than one style appears in the list, you can press the Up and Down Arrow keys on your keyboard to navigate them. Then, press Enter to apply the selected style, Option/Alt+Enter to remove all local overrides and apply the style, or Option/Alt+Shift+Enter to remove all local overrides and character styles before applying the style. If you’re not sure which style you want to apply, press Shift+Enter, which
applies the style, but leaves the Quick Apply window open. Press Esc to close the Quick Apply panel without making any further changes.
The Quick Apply dialog box
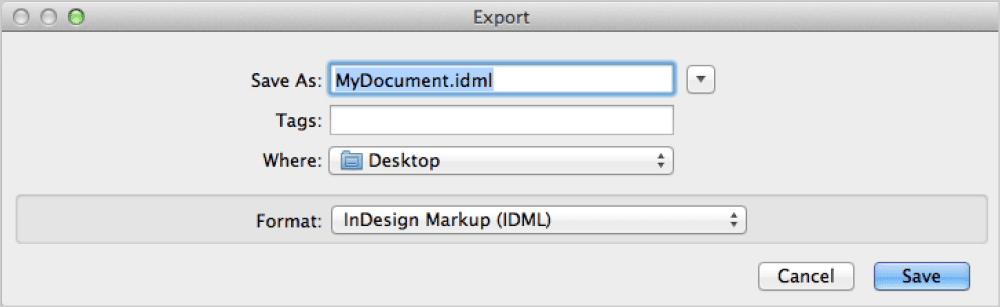
Reduce the Size of Your Files InDesign files, especially those containing a lot of images, have a tendency to get bloated, growing in file size with every save. It’s really a good idea to choose File > Save As every so often. Using Save As creates a fresh copy of the file, and clears out all the gunk that builds up over time. Another option is to export the file to IDML (InDesign Markup Language). To do this, deselect all objects on your page, and then choose File > Export. Choose InDesign Markup (IDML). Once you have exported the file in the IDML format, open that file in InDesign. It will open as a new untitled document that you can then name and save. This process totally cleans out the file of any weirdness that might have crept in over time.
Export to IDML to reduce file size
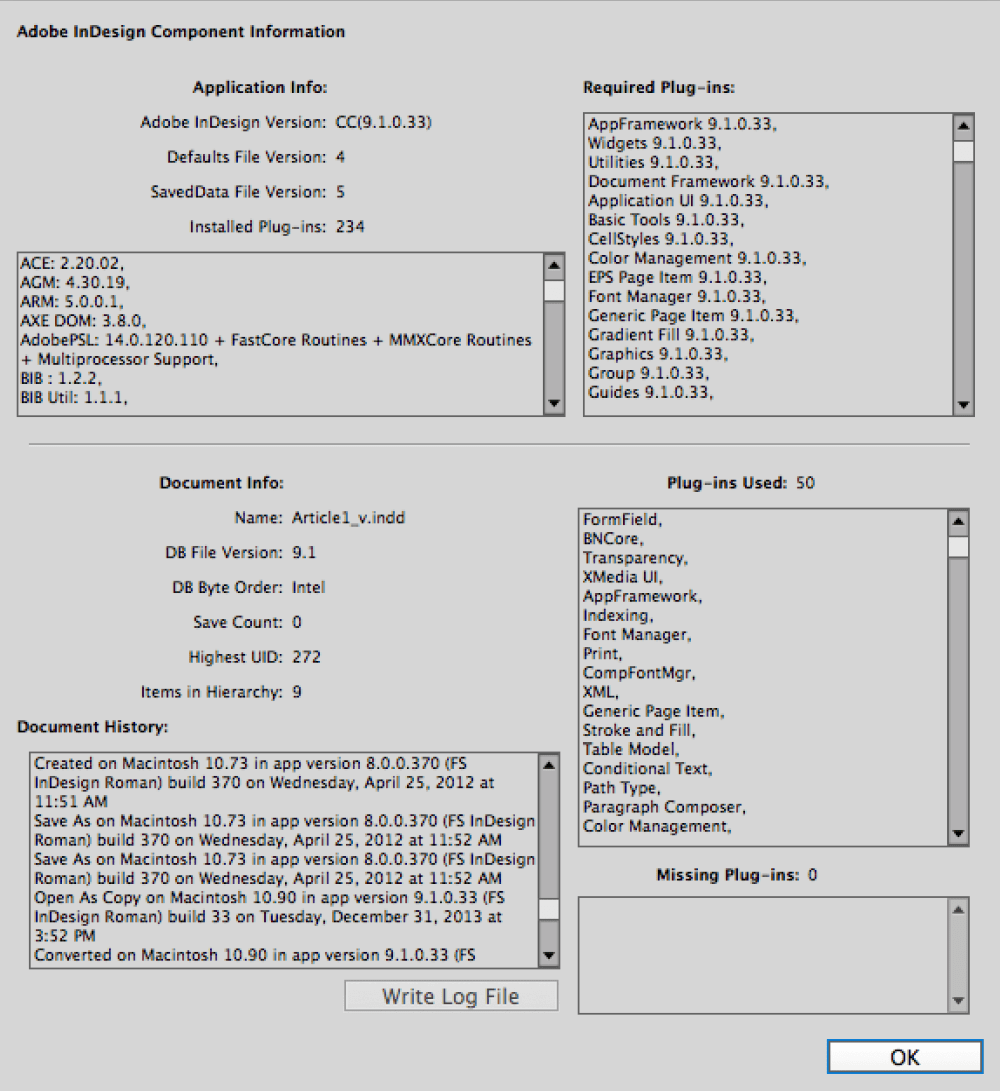
Redefine Styles Need to change the definition of a paragraph style? Instead of using the dialog box (who has time for that?), just select a paragraph that has the style applied to it, and change its formatting. Then, to update the paragraph style based on the changes you made to the text, choose Redefine Paragraph Style from the Paragraph Styles panel menu (or press Command+Option+Shift+R/Ctrl+Alt+Shift+R). The Environment Dialog Box One of the most useful dialog boxes in InDesign is also one of the least seen: the Environment dialog box. You can find this little creature by holding down the Command/Ctrl key and choosing About InDesign from the Help menu in Windows, or the application menu on the Mac. The Environment dialog box tells you all about your version of InDesign, including which plug-ins are running (and if any are missing). More importantly, it tells you tons of detailed information about the current document, such as: Was it originally a QuarkXPress or PageMaker file? When was it last saved? And which versions of InDesign were used to work with the document?
The Environment dialog box
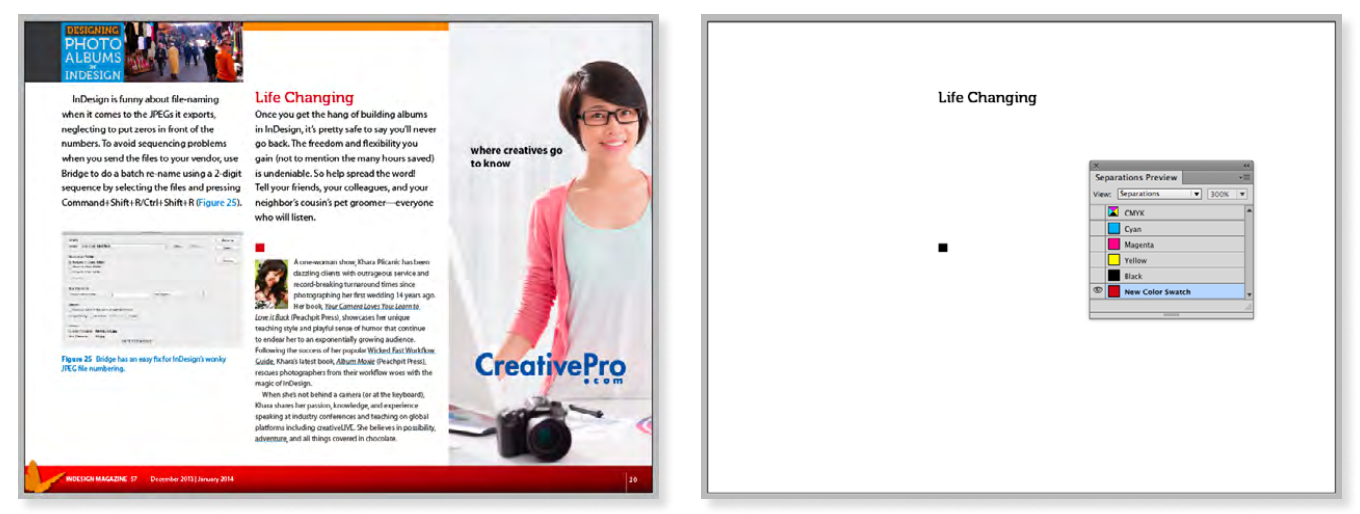
Move Precisely Sometimes the most precise way to move objects on a page is to use your keyboard arrow keys. By default, pressing arrow keys will move selected items in 1-point increments. You can change this preference in the Units & Increments panel of the Preferences dialog box. For bigger moves, add the Shift key to move items in 10-point increments (or 10 times the current increment value). And for super-precise work, hold Command (Mac) or Ctrl (Windows) and the Shift key while you press arrow keys to move items in .1-point increments (or one-tenth the increment value). Skip the New Document Dialog Box To create a new InDesign document without summoning the New Document dialog box, add the Option/Alt key to the Command/Ctrl+N keyboard shortcut. The resulting new document will be based on whatever setting you last chose in the Document Preset pop-up menu of the New Document dialog box. Insta-pages A super-fast way to create new pages directly after the currently selected (as opposed to targeted) page is to press Shift+Ctrl+P/Shift+Command+P. The new page will be based on the same master as the selected page. This shortcut also works to add pages to a master spread. Find that Color It’s great that InDesign allows you to use Find/Change to search for a color swatch. But if a complex placed image or PDF is the source of a spot color, you might still not know exactly where it’s coming from, because Find/Change will point to the whole image. The surefire way to find exactly where the color is located is to choose View > Output > Separations Preview, turn off all color plates except the spot color in the Separations panel. You’ll see black “ink” appear everywhere the color is used.
Find that color—The image on the right shows the same document page as the one on the left, using the separations preview to show only those items colored with the spot color.
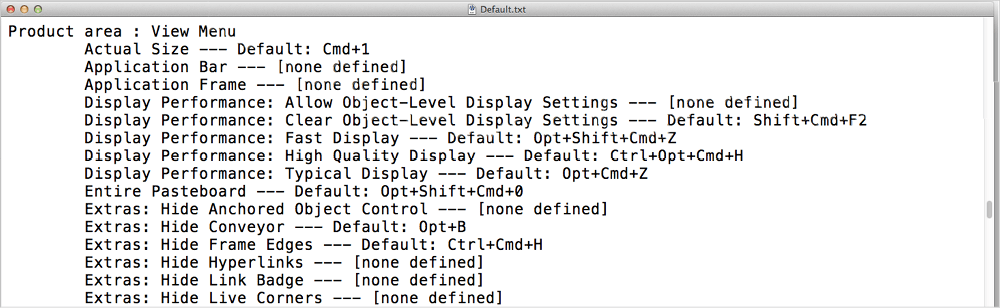
Scale Frame and Content to Specific Measurement Value If you want to scale both an image and the frame containing it to a specific size, you can use the Scale X and/or Scale Y fields in the Control panel. The trick is to include a unit of measure. For example, you can enter 2p in the Scale X field to make a selected object exactly two picas wide. Tweaking Text You can adjust the horizontal and vertical position of text very quickly with several keyboard shortcuts that involve the Option/Alt key. To increase leading, select the text, and then press Option/Alt+Down Arrow; to decrease leading, use Option/Alt+Up Arrow. To increase tracking, select a range of text, and then press Option/Alt+Right Arrow; press Option/Alt+Left Arrow to decrease it (use these same shortcuts with your cursor between two characters to increase and decrease kerning). And finally, to apply baseline shift to selected text, press Option/Alt+Shift along with your Up or Down Arrow keys. Search All Keyboard Shortcuts Quickly with Show Set What do you do when you can’t remember a specific keyboard shortcut in InDesign? Google it? Go to the Help? One method you can use to see a list of all your current keyboard shortcuts (including any you’ve customized) is to choose Edit > Keyboard Shortcuts. You can click around in this dialog box to select menu items and commands and see the shortcuts for each. Even better, you can click the Show Set button, which opens a list of your shortcuts in a plain text file that you can search for elusive items.
Show Set opens the shortcuts in a text editor.
Make Objects the Same Size To change many frames to the same size, set the height and width of one of them. Then select all the rest and choose Object > Transform Again > Transform Sequence Again Individually.
David’s Favorite Tips
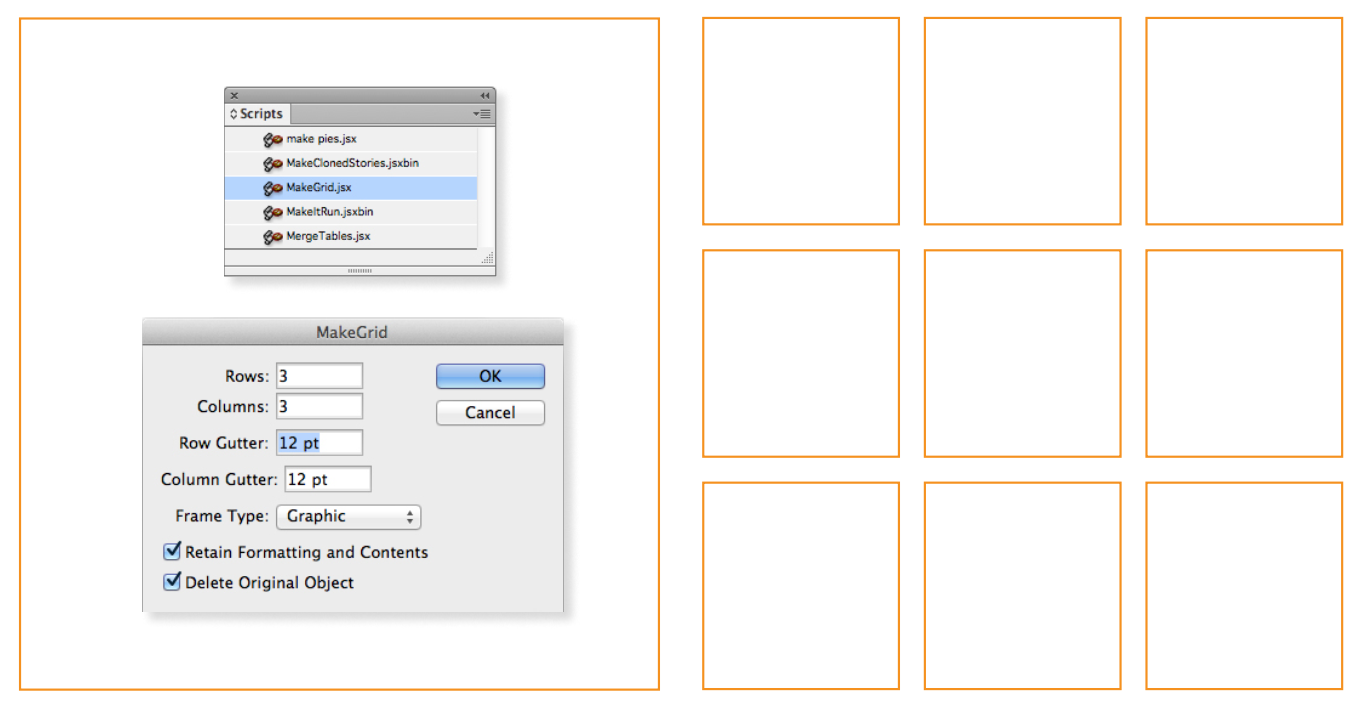
Removing Local Overrides To remove local overrides from text, don’t Option/Alt-click on a style. Instead, click the Remove Local Overrides button in the Paragraph Styles panel or the Control panel. This way is more flexible, because if you select text first, it removes overrides just from the selected text. If you have the cursor flashing, it removes overrides from the whole paragraph. If you have a frame selected, it removes overrides from all text in the frame. Five Guide Tips in One! 1. Double-click the spot on the ruler where you want to add a guide. 2. While dragging a guide, hold the Shift key to have the guide snap to tick marks on the ruler. 3. Hold the Option/Alt key and drag an existing guide to make a copy of it. 4. When you’re dragging a new guide from a ruler, change it from horizontal to vertical (or vice versa) by holding Option/Alt. 5. To create a page guide that extends to the edges of a page, drag a guide from the ruler and release the guide over the page. To create a spread guide that extends to the edges of the pasteboard, drag a guide from the ruler and release the guide over the pasteboard (or hold the Command/Ctrl key while you release the guide). Adjust Spacing Between Objects Select more than one object and start dragging a side or corner handle. While dragging with the mouse, hold down the spacebar; InDesign adjusts the spacing between the objects instead of scaling them. Changing Frames into Grids of Frames Need a whole grid of frames? You could use the Step and Repeat feature, but if you know how large you want the grid and not necessarily how large each frame should be, Step and Repeat can be a hassle. Instead, just draw one big frame to cover the size you want the grid to cover. Then, while that’s selected, open the Scripts panel (Window > Utilities > Scripts) and double-click the MakeGrid script (it’s inside the Samples > JavaScript folder in the panel). That converts any single frame into a bunch of frames on a grid, according to your specifications (how much space between each one, and so on).
Use the MakeGrid.jsx script to change one frame to a grid of frames.
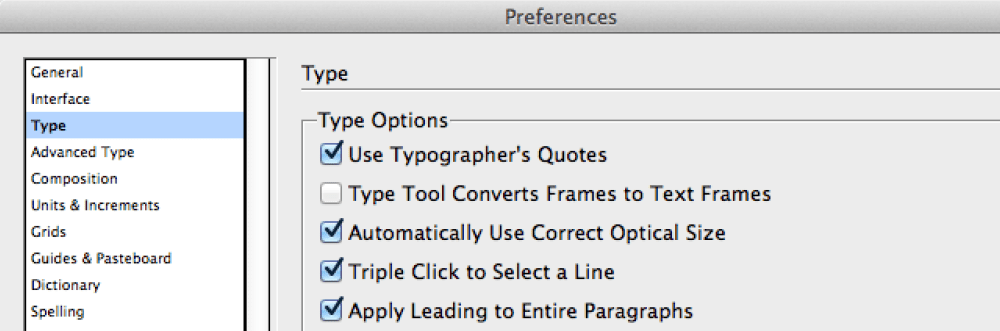
Negative Text Wrap Sometimes InDesign wraps text farther around an object than you want, even when the text wrap value is set to zero. This is especially true with text wrap underneath a frame. Fortunately, you can set the text wrap to a negative number, which makes the text hug closer to the object. Keep [Registration] Out of The Way Registration is a special swatch in InDesign to apply a color that prints on all printing plates—useful for creating registration marks for print, but you don’t want to apply it to any object on the pages of your layout. To avoid accidentally using the [Registration] swatch instead of [Black], drag Registration to the bottom of the swatch list. Do this while no files are open, and it will become the default for all new documents you create. (While we’re on the subject of color swatches, actually you can drag them to any order you want. If you have a corporate spot color that you use all the time, for example, drag it up to the top of the list so you can find it easier!) Delete Preference Files If InDesign starts acting odd (for example, panels appear blank or features disappear), you might try rebuilding InDesign’s preference files. You can do this by pressing Ctrl+Alt+Shift (Windows) or Control+Option+Command+Shift (Mac OS) immediately after launching InDesign. Hold them down until you see a dialog box asking if you really want to delete your prefs. Go and Fit in Window You know you can jump to a particular page by double-clicking on it in the Pages panel. But did you know that you can hold down the Option/Alt key while double-clicking to jump to that page and switch to Fit Page in Window at the same time? Turn Straight Quotes to Curly Somehow you have created a document with hundreds of straight quotes in it, instead of the proper, curly “typographer’s” quotes. How can you convert straight to curly? First, make sure Use Typographer’s Quotes is selected in the Type pane of the Preferences dialog box. (Bonus keyboard shortcut: hold down Command+Option+Shift or Ctrl+Alt+Shift and then press the single-quote key on the keyboard to turn this preference on and off.) Then choose Find/Change from the Edit menu. In both the Find What and Change To fields, type a single quote, and then click Change All. Now repeat, but put a double-quote in both the fields. Simple, yet effective!
Use Typographer’s Quotes in Preferences dialog
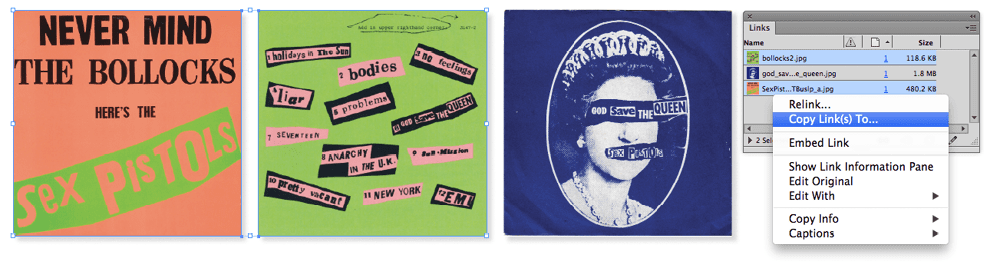
Find Images Scaled Wrong (and other document errors) You know how to tell whether an image is scaled disproportionately (different horizontal versus vertical scaling), right? You just select the image inside the frame and look in the Control panel. That’s OK for the occasional image. But if you have a lot of them to check, choose Define Profiles from the Preflight panel, click the + button to make a new profile, and select the Non-Proportional Scaling of Placed Object checkbox (it’s inside the Images and Objects section). Then click OK, and choose your new profile from the Profile pop-up menu in the panel. Any wrongly-scaled images will appear as errors in the panel in just a few seconds! Accessing Find/Change History Did you know that Find/Change remembers everything you’ve ever entered into its Find and Change fields? (Well, actually, only everything since you last rebuilt your preferences.) To access your Find/Change history, open the Find/Change dialog box, and click the Up/Down icon immediately to the right of either field. Don’t go all the way to the right; those are the metacharacter dropdown menus. Find/Change history can be useful when you need to run the same Find/Change searches in a series of layouts. Collecting Images Without Packaging Sometimes, way before you get to the File > Package stage of a project, you need to quickly gather a few or all of the layout’s linked high-res images in one place and do something with them—send them to a freelancer, for example, or back them up to an external drive. The fastest way I know to do this is to first select the images you want to gather in the Links panel (Shift- or Command/Ctrl-click to select more than one). Then choose Copy Links To from the Links panel menu (or even easier, just right-click on one of the images in the panel to use the contextual menu). Specify a folder where you want the files copied to, click OK, and you’re done. Note that your layout file will be linked to the new copies, so this can also be a good way to do a little organizational pre-packaging too.
In the following CreativePro video, Michael Ninness shows us how to use Camera R...
×By signing in, you agree to our Terms of Use and acknowledge our Privacy Notice.
Manage your privacy
This site uses cookies, but not the kind you eat. We use cookies to remember log in details, provide secure log in, improve site functionality, and deliver personalized content. By continuing to browse the site, you accept cookies.
Functional
Always active
The technical storage or access is strictly necessary for the legitimate purpose of enabling the use of a specific service explicitly requested by the subscriber or user, or for the sole purpose of carrying out the transmission of a communication over an electronic communications network.
Preferences
The technical storage or access is necessary for the legitimate purpose of storing preferences that are not requested by the subscriber or user.
Statistics
The technical storage or access that is used exclusively for statistical purposes.The technical storage or access that is used exclusively for anonymous statistical purposes. Without a subpoena, voluntary compliance on the part of your Internet Service Provider, or additional records from a third party, information stored or retrieved for this purpose alone cannot usually be used to identify you.
Marketing
The technical storage or access is required to create user profiles to send advertising, or to track the user on a website or across several websites for similar marketing purposes.
We use technologies like cookies to store and/or access device information. We do this to improve browsing experience and to show (non-) personalized ads. Consenting to these technologies will allow us to process data such as browsing behavior or unique IDs on this site. Not consenting or withdrawing consent, may adversely affect certain features and functions.
Functional
Always active
The technical storage or access is strictly necessary for the legitimate purpose of enabling the use of a specific service explicitly requested by the subscriber or user, or for the sole purpose of carrying out the transmission of a communication over an electronic communications network.
Preferences
The technical storage or access is necessary for the legitimate purpose of storing preferences that are not requested by the subscriber or user.
Statistics
The technical storage or access that is used exclusively for statistical purposes.The technical storage or access that is used exclusively for anonymous statistical purposes. Without a subpoena, voluntary compliance on the part of your Internet Service Provider, or additional records from a third party, information stored or retrieved for this purpose alone cannot usually be used to identify you.
Marketing
The technical storage or access is required to create user profiles to send advertising, or to track the user on a website or across several websites for similar marketing purposes.