
Adobe Stock to the Rescue
Khara Plicanic shows how to jump-start your next project with high-quality, royalty-free assets.


This article appears in Issue 115 of InDesign Magazine.
Few things are more intimidating than the paralyzing starkness of a blank canvas. Even the most talented illustrators and designers can be brought to their knees when faced with tight deadlines and creative ideas that may push the limits of our expertise.
Enter Adobe Stock. Many a creative project has been saved by this curated collection of video, illustrations, photographs, and 3D assets instantly accessible from your nearest Web browser—or even within the Creative Cloud app of your choice.
Getting Started
Before we take a look at how to access Adobe Stock from within the apps, let’s explore the platform, using your favorite browser, to find inspiration and download assets for a book project.
Finding the perfect asset
To get started, visit stock.adobe.com. Near the top right corner of the web page, you can click “Sign in” to take advantage of the site’s integration with Creative Cloud libraries to manage assets, download comps, and create lists/collections, and so on.
To narrow the scope of our search, select an option from the drop-down menu in the middle of the screen (Figure 1).

Figure 1. To get started, visit stock.adobe.com, and click “Sign in” to log in with your Adobe ID and start building your first asset library. Target your search by selecting the desired category from the Search drop-down menu.
In this case, I’ll choose Templates, and type “book” into the search box. At the time of this writing, there are nearly 900 search results relating to book templates. The thumbnail preview for each result makes it easy to see the title and format of each asset, with files for Photoshop, InDesign, Illustrator, and Premiere (Figure
2).

Figure 2. A search for “book” within the Templates category yields nearly 900 results formatted for Photoshop, InDesign, Illustrator, and Premiere. Results can be filtered in a variety of ways, including category and format, making it easy to target your search.
Scrolling through the results, we see a range of possibilities for everything from internal book layout templates to cover designs and finished product mockups.
For this project, let’s assume we plan to work primarily in InDesign. To limit our results to InDesign files only, click “View filters” in the upper left corner, and select “InDesign” from the App list. This takes our results from nearly 1,000 to a far more manageable 75. Even more exciting: if you look down in the bottom right corner of the thumbnail previews, you’ll notice that some of the assets are free!
Organizing and downloading assets
For this project, we’ll download two free InDesign templates: one for the internal book layout and one for the book cover. (Plus a third Photoshop file to mock up the finished product.)
Scroll through the results, and select the free “Classic Book Layout for ePub” by Themzy. To save an asset, you’ll first need to create a library. Click to expand the drop-down menu next to the download icon, and then click the “+” to create and name your new library. In Figure 3, I’ve titled the library “Book Project.”

Figure 3. Assets are saved to libraries, in this case, one called, “Book Project,” and then synced across devices and platforms. You can create multiple libraries and organize your projects in whatever way works for you.
(Note: This saves the file to a library in your CC account. If you want to save the file(s) directly to the Downloads folder on your local hard drive, click the drop-down menu next to the cloud icon, and select the “Download” link under “Save to Computer.”)
Repeat this process to download the free InDesign book cover template “Book Jacket Layout” by Scott Citron. (Note that the description mentions that this dust jacket is formatted for standard 8 × 10 inch books, so this will be the size we base our finished product on.)
As shown in Figure 4, once created, the site remembers and suggests your most recently accessed library, so you can stockpile additional assets with a single click of the little cloud icon.

Figure 4. As you continue to add assets to your library, Adobe remembers your most recently selected library, and you can add subsequent assets with a single click of the cloud icon.
Finally, return to the Filters panel, and change the App selection from InDesign files to Photoshop to find a mockup asset to help sell the final product and make a polished client presentation. Locate the free file called “Book Mockups,” by Supercrowds, and click the cloud icon to download it to your project library (Figure 5).

Figure 5. By changing the filter setting from “InDesign” to “Photoshop,” it was easy to spot a mockup template to help sell our design concept to the client.
Now we’re ready to begin the fun part—building our book!
Using Your New Files
Creative Cloud libraries make it easy to find, store, and organize assets for your project. Once you download a comp or license the file, you’re ready to get to work, and you’ll find everything waiting for you—right inside your Adobe apps.
Accessing Creative Cloud libraries
Where did the files go that you just downloaded/licensed? Instead of languishing in a generic downloads folder on your hard drive (unless you’ve specifically chosen to save the files there), you’ll find everything tidily waiting for you in the cloud, organized within your project library (conveniently synced across all devices).
From within InDesign, choose Window > CC Libraries. (In Photoshop and Illustrator, you’d choose Window > Libraries.) Once the CC Libraries panel opens, select your project library from the drop-down list at the top, and you should see the three licensed assets waiting for you (Figure 6).

Figure 6. After opening the libraries panel from within InDesign and selecting our Book Project library from the drop-down list, we can see our three downloaded assets are ready and waiting to be put to good use.
Double-click to open the book layout file, and you’re ready to get to work!
Customizing template assets
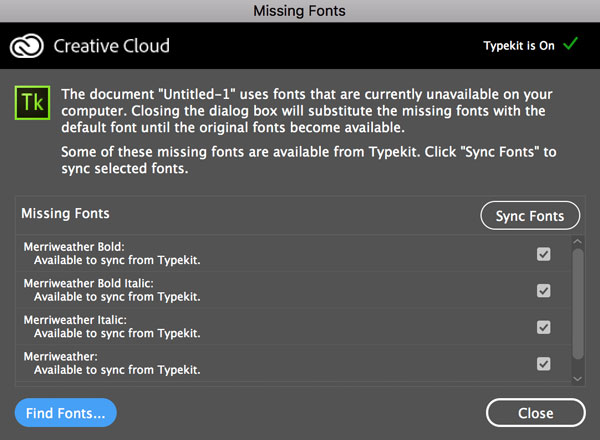
From the open libraries panel, double-click the Classic Book Layout to open the template. Most likely, you’ll see a warning, letting you know that the file uses a font you don’t have. Luckily, this template was built with Merriweather, which you can sync for free from Adobe Fonts.
To make InDesign happy again, in the Missing Fonts dialog box, confirm that all the missing fonts are selected, and then click Sync Fonts (Figure 7).
Now that the font situation is addressed, we’re ready to tackle the reformatting.
Because this file is optimized for fixed-layout EPUB, we need to convert it for print, and reformat it to 8″ × 10″ to match the dust jacket cover template asset.
To reformat the layout, choose File > Document Setup, and change the settings to match those shown in Figure 8.

Figure 8. To reformat the EPUB template for print and specifically to match the size of the dust jacket cover template we downloaded, choose File > Document Setup, and change the settings to those shown here.
Making assets your own
Once you have the file formatting adjusted to suit the needs of your specific project, you’re ready to focus on the content and design. In this case, that may mean importing a manuscript from Word and customizing existing paragraph styles. As shown in Figure 9, this file comes with an extensive collection of well-organized paragraph styles, conveniently tucked into folders. (Raise your hand if your files always look this neat and tidy. Anyone?)

Figure 9. Check out the fully loaded and well-organized set of paragraph styles that came with our chosen template file!
The amount of time you end up spending on reflowing text, tweaking styles, and so on, will depend on how closely the template file you’re using matches your project intentions, and of course, how neatly organized your own materials are. The easier it is to map existing styles and formats, the sooner you can be enjoying that post-project cup of coffee (or glass of wine).
Working Directly Within the Library Panel
If you’re in the middle of a project when the need for a ready-made design solution arises, thanks to the in-app libraries panel, you don’t even have to leave the comfort of InDesign (for example) to search for new assets. And with free watermarked comps, you also don’t have to stop your design flow to wait for purchase approval on final artwork. (Thanks, Adobe!)
Free comps and searching within libraries
When you’re finished setting up the book file, return to the libraries panel to access the dust jacket cover, and then double-click to open it. Let’s pretend our book project is about butterflies. To locate appropriate placeholder imagery for the cover, put your cursor into the search box near the top of the Libraries panel, and type “butterfly.” (It may be helpful to expand the size of the panel by clicking and dragging from the panel’s bottom corners.)
To limit the results to photographs, click to expand the results filter, and select “Photos” (Figure 10).

Figure 10. Filter search results right from within the libraries panel by expanding the small triangle and selecting the “Photos” checkbox. Additional filtering options, such as image orientation, depth of field, and more are available on the Adobe Stock website.
If you’re searching for something more specific, you can narrow your scope further by entering additional terms to suit your needs like “butterfly cherry blossom.” (For even more extensive filtering options, the Adobe Stock website offers results based on image orientation, depth of field, and whether or not the image includes a person.)

Figure 11. Misplaced an asset? Locate it by searching across your CC libraries.
The second search result seems like a great possibility for our project, so let’s add a free comp to our library by clicking the preview’s cloud icon to access a low-res/watermarked version that we can use as a placeholder. Notice that it remembers our most recently used library, and automatically saves the file to Book Project. From here, placing the file into our document is as simple as clicking and dragging the image from the Library panel directly onto your document (Figure 12).

Figure 12. Placing an asset file directly into your document is as simple as clicking and dragging the file from the CC Libraries panel to the active document.
Note that when you drag an image from a CC Library to your layout, the graphic is linked to the CC Library (you can see a small cloud icon in the upper left corner of the graphic frame and a shopping cart icon in the Links panel). For more on working with CC Libraries, see Steve Werner’s article in issue #83.
Of course, comps are just low-resolution watermarked “FPO” images. Once the design is finalized and assets are approved, we can license the image by right-clicking/Ctrl-clicking the image within the library panel, or by clicking the shopping cart icon in the Links panel (Figure 13).

Figure 13. Once approved, you can license assets directly from within InDesign’s Links panel by clicking the shopping cart icon.
Assuming you have paid for sufficient credits on the Adobe Stock site, the file will automatically update with no extra effort. (High-five!)
In this example, I tweaked the colors to riff off the cover image, and searched Adobe Stock for two more images, using the terms “author” and “barcode,” to complete the cover design. The finished result can be seen in Figure 14.

Figure 14. The final dust jacket design with the addition of an author photo and a placeholder barcode from Adobe Stock, found and accessed directly through the CC Libraries panel in InDesign.
Being able to search for and apply images from directly within InDesign (not having to leave the workspace) is a massive time (and sanity) saver.
Managing your library
If you get carried away adding tons of great assets to your library and find yourself with the need to tidy up, you can certainly do it on the website, but it’s also quite handy to do it right within the Libraries panel.
To clean house, simply select the files you want to get rid of, right-click/Ctrl-click, and choose Delete to remove them. This removes them from your library, but you still maintain any licenses you may have purchased. You can find a history of all your licensed files (and add them back to your library) from the drop-down menu in your account at stock.adobe.com.
Other useful file management tasks include being able to copy and/or move files to other libraries, rename files, and the ability to share a link.
Collaborating
Gathering potential assets to review with a team or client is as easy as creating a library and sharing it. The most direct approach is to navigate to the desired library in the libraries panel, and from the panel menu, choose “Share Link.” (Figure 15).

Figure 15. To share a library with a team or client, choose the “Share Link” command from the libraries panel menu and then copy and paste the link.
This will launch your web browser, where you’ll be prompted to change your library privacy setting to allow sharing. Next, just copy and paste the resulting link.
If you just want to send someone a quick link to a single image, from within the libraries panel, simply right-click/Control-click the image thumbnail, and choose “Share Link.” As before, this will launch the browser and give you a link you can copy and paste.
To share an entire library from within the website, first navigate to the library. Then, from the drop-down menu in the top right corner of the screen (Figure 16), choose Send Library Link.

Figure 16. To share a library link from the web, navigate to the desired library, and then choose “Send Library Link” from the panel menu.
To share an individual file, you have to get the direct URL for the file itself, not the URL that references the file as included in your library. To do that, navigate to your library, and then click the desired image. Below the expanded image, you’ll find the image file number (Figure 17).

Figure 17. To share a specific image, click on that image’s unique file number to obtain a direct URL.
Click the file number to open a direct URL to the image, and then copy and paste to share.
Creating a Cover Mockup in Photoshop
Once you finish your project, make it shine with a polished product mockup. In this example, we downloaded a mockup template to use in Photoshop.
To access the Libraries panel in Photoshop, from the file menu, choose Window > Libraries. Make sure the desired library is selected, and double-click the image thumbnail to open the mockup template file we downloaded earlier.
In Figures 18 and 19, you can see the finished project.

Figure 18 and 19. The completed Photoshop mockup of the cover and interior layout using the stock template file and related image assets.
If you look closely at the Layers panel in Figure 20, you’ll see that the template file consisted of multiple smart objects, including one for the book cover and one for each of the interior pages (left and right).

Figure 20. A closer look at the mockup template’s Layers panel in Photoshop reveals a rich document with multiple smart objects for customizing the image.
I simply copied and pasted elements from the layout files in InDesign into these Photoshop smart objects, adding some color fill adjustment layers to help tie things together.
Selling Your Own Work
So far, we’ve looked at how to jump-start your design process by taking advantage of the assets found in the Adobe Stock collection. But if you’re the kind of person who isn’t paralyzed by a blank canvas, you can also create and sell your own original works, adding them to the Adobe Stock marketplace to help other creatives.
To add your own original creations to Adobe’s curated collection, start by clicking the “Sell” link in the top right screen area of stock.adobe.com. From there, in the same general area of the screen, choose “Upload,” and walk through the various prompts to add your work to the ever-growing collection.
How much can one make from selling stock online? Like everything in life, the answer can vary dramatically. It’s definitely not a get-rich-quick kind of endeavor, but with volume, quality, and properly keyworded uploads, you can definitely make more than by keeping your work to yourself on your hard drive.
Adobe pays 33% of each license bought, which can vary depending on the content, license type, and the plan of the subscriber who purchased the license. Royalties can range from less than a dollar to almost $70 per license. For more information about the type of content Adobe Stock is looking for, what the review process consists of, and how payment works, read their Stock Contributor User Guide.
Deals and Details
There are two ways to pay for assets you want to license: credits and plans. Each option has its advantages.
Plans
Adobe offers subscription plans in several tiers, starting at $29.99/month. Each tier is available with a month-to-month or annual commitment. As you might expect, you get more for less when you subscribe annually versus month-to-month. For example, at the $29.99 level, you can download 3 standard assets when paying monthly, but you get 10 if you subscribe annually. Additional standard assets are $9.99 each with the month-to-month plan, but only $2.99 each if you subscribe annually (and as low as $.99 with bigger tier annual plans).
Some subscription tiers include the ability to roll over a certain amount of unused licenses each month, meaning you don’t lose licenses you don’t use. Naturally, if you cancel your subscription, you forfeit all unused licenses. (However, as you’d expect, you keep the licenses you’ve already purchased.)
In either case, a subscription plan only provides access to standard content. For premium assets, you’ll need a credit pack.
Credit packs
Unlike a subscription plan, credits are single purchases, sold in packs. With credit packs, you can access all Adobe Stock content—including premium assets. Offerings start at 5 credits for $49.95, which gets you a single premium image.
Unless you live in Japan, credit packs expire 12 months from the date of purchase. (In Japan, your credits expire in only six months.)
10 free images
Adobe offers a free, one-month trial of their $29.99/month annual subscription plan, which entitles you to 10 image downloads. Essentially, you sign up for a year subscription, and they give you the first month free, during which you have the ability to cancel, risk-free.
Premium content vs. standard content
Some assets are hand-picked by moderators as “premium.” These assets come from the world’s top photographers and agencies, and are chosen for their high quality content, style, authenticity, and more. Premium assets are not available to license with a subscription plan; they require credit packs to license.
Additionally, premium content comes with additional license options and includes three pricing tiers based on image size.
Extended license vs. standard license
A standard license allows you to use the image on items not intended for resale (like a website, or social media, or a promotional piece), in print runs of less than 500,000.
If you plan to use the image on a run of more than 500,000, or you want to put it on a t-shirt to sell, you’ll need an extended license.
Subscription plans don’t include extended licenses, but they can be purchased with credit packs.
Stock Up!
Next time you find yourself stuck, staring at a blank canvas, waiting for inspiration to strike, be your own hero and stroll over to stock.adobe.com to explore the millions of possibilities. With so many templates, design assets, and ready-to-use solutions, you just might finish your next project quicker than you can get a second cup of coffee.
Commenting is easier and faster when you're logged in!

Recommended for you

Packaging Graphics on the Pasteboard with the Book Panel
If you have to send packaged files and for whatever reason still have important...

Before&After: How to Design a Second Page
You've designed a beautiful outside. How do you follow it up inside? Simply.

Frame Fitting Options
Learn how to speed up your workflow by framing images like a pro in InDesign.