

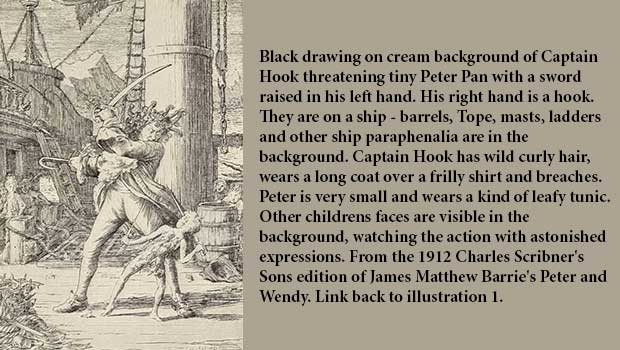
Sometimes the parameters of the alternative text field are inadequate to describe an image for accessibility. Perhaps the description needs HTML markup or perhaps it just needs more characters in order to describe the image adequately. That’s where a long description comes in. Sometimes known as an extended description, this is an opportunity to describe an image thoroughly without length limits. The best way to do this in an ebook is to link out to a HTML file, linking back to the text at the end of the description. The HTML file holding the long description can be linear or non-linear (the latter meaning it is only visible to the reader when activated). And because some reading systems have difficulty with locations, linking out to a separate file is the best way to accomplish a long description without creating failure-to-locate confusion. It is a simple, elegant way to code a long description and, at present, works nicely across all reading systems. If you are creating your ebooks from InDesign, as is true of 95% of the ebooks on the market, than you know that there is no obvious way to do this from within InDesign. But by manipulating InDesign’s cross-references feature, we can get it done. Here are the steps to accomplish it: First, make sure that both the long description and the item you want to link it back to are formatted with unique paragraph styles. Both items need a hook, so to speak. In my example, the long description has a header with the style Backmatter. The thing I am linking back to already has a relatively unique style, Caption. 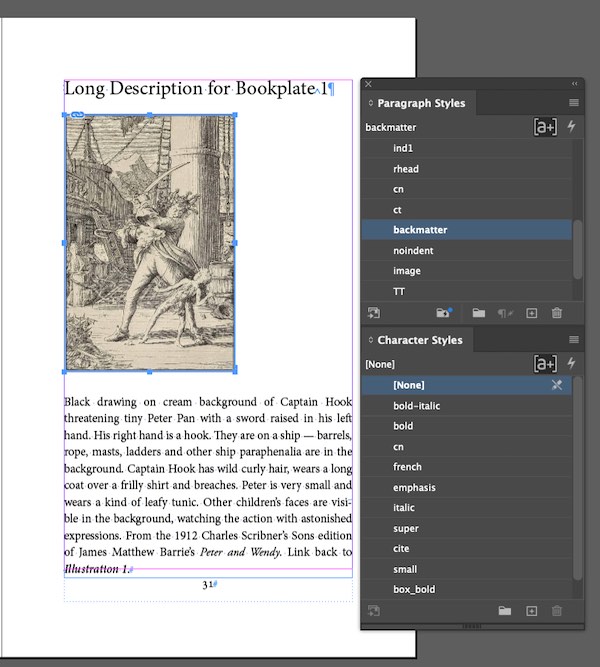 Next, create the cross references by placing your cursor where
you want to insert the link out to the long description. In this case, that’s in the image caption. Choose Type > Hyperlinks & Cross References > Insert Cross References. 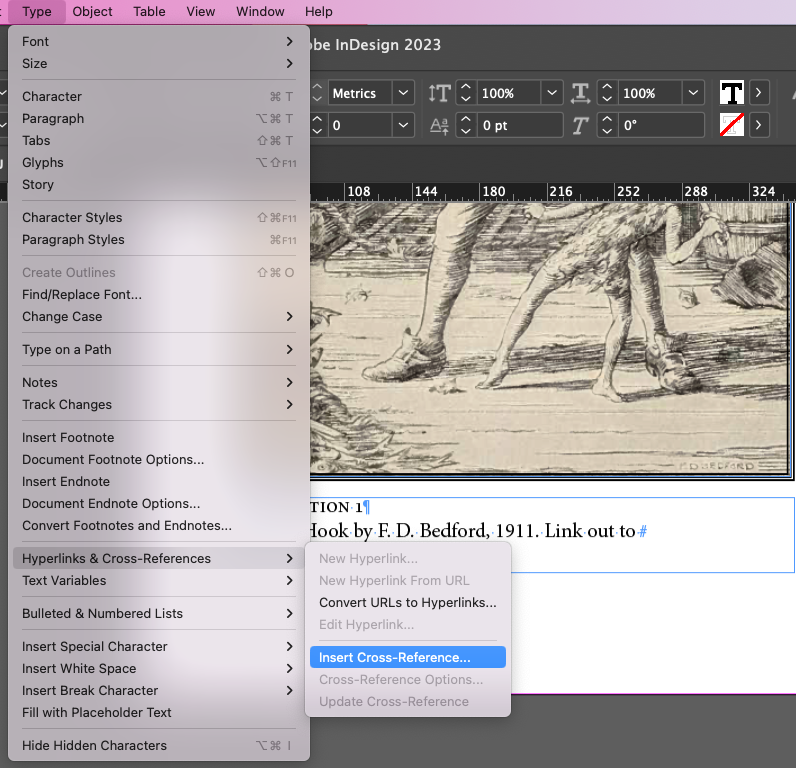 In my example, I’ve chosen to insert the full paragraph of the backmatter header without quote marks. I’ve also applied a unique character style to the cross-reference, a bold italic style.
 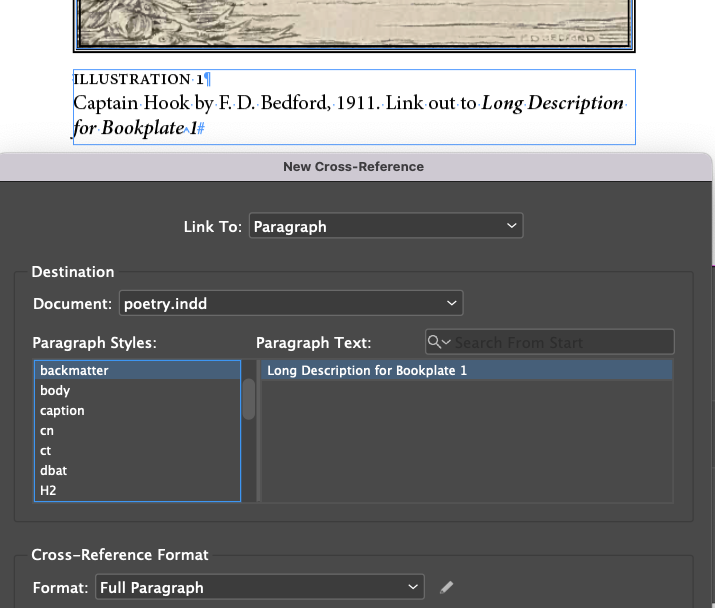 So now, there’s a link from the image caption to the long description. To create a link in the opposite direction, from the long description back to the image caption, follow the same steps in reverse. Once that’s done, these two items—the image and the long description—will now be hyperlinked to one another. When this content is exported to EPUB, the links will work nicely both ways. The last step in this process is to mark the HTML file holding the long description as non-linear in the <spine>. That way, it can only be found via the link from the image caption.
 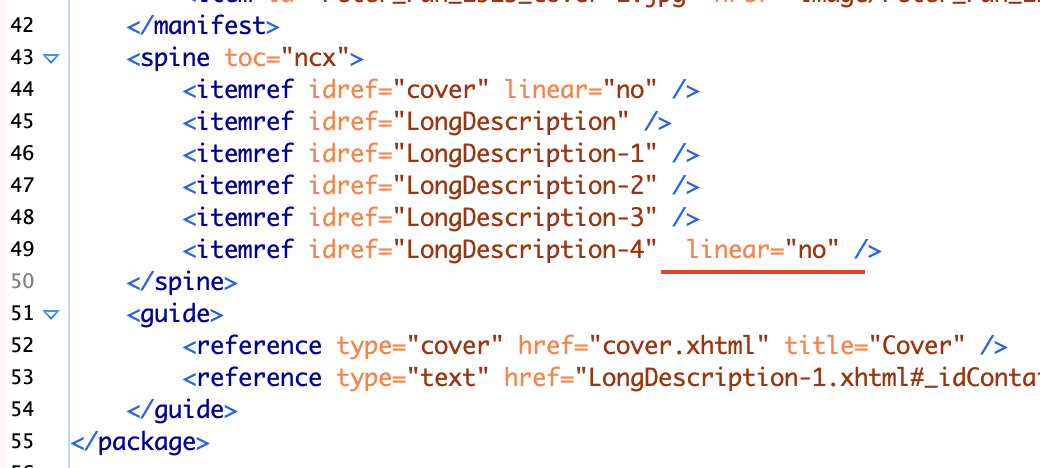 Tip: In InDesign you can always check and test your cross-references in the Cross-References panel (Window > Type & Tables > Cross References). I have a video walk-through of the process on YouTube, check it out if you prefer watching over reading. I hope this method works for you. I am happy to hear about improvements or tweaks that you find.
Commenting is easier and faster when you're logged in!

Recommended for you
The CreativePro Accessibility SuperGuide
A compendium of essential knowledge, tools, and techniques for producing accessi...

Interview with Caroline Desrosiers, Alt Text Entrepreneur
Q&A with Caroline Desrosiers, who is presenting at The Design + Accessibility Su...

Accessibility Tips for Presentation Designers
Use these quick, no-stress fixes to make your slides more accessible.