
Showing results for mon con9 com cézanne com11872 con9 com cusihuamán cézanne com9367 cyan con9 com cyan20 con9 com cusihuaman cezanne cusihuaman cezanne com ( com ( cyan- c’mon
P22’s Cézanne is one of the most intriguing script fonts in recent years. It defies the stereotype of the typical font because of its striking look of natural hand lettering. Designers often choose Cézanne for this reason alone. The elongated crossbar of the ‘t’ and the waving baseline are only two of the features that make it such a distinctive face. Cézanne appears just about everywhere, including dozens of CD covers, coffee shop and restaurant facades, menus, packaging, book jackets and even in scrap booking accents. As a result, Cézanne is one of the most popular fonts in the P22 library.
Designers consider Cézanne ideal for various projects. However, one of the drawbacks of its great popularity is that Cézanne may have become too recognizable and possibly not as irregular as one would wish for in a handwriting font. For example, when duplicate letters appear next to each other in a word written in Cézanne, they look identical in all instances. Longtime P22 collaborator James Grieshaber took these concerns to heart and resolved both issues by using the dynamic OpenType format.
The result of Grieshaber’s efforts is Cézanne Pro, an expansive suite of options that allows for several-as many as six versions of each letter. There are hundreds of automatic substitutions programmed into the font but designers can also hand-select individual letters for just the right look.
P22 Cézanne Pro includes full western and central European character sets and Cyrillic for typesetting in dozens of languages. It features several types of numerals (lining, oldstyle proportional, tabular, superscript, subscript and fractions), ligatures, snap-on swashes, and word glyphs (the, of, le, and, etc.). This new Cézanne Pro OpenType font includes over 1,000 glyphs and “smart features” that will automatically substitute letter combinations to create an even more natural handwriting effect than was possible with its predecessor.
More and more applications are taking advantage of OpenType features. Users of, for example, Adobe’s Creative Suite and the upcoming Quark Xpress, can take Cézanne to a whole new level. For those who cannot yet use OpenType features, PostScript and TrueType versions of the Cézanne alternate fonts are available. These can be manually intermixed with the original Cézanne to create effects similar to those in the OpenType version or they can be used on their own to achieve the familiar yet “not quite Cézanne” look.
P22 Cézanne Pro brings new flexibility to a proven face, one that thousands of designers worldwide have found irresistible. P22 — not your typical type.
For more information on P22 Cezanne Pro: www.p22.com
P22’s Cézanne is one of the most intriguing script fonts in recent years. It defies the stereotype of the typical font because of its striking look of natural hand lettering. Designers often choose Cézanne for this reason alone. The elongated crossbar of the ‘t’ and the waving baseline are only two of the features that make it such a distinctive face. Cézanne appears just about everywhere, including dozens of CD covers, coffee shop and restaurant facades, menus, packaging, book jackets and even in scrapbooking accents. As a result, Cézanne is one of the most popular fonts in the P22 library.
Designers consider Cézanne ideal for various projects. However, one of the drawbacks of its great popularity is that Cézanne may have become too recognizable and possibly not as irregular as one would wish for in a handwriting font. For example, when duplicate letters appear next to each other in a word written in Cézanne, they look identical in all instances. Longtime P22 collaborator James Grieshaber took these concerns to heart and resolved both issues by using the dynamic OpenType format.
The result of Grieshaber’s efforts is Cézanne Pro, an expansive suite of options that allows for several-as many as six!-versions of each letter. There are hundreds of automatic substitutions programmed into the font but designers can also hand-select individual letters for just the right look.
P22 Cézanne Pro includes full western and central European character sets and Cyrillic for typesetting in dozens of languages. It features several types of numerals (lining, oldstyle proportional, tabular, superscript, subscript and fractions), ligatures, snap-on swashes, and word glyphs (the, of, le, and, etc.). This new Cézanne Pro OpenType font includes over 1,000 glyphs and “smart features” that will automatically substitute letter combinations to create an even more natural handwriting effect than was possible with its predecessor.
More and more applications are taking advantage of OpenType features. Users of, for example, Adobe’s Creative Suite and the upcoming Quark Xpress, can take Cézanne to a whole new level. For those who cannot yet use OpenType features, PostScript and TrueType versions of the Cézanne alternate fonts are available. These can be manually intermixed with the original Cézanne to create effects similar to those in the OpenType version or they can be used on their own to achieve the familiar yet “not quite Cézanne” look.
P22 Cézanne Pro brings new flexibility to a proven face, one that thousands of designers worldwide have found irresistible. P22- not your typical type.
For previews and more information, visit: https://www.p22.com/products/cezannepro.html
Increase your productivity when working with text
Here’s the situation: You’re at the end of a long production project when a designer or a client calls with a “simple” request. They just want to tweak “one little last thing.” And to them it is simple, right? Yeah, for them. You, on the other hand, now have to create new styles and then manually go through every page and apply those styles throughout the document, one paragraph at a time. If you’ve worked in production, you’ve likely encountered this scenario. I know I have. Thankfully, Gabe Harbs (affectionately known by almost everyone as “Harbs”) has created Style Utilities as a relatively inexpensive offering by In-Tools.com.
Product: Style Utilities
Company: In-Tools
Website: in-tools.com
Price: US$39
Support: Mac and Windows, CS4 and later
Rating: 4 stars
This is not a snazzy or fancy plug-in. But it doesn’t need to be. It is a quiet, competent backstage player that subtly propels the success of the entire show. It doesn’t do anything until you’re ready, but once you click each OK button, it quickly restyles paragraphs of text in a variety of ways that will automate your production and save you time and frustration.
This $39 plug-in package gives you eight functions, any one of which would itself pay for the whole shebang in time-savings after just a few uses. If you routinely do production where styles change throughout the project, or if you use an InCopy workflow and need to apply and reapply styles throughout a project, you’ll likely find this very useful. Even if you’ve just got a “small” redesign or update planned for a legacy publication, some of these features will help you be more efficient, and more accurate. The goal of this plug-in is to make it easier for you to change things faster and more accurately than you can manually.
Almost everything Style Utilities does can be accomplished manually, or using other tools in InDesign. So if you are a GREP or a Scripting master, you may scoff at some of these things and say to yourself “Bah! I could write a command that will do that in ten minutes.” But not all of us are capable of that. And, of course, if you’re paid by the hour and enjoy manually applying paragraph and character styles over and over, you won’t be interested in Style Utilities. But if your goal is to save time, then the price of this package will be worth it.
That said, if you only need to change a few styles on occasion, or if you are pinching pennies, this plug-in set may not be the best for you. But do a little simple division to see if this is worth it. Take $39 and divide it by your hourly rate. I suspect that you’d only have to save yourself 1 or 2 hours of work to pay for this plug-in. After that, it’s all gravy.
But enough glowing about this plug-in; let me show you how it works!
Installation and Guidance
Installation is as easy as with any other plug-in. Purchase the plug-in online, and download the .zip file. Quit all open versions of InDesign, open the .dmg file, click through the screens to accept the license agreement, choose the version of InDesign you want to use, select the drive to load the plug-in on, and you’re done. Once you reopen InDesign, you’ll notice that you have a new drop-down menu with options (Figure 1).
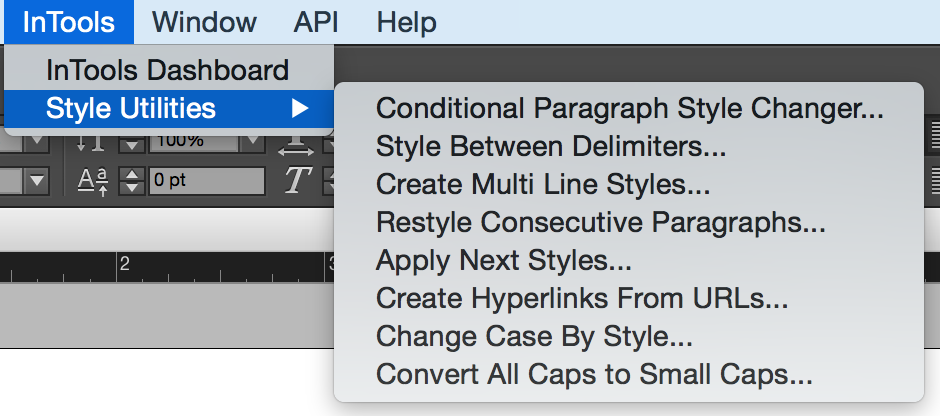
Figure 1: Choosing Style Utilities options from the newly-added InTools menu.
If you go to the top option, InTools Dashboard, you’ll be able to see this plug-in as well as all of the others available from In-Tools. This dashboard shows the current version and whether it’s installed. If you’re using a trial version, you’ll see how long until your license expires. The next option in the menu shows you a further drop-down that displays all of the functions included in Style Utilities. There are more details about installation in the included documentation.
The documentation is clearly written. But as a person who prefers visuals to written explanations, I found it a bit dense. There are screenshots of each function to show the drop-down menus and options that you have to choose from. But one page of examples per function wouldn’t make the PDF guide much larger. Alternately, the PDF could be generated to print on US Letter-sized paper, which would reduce the number of pages, and make it easier for folks who prefer to read from a paper copy. (Although if you can read smallish print, you can slightly reduce the guide to print as a spread on an 8.5” × 11” sheet of paper.)
The guide provides fuller explanations of each of these functions than I have room to describe here, but I think these examples will augment the guide and let you determine if Style Utilities is for you.
Conditional Paragraph Style Changer
This function allows you to restyle a paragraph based on the content at the beginning of that paragraph. In my example, it was decided that every paragraph that begins with “Challenge” would be changed to black text (Figure 2).

Figure 2: Before running the Paragraph Style Changer
Without the plug-in, I would have to manually select each paragraph that needed to change and apply a different style. Or I’d have to create a GREP find/replace that would change this formatting (Figure 3).

Figure 3: The Paragraph Style Changer dialog box
Style Utilities makes things a lot simpler. It lets me find every paragraph with the original “blue” style applied, and containing a specific character found in the first word, and then apply the “black” paragraph style (Figure 4).

Figure 4: After running the Paragraph Style Changer
In terms of performance, once you press OK, things go quite quickly, but the speed will depend on the size of your file. If you also wanted to change the character style of the number of words you have listed in your last entry in the function, you can call it out in the bottom portion of the pane as well. This would be useful if you were using a nested paragraph style and didn’t want to alter it or create a separate paragraph style (Figure 5).

Figure 5: Applying a conditional character style to the first word of a paragraph
Style Between Delimiters
This function is perfect if you need to change the appearance of text within parentheses, brackets, quotes, or any other repeating characters within any given paragraph. In my example, I needed to make all of the stage directions italic when they appeared within a line of dialogue (Figure 6).

Figure 6: Formatting between delimiters
This would be very time consuming if done manually, or it can be done with GREP, but it’s easier with this function (Figure 7).
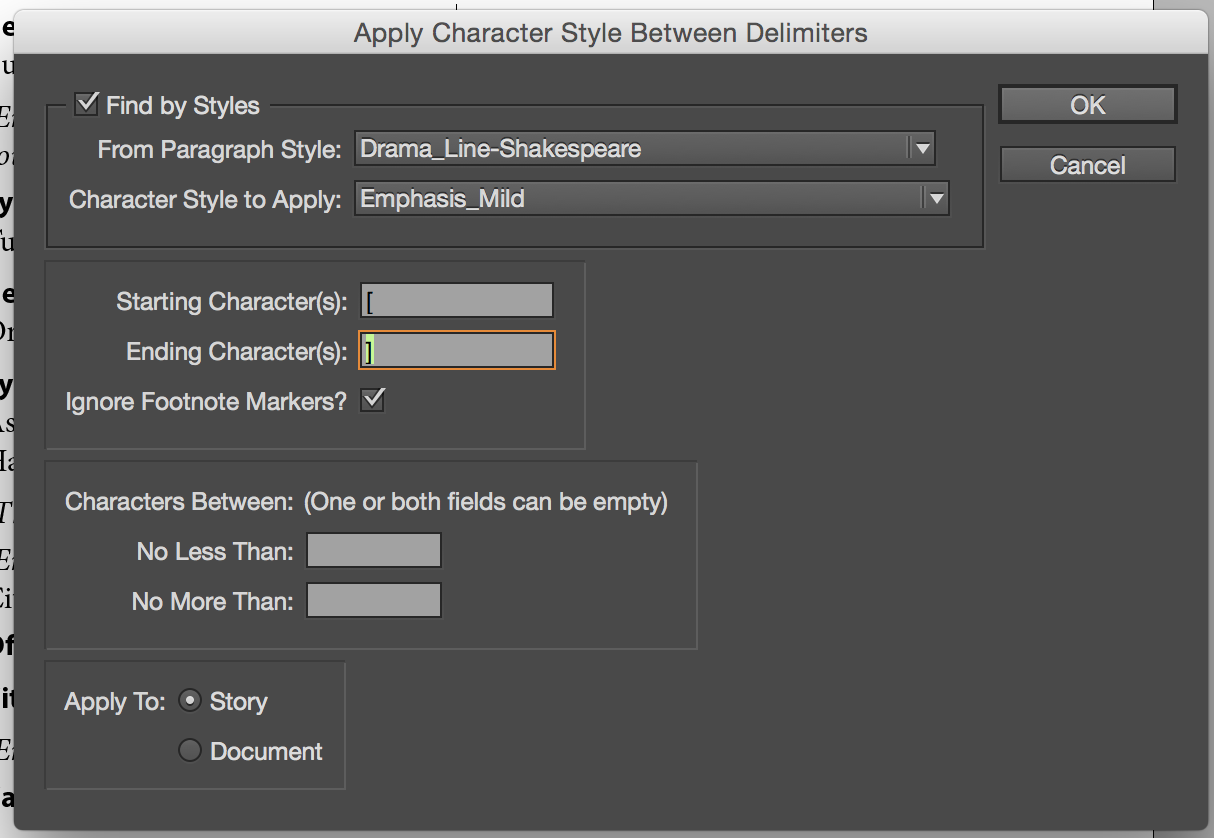
Figure 7: The Apply Character Style Between Delimiters dialog box
The options for this function are fairly self-explanatory. You choose the paragraph and character styles you want to apply. You choose your beginning and ending characters, whether there is a minimum or maximum number of characters you want restyled, and whether you want the restyling to happen in your document, your story, or your selection (which appears only if you have text selected). Once you click OK, your changes are made. I would love an option to not style the starting and ending characters differently. In my example, I would prefer the text within my brackets to be italic, but not the brackets themselves.
Create Multi-Line Styles
This function applies styles based on the number of lines in a paragraph. If you want to make every single-line paragraph a heading (as in Figure 8), or every three-line paragraph requires a specific style, this is the function to use.
Figure 8: In this example, all single-line paragraphs are headings, and as such require special formatting.
In my example, I have a set of paragraphs that are all styled as Body text, but the single-line paragraphs are headings. Again, this could be done manually, not without a lot of time and effort. And a complicated GREP style could be used. But this is so much faster and easier. You just choose the original paragraph style, the new style you want for one-line paragraphs (or another line count, if desired), and the style you want for two-line paragraphs (or other line count, if desired).
Consecutive Styles
If you ever wished for a function that would permit you to apply paragraph styles to consecutive paragraphs, then this is the function for you. Not only can it restyle paragraphs in a consistent order, but it can also apply styles to paragraphs that come before or after a specific style.
For example, I’ll frequently have to deal with a situation where I have a bulleted list, and I want more space after the last bulleted item than between consecutive items. This is great for any time when you need the first or last instance of a style to be slightly different (maybe your first paragraph after a heading has a run-in character style). This function is easy to fill in and makes the changes quickly (Figure 9).

Figure 9: In this example, paragraphs following a heading must be styled as a bulleted list, and there should be extra space between a final list item before a heading—no problem for Style Utilities.
Apply Next Styles
It was great back in the days of CS2, when Adobe added the Apply Next Style option to the Paragraph Styles panel. This allows you to apply a sequence of predictable styles to a range of paragraphs. Style Utilities takes things a step further by applying style sequences throughout a document, sparing you from having to locate specific instances. It’s very powerful and can be a huge time-saver in certain situations. You just choose the first paragraph style you want to begin the restyling with (Figure 10).
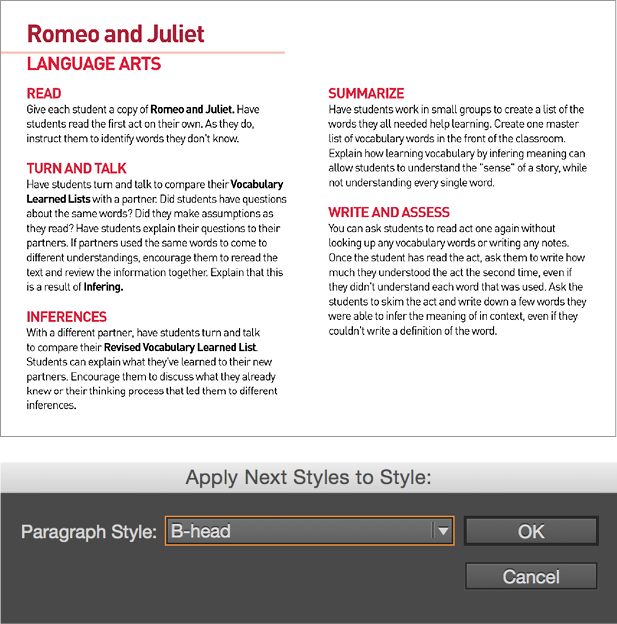
Figure 10: In this example, there are multiple paragraphs after a B-Head that can be styled all at the same time with Apply Next Styles.
Create Hyperlinks from URLs
This one should be self-explanatory. This function will find text in your file that fits a web address pattern, apply a character style to it, and turn it into a hyperlink.
The great thing is that this function chooses everything that begins with https:// or www., converts it, restyles it, and even ignores manually entered line breaks on longer URLs. You simply select the character style to apply; whether you want to apply it to a document, story, or a selection; and then click OK. As you can see in the example, my style makes the text red and italic. The links appear in your Hyperlinks panel just as if you created them manually.
Change Case By Style
InDesign has offered the ability to convert lowercase text to uppercase text (and several related functions) for a long time. But there are some complexities to applying Title Case. You’ll notice that Style Utilities calls this Smart Title Case, and indeed it is smarter than the Adobe default. At the bottom of the screen are two “exceptions” lists you can edit, with a few instances entered into each (Figure 11).

Figure 11: The Change Case By Style dialog box and its Edit Lowercase List option
By editing these fields, you can keep articles like a, and, and the as lowercase. You can add anything to this list by simply typing into this field with one space between words. You can also add other instances where you want to call out capitalization. This is great for frequently used acronyms, state abbreviations, and things with tricky uses of camel caps like InDesign or ePub, for example. Add your commonly used words to this list and you’ll be spared having to search for and alter specific words. I would love it if a user could export lists to share with others. You can copy and paste, of course, but a Save/Load option would be great for larger teams who may need to frequently update these lists.
More importantly, once you set this up, you can apply it quickly to all your headings or subheadings or whatever, based on a specific paragraph or character style.
All Caps to Small Caps
Converting multiple instances of capital letters to small caps can be very frustrating. In some cases, you can use GREP, but you need to know the proper GREP expression and you need an OpenType font that supports “all small caps.” So, for the rest of us, this function changes the text quickly in one pass (Figure 12).
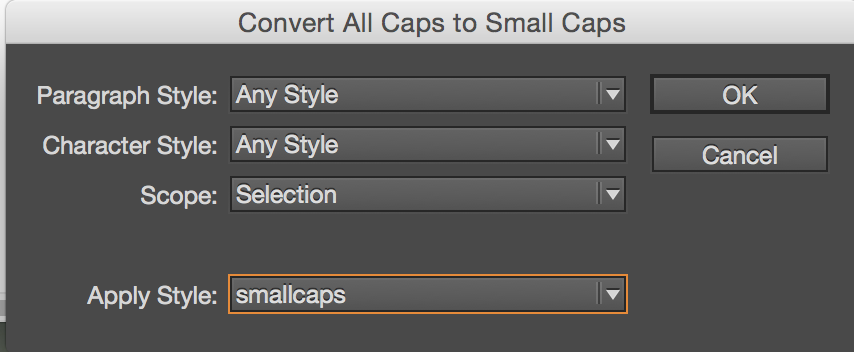
Figure 12: The Convert All Caps to Small Caps dialog box
You can specify whether you want to choose only text with a specific paragraph or character style applied, and you can select whether you want the document, the story, or the selection. Then you select the character style that has the small caps option included, and your text is converted. Proper nouns and capital letters that begin sentences are unaffected, since the plug-in selects only multiple instances of capital letters to convert. If your character style doesn’t apply small caps, you will get a confusing error message. Ideally, this message would be edited to be clearer to a non-GREP-using person.
Time is Money
Despite a few feature requests I have, the value of Style Utilities is very clear to me, as it should be to anyone who routinely has to apply styles to any InDesign file after the text has been added. The amount of time this plug-in saves can be extensive if you run into these issues on a daily basis (or even just frequently). For the sake of space, I provided one example of each function. But there are many more uses for each function. I’m sure that as I work, I’ll find various other ways to use these functions so I can spend less time at the keyboard and more time doing other things.
It’s that time of the year again. Decorations are going up, there’s a chill in the air, and we’re finding excuses to buy ourselves presents under the guise of “it’s work related.”
Joking aside, it’s hard to find great gifts for the creative types on your shopping list, so I braved the malls and online stores to go on the hunt for you. What I came back with is a whole sled-load of gift ideas that are sure to put a smile on your face. And they’re all really cool, which will make you this season’s most awesome gift giver. You’re welcome.
Gifts for Your Eyes
Exploded Alphabet Print
Matt Stevens, $25, hellomattstevens.com
Type is an art, and it’s also an obsession. Matt Stevens makes that abundantly clear with his beautiful Exploded Alphabet print. Matt created exploded designs for several of his favorite typefaces, and each letter is a work of art in and of itself.
The two-color prints are 18 × 24 inches on 100 lb Cougar bright white stock—just right for Ikea’s Ribba picture frame (model 903.016.21).
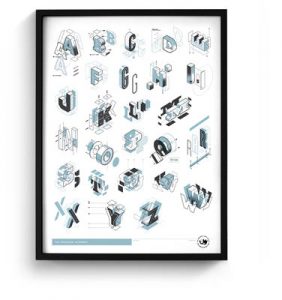
Matt is signing and stamping each print for a nice personal touch, too. His eye for design makes Exploded Alphabet a perfect accent for your office or home, and while each letter looks fantastic, Matt doesn’t guarantee you can actually build them from his designs.
Modern Arc Desktop Mobile
Ekko Workshop, $60, fab.com

Our desks may not be big enough for large pieces of art, so it’s great that the designers at Ekko Workshop in Portland, OR have come up with some awesome designs that look good without taking up too much space. One of my favorites is the Modern Arc Desktop Mobile. It’s made from laser-cut aluminum in colors that’ll look slick most anywhere.
The Arc is 8 inches high, 7 inches wide, and 6 inches deep, with teal and gray disks hanging from an arched orange base. It’s balanced just right, so the disks spin without getting too bouncy, plus it’s easy to clean if it gets dirty: just wipe it off with a cloth.
Neil Stevens Flight Tag Prints
Neil Stevens, £30.00, crayonfireshop.bigcartel.com
It doesn’t matter whether it’s at home or the office; seeing blank walls is torture for us creative types. I’m always on the hunt for cool prints, which is why I’m so glad I came across Neil Stevens’s work…
[s2If current_user_can(access_s2member_level1)]
…All of his prints are great, but I’m especially fond of his retro flight tags. They’re beautiful re-creations of the flight tags airlines attached to luggage in the 1960s and 1970s.

Neil re-created flight tags for several major airports, such as New York, San Francisco, Los Angeles, Copenhagen, Dublin, London, and my personal favorite, Reykjavik. The posters are Giclee-printed A3 size, or for £46.00 you can get a 500 × 700mm print. They’re all beautiful, and a wonderful reminder of a time when flight tags could be functional and good looking—unlike today’s functional but oh-so-bland black and white thermal printed tags.
Where’s Wall-E Print
Richard Sargent, £12.99, etsy.com
The sci-fi universe is filled with memorable robots, as is Richard Sargent’s Where’s Wall-E print. He drew and colored hundreds of robots from TV shows and movies, including the one robot you need to find: Wall-E. You’ll have to spend some serious time looking for Wall-E because he’s mixed in with a massive jumble of robots like R2-D2 and C-3PO, Marvin, K-9, Gort, Bender, Cylons, and more.

Richard’s print is A1-size, and he signs each one for a nice personal touch. The print quality is great, and it even offers a little bit for the hard-core sci-fi fans to debate…like are Daleks and the Tin Man really robots? My take: Daleks, no; Tin Man, yes.
Gifts for Your Mind and Bookshelf
Knowledge Is Beautiful
David McCandless, $30, amazon.com
Checking out amazing designs can be a great source of inspiration, especially when they’re infographics from David McCandless. He’s the author behind The Visual Miscellaneum and Information is Beautiful, and his new book, Knowledge is Beautiful, builds on his already fantastic graphics.

The hardback book is packed with amazing graphics detailing information about our world and history, how events are interrelated, politics, science, and more. Knowledge is Beautiful is more than eye candy; it’s an exercise in design, plus it’s loaded with facts, data, and relationships presented in the most beautiful way. The cover price is $30, but you can currently pick it up on Amazon for $21.69.
Steve Jobs: Insanely Great
Jessie Hartland, $22.95, amazon.com

Love him or hate him, the life of Steve Jobs is a big topic this year thanks to Aaron Sorkin’s film about Apple’s iconic leader. Turns out a lot of people wanted a dramatic documentary about his life, and not a three-part story inspired by events in his life. If you’re in the former group, how about a really fun graphic novel as a Steve Jobs biography? That’s exactly what Jessie Hartland created in her book Steve Jobs: Insanely Great. The book walks the line between showing Steve Jobs as a hero and a tyrant, and even though it’s a hardback comic book, you’ll find lots of details about the man who wanted to leave a dent in the universe. From a graphic design standpoint, the book is just plain fun to look at. Bonus: You’ll get to learn some interesting facts about the man who had a direct impact on the graphic design world. Steve Jobs: Insanely Great lists for $22.95, but Amazon sells it for $14.75.
The Art of the Brick:
A Life in LEGO
Nathan Sawaya, $29.95, amazon.com
You may not recognize his name, but there’s a good chance you’ll recognize Nathan Sawaya’s work. He’s considered one of the world’s top artists working with LEGO bricks, and he’s giving us a glimpse into his creative process with his book The Art of the Brick: A Life in LEGO. He talks about the self-doubt he faced after giving up his legal career to create sculptures with bricks people considered to be nothing more than toys, and working in a medium he was told wasn’t really art. He also talks about the inspiration behind his most popular works and the emotional effort that goes into his creative process.

Each work of art comes with no more than a couple pages, with Nathan sharing insights into the piece and anecdotes about the build and what was happening in his life. It takes just a few minutes to read about any piece in the book and is great for jump-starting your own creativity. And if you aren’t in a reading mood, just flip through the pages and marvel at the beautiful photos. List price is $29.92, but Amazon sells the book for $20.12.
Designer’s Grab Bag
CC Embossed Rolling Pin
Rainbow Rolling Pins, $29.99, etsy.com

Who doesn’t wish for flaky pie crust and cookies that proclaim their creative tendencies with panache (and maybe also ganache)? This handmade wood rolling pin has got the mnemonics for InDesign, Illustrator, Photoshop, Bridge, After Effects, and more CC applications engraved into it, not to mention the Acrobat Swoosh.
It creates repeatable product that’s not only tasty but looks fabulous. Hey, this is starting to sound like an advertisement for using templates and styles to streamline and ensure the quality of your work. But it’s not for your “just desserts;” you can use it on non-edible media as well, like pottery. Hmm, that gives me an idea…
InDesign Glass Necklace
Eclectic Penguin, $10.00, etsy.com

Show your colors! This cool, 14-mm-square handmade glass-tile necklace will have your designer friends smiling knowingly and non-designers (and maybe your parents) scratching their heads and wondering who “I.D.” is…or “P.R.” or “D.W.” or …
Wear it at conferences instead of a name tag, or just to remind yourself, and others, every day of the important players on your creative team. They don’t all have to be human, you know. If people can date their iOS (like in the movie “Her,”), then InDesign can be a necklace. Oh yeah, there are cuff links too.
CC Pillow Set
RuVaTo, $77.34, etsy.com
When you or the graphic designer in your life need a work break—or maybe this is part of your creative process—you can relax with these comfy sofa pillows. No, you can’t have just one; they are a family (it’s a suite, remember?). They might even serve a role in your editorial meetings, where actual weapons are not permitted.

Punctuation Coasters
Ugmonk, $32, ugmonk.com
Everyone needs a place to set their coffee, or beer, or whatever, without leaving stains on their desk. Ugmonk has you covered with their punctuation coasters.

The set of five coasters includes %, ?, &, !, and @ laser-engraved on bamboo, plus a bamboo storage case. The coasters look fantastic, and will fit in perfectly at your office or home with your favorite mug on top.
Chalkboard Mug
Firebox, $9.09, firebox.com

A little coffee or tea in the morning to get yourself going is pretty normal. Better living through chemistry, they say. Since your coffee mug is probably going to end up on your desk, it might as well show off your creative side. That’s just what you can do with the Chalkboard Mug.
The Chalkboard Mug is exactly what it sounds like: a mug that’s also a chalkboard. More accurately, it’s a mug with a blackboard coating on the outside, and a normal ceramic glossy coating on the inside so your drinks won’t taste like chalk. It comes with two sticks of chalk to get you going, so you can draw or write whatever you want. When to mood strikes you, wipe it off and draw something new. Just don’t drag your fingernails down your mug.
Make the Logo Smaller T-shirt
Typography Shop, $12.99, typographyshop.com
Clients may be necessary, but they aren’t always easy to work with. Not your clients, of course. Yours are the best. For all of those other clients, however, you can express your frustration with the “Make the Logo Smaller” T-shirt from Typography Shop. You can pick one up in black with white type or white with black type. Here’s a fun detail: The shirt type is Neuzeit S, which was designed in 1966 and is based on the Neuzeit Grotesk typeface from 1928.
![]()
Men’s sizes are $12.99 and women’s are $9.99, and this design is popular, so all sizes aren’t always available. “Make the Logo Smaller” is also available in a hoodie, although it’s often out of stock. Once this run sells out, the T-shirts are jumping up $10, so try to get one before the price increase kicks in.
Smart Notebook for Creative Cloud
Moleskine, $32.95, moleskine.com

Computers are great tools for creative minds, but that doesn’t mean you can’t start with paper and pencil to sketch out ideas. Moleskine’s notebooks have been a great choice for sketches and notes for years, and now the company is making it easy to turn your drawings into vector art. The Creative Cloud Connected Notebook looks like a traditional hardcover Moleskine, but each page is really a gateway to Illustrator, Photoshop, and InDesign.
The pages have special guide marks that the companion iPhone app sees when it snaps a photo. After capturing a page, the iPhone app converts your drawing into a vector graphic, and then syncs it with your Creative Cloud account. The notebook cover looks sharp with its debossed Creative Cloud logo, plus it has a pocket inside and a red elastic closure band, too.
Fun and Games
View-Master VR
Mattel, $29.99, view-master.com

View-Master was cool when we were kids because it gave us a 3D-ish snapshot into places we couldn’t visit, let us be part of shows and cartoons we loved, and opened our imaginations. Now we’re grown up, and Mattel has a new version called View-Master VR that feels like it’s just for us because it does the virtual reality thing. It works with your iPhone or Android smartphone and View-Master Experience Packs, downloadable View-Master apps, and Google Cardboard apps, too. Mattel has Space, Destinations, and Wildlife packs available now, and more are on the way.
Even though you can download the Experience Packs, buying the physical versions is better, because they include their own augmented reality features. Just set the Experience Pack disk on a flat surface to see animated menu options and other features through your fancy new goggles. View-Master VR isn’t on par with Oculus Rift, but that’s OK, because you don’t have to strap it to your head—and it looks a lot cooler, too.
CMYK Playing Cards
Fancy, $14, fancy.com
Playing cards are playing cards—unless you’re buying them for a designer. Then they’d better be creative and cool looking, just like the CMYK playing cards from Fancy. Unlike regular playing cards, the CMYK deck doesn’t note suits with hearts, diamonds, spades, or clubs, but instead uses printing colors: cyan, magenta, yellow, and black. Card values are opacity percentages where 3, for example, is 30 percent, 7 is 70 percent, and 10 is 100 percent.

It’s easy to tell each card apart even when the deck is shuffled, plus the colors and opacities in a mixed hand look pretty awesome. This deck won’t make you better at blackjack or poker, but you will look cooler while playing.
1000 COLOURS Puzzle 3rd Edition
Clemens Habicht, $70 AUD, puzzle.lamingtondrive.com

Jigsaw puzzle fans are in for an interesting twist with Clemens Habicht’s 1000 COLOURS design. He created a puzzle that shows the CMYK color spectrum where each piece is a unique color. Instead of re-creating a photograph or other image that relies on finding matching bits cut across multiple pieces, you’re building a graphic that we all know and recognize without the help of reference images.
The cool thing about Clemens’ puzzle is that we’re putting the pieces together based on our understanding of the color spectrum. Every part locks in place to lead you to the next shade, and it’s a great exercise in recognizing subtle color gradients. His puzzle is relaxing, but it’s also a cool visual training tool.
LEGO Mac Classic
Chris McVey, $78.50, shop.chrismcveigh.com
The Mac, along with PageMaker and PostScript, jump-started the digital design revolution and changed the creative world forever. LEGO bricks have had a huge impact on our imaginations and creativity, too, so it makes sense that eventually they’d cross paths. LEGO designer Chris McVey is well known for his creative brick creations, one of which is his computer-for-the-rest-of-us in LEGO form.

Chris’s 332-brick 128K Mac is a faithful reproduction—albeit smaller than the real thing—in a kit you can build yourself. My First Computer: Byte Edition v3.0 includes a classic Mac with keyboard and mouse, a display that says “hello,” and a case you can open to see the circuit board and CRT inside, no special tools required. It’s an easy build, and looks cool on your desk or bookshelf.
Whisky Advent Calendar
Master of Malt, $188.13, masterofmalt.com
I’m sometimes slow on the uptake, so it wasn’t until last year I learned about counting down the Christmas holiday with advent calendars. It’s a good thing, because otherwise I might have missed out on discovering this year’s Whisky Advent Calendar from Master of Malt. To be clear: An advent calendar. With a different Whisky. Every day. For a month.

The calendar includes 24 whisky samples, so that’s a shot a day. It’s an amazing collection of quality whiskies (no Wild Turkey here) from some of the best distilleries. You get to try out a 50-year old Scotch that’s very rare, winners from the 2014 World Whisky Awards, an award-winning Japanese whisky, and more. I could tell you more, but that would take the surprise out of opening a new sample each day.
Get Your Tech On
Sphero BB-8
Sphero, $149.99, sphero.com
Sometimes creativity means taking a break from your computer and finding a fun diversion in the office, and one of the coolest diversions I’ve found is the Sphero BB-8 remote control robot. BB-8, for the two of you who haven’t been buried in the onslaught of “Star Wars: The Force Awakens” advertising, is the cute ball-shaped droid that accompanies Rey, Finn, and Poe on their adventures as they try to stop the First Order from taking over the galaxy.

Just like BB-8 in the movie, Sphero’s softball-size version zips around while chirping and beeping—and its little dome head stays on top of its body while it rolls around. You’ll need the companion BB-8 app for the iPhone or Android smartphones to control your little droid. You can drive your droid around or set it loose to explore on its own. When BB-8’s battery runs low, just set it back in the included USB charging base. Fair warning: cats may be intrigued by BB-8, but they are not amused.
Pantone 8GB Flash Drive
Pantone, $21.99, pantone.com

USB flash drives still come in handy when we need to move files but don’t have a good Internet connection. You can use the same old boring yet functional drives everyone else has, or you can rock your designer style with Pantone’s colored thumb drives. They’re available in 4GB and 8GB sizes, and Pantone says 16GB versions will be available at some point, too.
Pantone’s USB sticks are available in five colors: 18-1438 (Marsala), 18-3224 (Radiant Orchid), 213 C (Pink), Violet C, and 285 C (Blue). They’re small enough to fit in your pocket without showing, and they have a small chain loop to help keep them from getting lost. They look like little Pantone chips, too, which is pretty slick.
Guide
Griffin, $39.99, griffintechnology.com

Losing a video or sync cable behind your desk is the worst. Fishing them out from their dark hiding places is a total pain, and crawling out from underneath a desk always makes people talk, so it’s great that Griffin invented its Guide cable-management system. The Guides are a set of heavy no-slip metal slabs with magnetic U-shaped loops that keep your cables in place and safe from slipping away when they aren’t attached to your computer.
The kit includes three metal bases and three magnetic anchors you can use to route cables and keep them on your desk instead of under it. Sure, other companies make cable guides, but Griffin’s look great on your desk no matter what computer you’re using.
Pulse 2 Bluetooth Speaker
JBL, $199.95, jbl.com
Silence is important for concentrating on some design projects, but others need some tunes to keep you motivated. JBL’s Pulse 2 helps by letting you listen to your music while giving you a lightshow, too. It’s a Bluetooth speaker that’s a little taller than a soda can with a wall of color-changing LED lights. You can customize its light show, and it also includes a sensor so you can sample colors and then see them dance to life on your speaker.

The Pulse 2 is splash-proof, sports a 10-hour rechargeable battery, includes a built-in noise cancelling microphone so you can answer calls without picking up your phone, and you can chain multiple speakers together for bigger sound. It also has an audio in port so you can connect devices that don’t support Bluetooth, like iPods.
Our podcast is hosted by Jeff Gamet and Jay Nelson of Design Tools Weekly. To hear any episode, click on the dated links below (for example, “February 23, 2009”). You can also subscribe to the podcast in iTunes.
Click a date to listen to that week’s podcast.
July 26, 2010
– QuarkXPress Free for Educators
– New Federal Guidelines On Internships
– Drive Genius 3 Adds 64-bit, RAID Support
Droffett 1.0.7
– Try YouTube for Application Videos
Tips:
• Find More Info in InDesign’s Find Font
• Delete Items with Any Tool in QuarkXPress
• Recall Selections in Photoshop
July 12, 2010:
Apple More Valuable than Microsoft: Story & Chart
Pantone Plus
Quark’s New Maintenance Program Offers Free Upgrades
HTML5 Pack for Dreamweaver CS5
HP’s Billion-color 30-inch Display
Tips:
• Quickly Lock Your Screen
• The Escape Key is Your Friend
June 21, 2010:
Adobe vs. Apple: the Flash Fight
MacBook Pro Gets Performance, Battery Boost
Quark Acquires Gluon
Reviews of Adobe Creative Suite 5 at Macworld.com:
• InDesign
• Photoshop
• Bridge CS5
Photoshop CS5: The Missing Manual
Fastest Desktop Hard Drive: Ci Design’s iStoragePro iT1 Dock 2TB
2010 Webby Awards
MyFontBook.com
Tips:
• Take Advantage of Document Tabs
• Copy & Paste Files in OS X
•
Drag Proxy to Desktop
June 7, 2010:
Quark Launches “Flash Magic” Website
FontExplorer X Pro 2.5
GlassMats
Convert SWF and Flash Video to Other Formats
Best Practices for Photographers
Tips:
• Adobe Reader as Presentation Tool
• Use InDesign Libraries for Page Guides
• Crop Two Images to Same Size
February 1, 2010:
We gush over Apple’s new iPad
Apple’s new iBookstore’s effect on design
Quark responds to Adobe’s dropping “print provider support”
X-Rite’s ColorChecker Passport–More Accurate Capture and Correction
TypeBook Creator 2 adds Font Energy Evaluator
Backgrounds and Color Palettes for Twitter with Themeleon
Tips:
• The Easiest Way to Grab All Images from a Website (File Juicer)
• Add Headers and Footers in Acrobat
• InDesign Tip: Control Which File Stays Open When Saving Copies
• Undo Saves in Photoshop
December 21, 2009:
Gift Guide Part 3
December 14, 2009:
Gift Guide Part 2
December 7, 2009:
Gift Guide Part 1
November 23, 2009:
Thermal Pad Keeps Your Laptop Cool
LittleSnapper has Big Features
An Excellent Noise Reducer
Output Raster Images of QuarkXPress Pages
Tricks for Working with Office 2008 files
Tips:
• Where’s the Rounded Rectangle Tool?
• Keep Commenting Tools Selected
• Reposition a Frame as You Draw It
• Save Multiple Clone Sources
November 16, 2009:
Snow Leopard now safe — mostly
20 years of Creative Business
Eye-Fi Pro now supports Raw files
TypeStyler comes to Mac OS X
Tips:
QuarkXPress
llustrator
InDesign
Photoshop
November 9, 2009:
Apple Updates Mac mini
Apple Intros Mac mini with Snow Leopard Server
New iMacs Have 21.5 and 27-inch Displays
Magic Mouse: Apple’s New Multitouch Mouse
How Those Advanced OpenType Font Features Work
The Best Online Backup Service
Tips:
• Preview Separations in InDesign
• Match Color in Two Images
• Dress Up Your Desktop for Free
November 2, 2009:
Windows 7 Arrives
“Is Snow Leopard Ready for Prime Time for InDesign Users?”
New AirPort Base Station Extends Range
New Time Capsule Improves Snow Leopard Support
CreativeTechs: “OpenType Font Secrets” free live seminar and weekly email newsletter
PitStop Pro 09
Tips:
– Hide Edges in Illustrator and Photoshop
– Protect Transparent Pixels in Photoshop
– Painting “Behind”
– Peruse the Best of the Web
October 26, 2009:
Hold Off on Snow Leopard
Ikea and Verdana vs. Designers
Font Problems in Snow Leopard
When “Adobe PDF” Printer Stops Working
Affordable Photoshop
FontExplorer X Pro Server Now $999
Tips:
• See Document History in InDesign
• Email Long URLs
• Reset Misbehaving Photoshop Tools
• Larger Comments in Acrobat
October 19, 2009:
Fax for Free Online
Recover Photos from Memory Cards
Simple Online Billing
Map Resources Now in Any Format
FontGenius Identifies Fonts in Photos
Print Font Catalogs from InDesign
Tips:
• Background Eraser Tip
• Hide the Non-printing Items in InDesign
• Stop Text from Jumping When Wrapping
October 12, 2009:
Test Windows Browsers on Your Mac
Easy Web File Sharing with Dropbox Pro
Skype 2.8 Adds Screen Sharing
RealVue3D for 3D Print Simulation
< a href=”https://www.markzware.com” target=”_blank”>Convert Microsoft Publisher Files to InDesign
Tips:
• CSS Troubleshooting Help
• Font Replacement Tips
• Edge Feather Preview
• Check Your Website’s Colors for Contrast
September 28, 2009:
GridIron Flow
Epson Stylus Pro 3880
Threading InDesign Text Frames
Your Logo Makes Me Barf
Tip:
Share Color Management Settings in Adobe’s Creative Suite
September 21, 2009:
Snow Leopard (Mac OS X 10.6) bug reports and fixes
Adobe Ends PowerPC Support
Halloween fonts from Chad Savage and CreativePro.com
Tips:
• Replace Pages in Acrobat 9
• Select Though Stacked Objects
• 50% Off at lynda.com. Use code BTS909 at checkout.
August 31, 2009:
Mac OS X 10.6 (Snow Leopard) ships:
* Runs on Intel-based Macs only
* Adobe CS3 not fully tested on Snow Leopard
* Font manager compatibility with Snow Leopard
* Printer and scanner driver compatibility with Snow Leopard
* Other utilities’ compatibility with Snow Leopard
August 24, 2009:
$300 Blu-ray Writer, with Toast!
Mobify Your Websites
SeeFile 4.7
Illustrator CS4 WOW! Book
PercepTool 1.5.5
Ideas from I.D.E.A.S.
Tips:
•Where Was That Tip?
August 17, 2009
Amazing new Panasonic digital camera/camcorder, Lumix FZ35
Nikon’s Pocket Camera/Projector
Google’s Advanced Image Search
Report on Logo Trends
Quark Releases Version 8.1 of Quark Dynamic Publishing, etc.
SWF Protector Blocks Flash Theft
Convert SWF to FLA
Tips:
• Patching in Photoshop
• Remove Permanent Ink
August 10, 2009:
Test Web Site Designs with Adobe BrowserLab
Vivozoom Guarantees Legal Images
QuarkXPress 8.1 adds several improvements and new features
Learn Every Feature in QuarkXPress with Jay’s new training video
QuarkXPress 8 & Instant PDF package: $299
HVC Color Composer Now for InDesign CS4
Smasher 1.7 for CS4 & Quark 8
Tips:
• Change Text Case of Panel Titles in InDesign CS4
August 3, 2009:
Google Now Shows “Usage Rights” for Images
Google Developing Chrome OS
QuicKeys 4 Adds Text Expanding
Single User Edition of Cumulus Returns
SnapFlow: Extract Great Still Images from Video
High Quality Hubble Images
iPhone Tutorials
Tips:
• Find Your Fonts with Smart Folders
• Create and Update Table of Contents in InDesign and QuarkXPress
• Change UI Font Size in Photoshop
July 27, 2009
Snow Leopard: $29 in September
Acrobat.com: The Free Ride is Over
Adobe Profitable, but Smaller
Retrospect 8.1 Adds PowerPC Support
Universal Type Server 2 from Extensis
New Pricing for FontExplorer X Server
Creative Business
Tips:
• Select Text Columns in PDFs
• Move Objects Within a Group
• Safer Healing
July 6, 2009:
New Windows 7 Coming this Fall
Wacom Intuos4 Tablet
iTimeZone
Eltima Software’s Flash Optimizer 2.3
FreelanceSwitch.com portable hard drive
Tips:
• Get Back in Acrobat
• Editing Non-PDF Files in a PDF Portfolio
• Editing Common Attributes in Illustrator
June 29, 2009
New MacBook Pro models
iPhone 3GS
Mac OS X 10.6 coming in September
Canto Cumulus 8
OWC Mercury On-The-Go Triple Interface portable hard drive
Map Resources
Tips:
• Design Interactively in Dreamweaver CS4
• Setting Exact Line Lengths in Illustrator
• Finding a Scanner’s “Sweet Spot”
June 22, 2009
Google’s New Similar Image Search
USB 3 Doesn’t Support USB 1
90 Minutes on Social Media Marketing
PDF Security Rendered Useless
Complete Blu-ray Mastering Solution
Book: From Design Into Print
Tips:
• New Spring-Loaded Tools in Photoshop CS4
• How to Save Illustrator CS4 Files for Earlier Versions
• See Substituted Glyphs in InDesign
• Better EPS Previews in QuarkXPress
June 15, 2009
Upcoming Events
Free Courses: Illustrator, Flash, and InDesign
Personalized Obama Time Capsule
The Art Directors Club Announces Winners
Free PhotoTools Lite
FontAgent Pro + 750 OpenType Fonts: $150
The Twitter Book
Tips:
Scissors Cuts Paper — and Paths
Drag-and-Drop PDF
Use DNG Converter for Newer Cameras
June 8, 2009
Glance Is Fast, Reliable Screen Sharing
WordPress for Creative Pros
Tutorial: Flash from QuarkXPress 8
Website of All Ads from 1930–1969
Find and Relink Pictures in QuarkXPress or InDesign
Custom Fabric for $18/yard
Tips:
* Reorder or Copy Pages in Acrobat
* Enable Commenting in Any Document
* Live Paint Colors Overlaps
* Photoshop Portrait Popper
June 1, 2009:
New LaCie Display Calibrator
Some Advice on Buying a Display
Free ‘Plain English’ Videos on Social Marketing
Take Control of Fonts in Leopard
InPreflight: Simple Preflight for InDesign
TeXTractor: Intelligently Export Text from QuarkXPress
A Beautiful Paper Site
Tips:
• Round Corners Your Way
• Easily See What’s Changed in CS4
• Solid Black Crop Shield
May 25, 2009
Adobe introduces a Marketplace for Photoshop and AIR apps
Lightscoop is a cool accessory for your on-camera flash
Use FontShaker to explore fonts in a whole new way
Caliper is a free onscreen measuring device with some unusual features
CMYK 2.0 is a book that every photographer and designer should own
Badia PrintPreview: Free!
Tips:
• Overcome Email Limitations
• Scale Frame and Content in InDesign
• Preview Changes in QuarkXPress
• Don’t Switch Tools to Move Text
May 18, 2009
Spec Work and Crowdsourcing: Gambles that Don’t Pay Off
$5 Blu-ray Discs
Book: Scanning Negatives and Slides
Inkd: Royalty-Free Design Templates
Gluon Cropster: Auto-Dimensioning, Multi-page Cropping, and more
PopChar X 4.2
Tips
• Combine All Kinds of Files in Acrobat
• Get Back to the Welcome Screen
• Instant Centered Guide in Photoshop
• Blend Mode Tricks
May 11, 2009
Freeway Pro Discounts for GoLive & Dreamweaver Users
Quark XML Author 3.0
Free Cable Identification Guide
Optimize Images in InDesign or QuarkXPress
Tips:
• Always Use the Latest Versions of Software
• Add a Scan to a PDF
• Feather a Mask — Anytime
• Redefine Styles in InDesign
• Use “Line Check” to Find Widows, Orphans, and Overflows
• Name Your Flash Drive with Your Phone Number
May 2, 2009
Free 10-week InDesign Training
Full-day InDesign workshop (includes free subscription to InDesign Magazine)
Free Flash Workshop
Full-day Flash workshop
40% off Peachpit ebooks and videos
“Copyright Basics” Video
CreativePro.com Job Board
<https://www.pantone.com/pages/products/product.aspx?pid=897 target=new>Pantone Color Cue Sale: $249
FontExplorer X Pro 2.0 review
Tips
* Expand Selection Without Rounding in Photoshop
* Delete All Guides in InDesign and QuarkXPress
April 27, 2009
Ghent’s PDF Output Testing System
Reports: Adobe and Quark Focus on Efficiency
Book Production Pack for InDesign
VTools Adds Features to QuarkXPress
Free Acronym Converter for QuarkXPress
Web Site: Add Your Own Text to Signs
InDesign Secrets podcast
Tips:
• Batch-Convert Illustrator to PDF
• InDesign: Dude, Where’s My File?
• Three Photoshop Tips from Lesa Snider:
– Digging Through Tools
– Sharpening a Multi-Layer Document
– Quick Eye Enhancement
April 20, 2009:
“The Copyright Registry“?
Retrospect 8: Faster, Easier to Use
VideoFlash Converter: Convert Video to Flash
Bokeh Your Photos! Example tutorial / Imaging Insider interview
Video Tutorials from Quark
Video: Photoshop CS4 for Photographers — Desktop Printing Techniques
InDesign Secrets podcast
Tips:
• A PDF Version of InDesign Help
• Three Photoshop Tips from Lesa Snider
April 13, 2009:
Skills Assessment
Adobe and Quark Integration Guides
Upcoming Events
Free PDF-to-Word Converter
The Newest Camera Features
InDesign Secrets podcast
Tips:
• Three Photoshop Tips from Lesa Snider:
– Quick black-and-white with color tint
– Partial color effect
– Portrait popper (vignettes)
• Lesa’s Web site and book
April 6, 2009:
U.S. Senate May Allow Newspapers to Operate as Non-profits
New Postage Rates
Macworld Expo Moves to February
Jay Nelson at HOW Design Conference
13th Annual Webby Awards
Upgrade to Adobe CS4 from Any Version
$299 Upgrade to QuarkXPress 8 — from version 3, 4, 5, 6 or 7!
QuarkXPress Table of Features by Version Number
Suitcase Fusion 2 Now Supports Tiger
InDesign Secrets podcast
April 6 Tips:
• See Spot Colored Items in Acrobat
• Force Hyphenation in InDesign and QuarkXPress
• Crop a Layered Document
March 30, 2009:
Google Quick Search: Search Everywhere At Once
QuarkXPress 8 Video Training
Adobe Videos: Everyday Timesavers
Quick Look Plug-in for Illustrator, InDesign, FreeHand, and EPS Files
Quick Look Plug-in for QuarkXPress
Track Text Changes in InDesign and QuarkXPress with CtrlChanges and Blacklining
Badia Duplica XT 4: an Über Eyedropper for QuarkXPress
Business Card Design Inspiration
Tips:
• Find First in QuarkXPress
• Flip Across Pages in InDesign
• Quickly Crop to Edges in Photoshop
March 23, 2009
Facebook’s Shameful Ownership Policy
Dangerous Acrobat Security Flaw
Fall ’09 Fashion Color Report
WhatTheFont Now on iPhone
iTunes for Audiophiles
Suitcase Fusion 2 Reviewed
AreMySitesUp.com
Tips:
• Try OCR in Acrobat
• Better Importing from MS Word
• Bring Photoshop CS3 Features Back to CS4
March 16, 2009
Free Photoshop
Webinars
Much Easier File Sharing with MobileMe (video)
Professional Portfolios
How to Think Like a Great Graphic Designer
Buyer’s Guide: When To Buy a Mac
Report: Flash in InDesign vs. QuarkXPress
Motionographer
Forbidden Color Combinations
Tips:
• Much Easier Commenting in Acrobat
• How to Collaborate Live in Acrobat
• Using .,/&X in InDesign
March 9, 2009
Pantone Mugs
Gluon’s ProPack 8 & StudioPack
Web Style Guide: Timeless Wisdom
Design for Special Events
New MyFonts Website Rocks!
Incredible Census Maps
Tips:
• Use Acrobat to Generate Hyperlinks
• Tricks to Control New Document Sizes in Photoshop
• Better PDF Names from QuarkXPress
• Use Help Menu to Find Menu Items
March 2, 2009
HOW Design Conference
FileMaker Pro 10
Suitcase Fusion 2 review by Jay Nelson
Freeway 5 Makes iPhone Website Content
Voyager Q: A Unique Hard Drive “Enclosure”
Auto-Flow for InDesign
Nametag: Quick Labels for Pictures in QuarkXPress
Top 10 Advertisements Worldwide
Tips:
• Find Ornaments in Fonts
• List Fonts in PDFs
• Space the Dots in Dotted Leaders
• Optimize Multiple Exposures in Photoshop
February 23, 2009
Web Design: An Event Apart: Discount code is AEADTM
Vista + PostScript Fonts = Bad News
17-inch MacBook Pro Gets 8-hour Battery: watch the video
PDF2ID 2.0 Improves PDF-to-InDesign Conversions
StudioPack: Four Powerful Plug-ins for InDesign
Eye Candy 5: Textures
Best Practices for Managing Fonts, 5th Edition
Newseum: Front Pages Around the World
InDesign Secrets podcast
Tips:
• How to Link an Excel Spreadsheet to a Table
• Click-drag Lightness, Hue and Saturation
February 16, 2009
Seagate Fixes Hard Drive Problem, But…
Avoid Barracudas
Trojan Horses in Pirated Software
Mac OS X 10.5.6 Update Fixes InDesign Problems
Updated MacBook Has FireWire, Faster Graphics
iPhoto ’09 and iMovie ’09
Mac Box Set = $149 for Mac OS X 10.5, iLife ’09 & iWeb ’09
Photo Calculator for Your iPhone
Tips:
• Create Your Own Blog Avatar at Gravatar
• Click the Text, Not the Checkbox
• Add a Background to a PDF
• Quick Color Boost in Photoshop CS4
February 9, 2009:
Answers to Professional Font Questions
Shadow Mirrors Your Data
Graphic Authority Design Elements
Tiffen: 2,000 Professional Photographic Filters
The Web Designer’s Idea Book
Preview Web Designs in 85 Browsers
Veer: Explore Your Model
PhotoshopUser TV
Tips:
• Optical Kerning & Numbers Don’t Mix
• Create Another iPhoto Library
• Magic Setting for Dodge & Burn Tools in CS4
February 2, 2009:
QuarkXPress 8.02 Updater
QuarkXPress 8.02 List of fixes
Buy FlightCheck, Get Q2ID, ID2Q or PUB2ID Free
Q2ID & ID2Q Updated for QuarkXPress 8 and InDesign CS4
iTornado
Mpix
Lynda.com: Advanced InDesign and Basic Final Cut Express
Photoshop CS4: The Missing Manual
The Graphic Reporter website
Tips:
• Acrobat’s Object Inspector
• Diagonal Guides in Illustrator
• Click-and-Drag Graphics in InDesign
January 26, 2009:
Two Solutions for Glossy Displays: Photodon & TechRestore
MagneCote: Magnetic Paper
Photofont WebReady: Searchable Web Headlines in Any Font
Convert PDFs to InDesign docs: PDF2ID 2.0
Ben Willmore’s Photoshop CS4: Up To Speed
Website: Convert RGB Colors to Paint Tints
Tips:
• Zooming Tip
• Compare Documents in Acrobat
• Drag-Select Entire Paragraphs in InDesign
• Blend Artwork Into an Image in Photoshop
January 19, 2009:
Macworld Expo roundup
Softpress Freeway
Suitcase Fusion 2
FontAgent Pro 5
TypeDNA
Future of Macworld Expo
Layoffs at Adobe & Quark
The Modbook for Designers
Free Guide to Integrating QuarkXPress with Adobe Creative Suite
Website: The Best Flash & CSS Designs
Tips:
• Share Your Screen in Acrobat
• Illustrator Smart Objects in Photoshop
• Rotate Spread View in InDesign
January 12, 2009:
• Bert Monroy retrospective
• Why and How to Buy a UPS: UPS Buyers Guide
• Migrate to the Mac with Belkin Cable
• Download popular logos
Tips:
• Manage Third-Party Photoshop Plug-ins
• Exact Text Links in Acrobat
• Replace a Graphic in InDesign
January 5, 2009:
• LogoLounge.com: Logo Trends in 2008
• Excellent Masking Tools:
– Vertus’ Fluid Mask
– onOne’s Mask Pro
– Digital Film Tools’ EZ Mask
• Download Adobe’s Guide to Acrobat 9
• Affordable, Professional Film Clips from Thought Equity and iStockphoto
Tips:
• External Hard Drive Advice
• Use InDesign & QuarkXPress Style Sheets in Word
• Spotlight Searches Photoshop Files!
December 29, 2008:
ReadyImages: New Image Service for Corporate Presentations
iStockphoto for corporate presentations
Artbeats: HD Stock Video & Textures
Color Oracle previews color blindness
Bracketeer combines bracketed photos
50 Sets of Free Photoshop Brushes
Cumulus: mega-asset manager
Studio Lettering Collection from House Industries
Design Parts Sourcebook: Rock and Street Culture
Photoshop Lady: Photoshop tutorials
Tips:
• The Key to Successfully Open Files Downsaved from QuarkXPress and InDesign
December 22, 2008:
CS4 Trial Versions Now Available
Pantone GOE Libraries for Creative Suite 4
QuarkXPress 8.01 Update
10 Million Photos from Life Magazine
Verbatim’s Movie-Reel DVD-Rs & 45-RPM CD-Rs
Verbatim’s Archival DVDs
Join AIGA
Pantone’s 2009 Color of the Year
Tips:
• Preview Sharpening in Camera Raw
• Better Grayscale Photos in CMYK
• Save All Open Documents in InDesign
• QuarkXPress 8 Tip: The “Local Formatting” ToolTip
December 15, 2008:
RAM: Cheap Speed Booster
CreativeTechs: Free Information & Inspiration
Free On-Demand Webinars: Color for Creatives
DropCopy
Mister Retro’s Permanent Press
Nik Silver Efex Pro
Pentawards: Packaging Award Winners
Tips:
• Always Read the Fine Print
• Redefine Symbols in Illustrator
• Quickly Change View Percentage
• Zoomify Your Photos
December 8, 2008:
Selected Ways to Learn Adobe Creative Suite 4
Video
Total Training
Lynda.com
Books
Ben Willmore’s Adobe Photoshop CS4: Up to Speed
Deke McClelland’s Adobe Photoshop CS4 One-on-One
Adobe InDesign CS4 One-on-One, by Deke McClelland and David Futato
Lesa Snider King’s Photoshop CS4: The Missing Manual
Adobe Photoshop CS4 Classroom in a Book
Amazon’s CS4 Books page
Reviews
CreativePro.com
Macworld
Ars Technica
Design Tools Monthly’s CS4 New Features overview
Web Sites
James Dempsey’s list at Macworld.com
Free CS4 Superguide
Other Topics
Book: QuarkXPress 8: Production Tricks and Experts’ Tips
Inside Digital Design show
ImageFramer: Realistic Mats and Frames
Phantasm
Suitcase Fusion 2
64 Years of Presidential Commercials
Tips
• View First Page Separate from Spreads in Acrobat
• Make Multiple Frames the Same Height or Width in InDesign
• Helpful Adjustment Presets in Photoshop
December 1, 2008
• $25 Gift Subscriptions to lynda.com
• Canvastic for Young People
• Pando Sends Up To 1 GB Files for Free
• Blow Up 2
• Genuine Fractals 6
• StuffIt Expander 13
• Quick Look Filter for QuarkXPress Documents
• Navigate the Image Grid in BrightQube
Tips:
• Make a PDF Form in InDesign or QuarkXPress
• Select and Distribute Guides in InDesign
• Reselect in Photoshop
November 24, 2008
• 6x Blu-ray drive
• Adobe Photoshop Lightroom 2.1
• Freeway Discount for Adobe CS4 Owners
• 2-for-1: Q2ID & ID2Q
• Exporting from QuarkXPress 7 to 6 & InDesign CS4 to CS3
• Quark Posts “New Features” videos for download and on YouTube
• Is It Safe to Upgrade to Mac OS X 10.5 Leopard?
Tips:
• Option/Alt Key Resets Dialog Boxes
• Skip the Confirmation Prompts
• Control InDesign’s Frame Fitting
• Instantly Name PDF Bookmarks
November 17, 2008
• Apple Updates MacBook & MacBook Pro; Switches to DisplayPort Video. MacBooks Can Use 6GB of RAM.
• 25 Years of Cell Phones
• FCC Approves Unlicensed Use of White Space
• Flash Player 10 Includes 3D Tools
• Acrobat 9 Pro, Bookmarks and Hyperlinks
Tips:
• Add Several Layer Styles
• Save Your Guides as Snippets
• Quickly Change Fonts in QuarkXPress
November 10, 2008
MetalFX: Single-pass Metallic Inks
Galaxy Gauge: An Exceptional Graphic Arts Ruler
Graphic Inspector 1.5
ITC Franklin vs. ITC Franklin Gothic
Switching from Windows to Mac
Switching to the Mac: The Missing Manual
Tips:
• OpenType Pro “Opticals” Explained
• InDesign’s Slug Area
• QuarkXPress and Text in Legacy Files
• Two-Step File Sharing with .Mac
November 3, 2008
* USB 3.0 in 2010 — substantial speed improvements to come soon
* Drobo: Now with FireWire!
* See Your Favorite Font Designers at Fontshop
* Text Exporters for InDesign
* TeXTractor: Intelligently Export Text from QuarkXPress
Tips:
* Use Command-Tab to Switch Applications
* Force Text to a New Column
* InDesign: Force Paragraphs to Start at Top of Page or Column
* QuarkXPress: Show & Hide Tools in the Toolbar
October 27, 2008
* Quark Publishing System (QPS) now supports InDesign?!
* StuffIt Deluxe 2009 Why you need it
* Casio EX-FH20: The latest mind-blowing high-speed camera features
* MenuMeters shows your network activity
Tips:
* Sample Colors from Anywhere
* Color Expert for iPhone
* Drag to Insert Pages into PDFs
* Bigger Previews from InDesign
* Space/Align Tricks in QuarkXPress 7
October 20, 2008
* Orphan Works Act “Hotlined” by U.S. Senate
* Adobe Creative Suite 4 New Features List
* Apple’s New MacBook Pro
* SilverFast Eliminates Shadow Noise in Scans
* Beautiful, Affordable Photoshop Actions from PanosFX
* Better Vertical Justification for InDesign and QuarkXPress
* Adorama’s 100 Photography Tips in 100 Days
Tips:
* Save Every Page as EPS in QuarkXPress
* Change Phone Number Formats in InDesign
* Use iChat for Text Messages
* Renumber PDF Pages
* Copy Photoshop Layers, Maintain Position
October 13, 2008
* Pantone speaks: What’s In For Spring 2009
* Low, low price for big hard drives
* Booklets on printing that are very useful and free
* Newsletter and books with advice on running your creative business
* FontAgent Pro is now cross-platform
* PopChar type-character finder is also cross-platform
Tips:
* Photoshop
* InDesign
* Acrobat
* QuarkXPress
October 6, 2008:
* Adobe Design Achievement Award Winners
* Flashforward Winners
* Pantone ColorMunki Create
* Pantone Color Cue 2.1
* The The Adobe Photoshop Lightroom 2 Book
* An Awesome Map of Web Trends
Tips:
* Faster Digital Camera Transfers
* Refine Edge of Selections
* Power Nudge
* Small Caps vs. All Small Caps
![]()
![]()
If you’re laptop user, there is a good chance that at some point in time, a laptop bag you’ve paid hard-earned money for has let you down. Perhaps it frayed quickly, or the lining shredded, or the strap ripped out, the zippers broke, or the snaps lost their snap. Regardless of the issue, we’ve all had a bag that either disappointed us or just didn’t suit our needs.
I make bags. I specialize in custom-made bags to suit the individual needs of the owner. So I know that every bag has a weak point. By learning where the weak points in bag manufacturing are, you’ll know what you’re getting for the time you spend shopping and your money. And if you know where your bags frequently wear out, the information below will help you recognize the bags that will best suit your needs.
The most common places where bags fall apart are the strap, the hardware, the lining, the bottom, and the pockets. Let’s look at each of these in turn.
The Strap
If you’re going to carry a bag that weighs more than 10 pounds (or if you’re going to be wearing the bag for long periods of time) you should have a strap that is at least 1.5″ wide. If you’re carrying a bag that weighs more than 20 pounds, choose one with a strap that’s 2″ wide. The wider strap will last longer since there is more strap to distribute the weight where it is attached to the bag. The wider strap will also distribute the weight across your shoulder and make it feel less heavy than if the strap is thinner.
It’s common to find bags with 1″ wide shoulder straps. These may look more attractive and they’re cheaper to make, but they will make it harder to carry the bag comfortably for a long time. They’ll also wear out faster if you carry a heavier bag.
The weakest link on the bag is where the strap is connected to the body of the bag. This connector needs to bend and adapt to your body’s movements. If it doesn’t, the stitching will be stressed and break or the strap will begin to fray where it is connected to the bag. To give the strap the flexibility it needs, the strap should be attached to a facing or to a piece of hardware that is attached to the bag.
The facing on the image below right is sewn to the entire height of the bag and attached to the bottom. This means that the force of the weight will be distributed evenly across the height of the bag, instead of just at one seam and shown below left.

The Hardware
The hardware also can affect how the bag will wear. Rectangular strap connectors are commonly used and are quite attractive, but as the bag wears, you’ll see that the torque on the strap will force the hardware into a vertical position as shown below, instead of a horizontal position. The bunched strapping will cause stress and wear on the bag. Hardware that is circular (or at least rounded) is less likely to have this happen.

To combat this problem, purchase a bag that uses round, oval, or D-ring loops as shown below. These will permit the strap to swivel across the hardware without harming the shape of the strap. To combat this even more, many bag manufacturers are creating straps that swivel (as shown in the far-right image below). This can serve a great purpose and keep the strap from bunching and wearing. But if the hardware is not high quality (or is handled roughly) then the swivel can break resulting in your bag (with its precious cargo) falling off your body and hitting the hard pavement at your feet.

The Lining
The lining of your bag is more likely to wear through before the exterior. This is because the lining is made of thinner, lighter material than the exterior. But it is also because you’re more likely to carry keys, pens, and other sharp and pokey items on the inside of your bag. The easiest way to ensure that your keys don’t damage your lining is to store them in a pocket that is just for keys, or in a separate pouch.
When shopping, I suggest you test the durability of the lining. Grasp the fabric on either side of a seam in the lining and tug lightly. You want to see if the fabric has some “spring” to it and will therefore last. If you can see the points of the stitches when you tug, but not see any strain on the lining when you release, then you have a bag with a quality lining. However, if you tug lightly and then see stress on the stitches, then this lining will be more likely to rip or tear. Most bag linings are made with acetate or polyester. These fabrics are durable against general wear and tear, but prone to fraying quickly after they’re pierced (usually with a pen or keys).
The Bottom
People who carry their bags with them everywhere are likely to place them on a seat next to them whenever possible. However, unless you live in Downton Abbey, you’re occasionally going to have to place your bag on the floor of a bus, airport, or coffee shop. There are a variety of ways that the bottom of a bag can be reinforced to reduce wear. There can be large rubber feet sewn on the bag bottom, smaller metallic feet positioned to distribute the weight of the bag contents, or there can be reinforcement or strips attached to the bottom of the bag. If the bag you’re looking at doesn’t have these, it may not be deal-breaker. But if you find that your bag bottoms often get wet or wear through quickly, you should look for these when shopping.


The Pockets
Unless you just want one large bag with no pockets, you should consider the types of things you want your bag to hold. I suggest taking your current bag stuffed with your typical belongings to the store with you. Then ask permission from a clerk to take a bag for a test-drive. Remove items from your bag and place them into existing pockets. See what is left over and if you have a lot of empty pockets, or a lot of items that don’t fit into a pocket, you should keep shopping. Make sure that items like your phone or wallet are snug in their pockets to prevent them from sliding out when your bag takes an inevitable spill. If you ride public transit frequently, make sure expensive items are securely attached in pockets that close. Make sure that you have a pocket for your keys and there enough pen slots. Not having keys and pens loose in your bag will extend the life and make it look better for longer. It is easier to get one small pocket that holds your keys replaced or mended than it is to have to replace the entire lining, or the entire bag.
If the pocket is kept closed with a zipper, can you see the zipper tape? Or is it securely tucked into the lining? Zippers that are visible on the inside of the bag won’t resist wear as long.


Interior pockets where you’ll be storing your phone, business cards, or your wallet are most likely to wear out on the top edge of the pocket. To combat this wear, some bag makers will use a reinforced edge often made from the material used on the outside of the bag. This can increase the life of your pocket and make it easier to slide your items into it since you can more easily feel where the edge is.

Exterior pockets are great for items that you want to access easily. If theft or loss is a concern, just make sure that the pocket has a flap or closure to prevent this. If you’re concerned about getting caught in bad weather, it is best to have a pocket with a zipper and a flap of fabric, or a welt, that covers the zipper. This will permit easy access for you but prevent water from seeping into your bag through the zipper.

Now you know the weak points to watch out for when purchasing a bag. You also need to consider how you use your bag to be sure you come home with a bag that will suit you best.
If you often carry your bag in inclement weather get a bag that is water-resistant if not water-proof. Bags made of leather or a synthetic vinyl-like fabric should keep your contents safe, but they are often heavy and very warm during summer months. You can look for waxed canvas or a canvas bag that has been treated with a water-resistance coating that will also be lightweight and breathable. In addition, look at the top of the bag. If there are any gaps between the flap and the strap, or if there are zippers that aren’t covered with a protective flap, this is where water will tend to enter the bag. And as we all know, water and laptops don’t mix.

Most people either want a bag with a shoulder-strap, or a bag with a handle. You can occasionally find a bag that has both. Make sure the strap is long enough and adjustable. I highly suggest adjusting it to fit before you leave the store. Make sure that the handles are comfortable. Padding or thicker handles will make the bag more comfortable to carry for a long time. If you prefer a shoulder strap and carry your bag for long periods of time, look for an adjustable strap protector to help cushion and spread the weight.

If you have a padded laptop sleeve, then you may not need a bag with padding. But, if you don’t have a sleeve, look for a bag with a padded exterior (or a padded interior pocket). Keep in mind that bags with padding tend to be heavier than those without. If you don’t always carry your laptop, you may want to make sure any padded interior parts are removable.
In addition to making sure that all of your small items fit into individual pockets as desired, I also suggest thinking about the other items you often carry with you. If you carry hardback editions of Stephen King novels with you, make sure they’ll fit, or your lunch sack, or the cardigan you need because conference rooms are always cold, or your running shoes.
If you’re someone with chronic back pain or other ailments that prevent you from carrying a bag on your shoulder or in your hand for long periods of time, you should be able to find a bag with wheels. Look for wheels that are taller instead of shorter. Taller wheels will permit you to go over curbs, gravel, or dense carpet easier. You’ll also want to make sure that the extendable handles are the right length for you. Even if you have a padded laptop sleeve, I’d suggest making sure that there is some padding on the bag to prevent bumps and spills to jar your sensitive hard drives.

All of these items are questions that a custom bag maker would ask you before creating a bag for you. There is often an extra cost for having a bag made just the way you like it, but if you truly live out of your bag, then having a bag that fits your specific needs and your individual style can make a difference in how comfortable and productive you are on a daily basis. Of course, not everyone needs a custom bag. Regardless of whether your next bag is a custom made or “off the rack”, I hope the information here will help you choose a laptop bag that’s perfect for you.
Listen in your browser: InDesignSecrets-166.mp3 (19.8 MB, 35:56 minutes)
See the Show Notes for links mentioned in this episode.
Or view the transcript of this podcast.
- Upcoming InDesign Events and Deadlines
- March 2: Early bird ends for Print + ePublishing Conference (May 14-16, San Francisco)
- March 3: Creating Digital Publications with InDesign, UC Berkeley
- June 13-14: InDesignSecretsLive! in NYC
- Recap of the O’Reilly Tools of Change Conference (TOCCON)
- Interview with John McWade, founder of Before&After magazine
- Quizzler Update: Code Breaker! C’mon people! (see below)
- Obscure InDesign Feature of the Week: Sample Buttons
News and special offers from our sponsors:
>> eDocker, the fine people who sell the InDesign > Flash magazine solution (now known as eDocker2 Desktop Publisher) that we’ve talked about before, just released a new InDesign digital publishing solution called eDocker Tablet Publisher. With this program you can create, from InDesign, an HTML5 Web publication that works in all devices, including iPads, and that you can publish through your own server. Normally $995 for a Single User edition, InDesignSecrets users can get Tablet Publisher for only $895 through April 30 2012 with the coupon code 10IDS2012. For more details and more discounts for InDesignSecrets fans, go to https://www.edocker.com/ids.
>> Recosoft continues to improve and enhance their breakthrough product, PDF2ID, now at v3.0. PDF2ID is a cross-platform plug-in for Adobe InDesign that enables you to directly open and convert PDF documents within Adobe InDesign CS3/CS4/CS5. It supports multiple languages and can even pull in PDF annotations (comments) into the InDesign layout! As an InDesignSecrets fan, you can get an incredible 50% off of PDF2ID Standard or Professional with the promo code IDSECRETS. Note this promotion ENDS on March 9, 2012!
—
> Diane Burns’ Creating Digital Publications with InDesign, UC Berkeley
> Info and registration for our 2-day, single track InDesignSecretsLive! in NYC
> O’Reilly eBooks optimized for Kindle Fire 8
> Anne-Marie’s Professional Web Site Design book
> Presentation Zen that very few presenters paid any attention to
> EPUB 3 Resources from TOCCON, collected by Matthew Diener from EPUBSecrets.com
> John McWade’s Before&After Magazine
> MOO.com Luxe Cards
> All about QR Codes and Teacup Software’s solution

Making high-quality charts and graphs can be a difficult and time-consuming task when using InDesign alone. Most people will make a pie chart, bar graph, or other basic chart in Illustrator, and place it in InDesign. Over the years, there have been several scripts, workarounds, and tweaks devised to get around the difficulty of creating accurate charts in InDesign. Thankfully, Travis Kochel imagined a different type of solution for this problem. Instead of creating a massive graphics plug-in or a series of scripts, he developed a set of fonts called Chartwell, which utilize discretionary ligature options in Adobe applications to create charts that are customizable and easy to build.
The fonts, originally created at TK Type Foundry, are now sold through Monotype. In all, there are seven different Chartwell fonts that you can use to create different types of charts (Figure 1, next page). The desktop fonts can be purchased individually for $25, or as a set for $129 from fontfont.com. Web versions are also available as a separate purchase, with pricing (based on monthly page views) that ranges from $25–$5000 per font.
Figure 1: The seven Chartwell fonts and graph styles.
While it is a better deal to purchase the full set of fonts, it’s great to have the option to buy just the font(s) for the type of charts you need. You can recoup the small investment in a single-font license after creating just two or three charts (or even just a single chart, if you have to update it frequently). And since there aren’t any similar options that exist for InDesign (the fonts also work in any application that supports OpenType ligatures), Chartwell is the best solution I’ve seen for creating charts as an InDesign user. I would also say it is simpler than using Illustrator’s built-in chart tools (or the new Creative Cloud Charts features discussed in Brian Wood’s article). And if you’ve ever tried to create a pie chart in Photoshop before, I suspect you’ll find Chartwell to be a huge upgrade.
Getting Started
Installing the Chartwell fonts is just as easy as installing any other OpenType font you might use. If you want to use a font management solution, try FontBook (Apple’s built-in font management tool for Mac OS) or any cross-platform third-party font management software like Suitcase Fusion, Font Agent Pro, or Font Explorer X. Once the fonts are active and available to you in InDesign (Figure 2), you’re ready to create a text frame, type in a string of numbers separated by “+”, and choose OpenType > Stylistic Sets > Set 1. (Side note: I found that having Ligatures turned on was all that was necessary to make charts with Chartwell fonts. I saw others in online forums mention that Discretionary Ligatures was required.)

Figure 2: The InDesign fonts menus: The only user interface you need to use Chartwell.
I created the charts shown in Figure 1 using the same values and colors for each one. The values I used were: 15+25+15+20+15+10.
I changed the fonts, but kept the font size at 80 pt, with no letterspacing or scaling applied. However, Vertical Bars, Radar, Rose, and Rings didn’t work well with lower values. This shows that not every chart is valid for every data set. I increased the values (40+40+60+70+80+90); the larger values worked better.
While it is very easy to get started using the charts, and it takes very little information ahead of time to do so, it is a good idea to read the document that comes with the fonts. This four-page document shows examples of the charts on the first page. The second page provides the four basic steps required to get up and running (always set kerning and tracking to 0, use values of 0–100, apply colors to numbers, and turn on Stylistic Set 1), along with a little more history and information about how the charts are best used. The third and fourth pages provide a few more tips about each chart type. I think this information was added more recently, since I’d seen a few complaints that it was unclear how to create a pie chart with a hollow middle (Figure 3). Spoiler alert: The trick is to add a letter at the end of the string of chart data; the size and color of the “hole” is determined by the letter you use and the color you apply to it. I’d also seen complaints that for the Line chart, you couldn’t use 0 as an initial number, but this works now.

Figure 3: A Pie chart with a hollow middle, achieved by adding a letter to the end of the chart data.
The Rose, Rings, and Radar options are somewhat less intuitive to create and also require you to use letters in addition to numbers. Figure 4 shows examples of each of these type of charts, with a background grid in each. This grid is created by applying a letter (or in the case of the Radar, two letters) followed by a plus sign (+) before the string of number values.

Figure 4: Three varieties of charts with background grids.
If you prefer a visual jump-start, there is a 4.5-minute video created by one of the technicians who worked on this font that will take you through the basics. You can check it out at Vimeo.com. I also have to thank Travis Kochel and his team for creating documentation that isn’t a horribly designed list of steps. If you’re used to getting documentation in a traditional step-by-step format, you may be a little confused and dismayed. But if you like getting information that is grouped visually by topic and presented in quickly scannable and digestible nuggets, then you’ll be pleased. It makes sense that a designer working to make it easier to share infographics would take care in how the information for this font set is shared.
Adjusting Charts
I’m sure there are many hacks and tweaks that can be applied when creating a chart. One in particular that I discovered seems obvious and useful for the vertical bars chart. In this chart style, the spacing between the bars can be changed by adjusting the tracking. On the other charts, changing the tracking from something other than 0 causes the information to be displayed in invalid ways. But for the vertical bars chart, changing the tracking with a negative value moves the bars closer together, and applying positive tracking moves the bars farther apart. Knowing this will make it easier to adjust your chart to fit your space and the content.
To adjust the size of the other charts, you simply adjust the size of your font. If you have a chart with its final edits in place and you really need to adjust the size of the chart without adjusting font size, you can convert your text to outlines, group the item(s), and then adjust it the way you would any other vector graphic. As someone who has balked for decades about having fonts converted to outlines, I finally have to acquiesce that this is a great feature to have available.
Another key tip for adjusting charts is to use InDesign’s Story Editor to see the chart values and edit them without having to unmake the chart by turning ligatures off (Figure 5).
Figure 5: Use the Story Editor to access and edit data in existing charts.
Choosing a Chart Style
While the basic video and the PDF included with the Chartwell fonts are both great, they don’t actually explain when to use each type of chart. If you need help choosing a chart style, a site created by Bryan Connor may be just the ticket. Bryan runs The Why Axis, where he documents “the rise of data visualization in the digital age.” His basic descriptions provide a perfect overview of how and when to use each chart style, and you can also learn alternate names for the chart styles, which will assist you in doing further research. For example, it helps to know that a line chart is also called an “area chart.”
Limitations
One of the downsides of Chartwell is that the numbers you input to create the chart objects are not displayed visually as numbers. This may be fine for many situations, but if you need these objects to be labeled, you’ll have to make callout text frames and arrows yourself. Also, if you create a vertical bars chart, you’ll still need to create the underlying grid to show tick-marks for numbering and to share what the content is for the x- and the y axes. But this is hardly a deal-breaker, in my opinion. And if you create a lot of these charts, it would make sense to create a library of basic structures and callouts.
Unfortunately, there is one issue that may be a real deal-breaker for people who need to chart very precise data. Chartwell fonts currently work only for whole numbers. So if your data includes any decimal values that you need to chart, you’re sadly out of luck. We asked Travis Kochel if there were plans to add support for working with decimals, and this was his reply: “There is a new version in the works that will round decimals to the nearest whole number. I wish it were possible to accurately reflect the decimals, but I haven’t found a way to do it within the limitations of the glyph count in a font.” Until a way to represent decimals is added to Chartwell, you’ll have to take a manual approach and convert your item to outlines and then tweak the chart, which is not ideal, but is still faster than creating something from scratch within InDesign.
Outputting Charts
Since content that begins in InDesign rarely stays in InDesign, I had to see how easy it was to get the chart content out of InDesign. And I was relatively happy with what I found. Everything I printed, on a variety of printers, came out as expected. I feared that older printer-drivers wouldn’t be able to handle the font, but even the almost-dead inkjet printer that I’ve had for 10 years was able to process my page. I also exported my test as a PDF and was thrilled with the results I got using a variety of the built-in PDF settings that ship with InDesign, as well as my custom settings that I use regularly. I also had no problem exporting my CC2014 file and opening it in CS 5.5.
The one area where you might run into problems is if you have to output your file as a reflowable EPUB. In order to get your charts to appear in the EPUB, you need to use Object Export Options (choose Object > Object Export Options) to rasterize the container (in this case, the text frame containing the chart data)(Figure 6). Chartwell charts export just fine to fixed-layout EPUB.
Figure 6: Use Object Export Options to get your charts to appear in reflowable EPUBs.
(Almost) Off the Charts
Despite a few hiccups, Chartwell fonts still offer you an elegant chart-making solution that more than pays for itself in a short amount of time. I’m amazed at the innovation that went into the process of using type and ligatures to create the chart objects. And I’m not the only one to think so. Since 2011, the Chartwell fonts have earned several awards from groups like Communication Arts and Fast Company, who gave them the Innovation by Design award.
Because of the inability to use decimals to create charts, and the need to purchase web versions of the fonts separately, I can’t quite give Chartwell a perfect rating. But I am still very excited about what these fonts can do. And I’m looking forward to using them to take the time and aggravation out of creating and editing charts and graphs right in my InDesign documents.
 This article appeared in Issue 141 of InDesign Magazine.
Connect your InDesign files directly to the cloud and search for assets without leaving InDesign.
After almost 20 years of using InDesign, it is rare for a new plug-in to make me flush with excitement. But CI HUB Adobe Creative Cloud Connector excites me. In practical terms, this new plug-in will save you time and frustration by connecting InDesign directly to all of your cloud-based asset services in one panel. CI HUB Connector helps you browse all of the assets in your DAM, MAM, PIM, MDM, and CMS systems.
(These acronyms refer to various systems for managing and accessing large sets of product data and related information. DAM = Digital Asset Management, MAM = Media Asset Management, PIM = Product Information Management, MDM = Master Data Management, CMS = Content Management System. This PDF has details on what differentiates each type of system.)
You can also search for images from stock photo partners and place them directly into your file without having to go to a browser. You can see previews for every version of an asset, every page of an InDesign file, and view metadata as you link and relink images directly from the CI HUB panel within InDesign.
Registration and Installation
Once you register with CI HUB for a 30-day free trial, you’ll get an email providing you with links to download and install the plug-in. The installation is intuitive and there is a Quick Installation Guide for other installation options, in case the preferred method doesn’t work smoothly. To verify installation is complete, navigate to Window > Extensions > CI HUB. Doing so opens a panel that you then can add to a custom InDesign workspace if desired (Figure 1).

Figure 1. Verify your installation was successful by navigating to Window > Extensions to see CI HUB. Click on this to open the CI HUB panel.
Panel Sections
The CI HUB panel has six sections. Founder Andreas Michalski demonstrates each section in short online videos on the CI HUB web site. To access the video links from the CI HUB panel, click the Info button, next to each section name (Figure 2).

Figure 2. To launch online tutorial videos about any feature in the CI HUB panel, click on the circular “I” icon beside each header.
Connections
You begin by logging in to services through the CI HUB panel. Click the disclosure triangle beside the word Connections, and then click the + to the right (Figure 3).
Figure 3. To add services to the Connections section of the panel, click on the “+” beside the Connections header. Choose the logo for the service you would like to add.
Click the logo for the service you would like to connect to jump to the appropriate login page in your web browser. After logging in, you’ll get confirmation the connection was successful. You activate services by selecting their checkboxes (Figure 4).
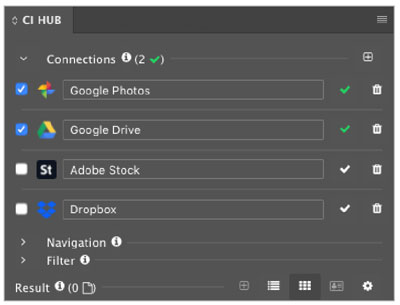
Figure 4. Activate and deactivate Connections by clicking the checkbox beside the service’s name.
Once you’ve connected to all of your services, you will reduce the amount of time you spend logging into websites and switching between them and InDesign. There are currently 20 services integrated into the plug-in—including Dropbox, Adobe Stock, Bynder, and more—with more connections expected to be added in the future.
Navigation
After you connect your services, you use the Navigation section to search within your folders or a service. The options here differ for each service when you select the folder icon or the magnifying glass. For example, a stock service shows you assets you have licensed when you click the folder icon, or you can click the magnifying glass to search by keyword (Figure 5). Or you can search within a folder structure, for a keyword, or for a specific filename for any file type when you click the magnifying glass (Figure 6).

Figure 5. The icons beside the Navigation head will change the options you see under Results. When you choose a stock image agency and you choose the magnifying glass icon, you’ll be able to type in a keyword and see all assets for that keyword. If you select the folder icon, you will see only assets you have previously licensed.

Figure 6. If you choose a cloud hosting service like Dropbox, the folder icon will let you see the folder hierarchy. Or you can search by keyword or filename if you choose the magnifying glass icon.
Filter
The Filter section helps you fine-tune your search results after you’ve selected the magnifying glass under Navigation. The options in this section vary for each service and by the metadata available for images. As you select your filters, they will appear in your panel. If you no longer want a filter, click the X to make it disappear and update your results (Figure 7).

Figure 7. As you choose filters to narrow your search, you will see blue boxes appear to show which filters you have chosen. You can click the x in the blue box to remove any filter.
Result
The Result section is where the plug-in really starts to shine. Once again, your options will vary depending on the service you’ve chosen. There are two view options for each: List view and Tile view. Under List view, you choose which columns of information you would like to see for each file from the settings wheel. You can then sort the results by clicking the column header. Under Tile view, you can choose the size of your image preview and whether you want to include items in subfolders.
If you connect to a service, such as Dropbox, and click the folder icon under the Navigation header, you will see your folder structure in the Result section and can navigate to your files and assets (Figure 8).
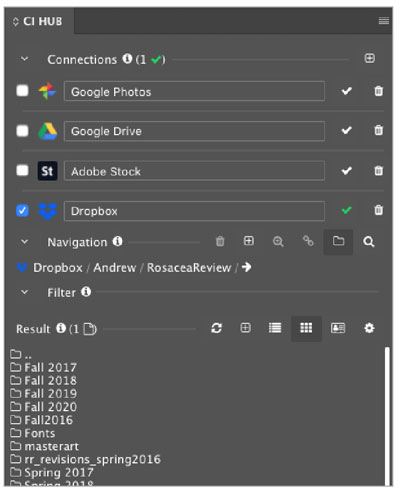
Figure 8. If you choose a cloud storage service and click the folder icon by the Navigation header, you will see the folder structure appear to the right of the service name with the contents of each level appearing under the Result header.
In either view, you can double-click the preview image to see your options and metadata. If an asset has multiple versions available (based on the features of your asset manager), you will see the number of versions. Click the arrows to preview the versions. You can also open an image in your browser or download it to your hard drive. If you have the proper permissions, you can replace an image with a locally saved version, lock it, or delete it.
If you navigate to a folder that contains InDesign files, you will see the number of pages in each file in the bottom-left corner of the preview. Click the arrows to see a preview of each page of your InDesign file. This is a great feature for when you have multiple files with the same first page, but works with files saved in CC 2018 or later only.
To open an InDesign file, drag the preview off the panel. Or you can right-click the preview, and then choose Open In InDesign or Save Local (Figure 9). If you have an InDesign file open, you can right-click the preview of any asset in the panel (an image, PDF, or even another InDesign file) to select Place And Link to place an image at full-size in your file or into any existing image frame.
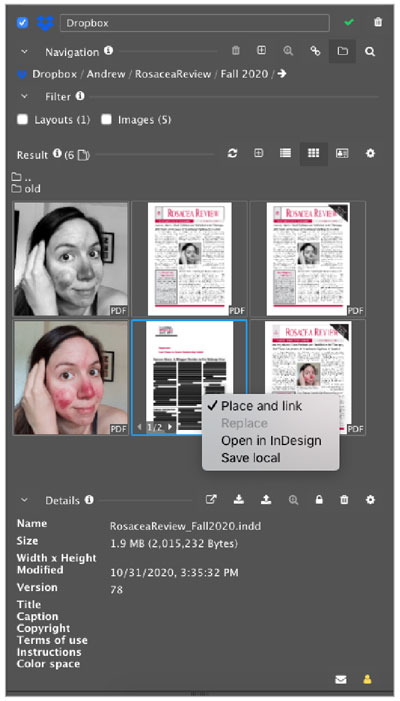
Figure 9. If you select and right-click on a preview for an InDesign file in the Result section, you will see options to save the file to your local hard drive, open the file in InDesign, or place and link an InDesign file (or any asset type) into your open layout.
The best part of this section is the “similarity search” feature. With it, you can narrow or expand your search options. I found an image I mostly liked, for example, chose this option, and CI HUB Connector refined 10,000 results to 64. You can also use it to search for similar images from a different stock agency. With this feature, you no longer have to open multiple browser tabs and search and filter in each service. You can search in the panel and place files into an open InDesign document.
Details
This section permits you to see almost every bit of metadata about an asset without ever leaving InDesign. Whether you navigate to a folder of images or search for images from a stock agency, you can click once on an image to see what CI HUB calls “quick details” below the image. Click the Settings button on the far right to choose which of the dozen metadata fields you want to display. (Figure 10)

Figure 10. To narrow the metadata fields you want to view as part of your asset search, you can choose the Settings button to the far-right beside Result and select the desired metadata fields from the pop-up window.
After you double-click a preview, the CI HUB panel will show every metadata field presently available below your preview. You can also view XMP, EXIF, and IPTC info available for any asset.
Link and Relink
The Links area of the panel is the section that deserves the most applause. After you open an InDesign file from Dropbox or a similar host, you will see a Links section in the CI HUB panel (Figure 11).

Figure 11. The Links section lets you see if an asset is missing (red icon) is available (green icon), or needs to be updated (blue icon). A gray + means the art is saved in your cloud storage location, and a blue + means it is saved locally. You can update all assets, or each asset individually, by selecting the blue arrows at the far-right.
At first glance, it is similar to what you see in the InDesign Links panel—for each link you will be able to tell if the link is missing (red icon) or available (green icon), and if it needs to be updated (blue icon). But that’s about where the similarity stops. You can tell if the art is present on Dropbox (gray plus (+) icon) or saved locally (blue plus (+) icon). If the art is saved locally you can upload it to your desired service by clicking the + icon, verifying the Target folder, and clicking OK. You can update all assets or individual assets, by clicking the blue arrows at the far right. Once the asset is relinked, the arrows turn white. If the arrow is grayed out, then it means that you have art saved locally. This feature is great for confirming that you’ve uploaded all assets and don’t have them stored on your local hard drive.
You can also see the same basic information you can see in the InDesign Links panel: filename, path, modified date, file size, if it is embedded, and which page it is placed on (with a clickable link to take you directly to the image). You will also see how many versions of an image are available, and you can place any version in your file. Or, you can use this panel to switch between a lo-res version and a hi-res version of an image, if your host has that option (Figure 12).

Figure 12. Click on each asset to see more metadata about the image, similar to what is visible in the InDesign Links panel. In addition, you can also see how many versions of an image are available, and you can place or link any of them in your layout.
Try It Out!
CI HUB will save you a lot of time if you search for stock photos. Being able to search for similar assets across multiple services and place art directly into your layout while never leaving InDesign seems like a dream come true. If you’re a freelancer who uses a wide variety of cloud services that are different for each client, being able to quickly activate just the few you need for a specific client will decrease the amount of time you spend logging into websites, manually downloading assets and files, and make tracking easier.
I’m thrilled to know I can quickly verify I haven’t forgotten to upload an asset to a client. The 30-day free trial, which is compatible with InDesign 2018 or later, should give you enough time to see the value this plug-in can bring to your own workflows or processes.
- CI HUB Adobe Creative Cloud Connector
- CI HUB
- €19 per month
- Compatible with Adobe Photoshop, InDesign, InCopy, Illustrator, Premiere Pro, and After Effects CC 2018 and later
- Rating: 5 stars