

When you mix photos and text, it’s most common for the text to be on top of the photo. But if you want to really get noticed, make an image sandwich, with part of the photo behind the text and another part of the photo in front of the text. This simple yet effective technique works well in magazines, brochures, and many other publications.
Step 1
Open the image you want to use. It should have something (or someone) that will be in front of, and behind, the title text.

Step 2
Duplicate the Background layer by pressing Cmd/Ctrl+J or by clicking-and-dragging the Background layer onto the Create a New Layer icon in the Layers panel.

Step 3
Click the Eye icon next to the Background layer in the Layers panel to temporarily remove its transparency.

Step 4
Next, you need to remove the pixels on Layer 1 where you’ll have the text title, with the exception of what you want on top of the text. For my example, I want the text to be on top of the background but behind the skater’s head, so I’ll need to make a selection after making sure Layer 1 (the top layer) is selected in the Layers panel.
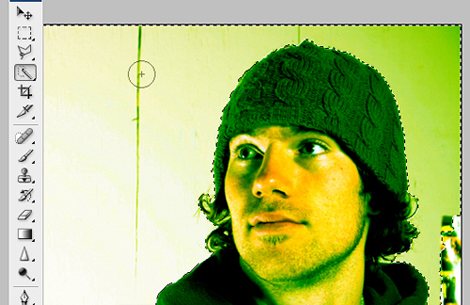
Since the edge in my photo is pretty clean, I’ll use the Quick Selection tool. Depending on your image, you may be able to grab what you want very quickly by choosing Select > Subject, or use one of the other section tools.
Step 5
Press Delete/Backspace to remove the selected pixels. The transparent pixels will be in a checkerboard pattern.

Step 6
Type some text in for the title.

Step 7
Drag the Text layer in between the two photo layers. Click the Eye icon next to the Background layer to bring its visibility back.

You’re finished! You now know a simple technique to hide text but keep it part of the cover in a magazine, newspaper, brochure, or other publication.

This article was last modified on January 5, 2023
This article was first published on July 6, 2009
Commenting is easier and faster when you're logged in!

Recommended for you

Find All Your Current InDesign Keyboard Shortcuts
You probably know that you can create your own keyboard shortcuts in InDesign, b...

This Week in InDesign Articles, Number 121
PePcon is coming and there is so much more to do! So I’d better get this list of...

How to Refine Illustrator 3D Artwork in Adobe Dimension
Learn how to bring 3D artwork created from Illustrator into a true 3D environmen...