

Last week I posted a tip about using compound frames to create interesting image effects. In one of the comments on the post, someone asked if it was possible to place the image into multiple frames (so each independent frame shows a different part of the image). The answer is to use the MakeGrid script that comes with InDesign, and David replied that he had shown how to do this in a previous post. But I think I can also add a few extra points here.
First of all, why would you want to place multiple copies of an image into a grid of frames? Maybe you need to tweak the size, angle, or position of the images within each frame independently.


See also: Fun with the Make Grid script
Also notice that you’re not limited to working with rectangular frames. Any shape, even ones you copied and pasted from Illustrator, or drew with the Pen tool will work.
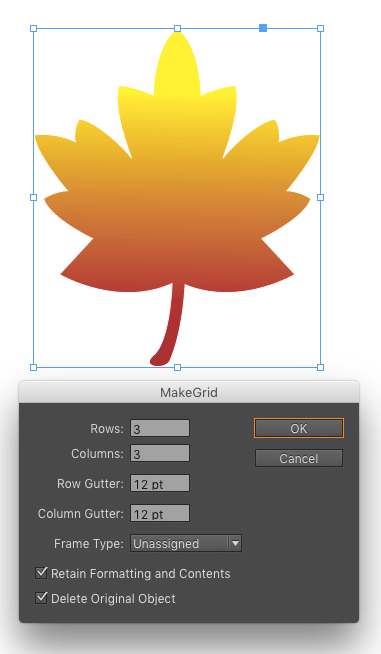

Open or closed paths are fine.


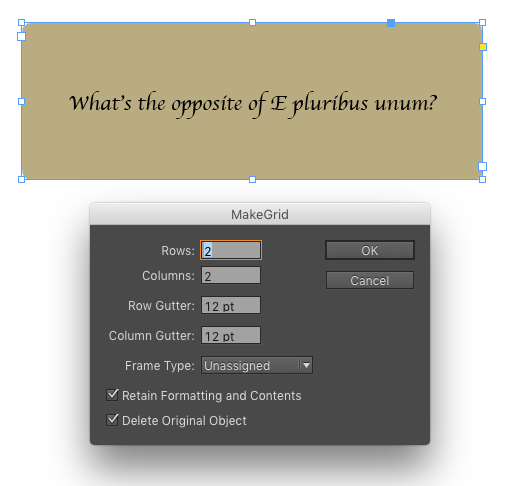
And you can make grids of text frames (including the text).

And finally, you can change the type of frame when you make the grid. Use the menu in the script’s dialog box to choose a different frame type.
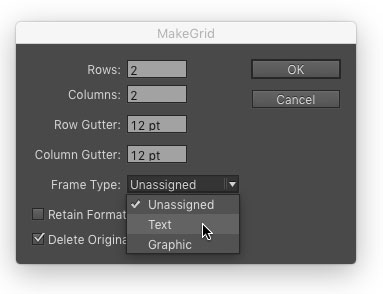
Just remember that in order for the change to take place, you also have to deselect the option Retain Formatting and Contents.

This article was last modified on July 25, 2019
This article was first published on October 14, 2015
Commenting is easier and faster when you're logged in!

Recommended for you

Making Page Numbers as Words Instead of Numbers
Recently, I came upon a script that is so awesome that I have to share it with y...
This Week in InDesign Articles, Number 131
I have to admit that this month it seems like there are fewer InDesign stories o...
InReview: MathML Kit
Rudi Warttmann reviews a plug-in for adding math equations to your InDesign layo...