




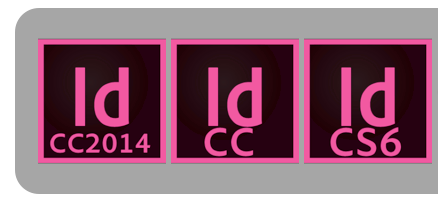
Before CS6, Adobe had different icons for each version of its applications. So it was relatively easy to tell which version you were using to open a file. Starting with CS6, Adobe stopped changing the icons for each version. So it was easy to get confused as to which version you very using. Today I decided to break down and finally make myself some new version-specific InDesign icons. These instructions are for Mac users.
- Download the images below and open them in either Preview or Photoshop.
- Select All.
- Copy.
- Navigate to InDesign on your hard drive.
- Press Cmd+I to open the Get Info dialog box
- Click on the application icon in the dialog box and then paste the new icon.


InDesign CS6 Icon

InDesign CC Icon

InDesign CC 2014 Icon
Once you change the icon for each version of InDesign you have installed, it will be easy to tell them apart in the Application Switcher (Cmd + Tab). You may have to restart your programs and/or computer in order to get the app switcher to acknowledge all the changes.
For bonus points, you can also add the apps to your Finder toolbar. Simply drag the application onto the top of your toolbar. If you to need to move (or remove) the icon, hold down the Command key while dragging the icon.

This article was last modified on July 25, 2019
This article was first published on July 24, 2014
Commenting is easier and faster when you're logged in!

Recommended for you

Cool Frames from Photoshop Clipping Paths
As I mentioned (but didn't go into great detail about) in my May 2008 column for...
Data Merging – Part 2
Last week I began a series on using InDesign’s powerful Data Merge feature...
Importing a list of items for CS6 forms
A fast-paced scripter writes a script to let you import a list of items for list...