Using GREP Styles to Format HTML Code in InDesign
Here's the ultimate in GREP Styles tricks: Formatting HTML text

[This is an article written by Claudio Marconato from Italy and reprinted with his permission. We’ve made only minor edits. Claudio presented this at the Ignite InDesign event at the Print and ePublshing Conference in Seattle a couple of weeks ago. We were impressed, so he graciously wrote it up and sent it to us.]
GREP Styles is one of the most powerful features added in InDesign CS4. Using GREP Styles, you can set a GREP expression to apply a character style to a range of characters in a very smart and dynamic way.
Recently I’ve discovered the possibility of using multiple GREP expressions to select the a range of characters and apply a sort of ‘cascading character styles’. You can’t apply multiple styles to the same range of characters using the standard character styles panel, but with GREP style you can, so you can use character styles in a way that is very similar to the HTML and CSS way.
With this technique you can set one character style that contains only the definition of the text color (e.g. red) and another one that contains only the definition of the text weight (e.g. bold). After that you can apply those styles combining the definitions.
Let me show you an example.
Here is a very simple piece of HTML code:
<p>This is a paragraph of plain text</p>
<p>In this paragraph there’s <strong>some bold text with some <em>italic text</em> inside</strong></p>
<p>Using GREP styles you can apply multiple styles at the same characters, for example you can apply a <font color=?red?>red color and also <strong>bold text</strong> using two separate styles with only one attribute each</font> as you can do with HTML and CSS</p>
<p>Enjoy</p>
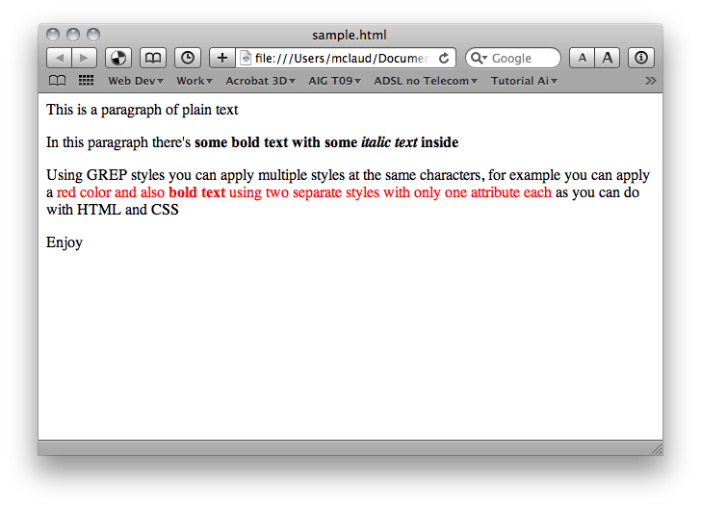
If you save this text in a text file and save it with an .html extension, you can open it in Safari or Firefox and look how those web browsers render the HTML code, it’s something like this screenshot:

Of course, InDesign does not read HTML. But you can simulate this same rendering with InDesign by applying some character styles with GREP, leaving the original text untouched.
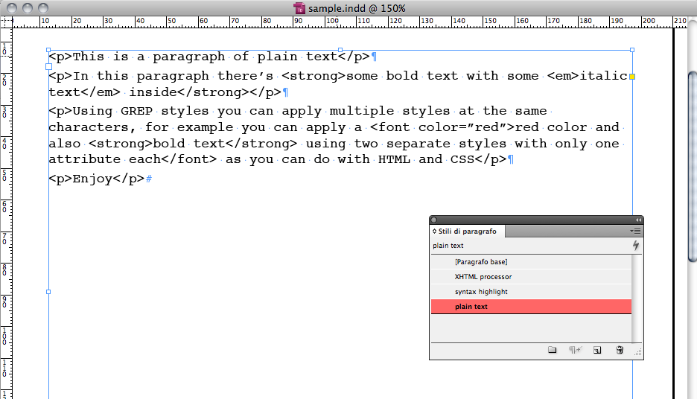
Step 1: copy and paste from a text editor to InDesign with all the HTML code. Here I have made a paragraph style called ‘plain text’ to simulate a text editor:

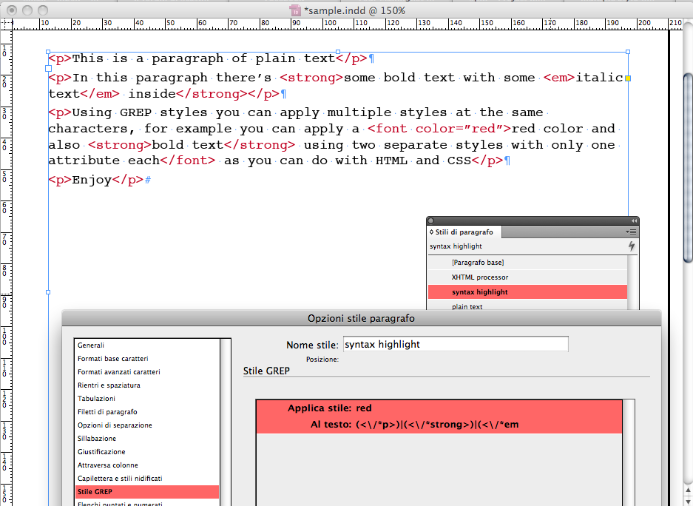
Step 2: I’ve created a paragraph style called ‘syntax highlight’ to simulate an HTML editor like Dreamweaver that highlights the HTML tags, you can do this with a single GREP expression that select all the tags, and you can add as many tags as you need:
(<*p>)|(<*strong>)|(<*em>)|(<*font( color="red")*>)
This is the result:

Step 3: Now you need to hide the tags and apply some styles to simulate a web browser. I have used the same GREP expression as before to apply a character style with a size of 0.1 pt (the minimum I can set with InDesign), a horizontal and vertical scale of 1%, and a color of ‘none’. With these settings the text of the tags become invisible!
Step 4: Finally, I can add some other GREP expression for formatting the text:
(<strong>).+(</strong>) for bold (that is, I apply a bold character style to that code in grep styles)
(<em>).+(</em>) for italic
(<font color=”red”>).+(</font>) for red color
(<em>).+(</em>)(?=.+</strong>) for bold italic
After creating each of these grep styles inside my paragraph styles, here is the result:
As you can see, I’ve defined one style for red text and one style for bold text. Then I applied red and bold separately, and as a result I’ve obtained a text that is red and also bold, two properties of the text that are defined in two different styles.
There are many instances in InDesign where you want to apply multiple characters styles to the same text. I hope you find this technique useful!
This article was last modified on December 20, 2021
This article was first published on May 25, 2010


