

The original subhead for this article mistakenly named Dreamweaver as the application to be used. The subhead was corrected on February 8, 2006.
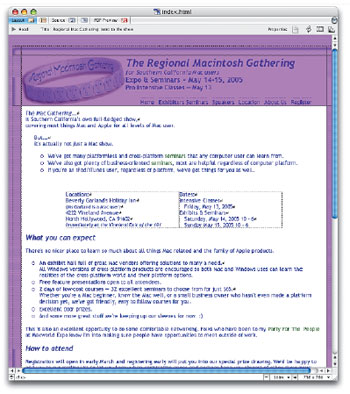
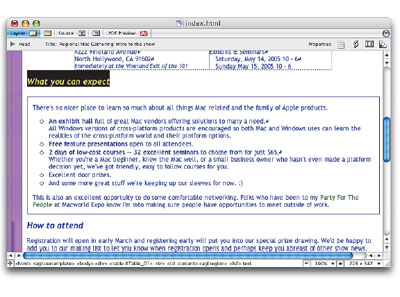
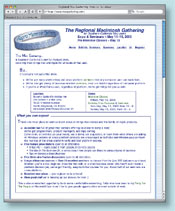
A page full of information can become rather dull, so it’s always nice to be able to add design elements. Images are excellent additions, of course; however, you don’t always have images and they’re not always appropriate. In these cases, some simple CSS can add to your page. This was the case for MacGathering.com. To present the information in easy-to-read groups, text was bounded by “boxes.” This tutorial focuses on the second group of text on the page.
Before settling on your page’s look, check how it appears in various pertinent browsers and platforms. The box and title effect here render well in Safari (Mac) and Internet Explorer (Windows), as well as in the Mozilla beta version that’s current as of this writing. The title effect doesn’t render in Firefox, but it still looks good, so the effect can be used. (This may change in future releases.)
STEP 1: Add Text to Your Page
Get all of the text onto your page with the basic formatting such as headers and paragraph breaks. You can have other formatting within that text, too, or you can add that later on.
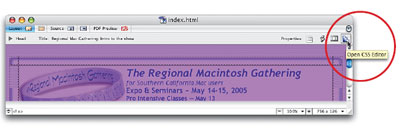
STEP 2: Open Your Style Sheet
To open your page’s internal style sheet, click the Open CSS Editor button (the stairs) at the top right of your page window.
Note: You can create your styles in either the page’s internal style sheet or in an external style sheet. This tutorial uses the internal style sheet because the styles on this page aren’t going to be used on any other pages, and putting the style in the shared external style sheet creates the risk of using these styles another time by mistake.
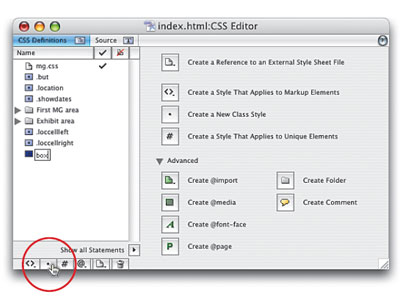
STEP 3: Create New Class
Click the Create a New Class Style button to create a new class. The new class is preselected, so type your class’s name. Give your class a descriptive name so you’ll recognize it later. Here, it’s named “.box.” If this box class were to be used only once, it would have a more descriptive, unique name. However, on this page there will be more boxes that are identical, so the same class is used for those areas.
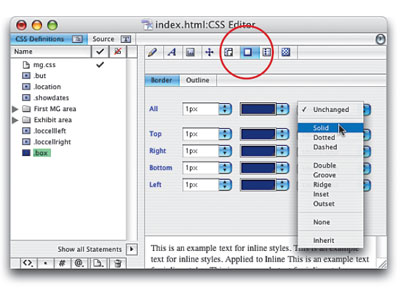
STEP 4: Define the Box’s Border
Set the basic attributes of the box. To do this, click the Border and Outline Properties tab. Still in the Border panel, type “1” in the first All column, then press Tab. It should enter “px” for pixels (if not, chose Pixel from the pop-up menu). Moving right, Control-click (PC: Right-click) the center of the color area and choose a color. Moving right again, choose Solid as your line. (If you’d like a shadowy look, change the bottom and right line widths to 2px. Another alternative is to choose any combo of widths and lines; however, not all lines render in all browsers.)
STEP 5: Define the Box’s Padding
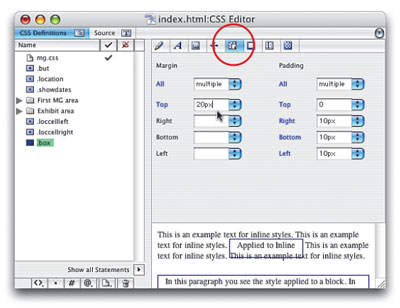
As it is, your text will butt up against the border. For a more attractive look, click the Margin and Padding Properties tab. Under Padding, use 10 pixels for Right, Bottom, and Left, then change the Top padding to 0. Also add a Top margin of 20 pixels to put space on top of this box. (You can tweak these numbers later. Experiment to see the different results.) This is a good time to do a Save.
STEP 6: Select the Text to Be Enclosed
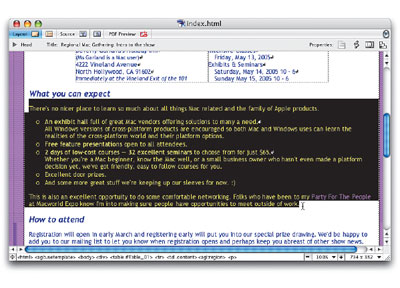
Back on the page, select all of the text to be enclosed in this box area. This selection can be a single paragraph or multiple paragraphs. Don’t include the area’s title text in this selection, though.
Note: You can still edit this text later on and even add or delete paragraphs.
STEP 7: Apply the Class
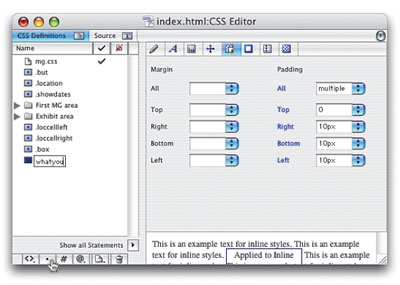
In the Style Apply tab of the CSS palette, in the box line, move to the Block Style column and click the box, placing a checkmark. This applies the class to the paragraph or paragraphs you’ve selected. You’ll see the result in the page layout, but check the page in each browser. Return to the style sheet and tweak it as desired.

Note: This effect may be all you’d like. If so, you can stop here.
STEP 8: Create the Box Title’s Class
Return to the page’s internal style sheet and, as in Step 3, click the Create New Class Style button. Type a name for your new class. This one must be unique (to accommodate the length of the title text) so make the name very descriptive. In this example, the text is “What you can expect” so the class name is “.whatyou.”
Note: To the right you’ll still see the last attributes panel used and may see the last style’s settings. Don’t let this throw you. They’ll disappear when you click anywhere or press Tab or Enter.
STEP 9: Define the Title’s Class
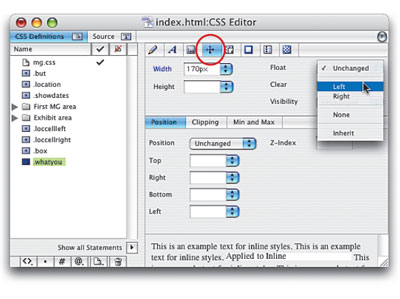
Under Font Properties, set the Back Color to white (or to match your page’s background color) and enter 10px for Line Height. Under Block Properties, for Width, enter the approximate width of your text (in this example, 170px). Then, choose Left in the Float pop-up. (This lifts the text out of the normal text flow, floating it above for the text-over-the-line look.) To create the spacing between the title text and the line it will lie upon, switch to the Margin and Padding Properties tab. Add 10 pixels for the Right Margin and 1 pixel for the Left. In the Padding column, give the Left side 4 pixels.
STEP 10: Select the Area’s Title Text
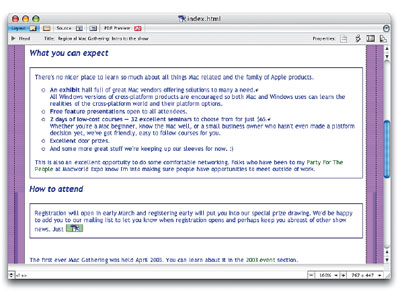
Back on the page, select all of the text in the line that will be the title that overlaps your box area.
STEP 11: Apply the Class
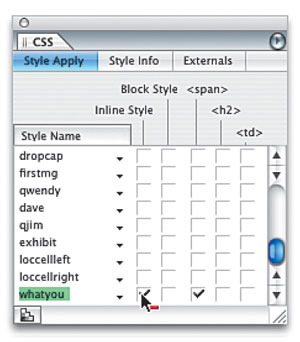
In the CSS palette, in the what you line, move to the Inline Style column and click the box, placing a checkmark as shown here. This applies the class to the selected text. This result won’t appear in layout and looks different in every browser, so you must preview it in several browsers. You’ll probably need to return to the style sheet and tweak the width, line height, margin, and padding.
STEP 12: Create More Boxes
To define more sections on your page, repeat Steps 6 and 7. Continue with Steps 8-11 to add the title effect.
Rather than having several identical boxes, you might create a variety as on this sample page below.
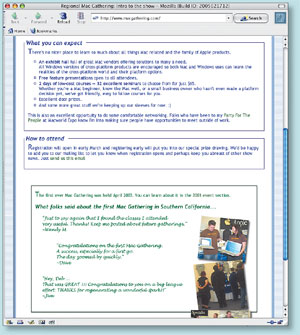
Using the same techniques in Steps 3-7, create more classes with varied box attributes. For example, color the background of a box, vary line width and styles, or set a different font color, size, or family within a box.
This example page also contains drop caps:
To create them, create a new class called “.dropcap.” Under Font Properties, enter a font size that’s larger than your body font. Here, the body is 14px so the drop cap is 20px. Apply by selecting the single letter (or word), then checking Inline Style in the CSS palette.
This article was last modified on January 18, 2023
This article was first published on February 8, 2006
Commenting is easier and faster when you're logged in!

Recommended for you

Triple Triangle Releases Raster Write for CS2
Triple Triangle today released Raster Write for InDesign CS2. The new version of...
Out of Gamut: Exploring Wide, Open (Color) Spaces
Color spaces can be quite different, as regular readers of this column will atte...

Synchronize Text in More Than One Place in an InDesign Document
Need to synchronize a bit of text from one place to another in a document? It's...