
In August 2018 Affinity took the unusual decision to launch its page layout program, Publisher, as a public beta. It generated a lot of comment on CreativePro, with users outlining its pros and cons. Since then the beta has undergone many updates, and the first shipping version of Affinity Publisher is now available at a one-off, no-subscription price of $49.99.
As well as being a fully-fledged page layout program, Publisher boasts a huge range of features, with many unique tools not found in InDesign or elsewhere. There isn’t room to go through all of Publisher’s tools and menu options; instead, we’ll look at some of the more interesting features of this hugely innovative publishing environment.
The power of StudioLink
If you own Affinity Photo, then you can make use of a truly extraordinary editing feature within Publisher. Select an image and, at the click of a button, the interface switches to that of Affinity Photo. This doesn’t mean it loads Photo as a separate app: rather, the entire Photo toolset appears right inside Publisher.
This is possible due to the fact that all three programs share the same file format. (They have different extensions purely so that when you double-click one on the desktop your computer knows which app to open it with.)
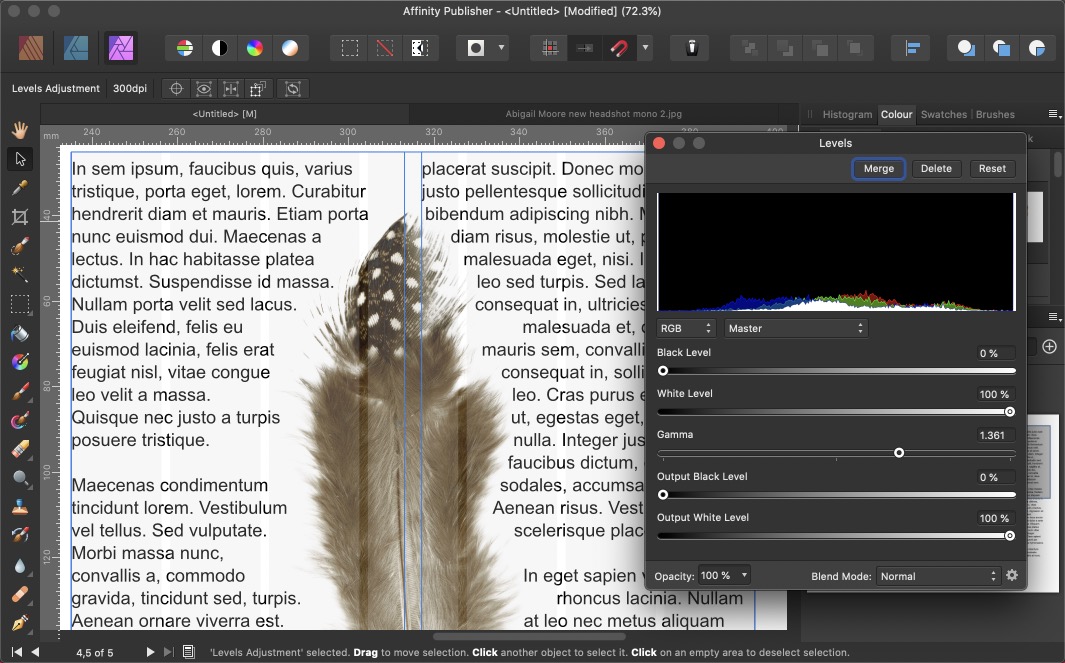
StudioLink is an astonishingly useful feature: although you’re effectively working in Affinity Photo, you still see the entire page layout, which means you can adapt images perfectly to fit the available space, without any guesswork. The same applies if you own Affinity Designer, although the wide range of vector tools built into Publisher means you’re less likely to need to use this for everyday tasks.
In the screenshot below, the feather is open in the Photo environment, with all its tools: but you can still see – and manipulate – all the Publisher elements on the page.
Making a new document
The New Document dialog closely resembles that of InDesign, except that there’s no facility for setting the number of columns here – that’s done separately on the Master Page, using the Guides Manager (see below). There are two novel features: you can retrieve the maximum print size from a connected printer, invaluable for business users; and you can choose to start on a left-hand page, rather than a right. This is helpful when preparing double-sided leaflets, as you can see both front and back sides next to each other.
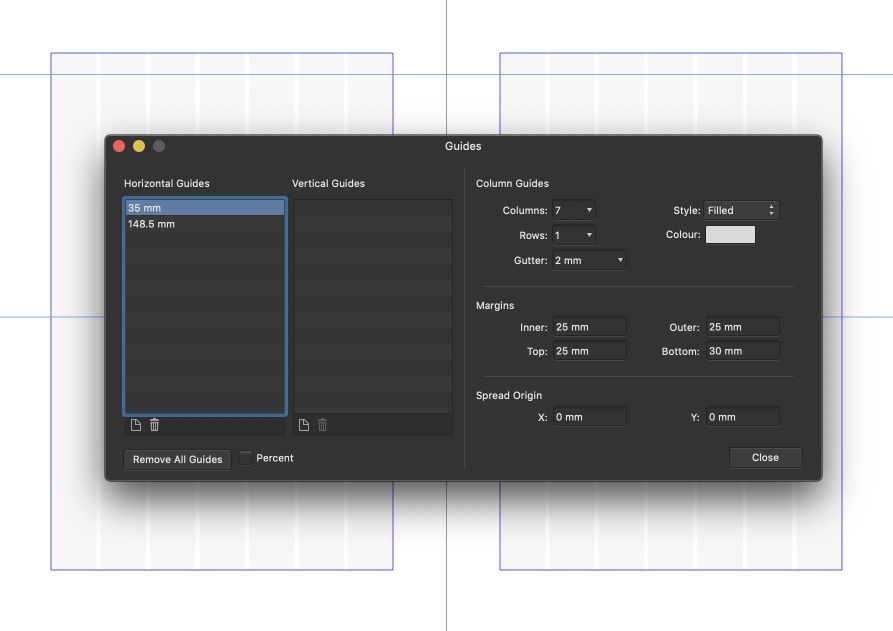
The Guides Manager allows you to set up guides either on a master page or an individual page. You can also use it to place precise, numerically-defined guides; and you can choose whether column guides are shown as outlines, or as blocks of color. Of course, you can choose your own colors to display here.
Working with shapes
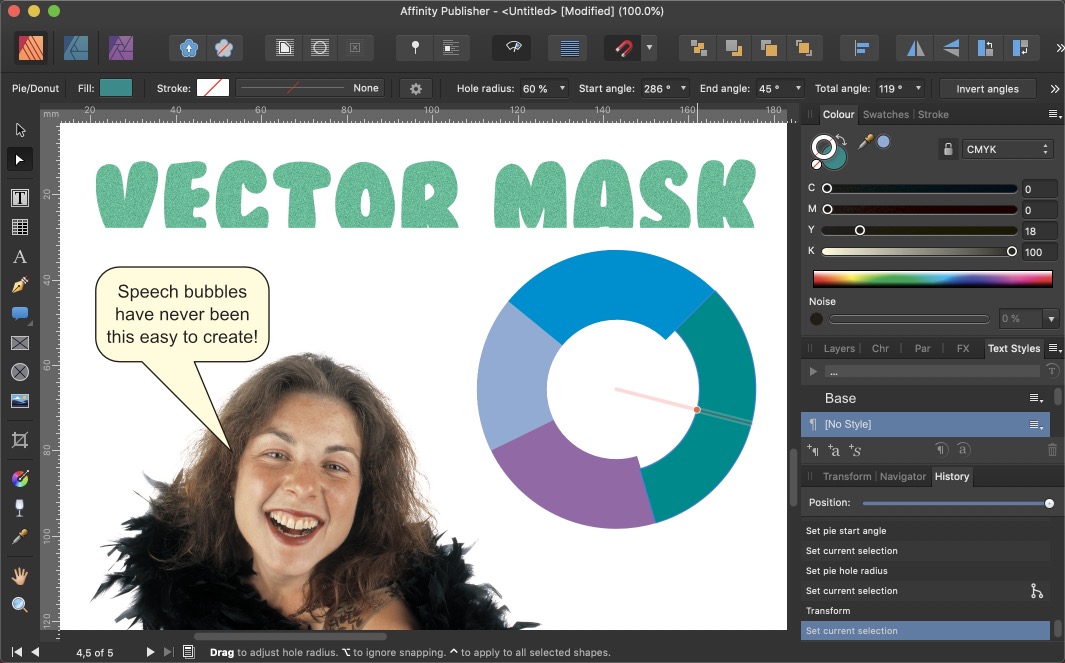
Publisher includes a range of shapes such as stars and donuts, all easily customized numerically or via intuitive on-screen controls. Use the Callout tools – either rounded rectangle or ellipse – to make speech bubbles, with simple controls for moving anchor points and bubble size. Use the Donut tool to create donut graphs, right inside Publisher.
You can also use the Vector Crop Tool to crop these shapes, or indeed any Publisher object – including text and stroked paths. And the inclusion of a Boolean Geometry menu – the equivalent of the Pathfinder panel found in InDesign and Illustrator – allows you to create overlaps and intersections from any pair of objects.
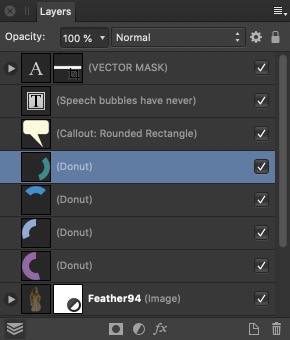
Layers panel goodness
There’s a Layers panel in InDesign, although many users ignore it unless they’re working on multilingual layouts. In Publisher, the Layers panel shows thumbnails of every item in the layout, including layers, live filters, and adjustments you’ve added in the Photo environment.
You can move individual layers up and down in the stacking order, or turn them off to hide them. The panel works on a per-spread basis, so the Layers panel only displays the objects on the spread you’re currently working on, and not those in the entire document.
Text handling
Publisher can place text either in standard text frames, or using ‘artistic text’ objects. Standard frames can be multi-column, with the novel ability to set columns of different widths within the same frame. The Artistic Text tool is used for creating standalone headlines, and has the advantage that the text can be scaled just by dragging a corner handle.
There’s full support for glyph variants, with the additional ability to implement stylistic sets from those fonts that use multiple font files to create their variations. You can even select obscure type using its Unicode values.
The Paragraph Spacing controls have a couple of useful features. You can tell Publisher to ignore spacing between paragraphs of the same style: if you’ve set a Subhead style to have, say, 12pt space after it, then setting multiple lines with hard returns between them will not implement this spacing. And if you’ve set spacing before a paragraph, you can check a button to make Publisher to apply this space only between paragraphs, and not at the top of a column. An especially useful feature is the ability to override paragraph leading for selected characters, to prevent oversized text from affecting the leading of the current line.
When browsing fonts in the Type or Paragraph Styles panel – if you’re on a Mac – then you can choose from sets of fonts you’ve previously grouped in Apple’s Font Book app. This is a real bonus if you have many fonts, and want to be able to categorize them for easy identification.
As with InDesign, you can define paragraph and character styles to ensure consistency across your documents. Unlike InDesign, though, these are all contained within a single Text Styles panel; and for ease of identification, the panel shows the text in the style it defines, rather than just its name.
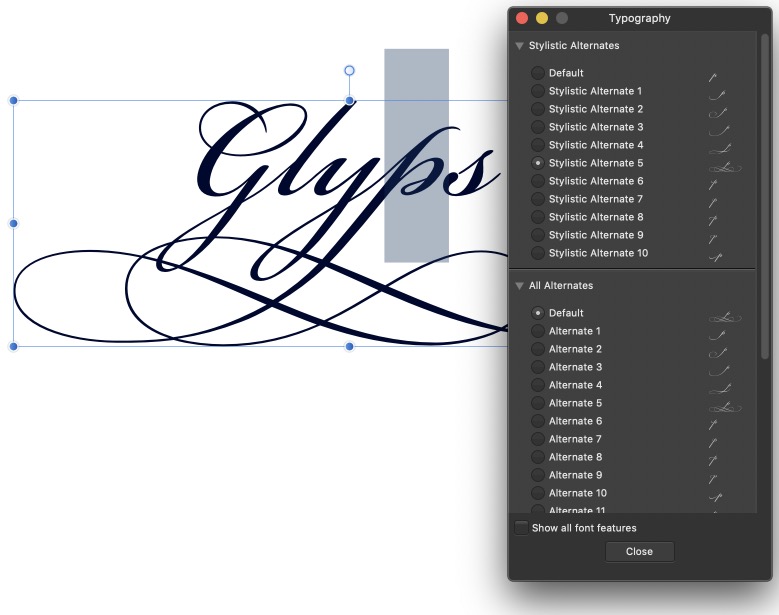
Image handling
As explained above, Publisher can call up the Affinity Photo toolset if you want to edit your images. But you can also apply a range of effects to images directly within Publisher, including outlines, blurs and color overlays. Outlines – strokes, to you and me – are smoothly drawn on cutout images, featuring none of the raggedness you might expect.
Frequently-used image assets can be stored in the Assets panel, which can hold multiple image groups for different clients or jobs. There’s also an intuitive Transparency tool, as well as gradient masks, for further customization of images.

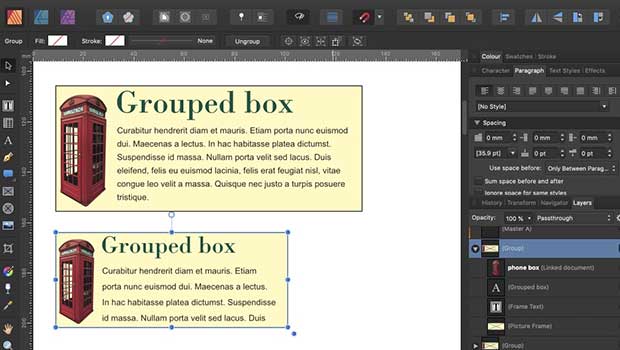
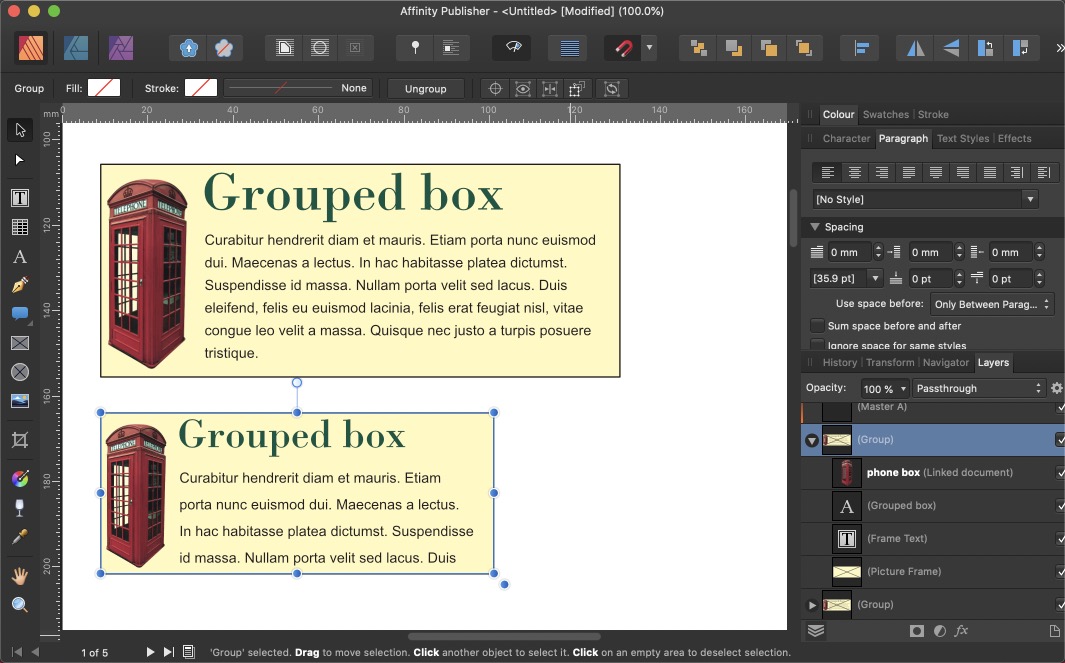
Working with groups
It makes sense to group selections of text and images together so they can be moved as a unit. Publisher also allows you to scale groups: if they contain text, then the text box will be scaled but the font size will remain the same, making the text reflow – although Artistic Text will scale with the group. And if you want to edit a single object within a group, double-clicking it will allow it to be edited independently of the group. Clicking away from it will make the group behave as a single unit once more.
A brush with history
Publisher features a History panel, which stores up to 8,000 steps in the creation of your document. You can step back and forth through the history, jump to a particular point – each step is labeled with its action – or use the slider to wind back through the document’s creation. Best of all, you can save the history with the document, so when you reopen it you’ll find all the creation steps preserved for you.

Limitations
Although Publisher can create tables of contents and indexes, it can’t yet handle footnotes or endnotes – and if you’re an educational publisher, this may well be a crunch point for you. There’s also no support for GREP styles or Nested Styles, which many InDesign users find invaluable. These features are due to be implemented in a future update, along with the ability to open IDML documents exported from InDesign – an essential feature if Affinity hopes to woo customers away from Adobe.
There’s also an issue with discoverability, as there is with Photo and Designer. To take just one example, it’s possible to add noise to both text and blocks of color, and you do this by clicking the tiny dot at the bottom left corner of the Color panel. There’s no indication that this is how to turn on this feature, either via pop-up help or in the online manual.
Conclusion
Limitations aside, there’s no doubt that Publisher is a worthy rival to inDesign. The ability to edit images and vector graphics without leaving Publisher is a huge bonus, and the innovative toolset contains many compelling features. The implementation of “missing” features in future updates will be especially welcome.
When Affinity launches its iPad version next year – with the same feature set as the desktop version – the era of mobile editing will truly be upon us. The main benefit, for most users, lies in Affinity’s pricing policy: as a one-off purchase, Publisher is sure to appeal to users unwilling to lock themselves into Adobe’s subscription model.
This article was last modified on April 23, 2021
This article was first published on July 2, 2019
Commenting is easier and faster when you're logged in!

Recommended for you

Transitioning from InDesign to Affinity Publisher: First Steps
A guide to getting started in a powerful new page-layout program.

Affinity V2: What’s New in Photo, Designer, and Publisher
The latest version of the Affinity suite is a remarkable upgrade with compelling...

Affinity Publisher: First Look
Software developer Serif has been taking on Adobe with Affinity Photo and Affini...