

In Part 1, we looked at how easy it is to create 3D text by making a minimal model in Photoshop and using Adobe Dimension to do the rest. You can use the same approach to make a 3D shape out of a vector shape, like a logo or other graphic, but you can run into a problem if the shape is too complex.
Irish comedian Dave Allen relates that a tourist visiting Ireland asked for directions from one of the locals. “Well,” was the reply, “I certainly wouldn’t start from here.” Sometimes design projects can be that way.
“It seemed like a good idea at the time”
Let’s say you have a client who wants you to incorporate a 3D-looking world map into the layout you’re creating for them: something that looks cut from a thin sheet of material. Maybe you could find a suitable stock image, but searching the web or stock image sites for just the right image could take hours. Better to make something from scratch.
The bright idea is to grab any old vector World Map™, make it a 3D extrusion in Photoshop, export this new 3D object like we did with the text in Part 1, and use Dimension to get the effect we want. (Although I’m using the map as an example, everything here applies to any vector shape you might need to work with.)
Problem: Sometimes you can’t get there from here
Open the file in Illustrator, select the outlines, copy, then paste into Photoshop as a Shape Layer.

That creates a perfect vector layer to create our extrusion. Or does it?
Normally, creating a 3D extrusion in Photoshop is as simple as targeting the vector layer and choosing 3D > New 3D Extrusion from Selected Layer from the menu. In this case, though, the map has too much detail. Photoshop gets mildly indignant and won’t cooperate.
Finding a different starting point
There are a couple of ways to work around this. One is to make the outline simpler in Illustrator using the handy-dandy Simplify command (Object > Path > Simplify).
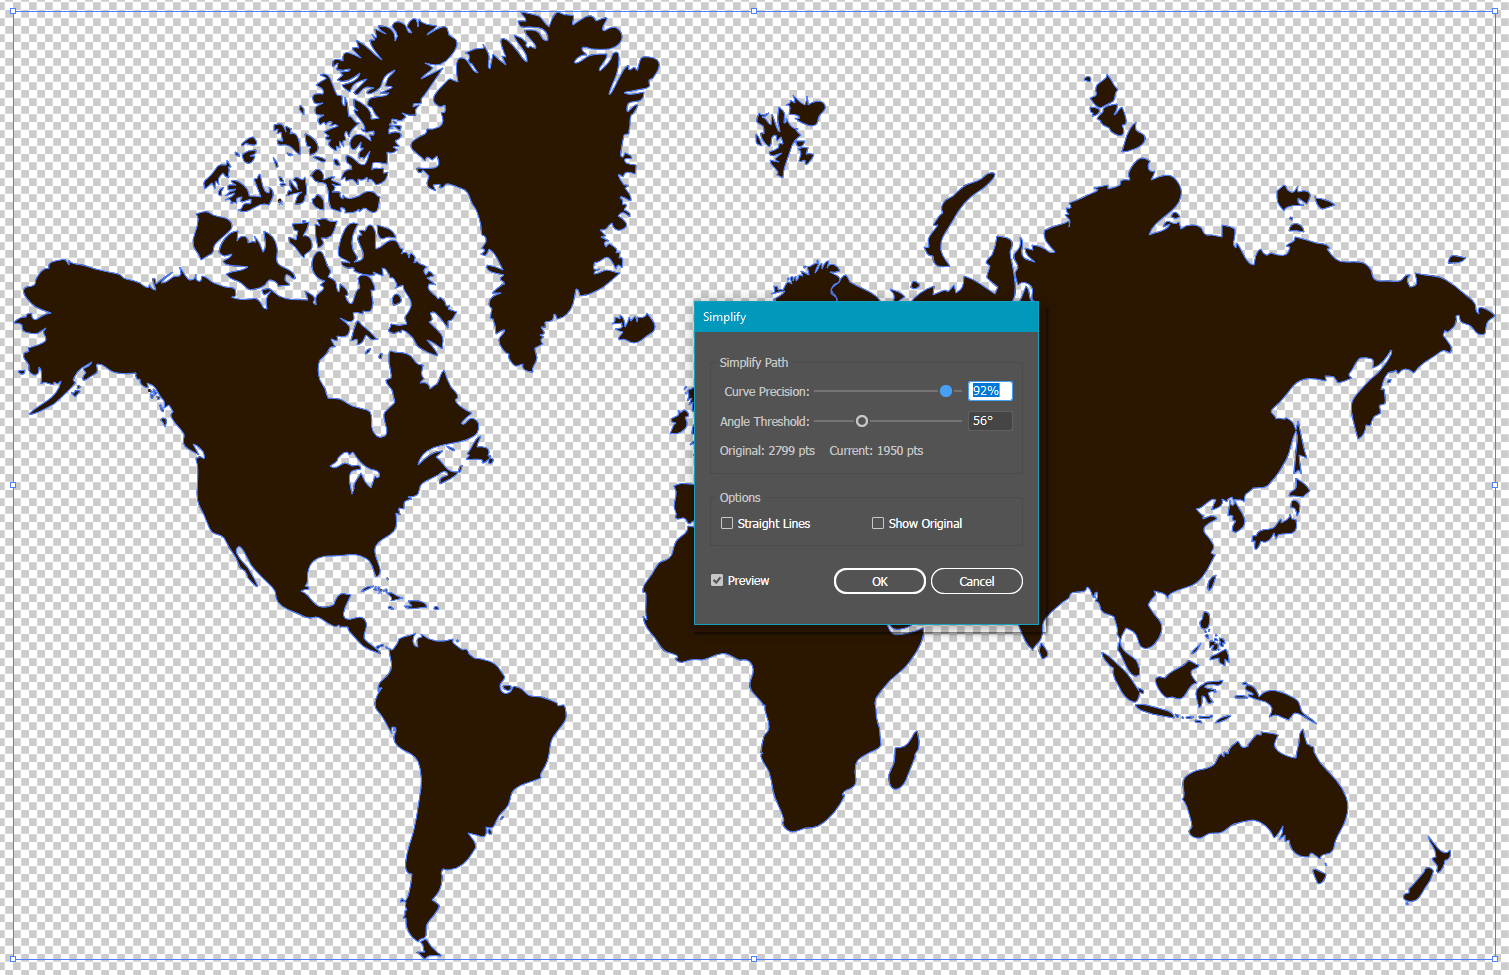
We aren’t looking for scientific accuracy, but the shapes of the major continents and land masses should at least be recognizable. Curve Precision controls how much the simplified paths can deviate from the original. The lower the value, the simpler the shapes will be. The default of 50% produces a set of unrecognizable blobs, but 92% works well in this case. Setting the Angle Threshold to 56% helps to keep the knobby bits of Canada and Greenland suitably knobby.
Another approach is to open the vector file directly in Photoshop as a raster image. In this case, you’ll want to use a high resolution, such as 300 ppi or more. Photoshop will happily extrude a raster image as complex as you like. Just be aware that it is a raster image, so that if you ever want to edit it you’ll probably have to go back to the vector original and repeat the entire creation process.

Moving on
With either of these as the new starting point, it’s time to try the outlines in Photoshop again, and this time we get our 3D Extrusion layer, complete with Photoshop’s usual over-enthusiastic extrusion depth. (Really. Where do they get this from?)
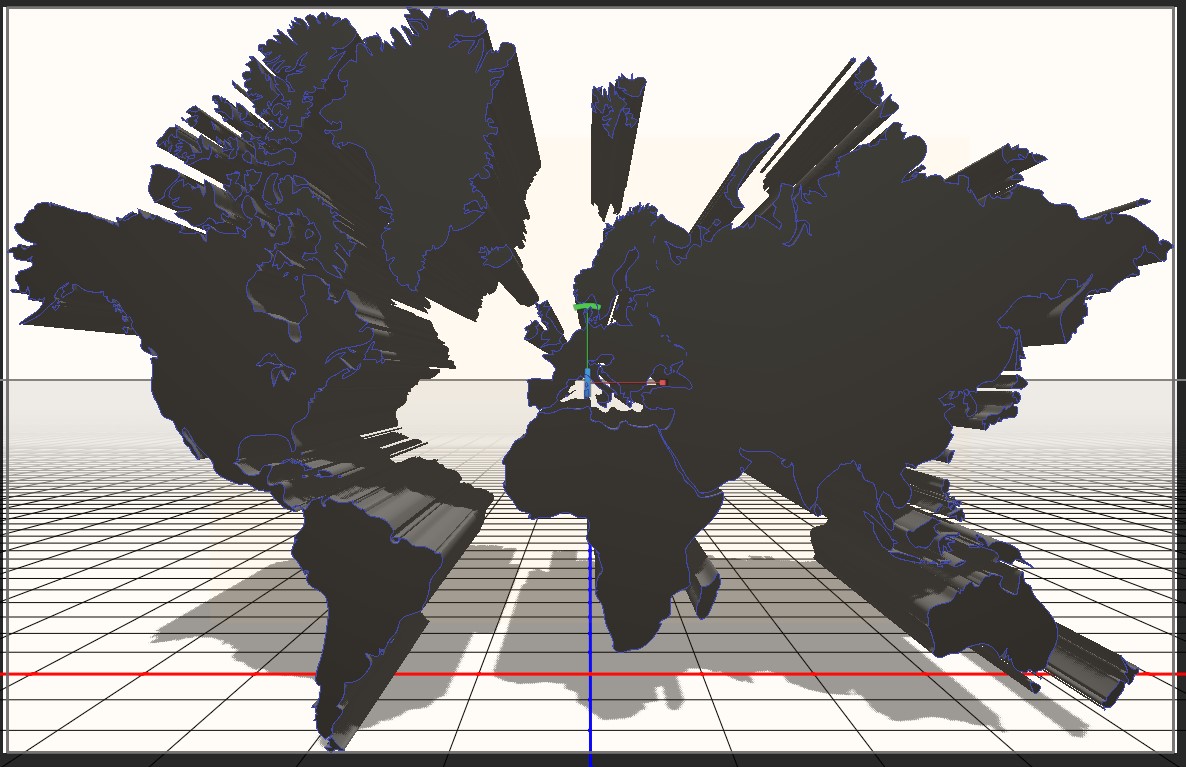
The first step, then, is to change the extrusion depth to something a bit more sensible. The newly-created shape is targeted by default, so Extrusion Depth is already showing in the Properties panel, so a careful shift of the slider fixes the problem.

Much better!
With the 3D layer targeted, choosing 3D > Export 3D Layer… from the menu opens the export dialog. As we did in Part 1, choose the Wavefront|OBJ format.

Getting there (finally!)
Open a new document in Dimension and change the size to whatever you need for your final graphic.
From the File menu, Import > 3D Model opens a navigation window filtered for 3D file formats that Dimension can handle. Just select the file you want—in this case, “3D World Map.obj”—and click open.

The model doesn’t appear on the canvas after you’ve imported it, so press F on the keyboard to put it in the center of the field of view. Dimension doesn’t import textures with the object, so the map is as plain as it could be. That’s just what we want.

Adding texture
Textures (“materials” in Dimension) are easy. You can drag and drop from the Starter Assets panel onto the surface you want to change, or select the surface and click on the material you want to add. There’s another, more exact method that is useful for imported Photoshop extrusions: using the Scene and Properties panels.
The Scene panel lists the objects in the document, immediately below Environment and Camera. In this case, there’s only one: Shape 1. Click the far-too-subtle dropdown arrow to open its material list.
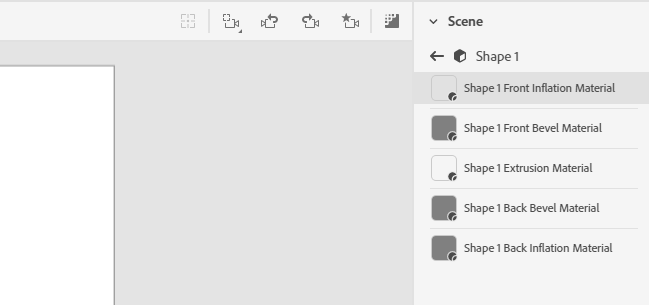
Because this object was created in Photoshop, it comes with a list of “materials” with names that refer to where they are in the model. If you’ve read Part 1, you’ll recognize them as the same ones we met on the 3D text extrusion. The “Front Inflation Material” and “Back Inflation Material” are just the front and back. The Front Inflation and Extrusion materials are the only ones we need to do anything with for purposes of this exercise.
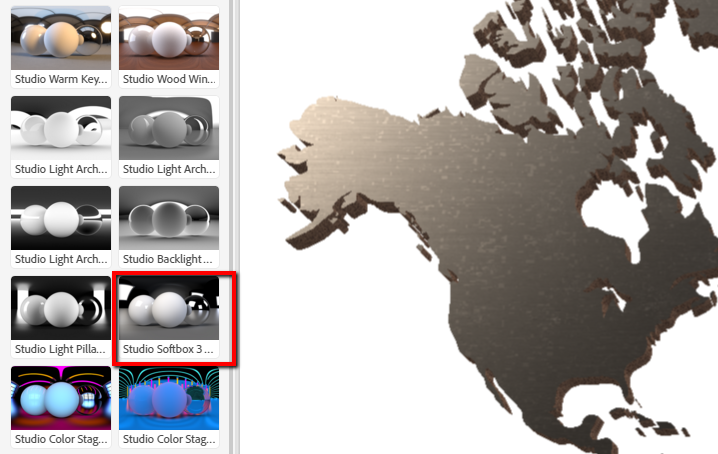
The front inflation is selected by default, so to give it a texture of Brushed Titanium (because why not?) just click in the Starter Assets list of materials. “Shape 1 Front Inflation Material” changes to “Brushed Titanium” and drops to the bottom of the list. The Properties panel changes to show the available settings.

We need to change the extrusion material, so select “Shape 1 Extrusion Material” in the list, and (because again, why not?) click on one of the wood or cardboard textures.
Enlightenment
At this point, the world is a dark and gloomy place. We want to bring a little light onto the scene.
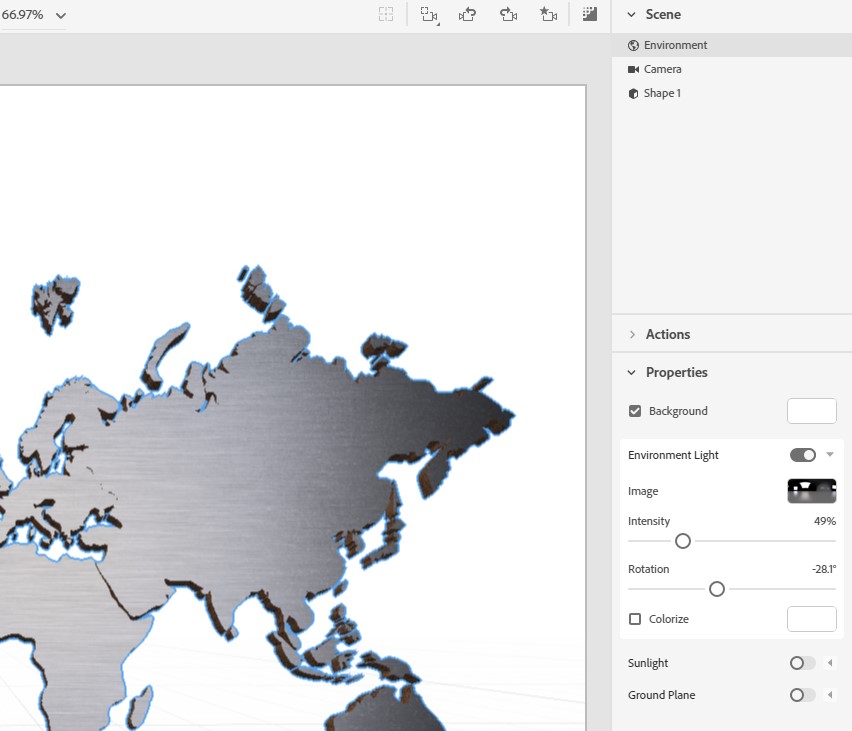
Lighting is part of what Dimension calls Environment, so select “Environment” at the top of the Scene panel, open the Lights section of the Starter Assets panel and choose “Studio Softbox 3 Point.”
In the Environment Light section of the Properties panel, move the Rotation slider until there’s a huge blown-out hot spot in the Atlantic, then reduce the Intensity to about 50%. While you’re there, turn off the Ground Plane switch so there’s no shadow being cast onto empty space, because we don’t need a shadow in our final graphic and there will be no ground plane to remove in Photoshop once we have the fully rendered graphic.
We won’t use a background image, so our world map is ready for rendering.
Render
Switch to the Render tab, choose an output file name, make sure that “PSD (16-bit)” is selected, and choose the path to your project folder. (See Part 1 for the details if you aren’t sure.)
Which render quality you choose is up to you, but I recommend choosing Low (Fast) for the first render, so that if you see something you want to change you won’t waste a lot of time. Once you are satisfied with the look, start your final render using the High (Slow) setting and pop out for a quick cup of your favorite beverage, or choose the new “Cloud” beta rendering option if you want to keep working on other things in Dimension meanwhile.
If you choose a local render, pay attention to the image that develops in the render window. You may see it reach a point where there isn’t anything useful happening in terms of increased render quality but it seems as if the render will keep going for a while. You don’t have to wait until the process is complete, because Dimension has a “snapshot” feature that allows you to save a PNG or PSD of the current state of the render without waiting for it to finish.
As soon as the Render Status panel gets past its “Estimating…” display, you’ll see a camera icon opposite the filename. Hover the mouse over it for a moment, and a tooltip pops up telling you that you can save a copy of your render at its current progress.

Click once, then choose “Save a copy as PSD” from the menu.

Post-processing in Photoshop
Open the render in Photoshop and look over the Layers panel. We’ll take a look at how to use the hidden “Additional Layers” group in Part 3. They don’t have any useful function in this example.
The hidden “Render Image” layer is also not a concern. In most cases it’s virtually identical to the visible “Render Image (Reduced Noise)” layer and can be discarded. To double check, make the hidden layer visible and change its blend mode to Difference. You’ll most likely see a completely black image, which means the two layers are identical.
The first thing you’ll probably want to do is remove or hide the solid “Background Color” layer, because you’re going to want the transparency for the final graphic. You can safely delete everything but the Render Image layer you want to keep.
The next important step is to convert the color profile (Edit > Convert to Profile) from Dimension’s “sRGB (Linear)” output to something less esoteric, such as vanilla sRGB or Adobe RGB. This heads off any possible color problems when you place the image in InDesign or Illustrator.
The graphic is now ready for use in Photoshop, InDesign, Illustrator, After Effects or Premier Pro.
This article was last modified on May 1, 2019
This article was first published on May 1, 2019
Commenting is easier and faster when you're logged in!

Recommended for you

How to Make a Solid Gold Ring With Photoshop
When a Welsh friend wanted to propose to his girlfriend, he thought it would be...

Integrating 3D Text into Images with Photoshop
This is a technique you’ll have seen in countless films and TV shows, from...

InDesign Magazine Issue 103: Adobe Dimension CC
We’re happy to announce that InDesign Magazine Issue 103 (November 2017) is...