
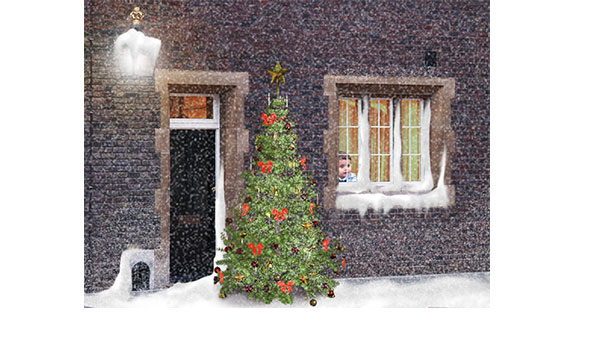
Too late to get your Christmas cards printed? You can still make an email card and save yourself the postage. Here’s how to turn an everyday view into a snow scene.
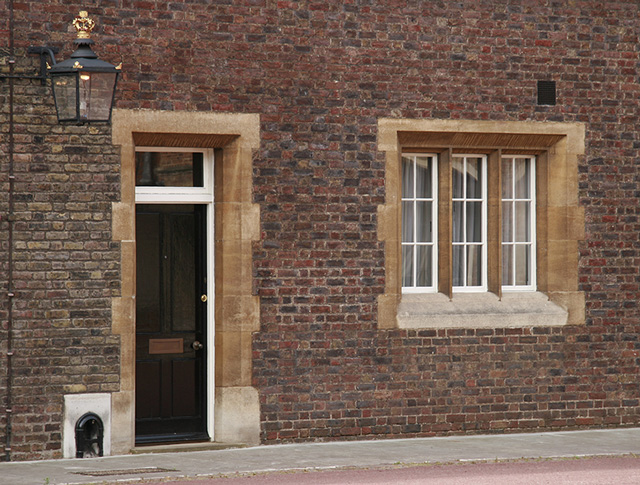
Step 1: Pick your background
Take a photograph of your house, your office, or wherever you choose. Include a window, and it’s helpful if you can feature a light source in the scene as well.
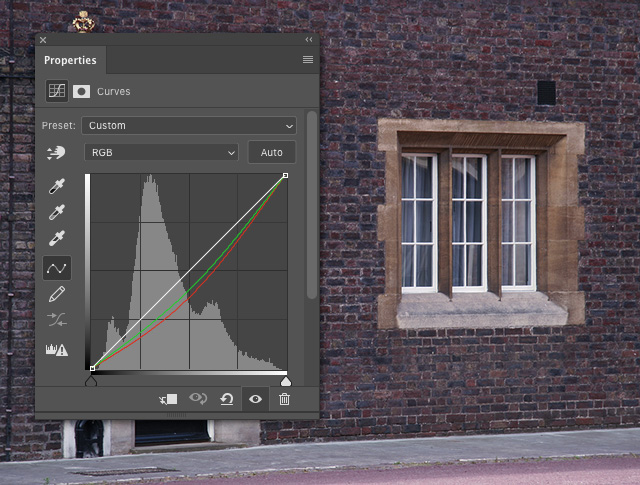
Step 2: Add a Curves Adjustment
Choose Layer > New Adjustment Layer > Curves, and choose the Red channel from the RGB pop-up menu. Grab the curve in the middle and drag it down a little way, and then drag down a little less in the middle of the Green curve to produce this darker, slightly bluer image.
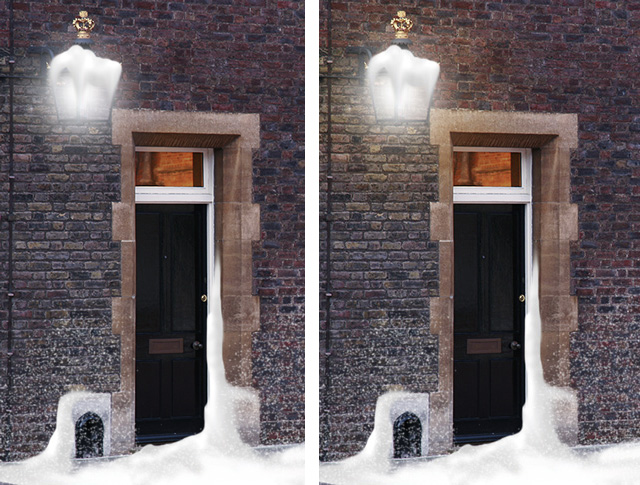
Step 3: Mask the windows
Each Adjustment Layer comes with a mask. So select the window area on that mask – I’ve also selected the glass above the door – and fill that area with black on the mask to hide it. This allows the original to show through.

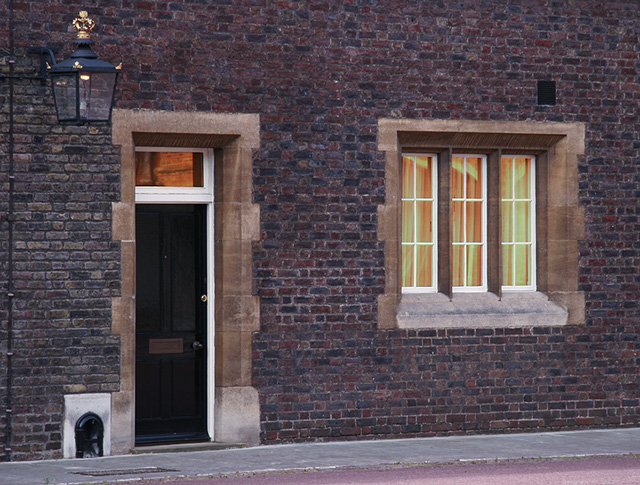
Step 4: Brighten the windows
Select the mask on the Adjustment Layer as a selection by holding Command/Ctrl and clicking on its thumbnail in the Layers panel. Use Command+Shift+I/Ctrl+Shift+I to inverse the selection, and add a second Curves Adjustment Layer. Increase the amount of red and green on this one, to make the windows look as if they’re lit from the inside.
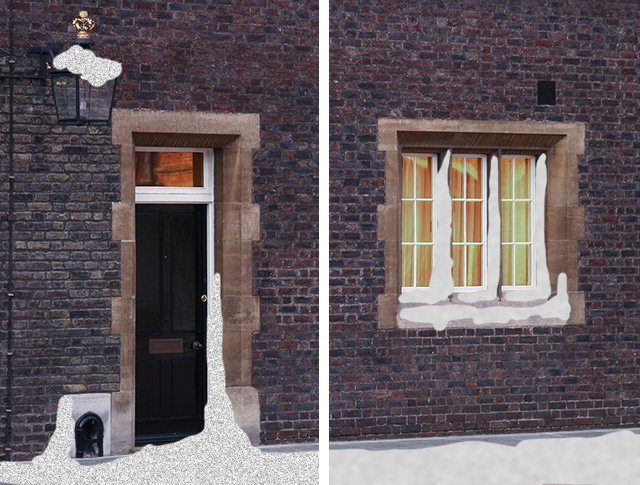
Step 5: Paint some snow
Make a new layer, and paint your snow on here with a hard edged brush. Paint in a light gray, rather than pure white, which will allow you to add highlights later.

Step 6: Add some texture
Use Filter > Noise > Add Noise to add some monochromatic noise to the snow (left), then lock the transparency using the / key. Now use Filter > Blur > Gaussian Blur to soften the noise (right).
Step 7: Paint some highlights
Use the Dodge and Burn tools to paint some highlights and shadows into the snow, to make it look more three-dimensional. You don’t have to be accurate at this stage.
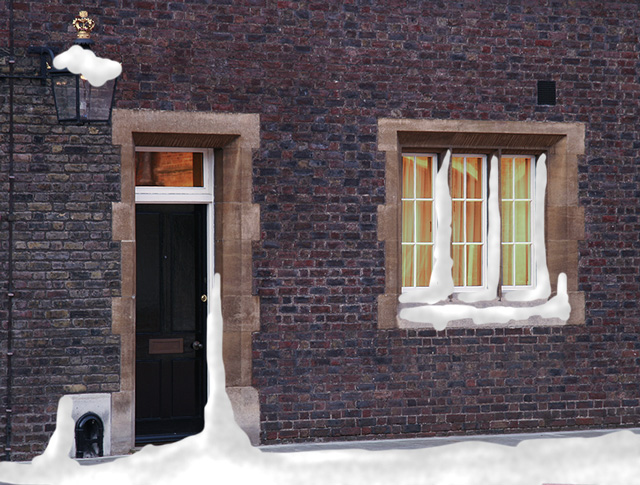
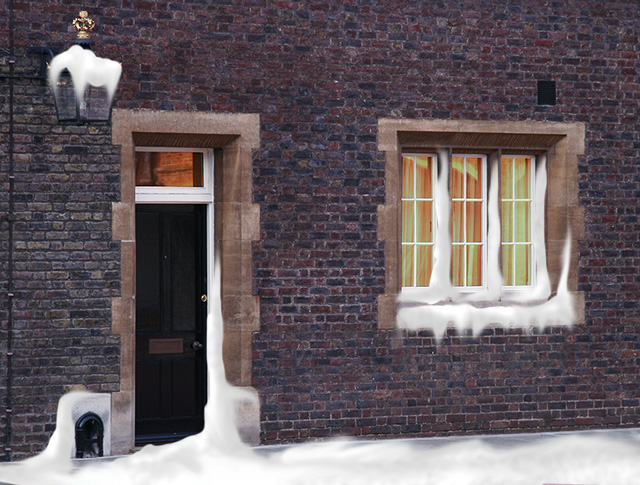
Step 8: Smudge the snow
Use the Smudge Tool, with a small brush set to about 80% strength, to smear the snow so it looks more like it’s dripping from the surfaces.
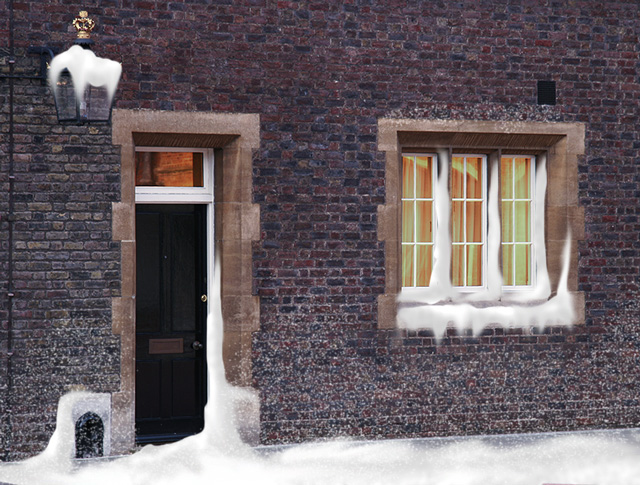
Step 9: Spray some extra snow
Choose a large, soft-edged brush, and set its opacity to just 10%. Change the mode of the brush from Normal to Dissolve, and when you paint in white it will paint a random dot texture. Paint some powdery snow on the walls.

Step 10: Soften the wall snow
Use Filter > Blur > Gaussian Blur to add a small amount of blur to the sprayed snow: about a 1 pixel radius or even less should produce the desired result.
Step 11: Light the lamp
Make a new layer. Make sure your brush is set from Dissolve back to Normal, and paint a dab of white over the lamp (left). Then go the the mask for the Adjustment Layer that reduced the amount of red and green, and paint in black around the lamp to allow the original image to show through (right).
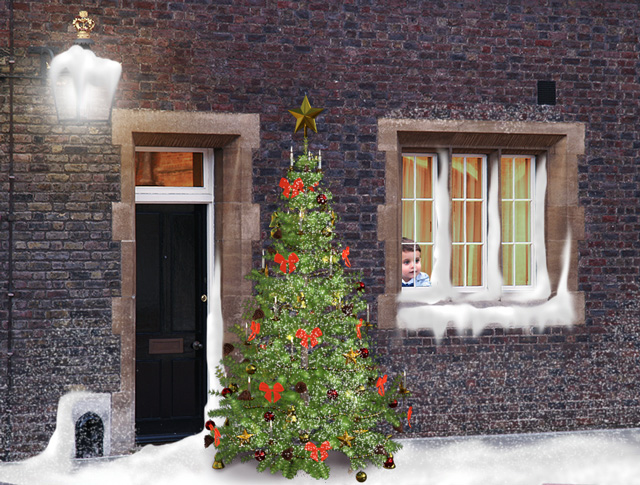
Step 12: Add a touch of Christmas
If you like, you can add a Christmas tree (you can get this one for free here). I’ve also added an expectant child (you can get this one here). To make the child fit in the window, place him in position and hold Option/Alt as you drag the mask from the window Adjustment Layer onto this layer. Unchain the mask from the layer by clicking the link between them so you can move him around.
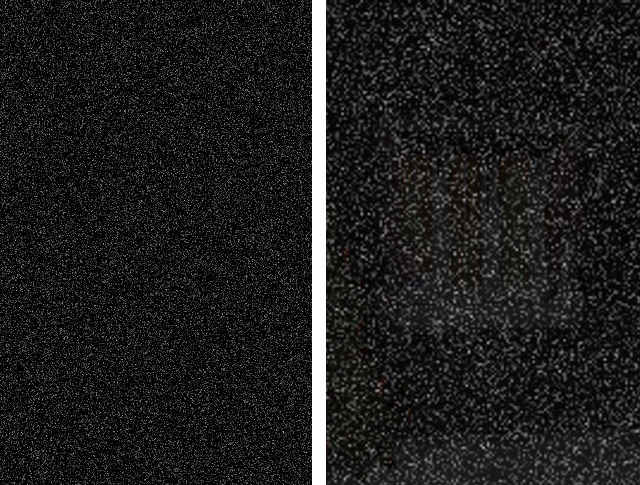
Step 13: Add some falling snow
Not Christmassy enough yet? Let it snow! Make a new layer and fill it with black, then choose Filter > Noise > Add Noise to make some Gaussian noise (left). Select about a quarter of this noise and use Free Transform to expand it to fill the whole scene (right).
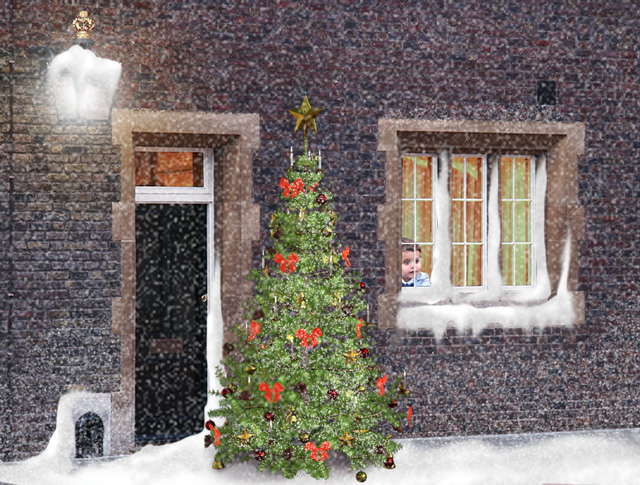
Step 14: The final step
Finally, change the mode of this new layer from Normal to Screen, so all the black disappears. You may want to reduce the opacity of this layer a little so it doesn’t swamp your image.
This article was last modified on December 20, 2022
This article was first published on December 3, 2018
Commenting is easier and faster when you're logged in!

Recommended for you

How to Create a Burnt Paper Effect in Photoshop
Creating a burnt paper effect in Photoshop is much easier than you might think....

Create Beautiful Contact Sheets Easily With DiapoSheet
If you need to build a contact sheet of images you have lots of options. You can...