


Adobe Photoshop CS2, announced last month, is poised to be the biggest upgrade to Photoshop in years. (For those of you keeping track using the old numbering system, this is Photoshop 9.) While Adobe often focuses on a few particular areas when revving an app, Photoshop CS2 adds a little something for everyone. In this installment of Framed and Exposed, I’ll show you new features tailored specifically to digital photographers and editors.
Please keep in mind that this is not a review. I’ve been using the beta version for months, but it’s just that — a beta, not the finished product, which may have changed.
Vanish and Warp
While Dutch masters of old studied and practiced for years to master a control of perspective, you can simply sit on your butt, pop open a beer, and choose the new Vanishing Point control from Photoshop’s Filter menu.
Vanishing Point lets you define single or multiple planes of perspective in your image. Once defined, Photoshop automatically scales and distorts any edits you make within these planes, so your edits magically take on the perspective of your image.

Photoshop CS2’s Vanishing Point tool automatically adjusts and scales image data, allowing you to move image data from one plane to another, with no additional editing required.
You use the Vanishing Point tool within its own modal dialog. In addition to the plane definition tool, the dialog includes a marquee selection tool for selecting and copying, a clone tool, and a brush tool. With these, you can perform automatic edits that could take hours using Photoshop’s normal tool set.

Vanishing Point’s heal option blends in underlying luminance information to seamlessly composite moved pixels.
For touch-up jobs that require distortions, CS2’s new Warp control is an alternative to the existing Liquify command. You can use Warp to create weird, Dali-like transformations, but it also has more practical, everyday applications.
The Warp control maps your selection, or the current layer, onto a mesh plane that can be distorted using simple Beziér control handles. You can re-shape the lines of the mesh just as you re-shape paths using Photoshop’s Pen tool. As you edit the mesh, Photoshop automatically distorts and stretches the selected area of your image to match.

The Warp tool lets you distort and stretch your images using a mesh grid composed of editable Beziér handles.
The Warp tool is particularly useful for compositing operations, where you might want to subtlly distort one layer so it better match an underlying layer.
The Warp tool includes a number of canned meshes, such as bulges and arches, and you can stretch your images quite a ways before they lose much sharpness. However, unlike the Liquify tool, the Warp tool makes no effort to stretch adjacent pixels, meaning your image will be “torn” when warping (unless the shape you’re warping is masked and sitting in its own layer). However, unlike the Liquify tool, you can easily and repeatedly refine your warps until you hit the OK button.
I’d like to see a few additions to the Warp tool, such as the ability to save custom warp profiles. More importantly, though, I’d like to be able to increase the density of the Warp mesh. Currently, the Warp tool provides a 3×3 mesh. Being able to add additional control points would add a lot of power.
Less Noise
Digital noise comes in two flavors, chrominance noise and luminance noise. Luminance noise appears as speckled pattern that often look like film grain. Chrominance noise appears as splotches of color, usually red or green. To battle noise, photographers employed many Photoshop techniques, such as blurring, usually trying to find a balance between noise reduction and detail preservation.
Adobe has formally addressed this problem with the new Reduce Noise filter. Offering controls for reducing both luminance and chrominance noise, the Reduce Noise filter provides good controls for attacking noise without compromising your image detail too much. A special Advanced tab lets you attack individual color channels, while a Reduce JPEG Artifacts checkbox does a fair job of reducing the boxy patterns caused by strong JPEG compression.
Reduce Noise is profoundly better than blurring, Despeckle filters, and other typical Photoshop techniques of old. Chroma noise reduction is more impressive than the filter’s luminance noise reduction. I was disappointed with the JPEG reduction, which provided variable results, sometimes softening areas of the image while offering little JPEG reduction.
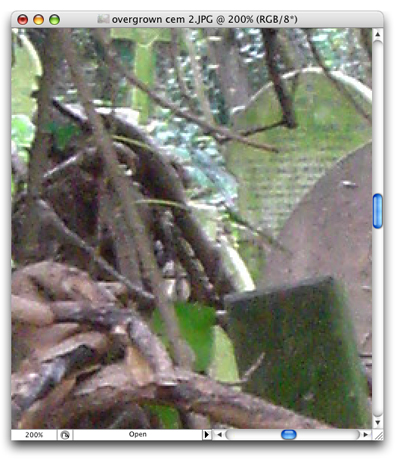

The new Reduce Noise filter does a very good job of eliminating tricky chrominance noise artifacts. The top of these two images is pre-filter; the bottom image is post-filter.
Though not as effective as software such as PictureCode’s Noise Ninja and NeatImage, Reduce Noise is a good alternative if you don’t need — or don’t want to pay extra for — a more robust noise-reduction package.
Be Healed
Photoshop’s new Spot Healing brush is a variant of the existing Healing tool that can, if you’re lucky, be a one-click solution to editing problems that would take a lot more effort with the Healing or Rubber Stamp tools.
The Spot Healing Brush samples the area around your stroke to calculate new pixels that match and blend with your image. Often, a single click is all it takes to completely erase a section of an image, filling it in with an appropriate background.
While the Spot Healing brush is good, results do depend on where you click. On some photos, clicks just a few pixels apart from each meant the difference between a successful heal and an operation that didn’t quite work.


The Spot Healing tool made short work of the sensor dust artifacts in this image (top). A single click on each spot smoothly eliminated the splotches (bottom).
In another one-click improvement, Photoshop CS2 finally brought in Photoshop Elements’ red-eye reduction tool.
Camera Raw 3.0
Between their Digital Negative Specification and the excellent Camera Raw plug-in, Adobe has done more to foster the use of raw-format digital photography than anyone else. Photoshop CS2 includes an updated version 3 Camera Raw plug-in that provides several important new features for Raw users.
For the most part, the Camera Raw interface is the same as version 2’s. New Crop and Straighten tools are at the top of the dialog. To use the Straighten tool, simply drag it along a line in your image that you want to have straight. Camera Raw automatically rotates the image and generates a crop to fit the new orientation.
New Clipping checkboxes let you turn on previews of Shadow and Highlight clipping, saving you from Option Dragging with the relevant sliders, while new Auto checkboxes make good initial guesses at exposure, shadow, brightness, and contrast settings.
Camera Raw’s sliders define a five-point tone curve that’s applied to your image. Version 3 now gives you access to the actual curve, with editable points just like in the standard Curves dialog. You may find this an easier, more familiar interface than the primary group of sliders.
One huge workflow improvement is Camera Raw 3’s ability to open multiple images. Thumbnails of each image are displayed along the edge of the Camera Raw dialog. From here, you can refine your selection. After you define settings, Camera Raw applies them to all selected images, and it can even process in the background, leaving you free to continue to work with Photoshop or to head back into Camera Raw to set up more conversions.
Raw workflow will never be as simple and convenient as shooting JPEGs or TIFFs, but with Camera Raw, Adobe has done a better job than anyone else of providing access to the raw format’s additional power and quality in a smooth effective workflow.
Adobe Bridge
While Photoshop CS1 introduced a revamped File Browser with excellent Camera Raw integration, Photoshop CS2 throws out the File Browser completely and replaces it with Adobe Bridge, a stand-alone application that provides File Browser-like capability with many refinements. Most importantly, Bridge can now communicate with all applications in the Creative Suite, making it a single browser/organizer that can automate much of your graphics production workflow.
For digital photographers, Bridge provides all of the same facilities as the old File Browser, including the ability to append or replace metadata, and to apply Camera Raw settings for automated Raw workflow.
Navigation features are much improved, as is the general interface, which now offers variable thumbnail sizes, searching, and much more.
HDR and More Sharpening
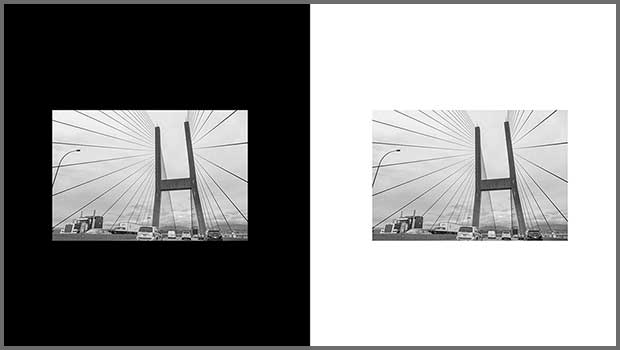
High Dynamic Range Images are 32-bit images that are regularly used in 3D rendering, animation, and compositing. Photoshop CS2 includes a new Merge to HDR option that merges a series of bracketed images into a single 32-bit image with substantially more dynamic range than you could capture in a single image. After merging, Photoshop opens the resulting image in the new 32-bit mode. Accurate registration is essential for good merges, and the Merge to HDI dialog lets you easily activate and deactivate images.
In addition to giving standalone noise reducers a run for the money, Photoshop CS2 also competes with other companies’ sharpening products. The new Smart Sharpen filter has Amount and Radius sliders, just like the normal Unsharp Mask dialog, but augments these with a pop-up menu for selecting the type of blur you want. You can select Gaussian blur, camera blur, and motion blur (with a separate control for specifying the angle of the blur). An Advanced tab lets you control how your sharpening operation affects the Shadows and Highlights in your image.
Smart Sharpen is very impressive. Like Unsharp Mask, Smart Sharpen works by fiddling with the acutance of your image — increasing the contrast of details and edges in your image — and so is still susceptible to the oversharpening halos that Unsharp Masking can produce. But unlike Unsharp Mask, Smart Sharpen does an excellent job of sharpening fine details, without exaggerating noise and texture in your image.
As with Reduce Noise, Smart Sharpen doesn’t provide nearly as much control as third-party sharpening programs, but it’s certainly a welcome replacement to Unsharp Mask.
Re-Tuned
There are many smaller changes throughout Photoshop. Other highlights:
- Improved 16-bit support. With each new version, Adobe adds a smattering of tools to 16-bit mode, and CS2 is no different. Liquify and Lens Blur now work in 16-bit mode, as do the new Reduce Noise and Smart Sharpen filters. In addition, the Shadow/Highlight tool now works in CMYK and LAB mode at 8 and 16 bits.
- Optical Lens Correction. A new Lens Correction filter is a single interface for eliminating barrel and pincushion distortion, chromatic aberration, vignetting, and perspective. Well-designed and easy to use, this great addition provides far better results and easier workflow than any of the traditional manual solutions to these problems.
- New RAM capacity. Photoshop CS2 can now address roughly 3.5 GB of RAM (as long as you’re running a Power Mac G5 or a Windows XP 64-bit Edition system running an Intel XEON processor with EM64T, AMD Athlon 64, or Opteron processor).
A Few Nits
Photoshop still has its frustrating weak points. After all this time, the program is still not fully 16-bit, something its now-defunct competitor, Color Studio, provided years ago. (Granted, all of the critical features that digital photographers need are 16-bit capable now.) Similarly, there’s still no way to apply filters as Adjustment Layers, something Live Picture, Photoshop’s other now defunct competition, was also able to do years ago.
But Photoshop CS2 promises to be an enjoyable upgrade for digital photographers. There are no huge interface changes, meaning it continues to work the way you expect, while the new editing additions, filters, and workflow improvements provide immediate improvements in your editing toolbox.
This article was last modified on December 14, 2022
This article was first published on April 19, 2005
Commenting is easier and faster when you're logged in!

Recommended for you
How to Perceive Brightness More Accurately
Learn how to control the key factors that can affect how you perceive brightness...

CreativePro Video: Using the Touch Type Tool in Illustrator
In this week’s CreativePro video, Mike Rankin demos how to adjust type with Illu...

Turn Your Mobile Phone into a Microscope With the Micro Phone Lens
Got a smartphone or tablet? Like macro photography? Then you might want to check...