

Maybe I’m obsessive, but few things in InDesign annoy me more than a line or frame that’s almost straight. Something that’s just a teeny bit “off” is like an itch I have to scratch. It can happen when someone selects an edge or endpoint with the Direct Selection tool and drags or nudges with an arrow key. Sometimes it can be hard to notice when frames or lines are just slightly askew.
A corner point of one of these frames is 1 pt off, but at 100% magnification, you can’t see it.

But if you zoom in or out, the culprit is revealed.

One of the lines below is slightly diagonal. If you select them with the Direct Selection tool it can be hard to see which one, regardless of your magnification level.
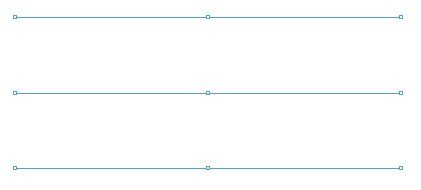
But if you use the Selection tool, you can spot it a mile away.

When the lines are given a stroke, it’s even more apparent which one is different. With a diagonal line, you get the full set of control handles instead of just the two at the ends of the line.

There’s one more clue. Look at the Reference Point in the Control panel. You can see whether a line is vertical,

horizontal

or diagonal (even by just .001 pt)

So now that you’ve found these things, how do you fix them quickly so you can get on with obsessing about other things? Go to the Object menu and choose Convert Shape > Rectangle. Any points inside the object’s bounding box are moved out to the edges of the bounding box to make a perfect rectangle. It also works with multiple frames selected.
So you can go from this
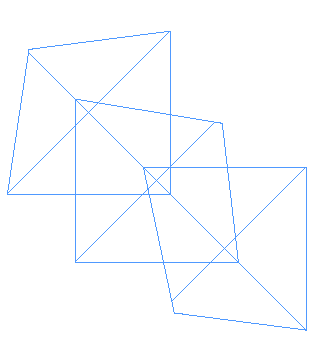
To this

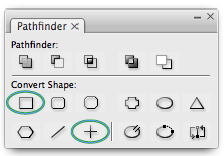
For lines, choose Convert Shape > Orthogonal Line. This former Obscure Feature of the Week-eek-eek will make the line perfectly vertical or horizontal.
You can also find the Convert to Rectangle and Orthogonal Line commands in the Pathfinder panel.
Ahh, that feels much better.
This article was last modified on December 19, 2021
This article was first published on March 12, 2009
Commenting is easier and faster when you're logged in!

Recommended for you

Scanning Around With Gene: The Almost-Lost Art of Decal Printing
If all my dreams came true and I had unlimited time and funding, I’d spend a goo...

Making Long Shadows in InDesign
I was watching Justin Seeley’s recent video about making long shadows in Illustr...