
Cleaning Up In QuarkXPress
Clipping paths — invisible lines that hide unwanted portions of an image — are a page designer’s best friend. How often must you work with an image that has an ugly or distracting background? A properly done clipping path will banish that background. Images often come with embedded clipping paths, but even these may need modification. You can also create one from scratch within QuarkXPress.

A white background makes this photo of a wine glass seem clunky, not elegant.
In many cases, clipping paths that are automatically generated — whether in XPress or another application — are imperfect because computers can’t subjectively evaluate image content and determine the appropriate position for a line.
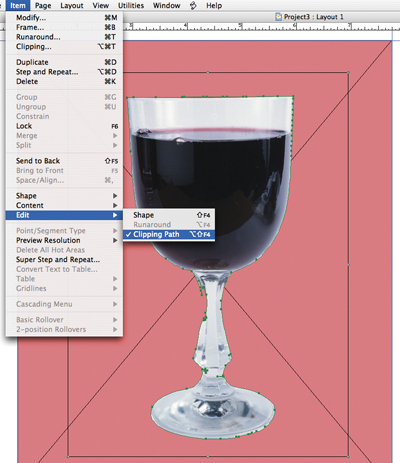
This clipping path (represented by a green line) was generated in XPress by selecting the image, going to Item>Modify, clicking the Clipping tab, and choosing the Non-White Areas option in the Type drop-down menu. Because much of the glass stem has little or no variance from white, XPress clipped some of the stem.
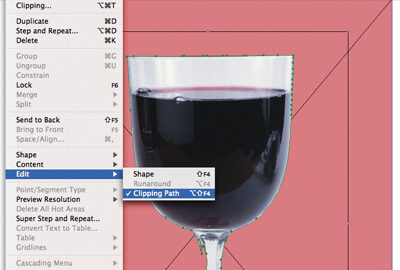
To bring back the missing stem, go to Item>Edit and make sure Clipping Path is on. Now you can select and modify an individual path segment by clicking once on the segment. To modify an individual anchor point, click once on a solid green point. If you select an anchor point, the point becomes hollow and the point’s control handles appear. If you select a path segment, both related anchor points are selected and the control handles of each point are visible.
Bend Bézier Lines
You modify clipping paths just as you would modify any Bézier line:
- Reposition a point or segment by selecting it and dragging. Pressing the Shift key constrains the movement to 45° angles.
- Change the shape of a segment by dragging the control handles of the related anchor points.
- Add anchor points by pressing the Option/Alt key and clicking on a path segment.
- Remove anchor points by pressing the Option/Alt key and clicking on any existing point.
- Change the type of an anchor point or segment by selecting it and choosing from the Item>Point/Segment Type menu.
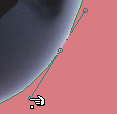
The cursor’s appearance tells you what you can modify.

A diagonal line beneath the pointing hand means you can drag the line segment.
A white dot means you can drag the control handle.
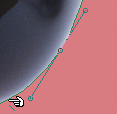
A black dot means you can drag the anchor point.
When you’re satisfied with the clipping path, toggle off Item>Edit>Clipping Path to prevent change, intentional or inadvertent.
Finishing Up
Now go to Item>Modify and click the Clipping tab. The Type menu should reflect that the clipping path is a User-Edited Path.

Your Modify dialog box should look like this.
You can always revert to another type of path (Embedded, for example). But beware: If you change the Type menu to something other than User-Edited Path, you may not be able reapply the path you modified. User-Edited paths are not stored once you remove them. Depending on the number of actions you set in your Undo preferences and how long it’s been since you changed the path, you can restore the path using the Undo command. You cannot recall the user-edited path in the Modify dialog box.
This article was last modified on January 3, 2023
This article was first published on April 12, 2005
Commenting is easier and faster when you're logged in!

Recommended for you

Sometimes a Logo Is Just a Logo
The recent hubbub surrounding Quark’s new logo has raised several question...
CreativePro Tip of the Week: Resetting the Bounding Box of Objects in Illustrator
This CreativePro Tip of the Week on resetting the bounding box in Illustrator wa...

How to Create a Snow Scene in Photoshop
Too late to get your Christmas cards printed? You can still make an email card a...