


Gathering Video Assets for Premiere Projects
Import, acquire, animate, and use AI to generate video content for Premiere

This article appears in Issue 61 of CreativePro Magazine.
If you’re a graphic designer who is new to Premiere, you may not be aware of what you can use as visual assets for your video content. In this article, I’ll give you an overview of:
- Importing videos
- Creating content within Premiere
- Animating still images
- Using Adobe Firefly to generate video
- Extending a clip using generative AI
Creating a Project and Importing Video
To import video and animated clips into Premiere, you have to have a place to put them. You need to open an existing project or create a new one.
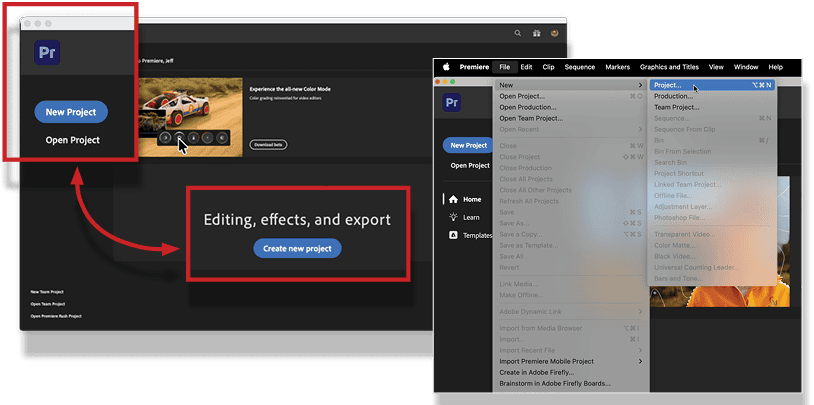
The Home screen offers you two ways to create a new project and get started assembling video files. You can click New Project on the left or Create New Project in the center. You can also choose File > New Project (Figure 1).
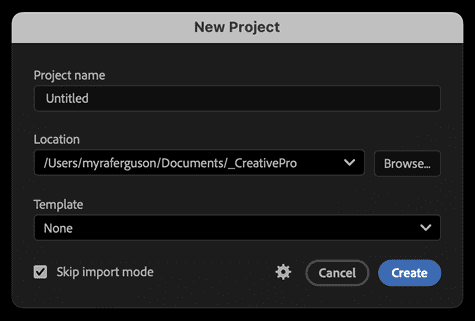
In the New Project dialog box that opens, give your project a name and determine where you want to save your data (Figure 2). If you want to select a template to base the project on, you can do so here too.
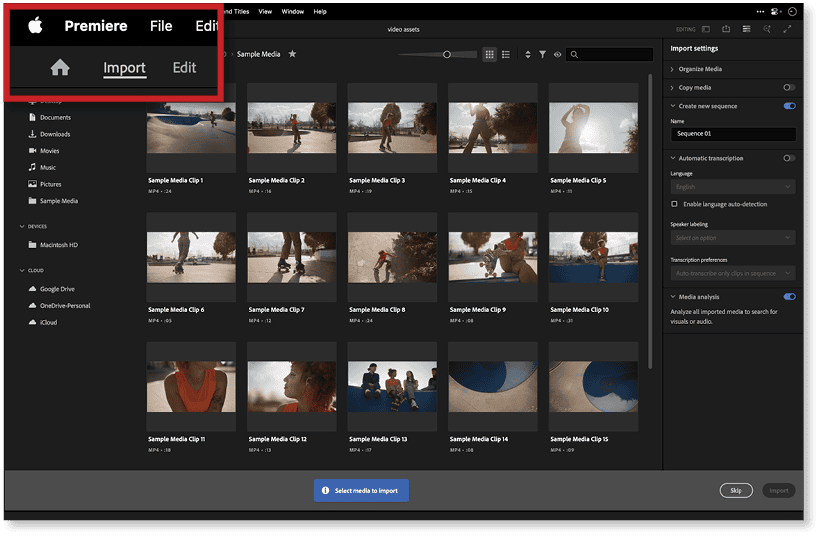
When you click Create and leave the Skip Import Mode option unchecked, Premiere will open in Import mode (Figure 3), where you can immediately navigate to the asset you want to import, whether it’s on your system’s hard drive, a connected device, a cloud-based source, or a network location.
Tip: I recommend working on your local hard drive, if possible, to avoid any issues that could potentially break the links to your assets.
Select your files with the assets you want to use and click Import.
When you select the Skip Import Mode option in the New Project dialog box, Premiere creates a new project and takes you directly to Edit mode (Figure 4).
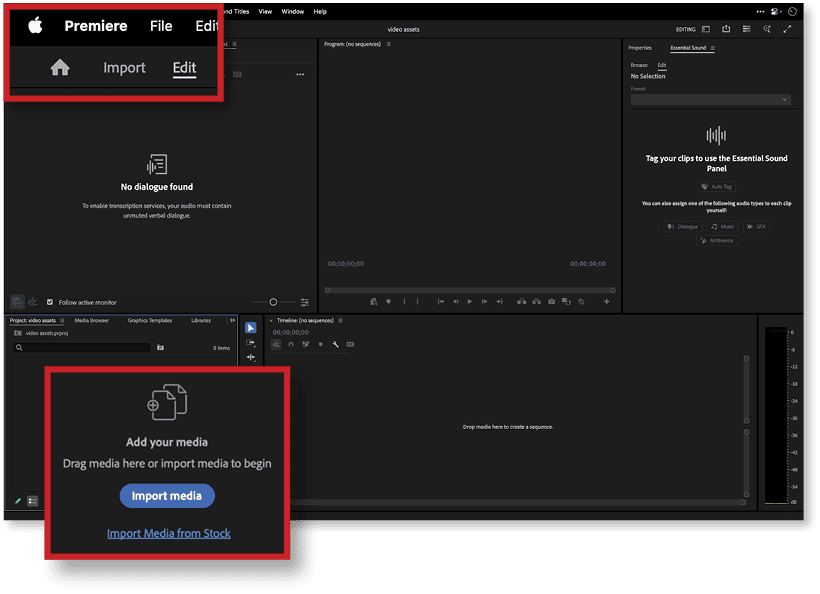
From here, you can import your assets from the Project panel. (If the Project panel isn’t open, go to Window > Projects and select the name of your project in the submenu.)
Of course, your Project panel will contain no media assets when you start—it will display a blue Import Media button. Click it to navigate to your first media file.
If you’d rather, you can import your files by double-clicking the rectangle below the Edit mode search bar (top left) or by right-clicking there and selecting Importto open the Import dialog box (Figure 5).
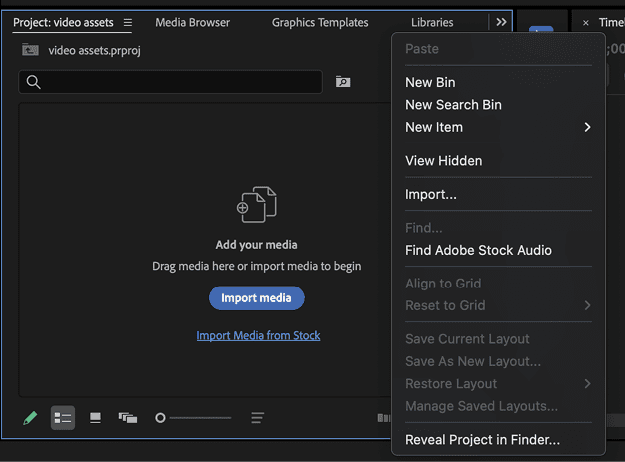
Premiere can import a wide variety of formats, including those from various cameras and phones. You can confirm if a file type is supported in Premiere’s online help.
Creating Content within Premiere
While in Edit mode, you also can create content within Premiere by using various tools, customizing templates, and generating some specific types of assets.
Tools
Look to the Tools panel (Window > Tools) for such content-creation tools as the shape tools (Rectangle, Ellipse, and Polygon tools), the Pen tool, and the Type tool (Figure 6). You can use these to create shapes or masks for animations.
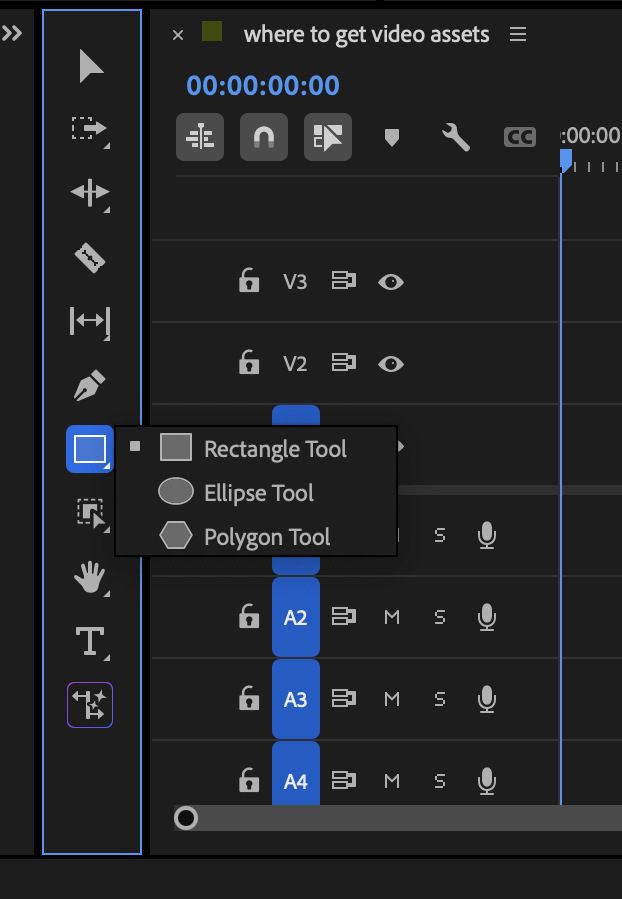
Figure 6. The Tools panel offers multiple ways to create content, such as the Pen tool, the Rectangle tool, the Ellipse tool, the Polygon tool, and the Type tool.
Graphics templates
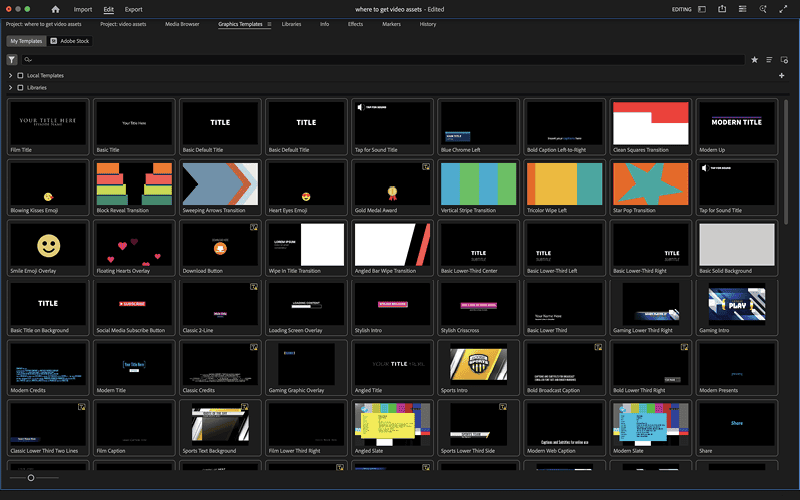
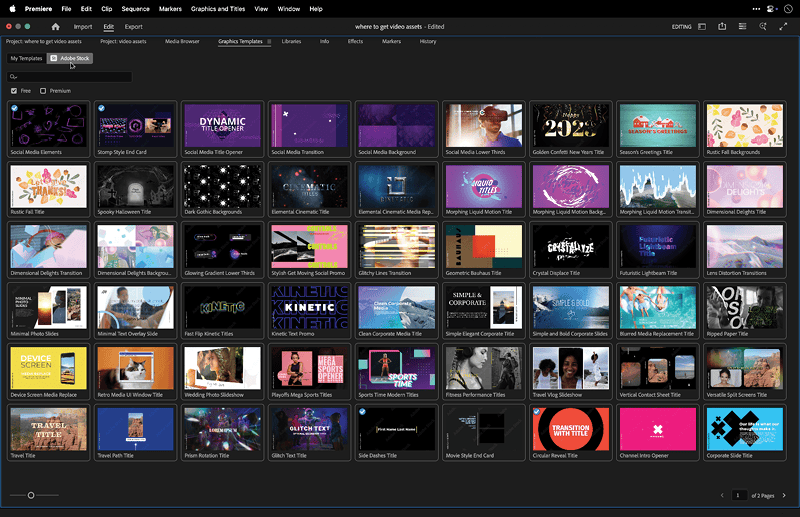
From the Graphics Templates panel (Window > Graphics Templates), you can choose and customize templates to create such assets as titles, lower thirds, credits, or captions (Figure 7). If the many built-in templates don’t quite fit your needs, you can download more fromAdobe Stock. Simply click the Adobe Stock tab, select either the Free or Premium option, and start browsing templates (Figure 8).
Traditional video assets
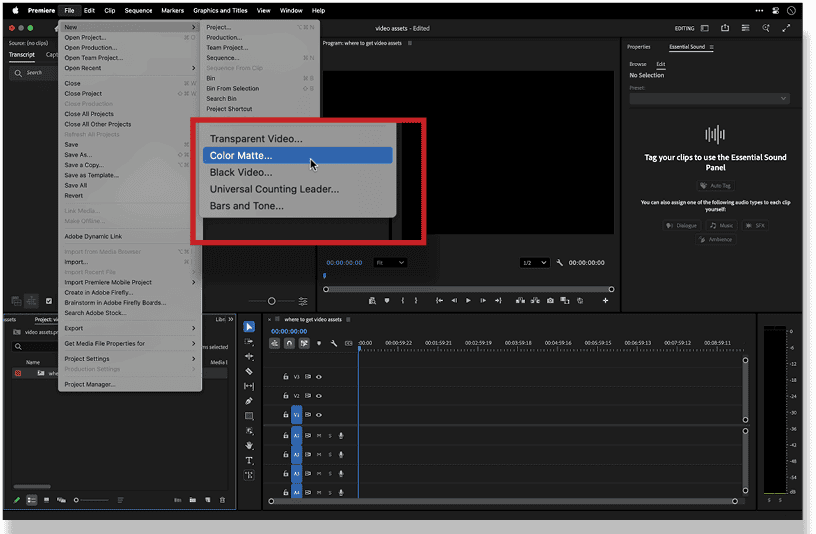
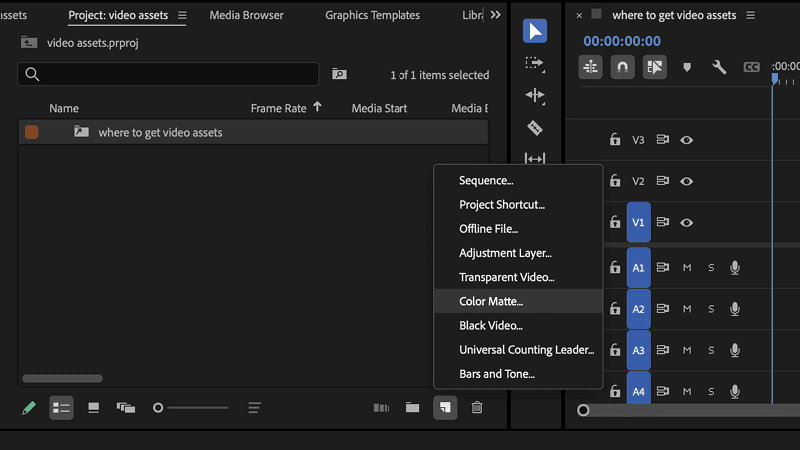
Other assets you can create in Premiere may not be as obvious but are useful standard video elements. Choose File > New or click New Item in the Project panel (lower right) to see the list: Bars And Tone, Black Video, Color Matte, Universal Counting Leader, and Transparent Video (Figures 9 and 10). As a new user, you’ll most likely need Black Video or Color Matte only. You can use Black Video to create a placeholder or a background for text. If you prefer colored placeholder frames or backgrounds, use Color Matte instead.
Adjustment layers
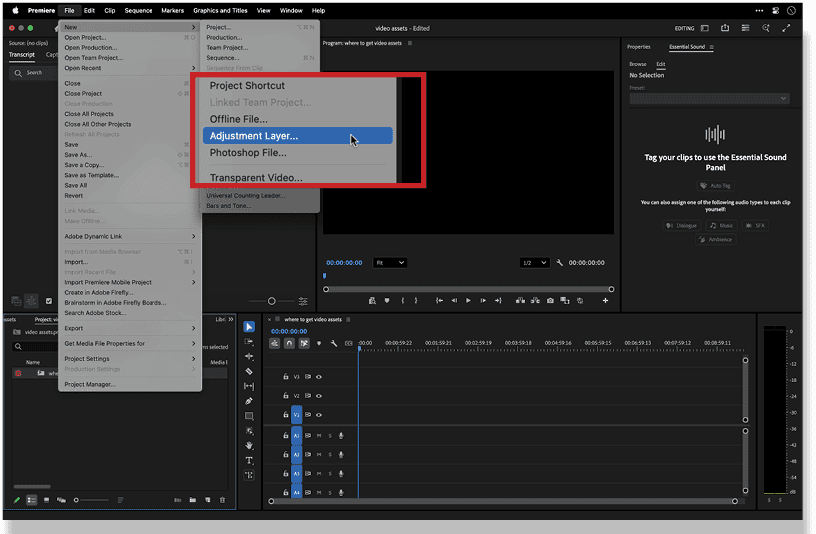
You can modify the appearance of video tracks using another type of asset: an adjustment layer. To create one, choose File > New > Adjustment Layer or click New Item in the Project panel and select Adjustment Layer (Figures 11 and 12). When using the File menu method, make sure the Project panel is selected (it has a thin blue line around it), otherwise the Adjustment Layer option will be grayed out.
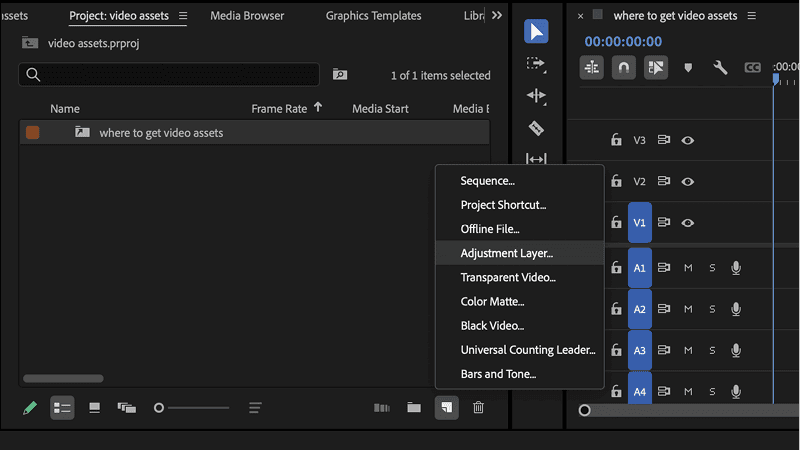
Like Photoshop adjustment layers, the effects on Premiere adjustment layers affect the layers below them. In Premiere, however, you can apply multiple effects to a single adjustment layer to enhance the layers below.
Animating Still Images
You can also create video content starting with a still image. Premiere includes features for animating properties such as Position, Scale, and Opacity in addition to a large selection of video effects.
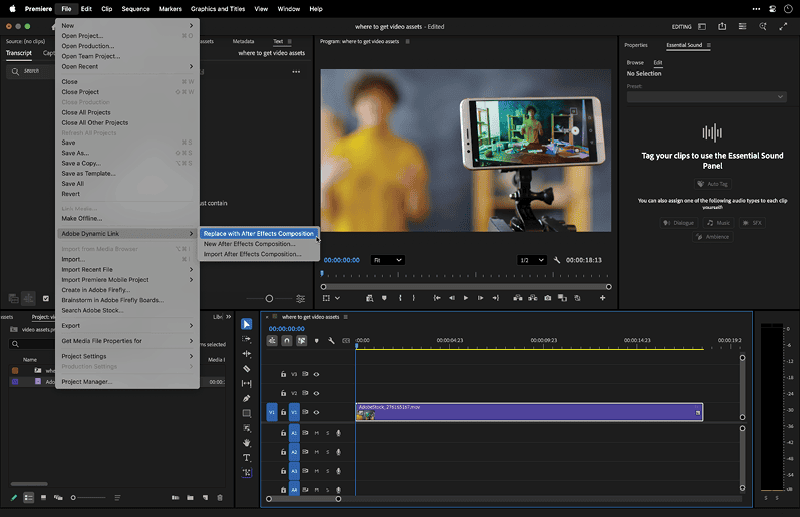
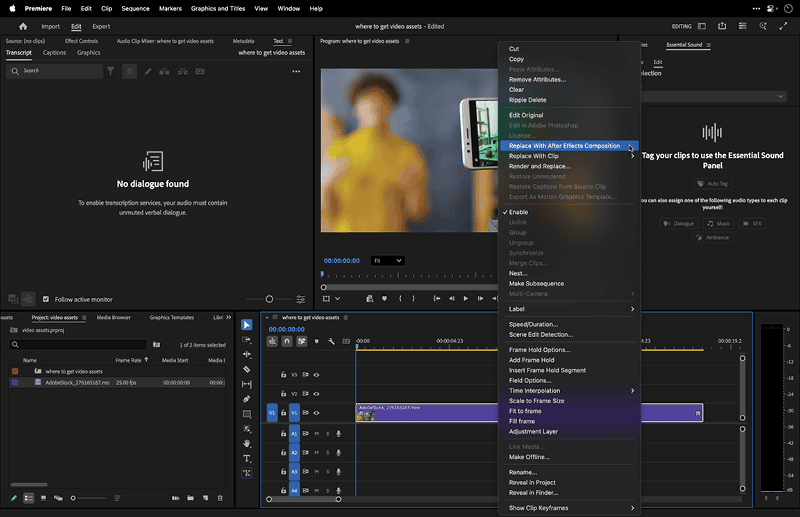
If you need more sophisticated animation or effects, you can send a selected clip from a Premiere sequence to After Effects by either choosing File > Dynamic Link > Replace With After Effects Composition or right-clicking the selected clip and selecting Replace With After Effects Composition (Figures 13 and 14.)
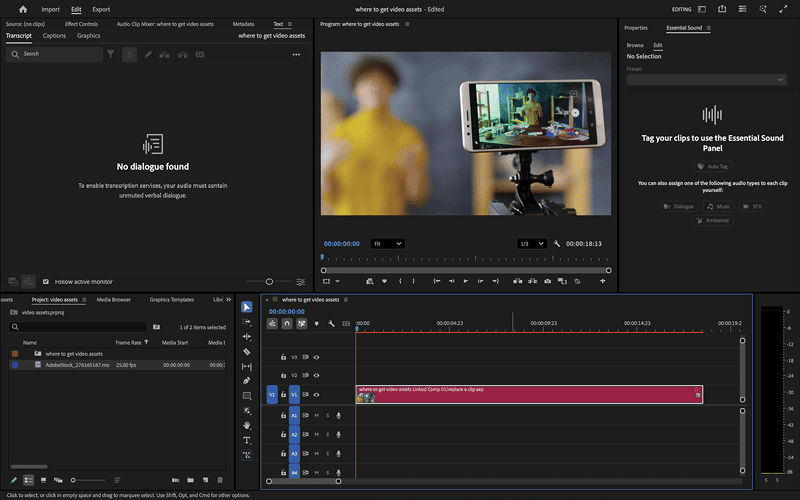
Although adding After Effects animation is outside the scope of this article, in general, you apply effects to the clip, save it, and return to Premiere. Then the clip in the Premiere sequence is automatically updated with the changes applied in After Effects. In the Premiere timeline, the clip from After Effects appears in rose to indicate it was transferred with Dynamic Link (Figure 15). If you’d like to customize the colors that indicate the different types of assets in the timeline, you can go to Premiere > Settings > Labels on macOS or Edit > Preferences > Labels on Windows.
Generating AI Video Using Firefly
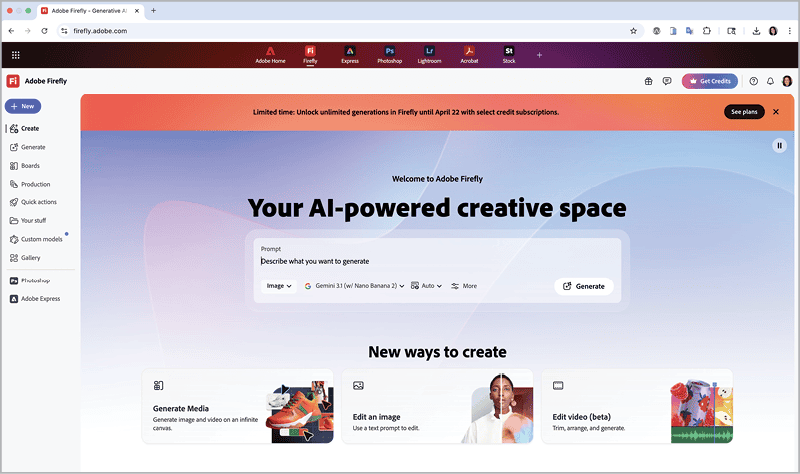
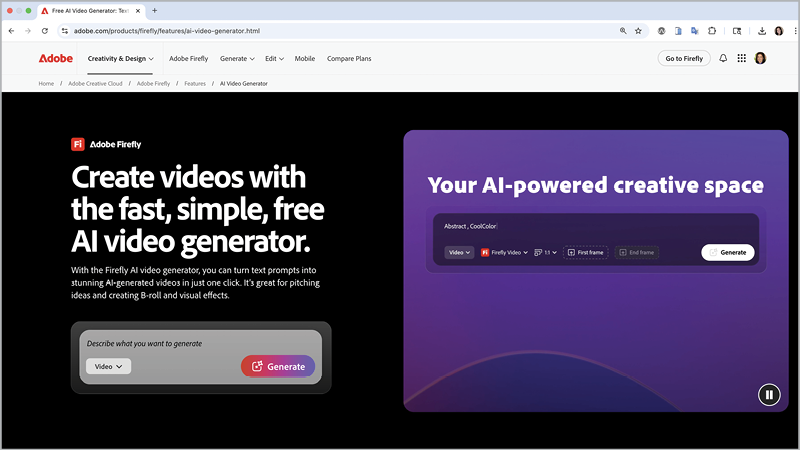
If you don’t have recorded video, stock video, or animated content that will work for your project, you can use the text-to-video capabilities of Adobe Firefly, available directly on the web (Figure 16) or via Adobe’s website (Figure 17). Enter a prompt or upload a reference image for Firefly, and it will create a five-second video for you.
To create a video in Firefly, choose New > Generate New Video (or click Create), and in the menu beneath the Prompt, choose Video (Figures 18 and 19).
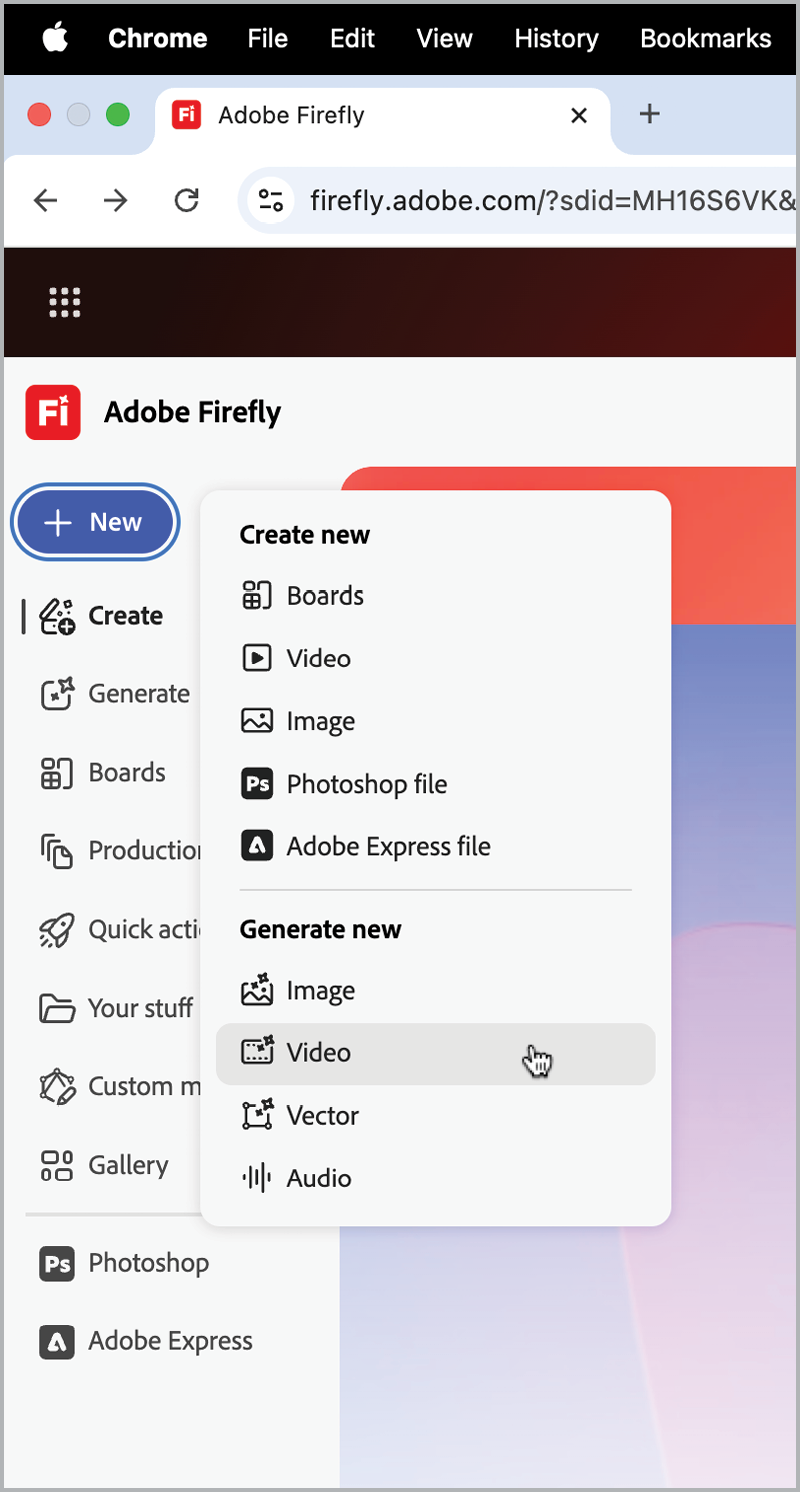
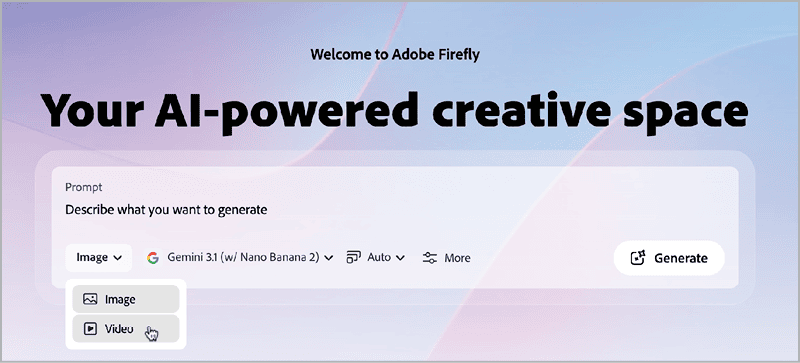
Enter your prompt, then click Generate. If you choose New > Create New Video instead, then Firefly will open the Video Editor page (currently in beta). Here you have more control over how the new video is created: You can enter a prompt, set the AI model to generate the video, select the aspect ratio, add an optional reference image for the first frame, and add an optional reference image for the end frame. If you click More, Firefly will take you to the Generate Video page where you can access additional settings that vary based on which AI model you select (Figure 20).
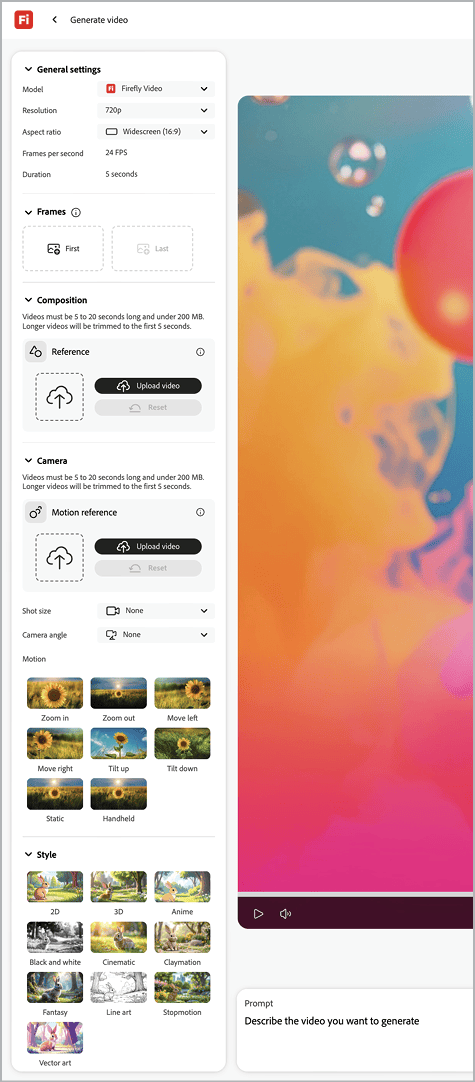
Tip: When deciding which AI model you want to select, it may help to consult the Partner Models in Adobe Products page for text-to-video partners to evaluate the qualities that each features.
Each AI video clip is Firefly generates is 5 seconds. If you’d like to make a longer sequence, add the last frame of the generated video as the reference image for the next prompt. Repeat as needed. You can then assemble all the clips together in Premiere.
Creating generative AI content using Firefly usually requires generative credits with some exceptions for promotions. On average, generating video requires more credits than generating an image. To see how many credits are required, consult the How many generative credits do premium features use? section of Adobe’s Generative credits FAQ page.
Note: In addition to going to Firefly.com to generate video, you can now use the Generative Media Tool in Premiere version 26.5, introduced in September 2026.
Extending a Clip Using Generative AI
Sometimes you may find the almost perfect clip for your project, but it’s too short to fill the space where you need to put it. The new Generative Extend feature in Premiere can help you out. This feature can add up to two seconds of content to your clip, but it comes at a hefty cost of generative credits. Single app plans and the Creative Cloud Standard plan come with only 25 credits per month, so you’ll need a plan that offers premium feature access and ample credits to use Generative Extend.
More Premiere Tips
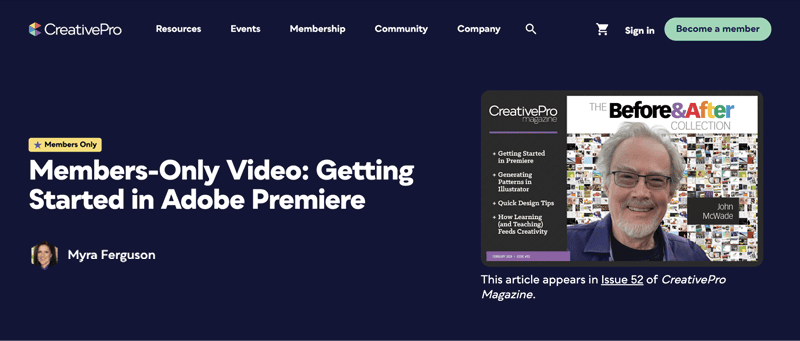
Now that you’re familiar with how to import, acquire, customize, and create your own video content, I hope you’ll see what you can make with Premiere. If you need a little more help and instruction to get started, please see my Members-Only Video: Getting Started in Adobe Premiere (Figure 21).
Commenting is easier and faster when you're logged in!

Recommended for you
How to Make Motion Look Realistic in Premiere
Create a convincing animation in Premiere using the Transform effect.
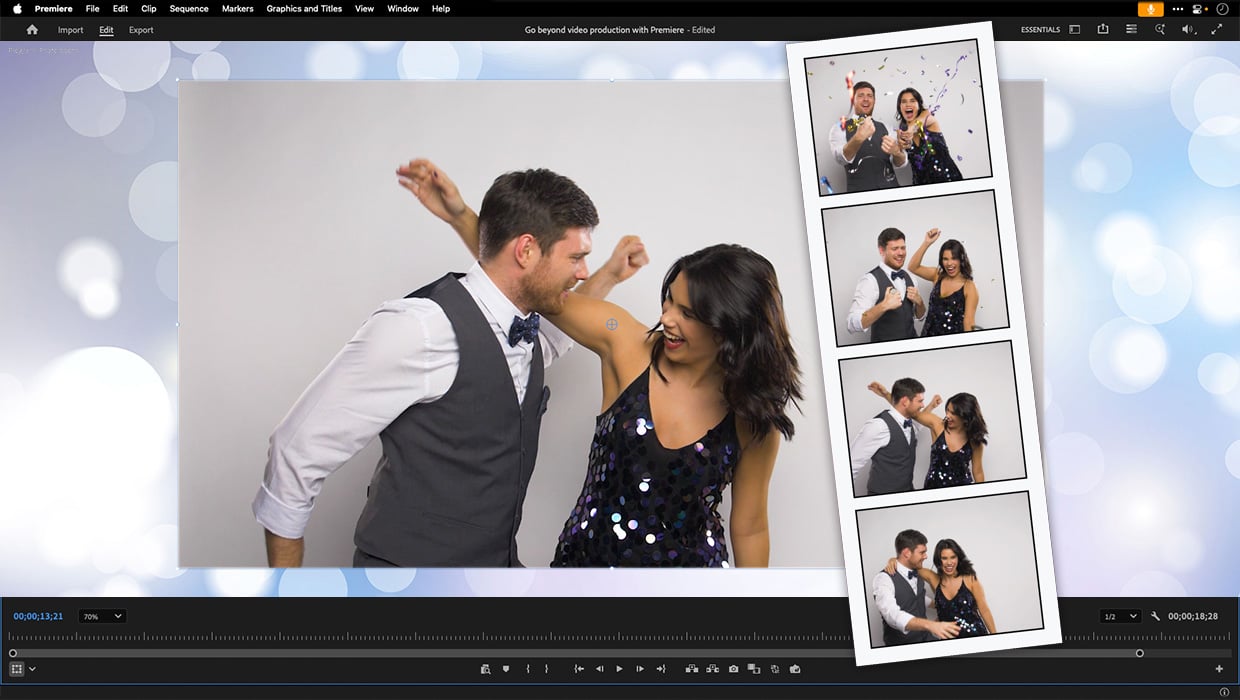
Premiere: It’s Not Just For Video
Designers using InDesign and Photoshop can look at Premiere as a surprising reso...
How to Fix Missing Content Problems in Premiere
Learn what the media warnings in Premiere mean and how to address them