
Getting Started in Packaging Design
Join the fold: Packaging design is one of the most rewarding (and future-proof) corners of the industry.

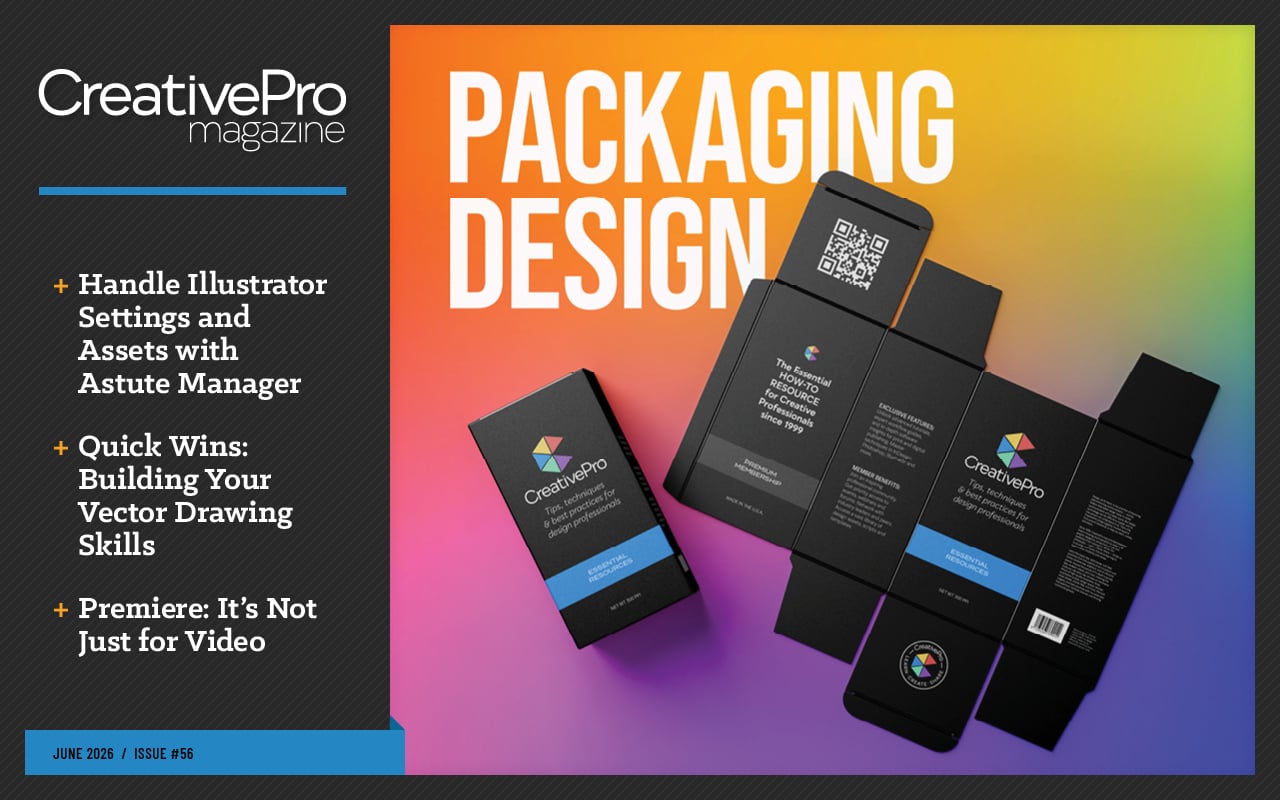
This article appears in Issue 56 of CreativePro Magazine.
For those of us who have spent our careers perfecting Bézier curves and mastering artboard layouts, the current state of design can feel a bit… unsettling. AI tools and ready-made templates are automating many of the routine 2D design jobs that used to fill our days. So, what’s a designer to do?
You can future-proof your career by stepping off the flat screen and into the physical world, investing now in creative niches that demand more human input than any algorithm can provide.
Packaging design is a perfect example. It’s a craft that goes well beyond flat, screen-only design work: You’re solving for physical constraints, three-dimensional spatial logic, strict legal requirements, and real-world manufacturing—often all at once. That’s a lot of human problem-solving that’s hard to hand off to an algorithm.
Beyond the career-security angle, it’s genuinely funand satisfying to craft a real-world object that people can actually hold and interact with. It’s a specialized craft that could breathe new life into your daily design work.
Work that Lives in the Real World
For designers who enjoy different types of design thinking and problem-solving, packaging design offers a few unique challenges.
You will need to create a package that successfully grabs a customer’s attention when they are standing in an aisle staring at a wall of competing products.
In addition, your design will need to quickly and clearly communicate the benefits of the product over its peers and establish brand voice and trust at a glance. Your package design must essentially do the work of a salesperson and an ad all in one.
When a product line gets the design right and sticks with it, the packaging design itself can become a form of brand equity. Think of the products you reach for automatically without really looking—the ones whose shape, color, or layout is so familiar it registers before you’ve even read the name. That kind of recognition is built by designers, one package at a time.
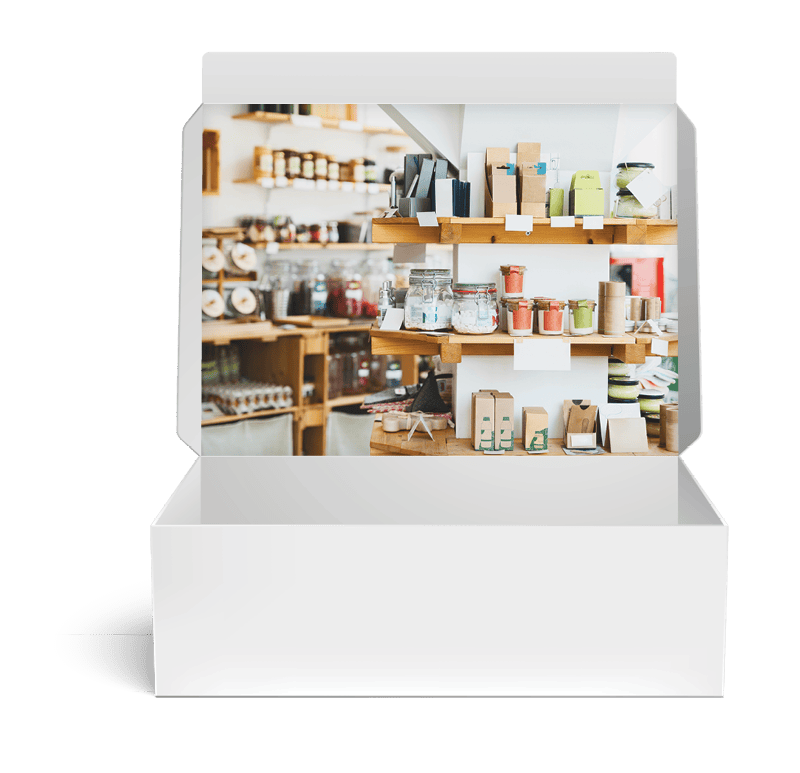
And unlike the more ephemeral digital designs many of us spend our days on, these designs don’t disappear after a few scrolls. A social post or web banner might have a shelf life measured in days or even hours, but a well-designed package can sit in someone’s home for weeks or months.
Some package designs even become collectible—think limited-edition album packaging, special game editions with custom boxes, or seasonal product runs that fans actively hunt down.
When the packaging itself becomes part of the appeal, your design takes on a life well beyond the checkout lane.
Learn to Think in Three Dimensions
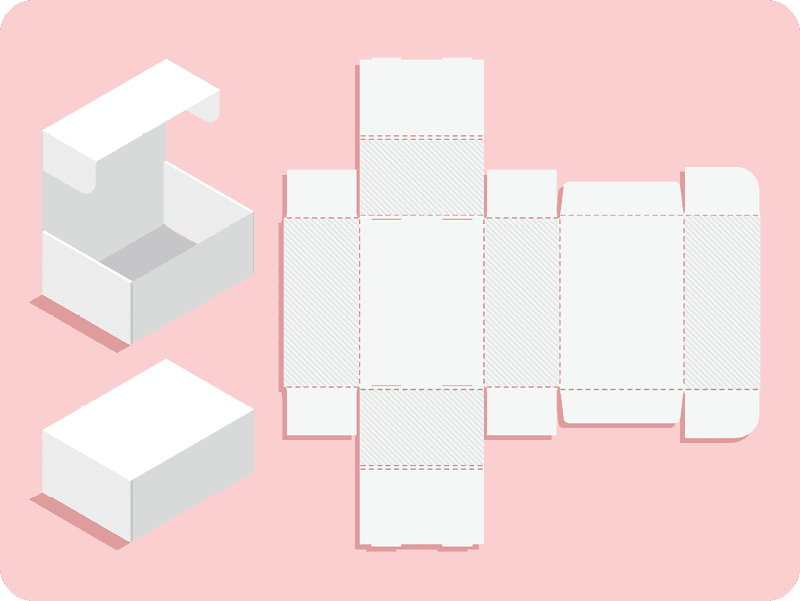
Working from a packaging template is a bit like working from an architectural blueprint. You’re staring at a flat technical document, but your job is to visualize and design for the finished 3D form it becomes. You have to train your brain to hold both versions in your head at once.
In practice, packaging design is rarely a solo endeavor. In most professional projects, the workflow moves through two distinct roles. The structural designer engineers the physical package and produces the packaging template, then the graphic designer takes it from there to apply all the visual branding.
Think of the structural designer as the architect. Using specialized CAD software like ArtiosCAD, structural designers work out the structural engineering of the package, determining how a folding carton, rigid box, or flexible pouch needs to be constructed to hold up through manufacturing, shipping, and retail display.
Their final output is the packaging template, a technical file that includes the dieline (the cut, fold, and score lines that define the package’s shape), along with guides for bleed, safety margins, and panel identification for printing the packaging material.
As the graphic designer, your job begins where the structural designer’s ends. Using typography, imagery, color, and other qualities of effective graphic design, you breathe life into the packaging template. But designing across a surface that will eventually fold into a three-dimensional object requires a very specific spatial logic.
The first task is getting oriented. First, find the primary display panel (PDP), the visual anchor of your entire layout, and start working outward from there.
Every decision you make on that flat file has to account for the folded form it will become.
Because packaging rarely lives on a single plane, your design must maintain visual continuity as it wraps across score lines and around corners, even when panels that sit side by side on your flat artboard end up on completely opposite sides of the finished box. Top and bottom flaps often need to be laid out completely upside down so they read correctly once the carton is assembled.
Depending on the type of packaging, your template might also include panels that the consumer will never actually see, things like glue flaps and dust flaps that exist purely for structural purposes.
These unseen elements will still need your design attention, though. Your artwork typically needs to bleed onto them to create a clean, finished look on the final folded package. In some cases, you’ll need to leave specific areas blank or use a solid light color onto which the printer can add barcodes, registration marks, or color control symbols during production.
Learning which panels to design, which to bleed, and which to leave alone can seem overwhelming at first, but it becomes second nature as you build up experience with different types of packaging design projects.
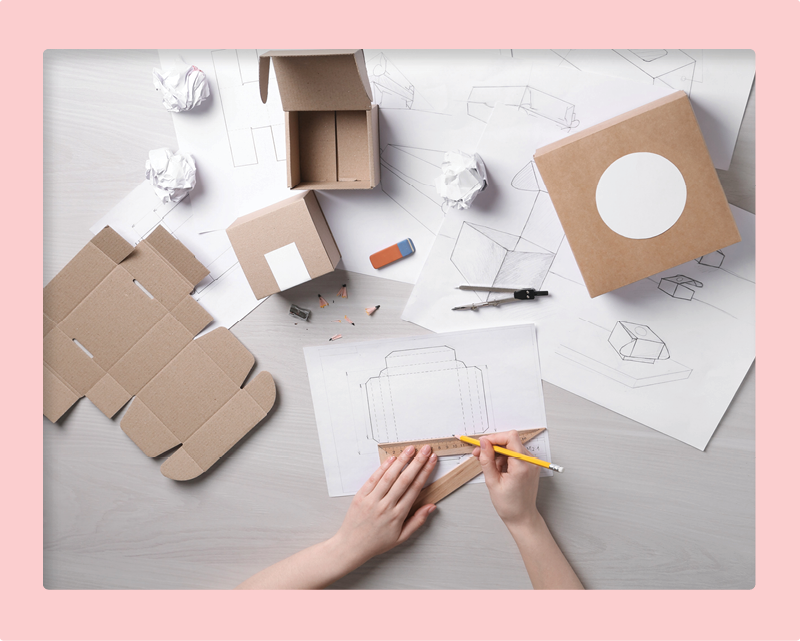
No matter how well you think you’ve internalized the layout, it’s easy to misjudge how panels will orient once they’re folded, which is why so many packaging designers still rely on a physical dummy. Despite all of our advanced digital tools and mockups, physically printing a full paper mockup and manually cutting, folding, and gluing your design into its final form remains one of the best ways to catch issues and make sure your art works the way you intended.
I’ll be the first to admit that my mild dyslexia plays a role here, but I still catch orientation errors on nearly every paper dummy I make—panels I’m absolutely certain are right-side up turn out upside down.
Given the expense and scale of most packaging print runs, it’s worth taking that extra step to verify your work as thoroughly as possible.
If you take the time to make a more polished version of that physical dummy, it also doubles as an incredibly effective client presentation tool. Many clients struggle to visualize a final physical product from flat files or even digital mockups, and handing them something they can actually hold and turn over in their hands closes that gap instantly.
The Modern Packaging Design Toolkit
The paper dummy will always have a place in the process, but you don’t have to rely on guesswork and scissors alone to get a sense of how your flat layout will translate into a finished product. A growing number of digital tools now make it possible to visualize that flat-to-form relationship much earlier in your workflow.
While there are niche applications dedicated entirely to packaging, Illustrator remains the industry standard for packaging design work. Its support for complex vector artwork, multiple artboards, crop marks, and detailed template structures makes it well suited for the kind of precision that packaging demands.
- Using Illustrator for package design work has evolved considerably. The Mockup tool, for example, lets you wrap your flat vector artwork onto 3D product photos directly inside your Illustrator file, giving you a quick read on scale and visual hierarchy without switching applications.
- Adobe is also developing Fantastic Fold, a web-based tool in beta which aims to solve the mental shift problem entirely. It allows you to watch your 2D layouts fold into 3D shapes in real time, instantly catching upside-down or misaligned designs. It’s worth keeping an eye on.
- Outside of Adobe’s ecosystem, there are some other great resources worth bookmarking.
- If you need a structural starting point, for example, diecuttemplates.com offers an extensive library of free, industry-standard packaging templates for common types like mailer boxes and tuck-end cartons, all generated as clean, print-ready Illustrator (AI) files.
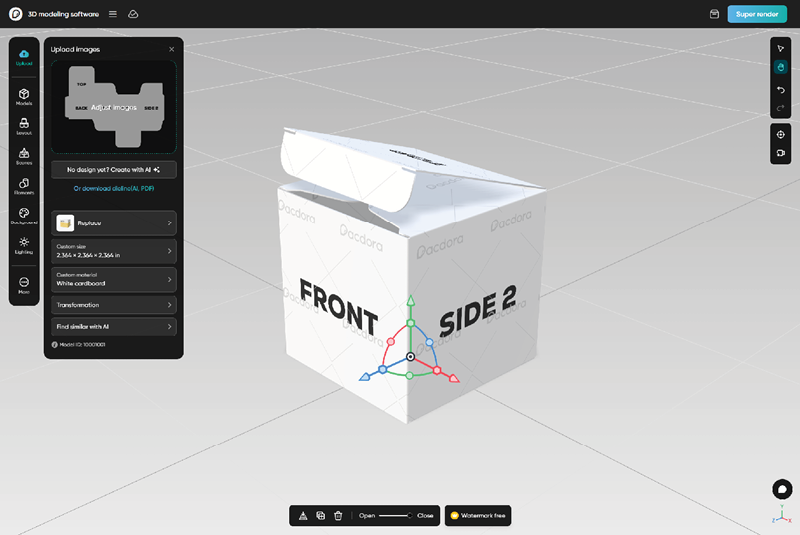
- For a more end-to-end solution, the cloud-based Pacdora web app combines a customizable packaging template library with a browser-based 3D mockup generator, so you can pick a template, design it in Illustrator, and upload your finished artwork to see a high-quality, rotatable 3D model in seconds. It’s a great way to test alignment and get a feel for the consumer experience long before you commit to a print run.
- When it comes to visual inspiration and staying current with what the best studios are doing in this space, industry trade websites like DIELINE are well worth following.
The Fine Print You Can’t Ignore
Packaging is a heavily regulated medium, and understanding the legal landscape is just as important as mastering the spatial one. As the designer, you’re responsible for fitting all the legally required information into the design without sacrificing brand voice and aesthetic appeal.
To be clear, the client is ultimately responsible for providing legally accurate copy. But you are responsible for making sure that copy appears on the correct panel and that it meets minimum legibility, sizing, and positioning requirements.
In the United States, the Fair Packaging and Labeling Act (FPLA) is the primary federal standard governing how consumer products are labeled. It requires that packaging clearly display the:
- Identity of the product
- Net quantity of the contents in both metric and US customary units
- The name and location of business of the manufacturer, packer, or distributor
The U.S. Food and Drug Administration enforces these requirements for food, drugs, and cosmetics, while the Federal Trade Commission covers most other consumer goods.
What catches many designers off guard is just how prescriptive these regulations can get. The FPLA goes well beyond simply requiring you to include the net quantity; it specifies minimum type sizes based proportionally on the area of the principal display panel, with requirements that scale with the package size.
Food labeling goes even further. The FDA dictates minimum text sizes and formatting rules for the Nutrition Facts panel, as well as strict requirements for disclosing major allergens.
Cosmetics have their own set of requirements, including the use of standardized International Nomenclature of Cosmetic Ingredients (INCI) names for all ingredients.
If you’re working with corrugated packaging, you’ll also encounter the Box Maker’s Certificate (BMC). Your packaging design will need to accommodate this standardized stamp, which displays the box’s structural specifications, including board type, strength rating, and weight limits. Once you start looking for it, you’ll start noticing the BMC on virtually every corrugated box.
Likewise, nearly every product headed for a retail shelf needs a barcode, whether that’s a UPC-A for the North American market or an EAN-13 for international distribution (both managed by one membership organization, GS1). As the designer, it’s on you to make sure the code is sized correctly, placed on a flat, scannable surface with adequate quiet zones, and printed with sufficient contrast between the bars and background. This guide is a helpful resource.
If the product is crossing international borders, your layout may need to accommodate additional localized regulations on top of everything else. Canada, for example, requires that all mandatory information appear in both English and French under its Consumer Packaging and Labelling Act.
These are legal minimums, not suggestions, and they need to be factored into your layout from the very beginning of the design process. Balancing all these compliance requirements with the visual hierarchy and brand identity you’ve built is one of the real craft challenges of packaging design, and one of the reasons experienced packaging designers are so valued.
Get Your Hands Dirty
If all of this sounds like a lot to learn, it is. The good news, however, is that you don’t need to master every regulation and structural nuance before you start taking on projects.
The best entry strategy is simply to start building a portfolio that shows you can think in three dimensions and to get your work in front of the right people.
You don’t need to jump in with a massive corporate client with complex custom packaging needs and a full product line. You just need some small starter projects that show you understand the mindset and spatial thinking required to tackle real-world 3D package designs.
One of the most effective ways to find these projects is to look locally. Startups, boutique cafes, and local craft breweries often need professional branding but lack the budget for a large marketing agency. They’re usually very open to working with a designer who is enthusiastic about their product.
Reach out to these firms and offer to redesign their simple sticker labels or their stand-up pouches. Projects like these are a perfect low-stakes way to practice the basics with real constraints to work through and to grow your portfolio.
Presenting Your Packaging Portfolio
How you present your projects in your portfolio matters just as much as the work itself. Prioritize high-quality, photorealistic renders that show the packaging in context, and consider going a step further with your physical paper dummies.
A short, well-lit video of you folding and assembling a printed mockup by hand is one of the most compelling things you can put in a portfolio or on social media, because it demonstrates that you understand the structural side of the work, not just the visual.
Pair that kind of presentation with networking at local trade shows, food and beverage expos, or maker fairs—the kinds of events where physical products are born and where founders are actively looking for designers who can help their products stand out on the shelf.
There is something genuinely satisfying about walking into a store and seeing a physical object that you designed sitting on a shelf, waiting to be picked up.
If that sounds appealing, I encourage you to go download some product packaging templates, fire up some mood boards, and start designing!
Commenting is easier and faster when you're logged in!

Recommended for you
The Frank Romano Show Debuts on WhatTheyThink.com
WhatTheyThink.com, the leading news and analysis site for the printing and publi...
Adobe Reveals New Technologies for InDesign
Ordinarily features planned for future versions of software are closely guarded...

My CMYK Images Change When I Print or Export PDF!
A color management mystery (with a solution!)