
Project Neo: A New Dimension in 3D
Adobe's new web-based 3D app will help you give your vision shape.

This article appears in Issue 41 of CreativePro Magazine.
Although a “Neo remix” may sound like The Matrix fan fiction, it’s actually a mistake-proof way to experiment with Adobe’s free, browser-based 3D modeler. In Adobe Project Neo (Beta), you can practice your skills by remixing existing models, build 3D models, and export them as vector (SVG) files for Illustrator, as JPG files, as PNG files, or as turntable animations in MP4 video format. You can even use your models to direct Adobe Firefly prompts.
Neo started life as a private beta in 2023, when it was featured in the Adobe MAX 2023 Sneaks demos. Like baby turtles, most of the Sneaks tech demoed don’t make it to adulthood, but Neo won the lottery and became a real product. You can find it at projectneo.adobe.com (Figure 1). Because Adobe Project Neo runs entirely in a browser, you don’t need a fire-breathing gaming machine. You do need a GPU or a CPU with good onboard graphics, because Neo uses WebGL. The current technical requirements are here for macOS, and here for Windows.
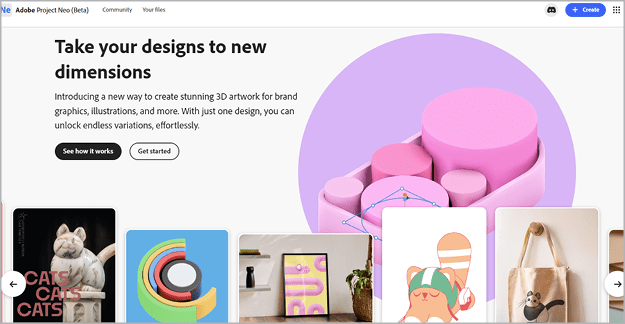
Figure 1. Project Neo home page
Before we take Neo out for a spin, I recommend you watch the See How It Works video (click the button of the same name on the Home page)—and watch it at half speed. There’s a lot going on, so be ready to pause frequently!
Take a Test Drive
Time to get started: Click the Get Started button, then, on the next page, click Remix This Design (Figure 2) to open the Neo user interface. A view-only scene loads too (Figure 3); you can play with it as much as
you like, knowing you can’t accidentally mess anything up permanently.

Figure 2. Click the button to remix the artwork.
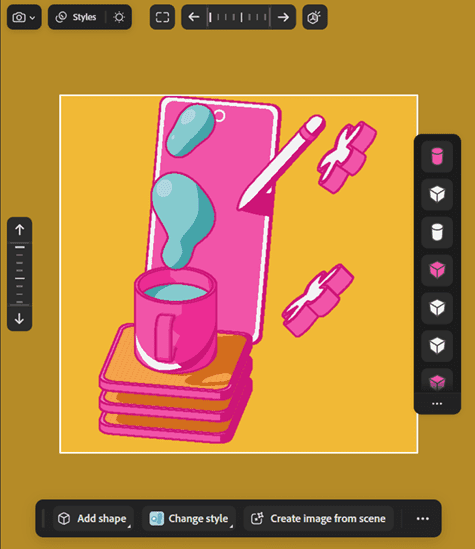
Figure 3. The remixable scene you can’t mess up
If you’re completely new to 3D, remixing is great way to get interactive and familiar with the app. Give it a try. Right-click and drag to rotate the view until it’s angled like Figure 4. Click the cup. An odd-looking but important widget appears (Figure 5). The widget takes a bit of explanation, but also needs hands-on experimenting to get the hang of, so follow along with it while you read.

Figure 4. Right-click and drag to angle the artwork this way.

Figure 5. Every 3D app has a widget. This is the Neo version.
The three blue arrows point in the X (left-right), Y (up-down), and Z (in-out) directions. Click an arrow and drag to move the cup, just to get a feel for how they work. (Only the cup moves, not the handle or the contents.) Drag the blue curved lines to rotate the cup in each of the three directions, and the tiny square near the tip of each arrow to scale it on that axis.
Near each corner of the rounded rectangular border surrounding the widget in Figure 5 is a small icon. The four-way arrow (bottom-right) is a Move handle for the whole shape. The small square (top-right) scales the whole object proportionally (like holding Shift when you scale something in InDesign or Illustrator), and the little circle (bottom left) changes how much the corners of a shape are rounded.
Take some time to play around with the various objects in the scene to get a feel for how the tools work. If you make a mistake at any point, press Command/Ctrl+Z to undo it.
What Can You Make?
You can make most anything you can imagine from the app’s very simple building blocks and intuitive controls. To demonstrate, how about an egg? Double-click the Neo icon at the top left of the screen to get back to the Home page, then click the + Create button at the top right (Figure 6). Neo gives you its default starter document with a random name (“copper” in Figure 7) that you can change by double-clicking and typing a new one that makes sense to you.

Figure 6. The button to start a new document in Neo
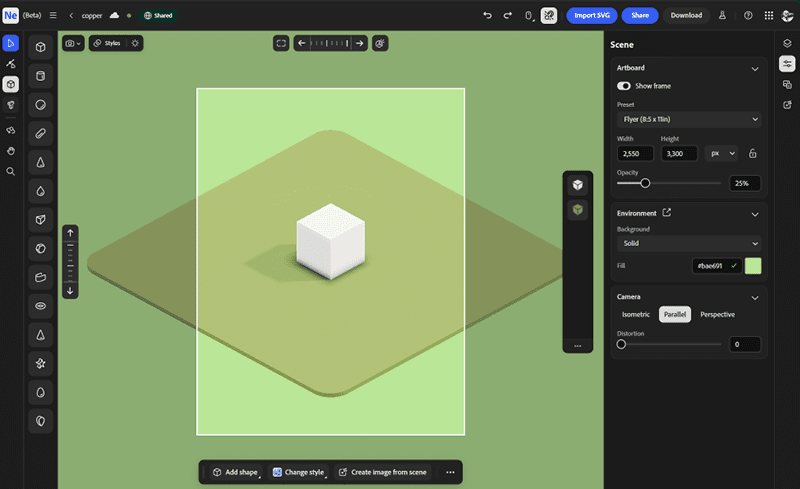
Figure 7. The default starter scene in Neo
On the left edge of the artboard you’ll find the toolbar, as well as icons of the various simple shapes, called primitives, that you can place on the artboard. Click the cube (third from the top of the toolbar) to toggle the list of shapes off and on. The Selection tool (top of the tool bar, shortcut V) works just like its cousins in Illustrator and Photoshop. In fact, the only tool that might look completely unfamiliar is the Turn Around tool (third from the bottom), which enables you to drag the whole scene around to view it from a different perspective. Its keyboard shortcut is O (think orbit).
Notice the column with two cube icons near the right edge of the artboard (Figure 8). This is Neo’s equivalent of a Layers panel, and every object on the artboard shows up here. The white icon represents the white cube in the scene, and the green icon represents the “platform” it is sitting on, which is just a modified cube.

Figure 8. The object stack in Neo is like the Layers panel in Illustrator or Photoshop.
Now that you’re oriented, let’s get started. Make sure nothing is selected (click a blank part of the artboard), and turn off the Show Frame switch in the Scene panel on the right (Figure 9).
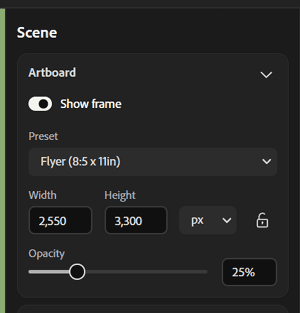
Figure 9. For now, click the Show Frame button to turn the option off.
Make it round
Click the white cube with the Selection tool, and drag the Rounding (bottom left) icon down and to the left, to turn the cube into a sphere (Figure 10), then drag the Scaling (top right) icon up and right to expand it (Figure 11).
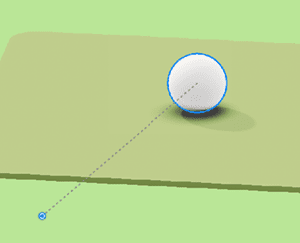
Figure 10. Drag the corner radius icon down and left to turn the cube into a sphere.
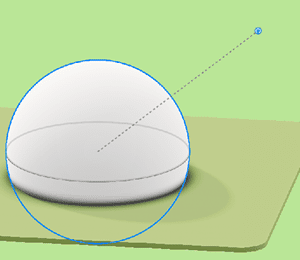
Figure 11. Drag the square scaling icon up and right to enlarge.
The top item in the Layers panel is now round, and the Properties panel is on the artboard’s right. Click the gray swatch at the top of the Appearance section, and change the color of the sphere to a golden yellow (Figure 12).

Figure 12. The color change dialog is mostly familiar to Illustrator users.
Select the green mat shape, change its color to near-white, then double-click it. You now see scaling handles and corner shape handles very similar to the ones that perform the same functions in Illustrator (Figure 13). Modify the corners by dragging them inward to make the shape round, then drag out two opposite side handles to make it oval.
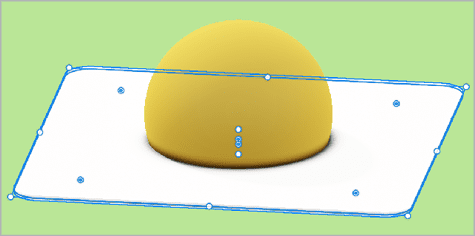
Figure 13. Scaling and corner radius handles, just like Illustrator
Select the yellow sphere, double-click to get the widget, then drag down the square Scaling icon (above the up arrow colored orange in Figure 14) to flatten the sphere (Figure 15).
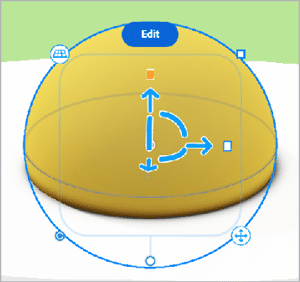
Figure 14. Drag the up/down scaling icon (orange) to change the height.
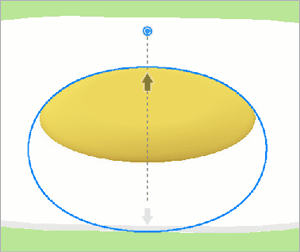
Figure 15. This is what the interface looks like as you drag the scaling handle.
If you find it dropping below the surface, drag it up a little, to give it a bit of a bulge.
Add text
Click the Text tool to activate it, then click an empty spot on the artboard just above the shapes. Lorem ipsum appears on the artboard, lying on its back. Press V for the Selection tool, click the text to show the widget, and use a Rotate handle (highlighted in orange in Figure 16) to stand it upright. It’s finicky, so you might need to fiddle with it a bit.
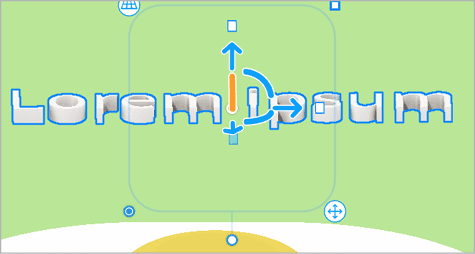
Figure 16. Lorem ipsum text appears lying down on the job! Use the widget’s rotate handles to stand it up.
In the Text section of the Properties panel, type EGGS ARE GOOD in the field, and use the Fonts menu to change the font to something narrow. I used Acumin Pro ExtraCondensed, but any narrow font will do. I set the style to Ultra Black, and the height to 0.3 (Figure 17).

Figure 17. The text parameters and the text are all in one place in the Properties panel.
Your artboard should look roughly like Figure 18.

Figure 18. The artboard with text applied and formatted
Change the text color to a cheerful blue or red, and click away.
To Illustrator
You can easily prepare your Neo models for use in Illustrator. In the top-left corner of the artboard, click the Styles button to see the available styles (Figure 19). Right now, Realistic is selected. Click the others to get a sense of how they change the appearance of the artboard, but settle on Vector Art.
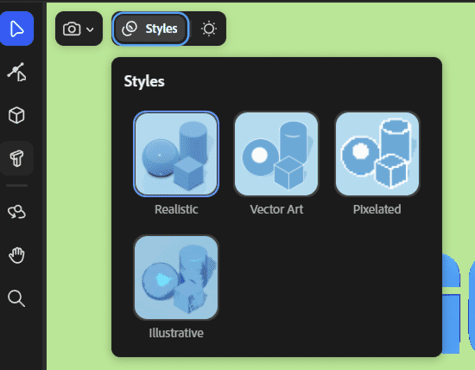
Figure 19. The Styles button lets you change how the artwork looks and gets it ready for export or sharing.
With nothing selected, go to the Scene panel and turn on Show Frame under the Artboard section. Change the preset to a 16:9 Aspect Ratio 4K (Figure 20).
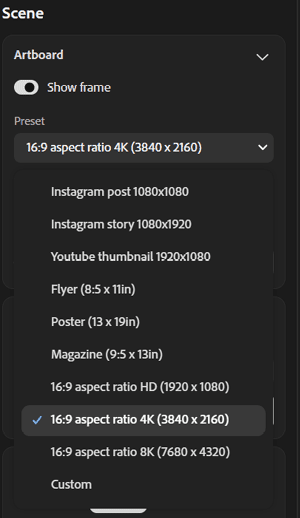
Figure 20. Presets let you select the size and aspect ratio of the output, which is represented by the frame on the artboard.
The artwork may not fit in the frame, so zoom out until it does. Now click the Share button, and choose Send To Illustrator As Vectors (Figure 21).
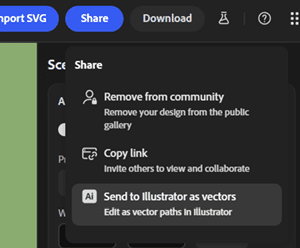
Figure 21. When the artboard style is Vector Art and Show Frame is on, the Send To Illustrator As Vectors feature becomes available.
Your browser will now ask permission to open Illustrator on your computer, and the full artboard will open (Figure 22).

Figure 22. The artwork opens in Illustrator as regular two-dimensional vector art.
To Firefly
As I mentioned at the beginning, you can use your model to guide Adobe Firefly in generating imagery. Simply click the Create Image From Scene button, enter a prompt, then click Generate. I tried the obvious: Fried egg, sunny side up. I got the slightly singed result in Figure 23, (along with three other variations)! In the Generate panel, you can adjust the percentage to which your model’s shapes and colors inform the scene (Scene Reference), choose whether to generate an art- or photo-like image (Content), and even specify materials or upload images as style references for the results (Style Reference).
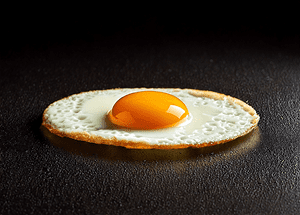
Figure 23. Here’s what Firefly reckons a fried egg looks like.
Where to Go Next?
This article has barely scratched the surface of what Project Neo can do. On the Home page, click Community to see dozens of ideas, many of which you can modify. Click the Remixable button for a host of scenes you can remix and practice with, including the original basketball court from the Adobe MAX 2023 announcement. There’s lots to explore, and the absolute best way to learn is to dive in and play. It’s fun!
Commenting is easier and faster when you're logged in!

Recommended for you
How to Create 3D Artwork With Project Neo
Learn how Adobe’s Project Neo allows users to create 3D vector images, integrate...

Fun with Depth Map Photos
If you’re on Facebook, you’ve probably run across photos lately that move in an...

How to Make Realistic 3D Text in Illustrator
Learn how to use Illustrator to add realistic 3D text to an image.