Getting Started with XML in InDesign Part 2
Learn how to complete an XML workflow circle and follow along with the downloadable sample files!

This article appears in Issue 24 of InDesign Magazine.
In Part 1 of this series, you learned about some of the exciting possibilities of XML and InDesign. You started on a sample project, using XML to create a training workbook in multiple languages. In Part 2, I’ll examine unique advantages of this XML workflow, demonstrate how to edit the English text to create content for the Spanish and French versions, and finally flow these translations into the original document.
XML Document Structure
Let’s look at the document you created in Part 1. To reveal the XML structure hiding in the document, open the structured version of your workbook—either the one you created in Part 1, or the file Participant Guide-1. indd, which you can download along with other relevant files from https://creativepro.com/supportfiles/XMLPart2ExampleFiles.zip. If the Structure pane isn’t displayed on the left side of the document window, select View > Structure > Show Structure. You can also summon the Structure pane by clicking the double-headed arrow at the lower left corner of the main InDesign interface, or by clicking the left edge of the InDesign document window. If tag markers are invisible, go to View > Structure > Go to View > Structure > Show Tagged Frames. If the Tags panel is invisible, go to Window > Tags. With all the XML structure now visible, you can see which frames and text elements are tagged with XML (Figure 1).
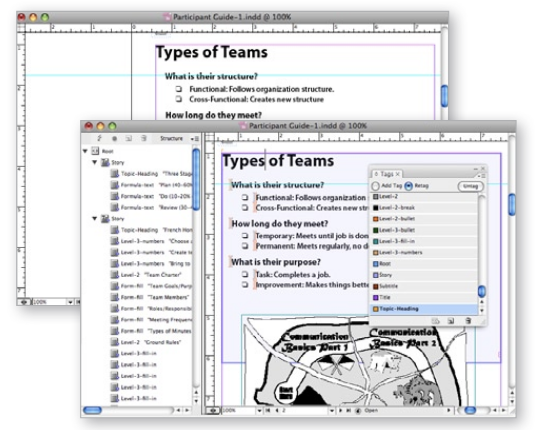
Figure 1. If you don’t reveal the XML structure, there’s no way to tell an XML-based document from one that’s not. XML-based documents look and perform in every way like non-XML InDesign files.
had the same names. While it took a little work to manually create the tag names for the first guide, you could then use these same tag names for the other five workbooks in the project. In other words, a little bit of work and planning at the beginning of the project pays off with significant productivity gains later.
Trouble with White Space?
Zoom in on a text frame—or better yet, open one of the text stories in Story Editor by choosing Edit > Edit in Story Editor. This lets you take a closer look at how the tags were applied within the existing text frames (Figure 2). Notice that the tag markers include not only the text, but also any tabs and paragraph returns within the text. Tabs and paragraph returns are just two of more than a dozen kinds of white space InDesign can produce. As long as these items are within the styled paragraph, they will also be within your XML. However, in some cases, this white space can cause trouble.

Figure 2. When you apply tags to paragraphs by using the mapping feature, InDesign includes all the text as well as the paragraph return itself within the element. These paragraph returns, including any other white space, will also be included in your exported XML.

Figure 3. White space (and other special characters) in InDesign’s XML can cause unexpected results like this one in browsers and other applications. Typically, the strange characters you see mean that there are characters stored in the XML that are incompatible with HTML and can’t be rendered by the browser.

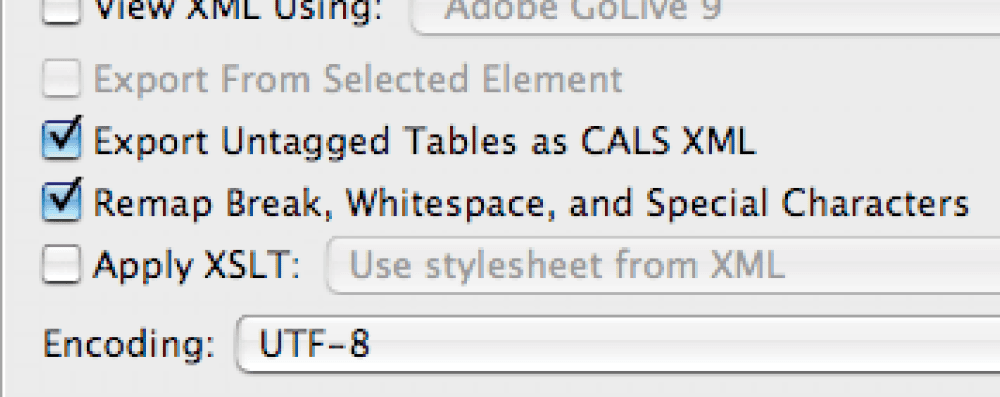
Figure 4. Many of the white space characters we love to use in InDesign are not supported by some XML workflows. In the XML Export Options dialog this choice will convert, or remap, the characters to encodings that are supported.
Untagged Graphics
As you study how the text on each page was tagged with XML elements, note that the graphics are not tagged. While InDesign has an easy method for tagging text automatically, based on styles, only graphics that are anchored within text are tagged—free-floating graphics are ignored. Of course, that doesn’t prevent you from manually tagging pictures or other objects on your page. To tag a graphic frame, you can select it with the Selection tool and click on a tag in the Tags panel. However, for this project, the fact that these drawings were not tagged suits my purpose because I’ll be using a different method of importing new, translated images.
Working with XML
Using a text editor such as TextEdit, Notepad, or Text Wrangler, open the English.xml file that you exported in Part 1. (Don’t open it with an XML editor like Oxygen, which could make your file useless.) If you don’t have English.xml, use the file of the same name It’s important that your XML match the structure of your layout exactly. If you didn’t export the XML from the document yourself, be sure to use both the XML and the InDesign files in XMLPart2ExampleFiles.zip. Deviations in the structure of either file will cause the XML to fail when it’s re-imported later. Examine the XML code. You’ll notice the key English phrases nested snugly between XML tags (Figure 5). Note that the tag names are the same as the Paragraph and Character styles from the original file. While it’s not strictly necessary to do it this way, it makes it simpler later to remap the data elements back to the correct styling. As you can see in Figure 5, XML doesn’t store any formatting information.

Figure 5. The editorial content appears between the opening and closing tag names. That’s the easy part. What you can’t see are all the white space characters in the file, such as paragraph returns, em and en spaces, and break characters. If you want the XML to replace the existing content without an error, it’s crucial that these “invisible” characters remain in the text.
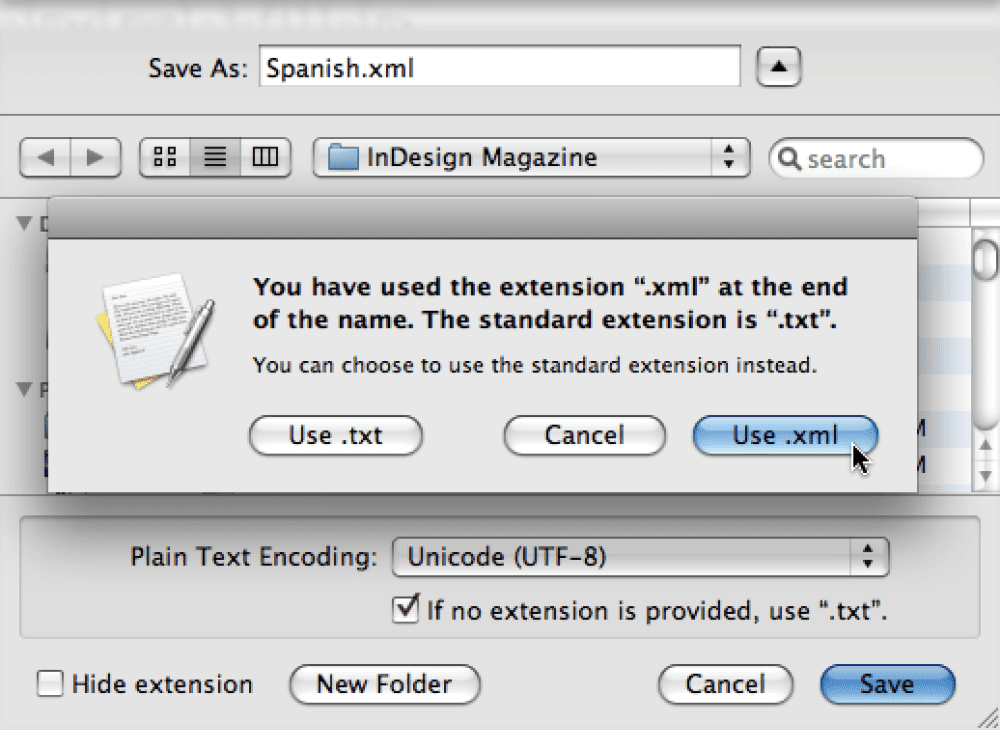
Figure 6. TextEdit has a tendency to replace your file’s extension with TXT. If this little bit of mischief slips by you, you can change it back in a Finder window.
Editing XML
Normally, XML editors, such as Oxygen (Mac and Windows) and XMLSpy (Windows only), are an invaluable tool in an XML workflow. For this project, stick with TextEdit (Mac) or Notepad or Microsoft Word 2003 or higher (Windows) (Figure 7).
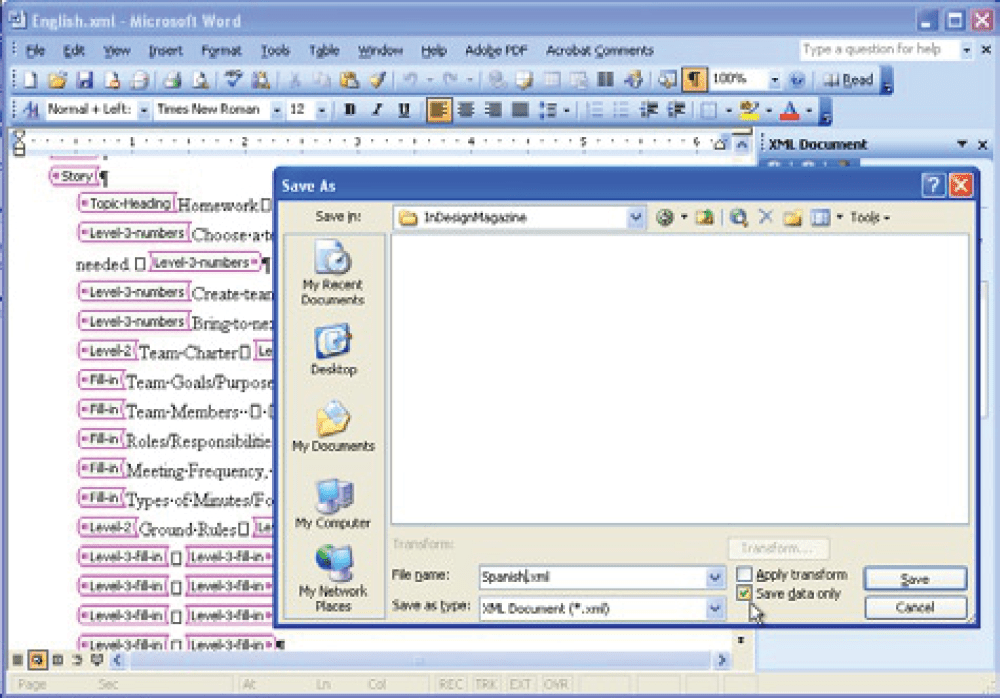
Figure 7. Word for Windows 2003 and 2007 both allow you to open and edit XML files properly. Unfortunately, none of the Mac versions do. When saving the finished XML, remember to select the Data-only checkbox when saving.
Foreign-Language First Steps
Before you begin making the foreign-language versions, there are some preliminary steps to perform. 1. Open the English version of the participant workbook. This must be the same file from which the XML was originally exported. If you try to import XML created by another file the import may not succeed, even when the tagging and structure vary only slightly. 2. Select File > Package. Name the folder “Spanish Participant Workbook folder”. 3. Repeat step 2 to create a “French Participant Workbook folder”. Steps 2 and 3 create an identical document collection for each version of the workbook. Do you see the method to my madness yet? 4. Copy the XML translations to the appropriate folder.
Foreign-Language Next Steps
Let’s continue by making the Spanish Workbook. 5. Open the Participant Guide within the newly packaged Spanish folder. Add the word “Spanish” to the InDesign file before you open it. 6. Open the Structure pane, if it’s not already visible. Reveal all other XML features as I described in the “XML Document Structure” section. At this moment, the workbook is identical to the original English version. The file and all the graphics have been copied and placed in the Spanish folder. 7. Click on the Root element at the top of the Structure pane to select it. 8. Select File > Import XML. 9. When the Import XML dialog appears, choose Spanish.xml and select the other options shown in Figure 8. Click Open.
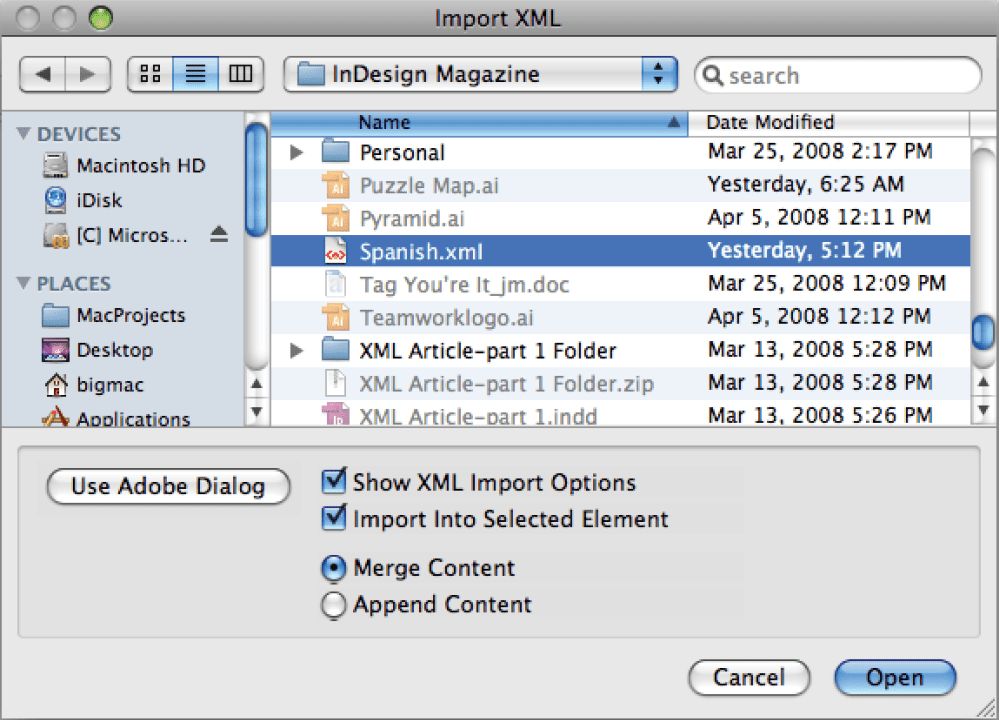
Figure 8. Use the options shown to properly import Spanish content.
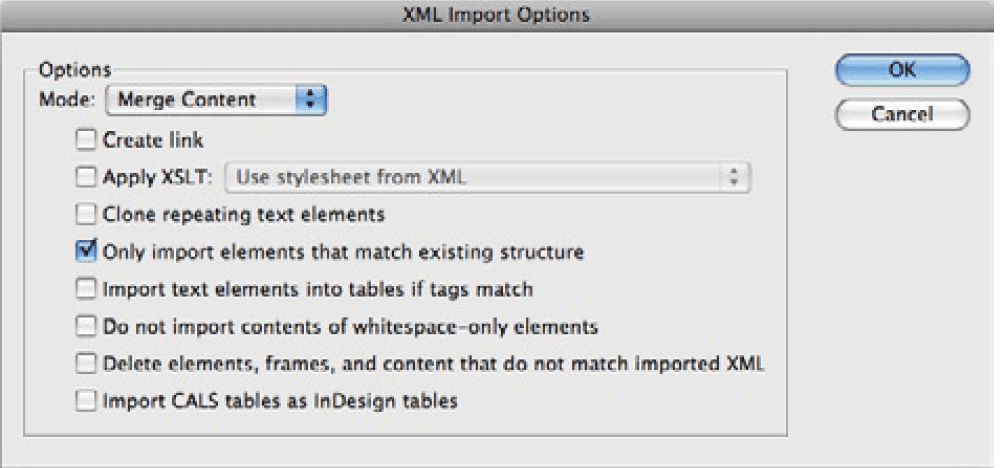
Figure 9. This option makes the Spanish text replace the English copy in place.
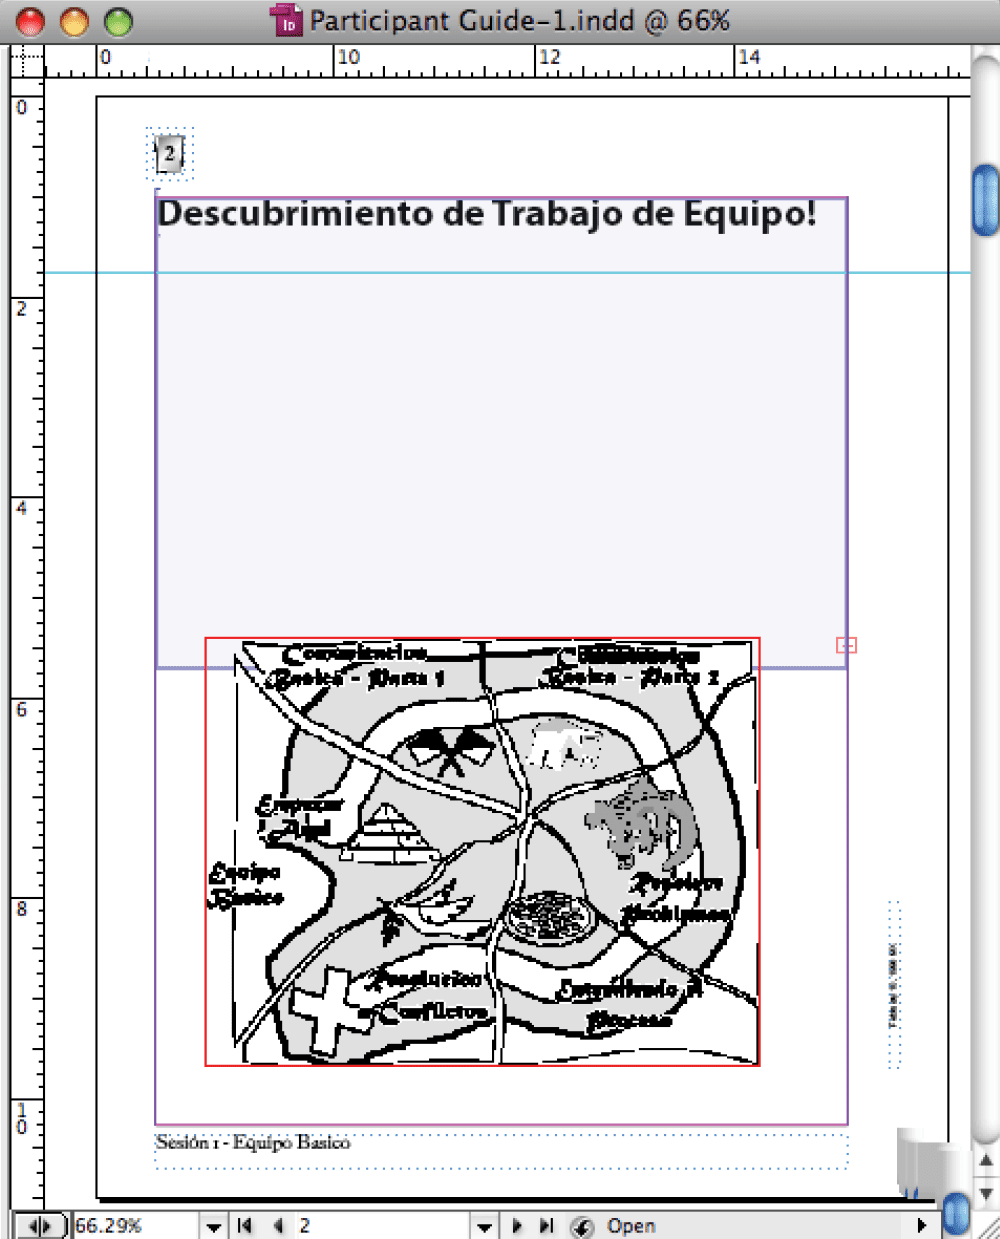
Figure 10. If the Spanish or French text doesn’t appear on the page in place of the English, you need to map the tags to the appropriate Paragraph styles.

Figure 11. Here’s where all the work creating matching tag names in Part 1 comes in handy. When you click the Map by Name button all the tags are mapped to the appropriate Paragraph (and Character) styles.
Replacing Graphics
There are two small jobs left. First, let’s replace the graphics with English words and phrases. You could have done this in the XML itself, but instead you’re going to use a more mundane but easier solution. 13. Locate the Spanish Art folder in XMLPart2ExampleFiles.zip. 14. Using the Finder or Windows Explorer, drop the files into the Links folder of their respective workbooks. You’ll notice that Spanish graphics are named identically to the English ones. Have you figured out my little secret? Now that you’ve placed the Spanish graphics in the Links folder for the Spanish workbook, InDesign will take care of the rest of the job. 15. Select Window > Links. After a moment or two, InDesign will report that the linked graphics have changed and need to be updated. 16. Select the graphics in the Links panel that have changed. Select Update Link from the Links panel menu. The logo and other English graphics are then replaced by Spanish-language versions.
Keeping Tabs on Tabs
While your conversion should now be complete, you may encounter a problem that confounds us: Tabs. Or, more precisely, missing tabs. When the XML is imported back into the layout, InDesign occasionally brings in everything correctly except the tabs. The mysterious thing about this is that InDesign did export the tabs. The problem arises when you try to re-import them, whereupon InDesign sometimes strips them out for no good reason. Probably just a bug. Fortunately, it seems to work more often than not—but check your final layout carefully. If you find you do have this problem, you can fix the layout by reviewing each page and manually re-inserting tabs wherever they’re needed. Obviously, this is not a satisfactory answer for long documents, where there may be thousands of tabs in the text. One solution is to recreate the design without using tabs. When that’s impossible, you can work around them by first searching and replacing the tabs with a placeholder character that would not normally appear in your text (or XML code), such as $$ or @@. Then export the content to XML as before to make the changes. When the XML is re-imported, search and replace the placeholders with tabs (Figure 12).
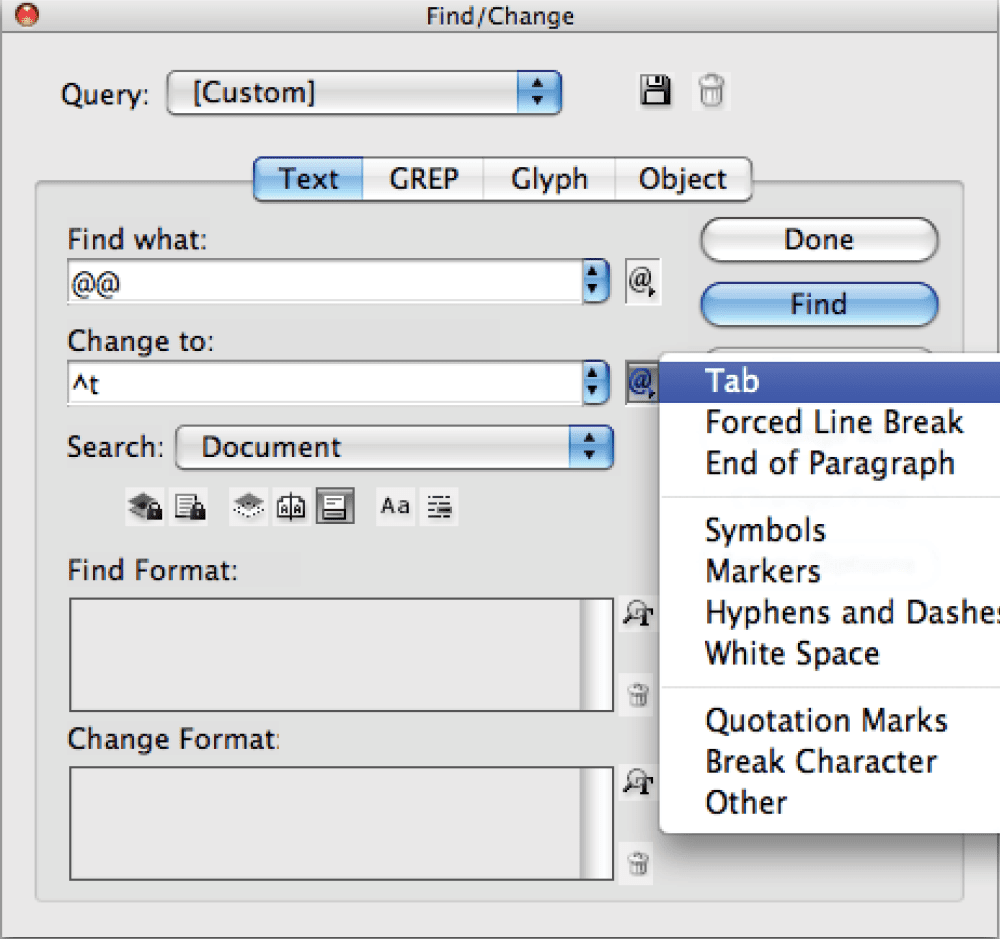
Figure 12. InDesign makes it easy to search for a variety of special characters and white space, making a tab workaround tedious but possible.
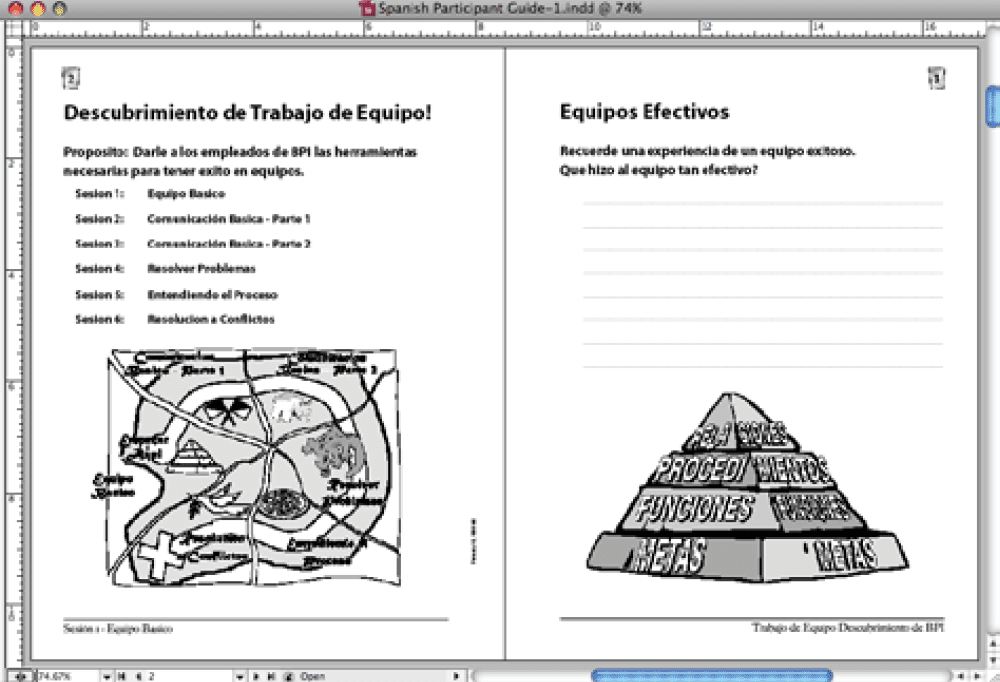
Figure 13. Once the tabs are back in the text, the completed Spanish version is a spitting image of the English workbook.
Worth It for the Right Project
XML can save you enormous amounts of time and drudgery when you’re creating a wide variety of data-intensive or specialty documents, like these workbooks. What might have taken you days or weeks without XML can be only a few clicks of the mouse with it. XML is certainly not for everyone, but for many projects, there’s nothing faster and easier.
- Do your tag names match the tags names in the structure exactly? (Remember that everything counts, including spelling and case.)
- Is the tag order in your structure the same as your XML file?
- Is your XML file well-formed? For example, are you sure all your tags are closed properly and that you didn’t accidentally delete a tag or bracket in the XML file? For this purpose and this purpose only, use XML editors, such as Oxygen and XMLSpy.
- Does the whitespace stored in the XML match the whitespace in the structure? In other words, look for the tabs, spaces and paragraph returns exported from the original text. Did the XML preserve them properly?
- Did you select the proper options in the import dialogs?
Commenting is easier and faster when you're logged in!
Recommended for you
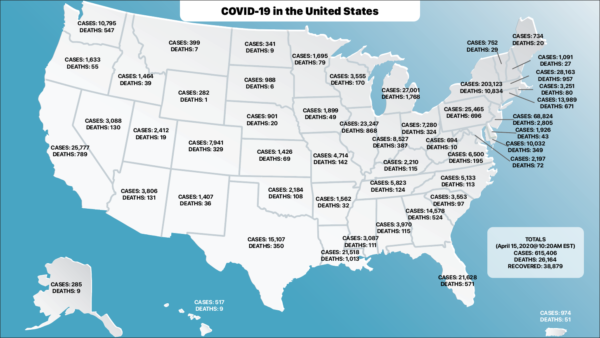
Using InDesign and XML to Visualize the COVID-19 Data
The COVID-19 Pandemic is something that has touched us all in one way or another...

Formatting Text With XML in InDesign
by Andrej Balaz The first time I learned about the XML workflow in InDesign was...

InDesign GREP You Already Have
There are a few things in InDesign that send the most seasoned of designers scre...


