
Using Text Wrap in InDesign
Flowing text around all kinds of objects and shapes is easy once you know how.


This article appears in Issue 20 of InDesign Magazine.
I heard a frightening tale the other day. A third-year advertising student at a prestigious college didn’t know how to wrap text around a silhouetted image in InDesign. But that wasn’t the scary part. What sent chills down my spine was her solution to the situation. She applied a text wrap to the bounding boxes of several empty frames and then arranged them around the image. Unless you’re new to page-layout, I’m sure you wouldn’t commit such an offense. But you may not be aware of the many ways you can wrap text around various types of interceding objects (Figure 1).

Figure 1: I used four text-wrap techniques on these two pages.
Fill a frame with text
Create a new two-page InDesign document (Command-/CtrI-N). Press T to select the Type tool in the Toolbox and click and drag the cursor from the top-left corner margin to the bottom-right corner margin to create a large text frame on page 1. Fill this frame with placeholder text by choosing Type > Fill With Placeholder Text. Then, choose Object > Text Frame Options (Command-/CtrI-B). Set the number of columns to 2 and click OK. Do the same on page two.
Wrap text around a bounding box
The next step is to add a few graphic objects to your sample article and use the Text Wrap command to flow the text around them. Go to page 2 and create a small square using the Rectangle tool and position it between the first and second columns of text. By default, the text ignores the object and continues to flow underneath it. To flow the text around the frame (Figure 2), choose Window > Text Wrap and click the Wrap Around Bounding Box button. You
may need to adjust the offsets to create a suitable amount of space between the object and the text.
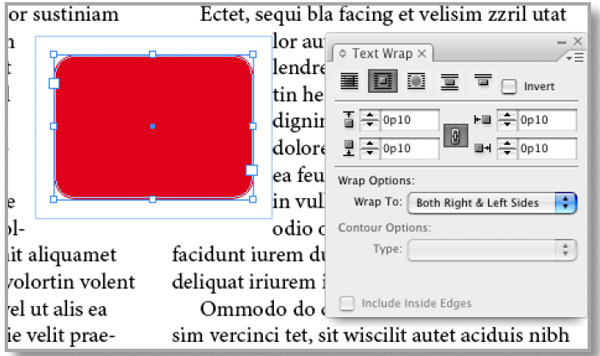
Figure 2. Flow text around a frame.
Wrap text around a silhouetted image
Some images have additional text-wrap options. For example, press Shift-Command-/Ctrl-A to deselect all items on the page, and then import an image (File > Place) and place it on page one. For best results, choose one that has a solid, contrasting background or an alpha channel or clipping path masking the background. With the image selected in your document, click the Wrap Around Object Shape button. Then, choose Show Options from the Text Wrap panel’s menu to display the seven Contour Options (Figure 3).
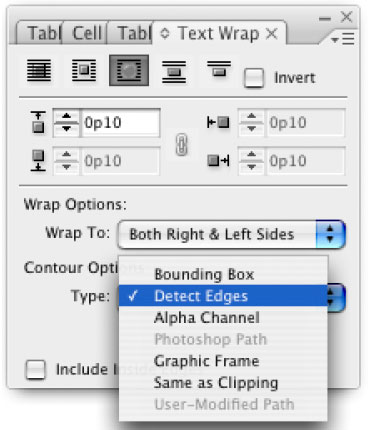
Figure 3. You have seven contour options. If the image doesn’t come with an alpha channel or clipping path, try Detect Edges.
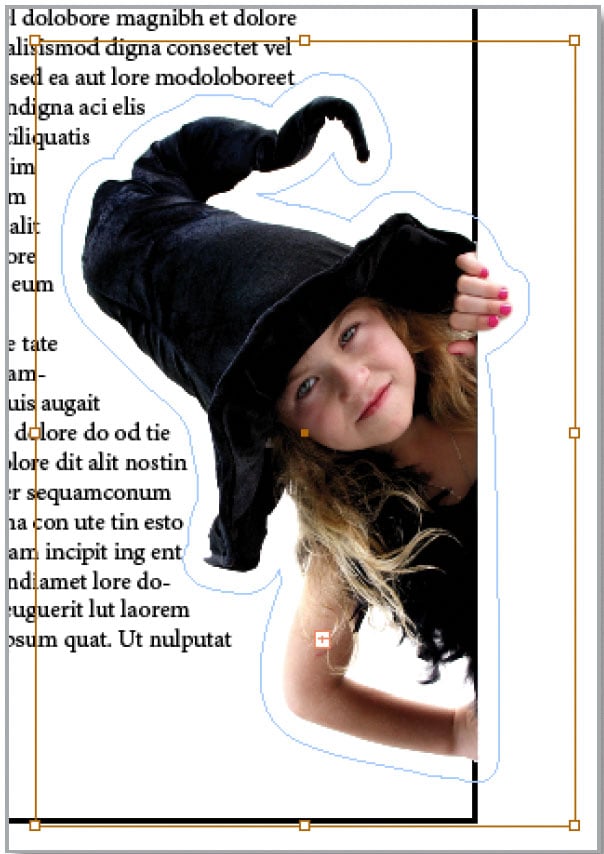
Figure 4. InDesign will find the edges of many images.
Jump text over objects
You can also jump text over objects instead of around them. You may want to use the Jump Object option to continue flowing text after the object, such as a pull quote (Figure 5), or the Jump To Next Column option to flow text into the next column of the same frame or a subsequent threaded frame.
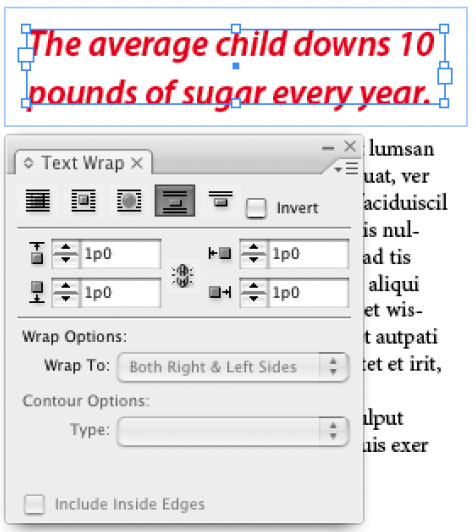
Figure 5. To flow body text around pull quotes, use the Jump Object Option.
Prevent a text wrap
You’ve applied a text wrap to an object and it’s doing what it’s supposed to do: repelling text around it. Unfortunately, it’s also preventing you from placing text on top of the object. There’s a simple solution. To demonstrate, type the word “Boo” in a new text frame and place that text frame on top of the square object you created earlier. Then, with the text frame selected, choose Object > Text Frame Options. Select the Ignore Text Wrap check box and click OK (Figure 6) to wrap things up.
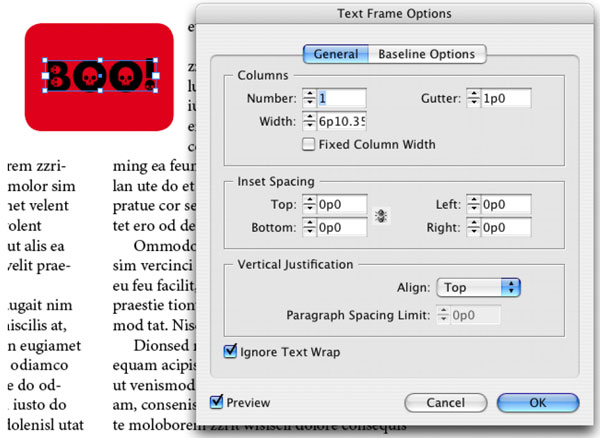
Figure 6. The Ignore Text Wrap button is small but important.
Commenting is easier and faster when you're logged in!

Recommended for you
MagicPicker Color Wheel Now Even More Magicker
Anastasiy’s MagicPicker plug-in (currently $19) has been re-written from t...

New Zealand Crowdsources New Flag Design
What if Twitter had been around in 1776 when the Founding Fathers asked Betsy Ro...

FSI FontShop International Announces the Release of the Long-awaited Fourth Edition of FontBook
FontBook is the largest type reference in the world. Since 1991, “the big...