25 Years of Tips and Tricks
A look back at a quarter century of tips reveals some timeless treasures


This article appears in Issue 34 of CreativePro Magazine.
They say time flies when you’re having fun. And it’s true, the years have flown by since CreativePro first launched late in the summer of 1999. Over the last quarter century, experts from around the world have dished out thousands of useful tidbits in our web articles and YouTube videos, in our newletters, and at our events. All those tips have one thing in common: They can help you get your work done faster, with less hassle and more fun, so you can devote more time and energy to being creative (or just sipping a Starbucks while watching funny videos, we’re not judging). In this article, we’ll highlight some of our favorite tips published on CreativePro during the last 25 years.
The Hidden Autoexpand Feature in InDesign
Do you frequently have to enter the same long names in your layouts over and over? People’s names, places, government offices, titles, things like that? And moreover, do you occasionally misspell them as you type? The solution to both of these annoyances is to take a second and add each long name to InDesign’s Autocorrect database (Preferences > Autocorrect) (Figure 1).

Figure 1. Set up Autocorrect to deal with any long words or phrases you regularly have to type.
That way, the next time you need to type a name in the text flow, you can just type a short code. InDesign will automatically expand it to the full name, correctly spelled. (Assuming you entered the correct spelling in Autocorrect, of course.)
—Anne-Marie Concepción
Jumping Around in InDesign
To jump to any document
page in InDesign, press Ctrl/Command+J and enter the page number. Or, to jump to a parent page, enter the page prefix.
—Mike Rankin
Master the Nudge in Illustrator
Illustrator’s default nudge increment amount is 1 pt., but you can choose a value more relevant to your task at hand.
Ctrl/Command+K: Opens the Preferences panel and highlights the keyboard increment field (Figure 2). Just enter a numeric value and press the Enter/Return key to change it.
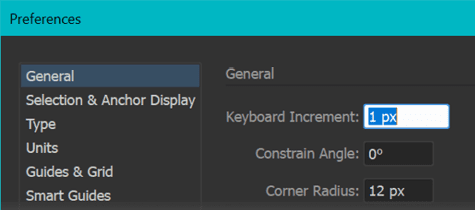
Figure 2. Ctrl/Command+K opens Illustrator’s Preferences panel and highlights the keyboard increment field.
- Arrow: Nudges selected artwork the amount specified in the Preferences dialog box.
- Shift+Arrow: Nudges selected artwork 10x the amount specified in the Preferences dialog box.
- Alt/Option+Arrow: Nudges a copy of the selected artwork by the amount specified in the Preferences dialog box.
- Shift+Alt+Arrow/Shift+Option+Arrow: Nudges a copy of the selected artwork 10x the amount specified in the Preferences dialog box.
—Mordy Golding
Duplicate InDesign Objects to Another Layer
To quickly duplicate an item to another layer in InDesign, Alt/Option-drag the item’s Proxy Icon in the Layers panel.
—David Blatner
Photoshop Blend Mode Shortcuts
Want to quickly experiment with different blend modes applied to a layer in Photoshop? Target the layer in the Layers panel, and use a keyboard shortcut. All the blend mode shortcuts are composed of Shift+Alt/Option plus a letter. Here are a few common ones you should commit to muscle memory.
- Screen: Shift+Alt/Option+S
- Multiply: Shift+Alt/Option+M
- Overlay: Shift+Alt/Option+O
- Normal: Shift+Alt/Option+N
- Color: Shift+Alt/Option+C
—Julieanne Kost
Rotating the View in Illustrator
Having a hard time editing some Illustrator artwork because it’s rotated on the artboard? Choose View > Rotate View to Selection. When you’re done making your edits, press Esc to rotate back to the normal orientation.
—Mike Rankin
Draw, Reposition, Continue Drawing
Start drawing a frame in InDesign, then (still holding down your mouse button) press and hold the spacebar so you can reposition the frame. Once it’s in the correct position, release the spacebar and continue drawing.
—Claudia McCue
Making Dotted Lines in Illustrator
To apply a dotted stroke to a path in Illustrator, use the controls in the Stroke panel. First, turn on Dashed Line. Set the first dash length to 0. Then, make the gap twice the value of the stroke weight for perfectly spaced dots (Figure 3).
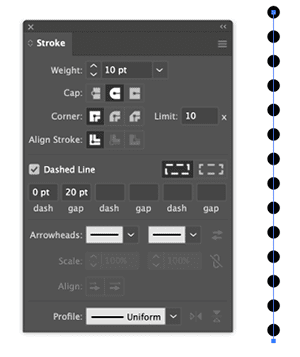
Figure 3. Stroke settings for making a dotted line in Illustrator
—Ari Weinstein
Bevel and Emboss Effect in InDesign
Bevel and Emboss gives your text a raised or even metallic look. I use an Outer Bevel to make type look like it’s being pushed out of the background. In Figure 4, the fill color of the text is white and its blend mode is Multiply, effectively making the text fill disappear—all you’re actually seeing are the effects themselves. For some texture, I added an inner shadow with 10% noise.

Figure 4. Effect is applied to the text, not the object. The color of the text is set to Paper, and its blend mode to Multiply which neutralizes white, so that all you see are the effects.
—Nigel French
Keeping Photoshop Vectors Sharp in Output
If you have text or other vector shapes in your Photoshop document, save the file as Photoshop PDF instead of PSD to maintain the sharp outlines.
—Sandee Cohen
Change the InDesign Pasteboard Size
By default, the Pasteboard above and below your pages is just 1 inch tall. To make the Pasteboard taller, go to the InDesign (macOS) or Edit (Windows) menu and select Preferences > Guides & Pasteboard. For Vertical Margins in the Pasteboard Options section of the dialog box (Figure 5), increase the amount to any size up to 120 inches, and click OK to apply.

Figure 5. Setting a vertical amount of space for the pasteboard
—Jeff Witchel
New Document from Photoshop Layer
To create a new document from one or more layers, select the layers in the Layers panel. Choose Duplicate Layer from the Layers panel menu (Figure 6). Then in the dialog box, choose Destination > Document > New.
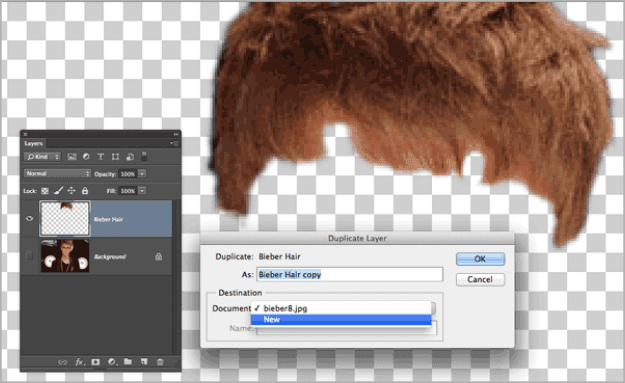
Figure 6. Creating a new layer to create a new document
—Mike Rankin
Text Spacing Shortcuts
You can adjust the spacing of text by holding Alt/Option and using the arrow keys in InDesign and Illustrator. With a selection of text, press Alt/Option+Left Arrow to decrease tracking, Alt/Option+Right Arrow to increase tracking, Alt/Option+Up Arrow to decrease leading, and Option/Alt+Down Arrow to increase leading. With your cursor between two characters, press Alt/Option+Left or Right Arrow to decrease or increase kerning.
—Michael Ninness
Viewing Overset Text
You don’t have to enlarge a text frame to see and edit overset text. View the story in the Story Editor (Ctrl/Command+Y). Editable overset text appears at the end of the story next to a red vertical line.
—Anne-Marie Concepción
Breaking Special White Space Characters
InDesign treats special white space characters (such as em and en spaces) as nonbreaking. If you want to allow them to break at the end of the line, insert a Discretionary Line Break (Type > Insert Line Break > Discretionary Line Break).
—Nigel French
Extract All Images from a PDF
Ever been asked to provide all the images in a PDF as separate files? Or, maybe you need to use the images in another project, but you don’t have the original working files? In either case, you can simply export all the images at once (Figure 7).

Figure 7. You can export all images from a PDF in one step.
- Open the PDF in Acrobat.
- Select Export PDF from the righthand toolbar.
- Select Image and turn on the Export All Images option to export them individually.
- Only need to extract one image? Right-click it with the Selection tool and choose Save Image As.
—Colleen Gratzer
Drag and Drop to Locked or Hidden Layers in InDesign
To move an object to any hidden or locked Layer, Ctrl/Command-drag the little square in the Layers panel to your chosen layer.
—Scott Citron
Adding Texture to Illustrator Artwork
It’s easy to add some texture to your vectors with Illustrator’s Texturizer effect. Select elements of your artwork to stylize, and choose Effects > Texture > Texturizer.
Texturizer has four styles you can choose from the Texture menu: Brick, Burlap, Canvas, Sandstone. You can also experiment with the other five textures in the Effects dialog box. Note: The texture will be applied apply to both strokes and fills of your selected artwork (Figure 8).
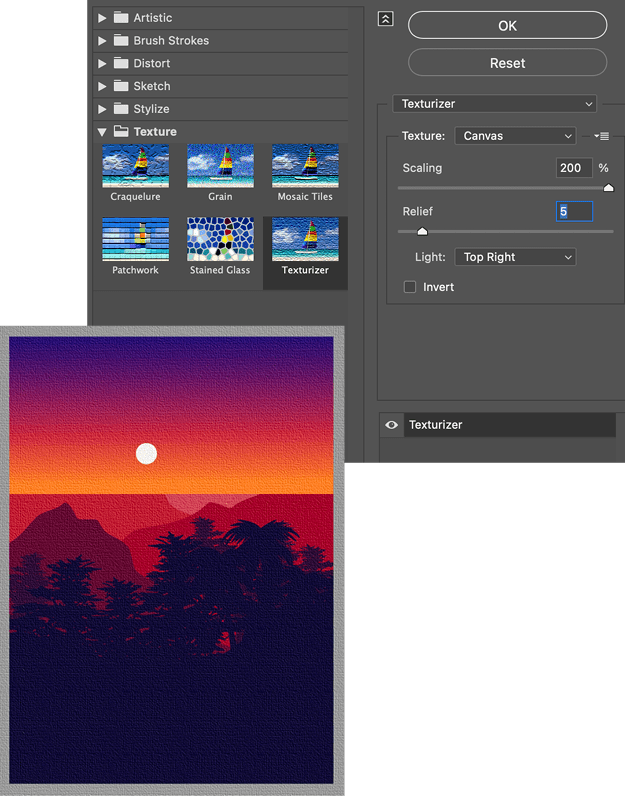
Figure 8. It’s easy to apply an effect that makes flat vector art look like it’s on a background material such as canvas.
—Ari Weinstein
Snap Guides to Tick Marks
You like pulling guides out on to your pages, but you don’t like placing them at positions such as 10.256 cm? You can snap a guide to the nearest tick mark—and therefore to more normal values—if you hold down the Shift key while you’re dragging it. Bonus: It works the same in Illustrator.
—David Blatner
Add Layer Sets to InDesign Documents via Snippets
If you commonly have to add the same set of layers to InDesign documents, consider using snippets. They make the job a simple drag and drop. First, select an object on each layer you want to copy to other documents. Choose Export > Format: InDesign Snippet. In the receiving document(s), go to the Layers panel menu and make sure that Paste Remembers Layers is turned on. Then, drag the snippet from the Finder or Explorer, or choose File > Place. The layers are instantly added to the document, along with any other styles and swatches used by the objects in the snippet. So, you don’t even need to finish placing the objects. You can press Esc, and you’re done (Figure 9).

Figure 9. Add any layer structure to your InDesign documents instantly with Snippets.
—Branislav Milic
Decimal Align Numbers in InDesign Table Cells
To align numbers in a table based on their decimal points, start out by making sure the text is left-aligned in the Paragraph Options. Next select the table cells or columns that hold the numbers. Then, even though you haven’t typed any tabs, choose Type > Tabs to open the tab options. Finally, choose the Align on Decimal tab, and click the ruler to set the position (Figure 10).

Figure 10. Setting an Align On tab in a table
—Bart Van de Wiele
Illustrator’s Flexible Type Tool
You don’t actually need Illustrator’s Area Type tool. The regular Type tool will change into the Area Type tool when your cursor is over the border of a shape. It will also turn into the Type on a Path Tool when your cursor is over a path. This means you need to be careful that you don’t accidentally click a shape or path with the Type tool.
—Kirsten Rourke
Using Photoshop’s Blend If Sliders
Blend Photoshop layers based on a color channel (or highlights and shadows for grayscale images) and choose which layer to affect by using the Blend If sliders. From the Layers panel, choose fx then Blending Options (Figure 11). Choosing the top slider affects the layer currently selected in the Layers panel, while choosing the bottom slider affects all layers below the current layer.
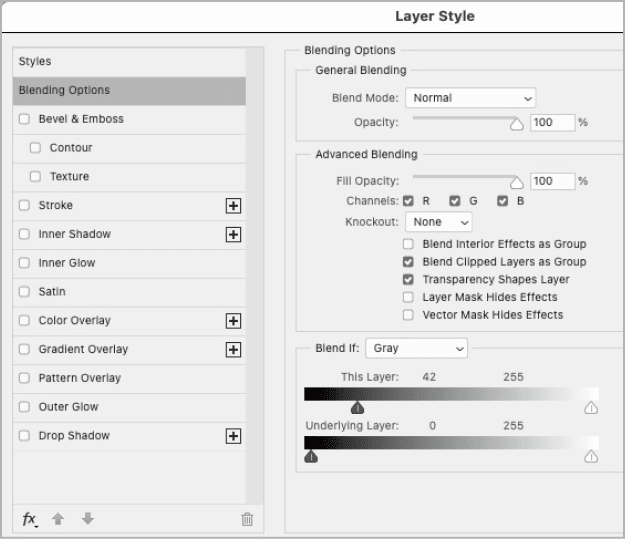
Figure 11. Photoshop’s Blend If sliders
—Mark Heaps
Standardizing Frame Size in InDesign
To change many frames to the same size in InDesign, set the height and width of one of them. Then select all the rest, and choose Object > Transform Again > Transform Sequence Again Individually.
—David Blatner
Add Image Captions Fast with the Links Panel
The fastest way to add a bunch of captions to images is to use an obscure command in the Links panel menu. First, set up the captions for your document (choose Object > Captions > Caption Setup). This same command is also in the Links panel menu. Then in the Links panel, select all the links you want to add captions to. Finally, from the Links panel menu choose Captions > Generate Static Captions (or right-click on the images in the Links panel). Voilà, all the captions are added throughout the document! (Figure 12)
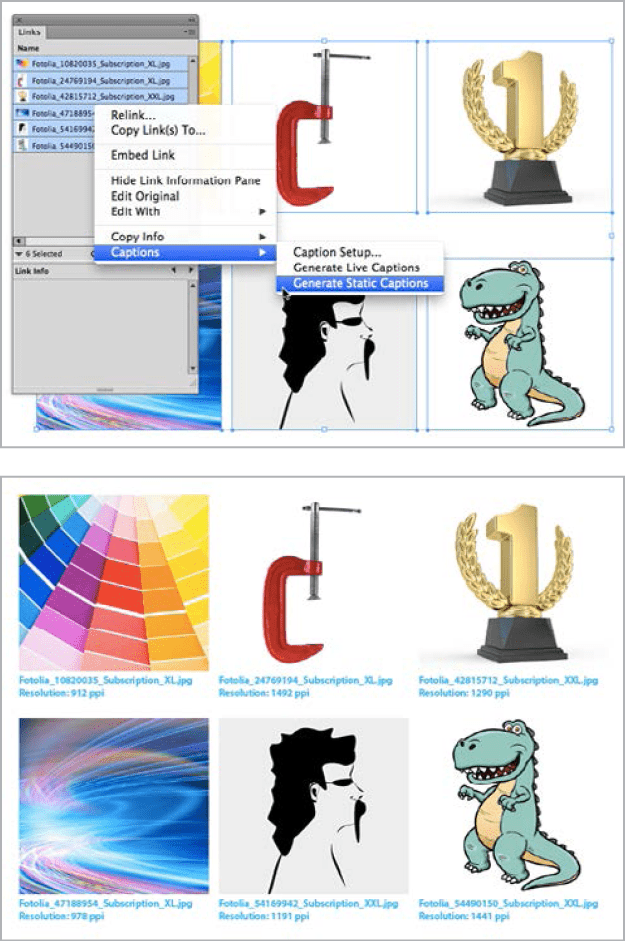
Figure 12. You can apply captions to all the images in your layout at once.
—Conrad Chavez
Instant Swatch Replacement in Illustrator
To instantly replace a swatch in Illustrator Alt/Option-drag one swatch over another. It works with symbols, too.
—Laura Coyle
Resize Photoshop’s Canvas to Fit
Easily fit your Photoshop canvas to include any items that have moved outside its boundaries, without having to enter specific width and height values. Use the Reveal All command found in the Image menu with the same group of commands as Canvas Size. Just choose it, and the canvas is increased to fit any content that extended past the edge of the canvas (Figure 13).

Figure 13. Use the Reveal All command to automatically re-size the canvas to fit all elements.
Need to shrink the canvas quickly to fit your content? Then use the Trim command, also located in the Image menu. Note that unlike Reveal All, Trim gives you a dialog box with options for resizing the canvas.
—Mike Rankin
Drag and Drop into Books
To add multiple InDesign files to a book, drag files from the Explorer (Windows)/Finder (macOS) or Adobe Bridge into the Book panel. You can drag multiple files at a time. You can even drag a top-level folder, and all the InDesign files in that folder plus all its subfolders will be added to the book!
—Keith Gilbert
Extending a Text Selection in InDesign
With text selected in InDesign, you can hold down the Shift key and the Right or Left Arrow key to extend the selection in that one direction. But what if you want to extend it in both directions? (Figure 14)

Figure 14. Shift+Right Arrow extends the text selection to the right. Temporarily lift up on the Shift key, and Shift+Left Arrow key now lets you extend the selection to the left.
The trick to getting the selection to shrink or grow in both directions is to temporarily release the Shift key before switching the side of the selection that you want to change.
—Ashley Mitchell
Create a Three-Sided Text Frame in InDesign
To create a text frame that has borders on only three sides:
Create a text frame (Object > Text Frame Options), and give the frame an inset.
Apply a stroke to the frame, adding an arrowhead and tail if you want (although they won’t be visible yet).
Switch to the Direct Selection tool, drag a selection marquee across any one edge of the frame to select just that edge (Figure 15), and press the Delete key to delete that single line segment.
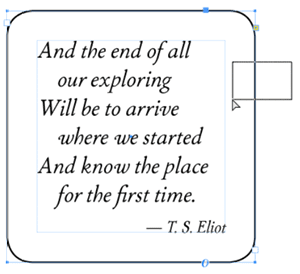
Figure 15. Dragging a selection marquee across a frame edge to select just that edge
Even though the text frame has only three visible sides, it still behaves as a text frame. You can resize the frame to make it wider or longer, change the contents, thread it to other frames, and so on.
—Keith Gilbert
Converting Guides on the Go
To convert between horizontal and vertical guides as you’re dragging a new one from the rulers, Alt/Option-drag the guide. This works in Photoshop, InDesign, and Illustrator.
—Mike Rankin
Commenting is easier and faster when you're logged in!

Recommended for you

50 Classic Tips From 50 Issues
David Blatner digs into the InDesign Magazine archives to deliver one great tip...
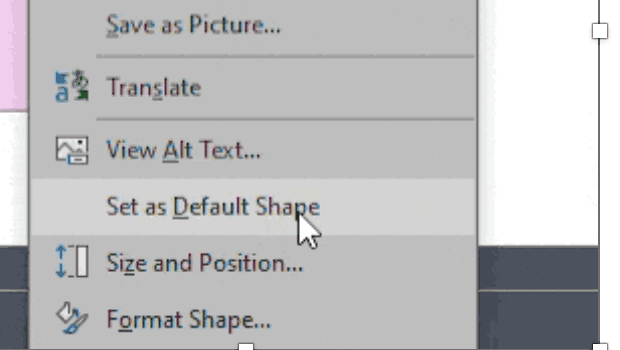
How to Set Default Shapes, Lines, and Text Box Styles in PowerPoint
One way to make working in PowerPoint smoother is to set default shapes, lines,...