
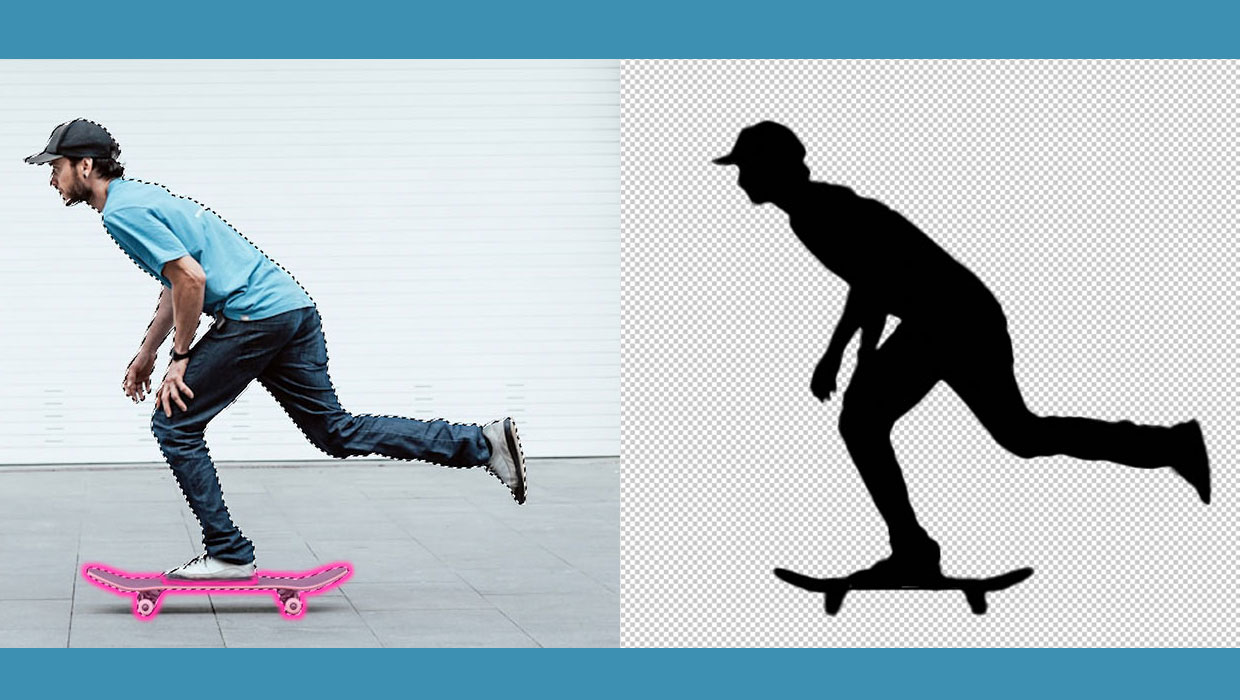
Including photographs of people in websites and publications can raise difficult issues over race, gender and age. Silhouettes, on the other hand, neatly avoid all these problems by essentially representing people as monochromatic shadows. Here’s how to create a silhouette in Photoshop from just about any image.
Choose Your Image
I’ll use a skateboarder for this example. It’s important to consider the shape when selecting your image: In the photos below, the pose of man on the left is unclear, and because his legs merge into the skateboard, this wouldn’t make a good silhouette. Without the image details you might not even know he was riding a skateboard. The man on the right, however, has a clearly identifiable shape and activity. He’ll also be a lot easier to extract from the background. 
Select the Subject
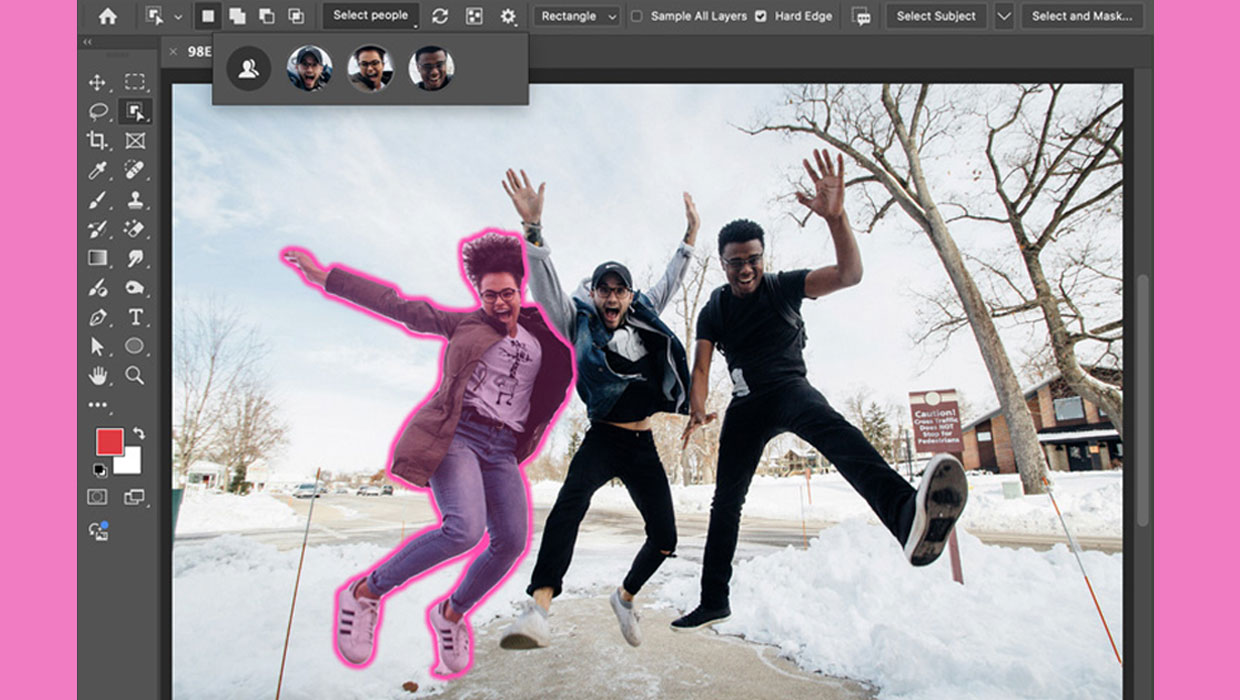
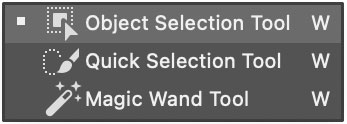 Choose the Object Selection tool, which is nested with the Quick Selection tool and the Magic Wand. As you move it over the image, Adobe Sensei AI will automatically select the person. But notice it hasn’t selected the skateboard.
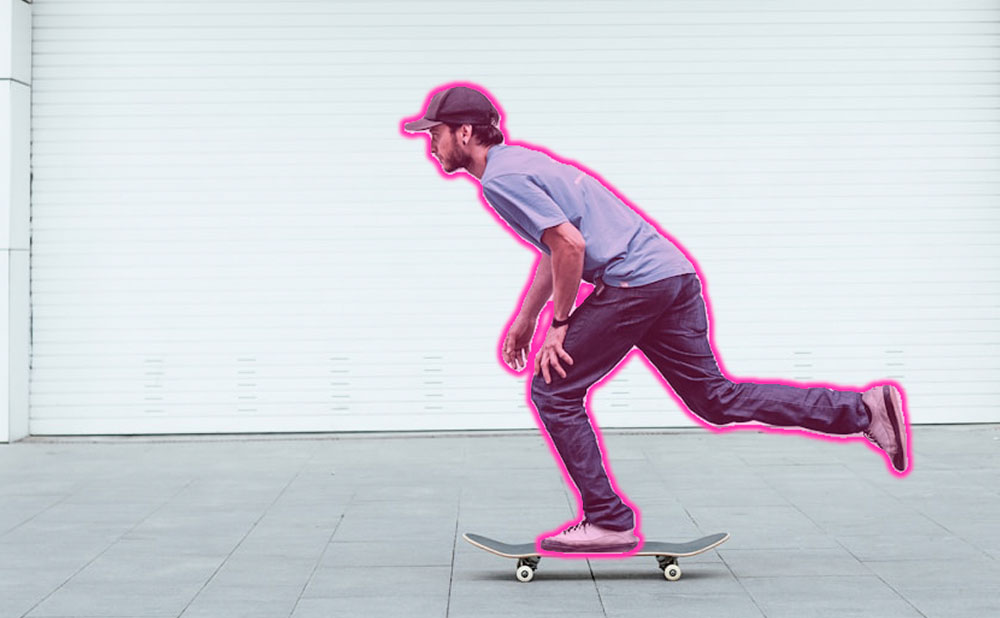
Add to the Selection
Hold the Shift key, and move it over the skateboard. You’ll see the man’s outline as a standard “marching ants” selection, and the skateboard will be highlighted. Click it to add it to the selection. 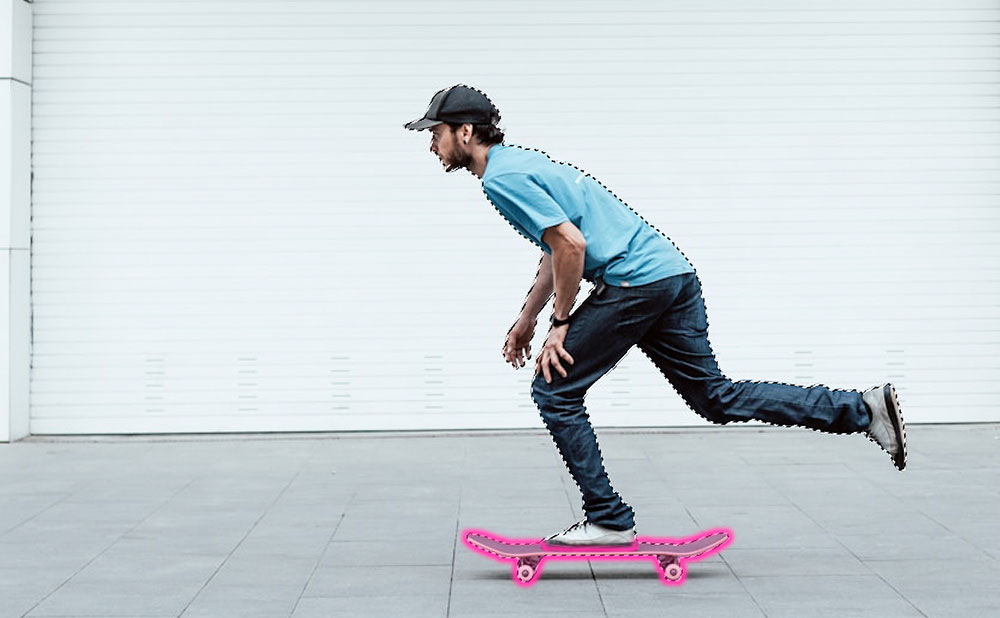
Tidy It Up
You could just use the selection you’ve got so far, but it’s worth putting in an extra couple steps to clean it up. Choose Select & Mask from the Options bar, then in the dialog that appears go to the View pop-up at the top of the Properties pane. Choose Black & White (or use the keyboard shortcut K), to see your silhouette so far. You can now see there’s a bit missing on the man’s chin, and between his foot and the skateboard. 
A Cleaner Result
Use the Brush tool to paint in any missing areas. For a cleaner silhouette, try increasing the Smooth amount just a little, and increase the Contrast to get a crisp edge. When you’re done, click OK. 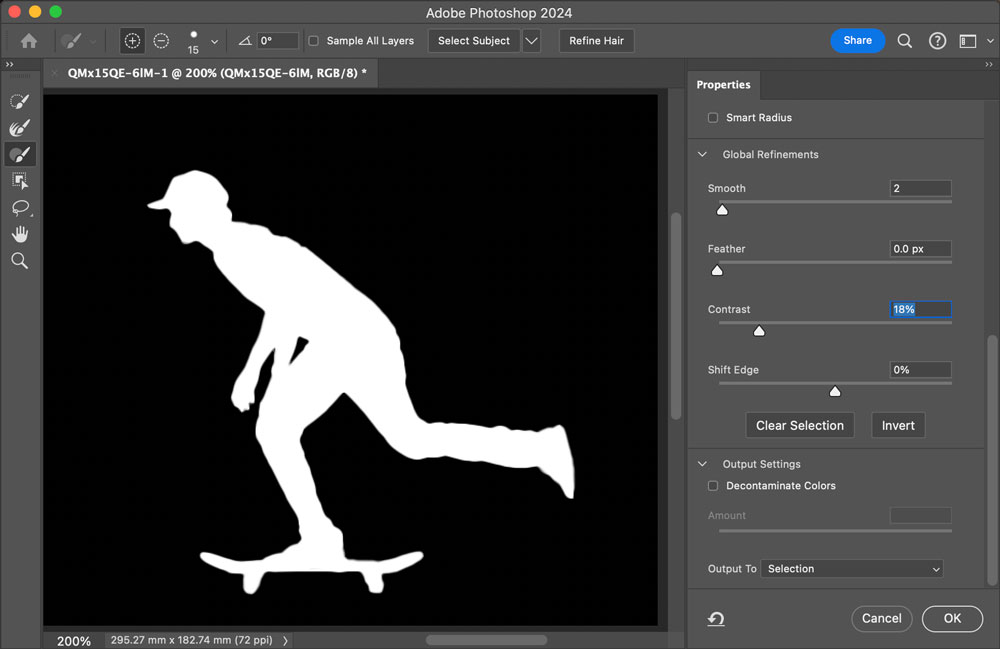
The End Silhouette
Make a new layer, and hide the background layer. With the selection active, choose your foreground color (or press D for the default Black/White foreground and background combination) and press Option/Alt-Backspace to fill the selection with that color. Crop it to size, and export it as a JPG file or as a PNG if you want to place it on a colored background. 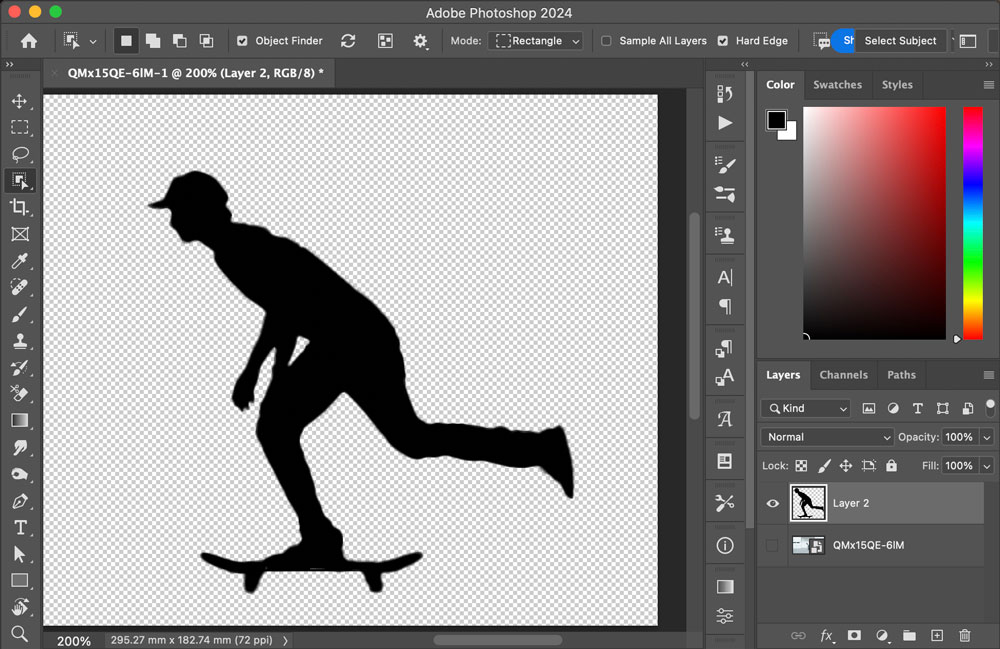
This article was last modified on July 3, 2024
This article was first published on July 3, 2024
Commenting is easier and faster when you're logged in!

Recommended for you
Compositing Video in Photoshop
Tips for using masks, blend modes, filters, and more with video in Photoshop.
New Features in Photoshop 2025
New features in Photoshop 2025 including powerful new ways to select, mask, and...

How to Mask Hair Using Today’s Techniques in Photoshop
Using Photoshop features like Generative Fill and Select and Mask makes the job...