
Linking & Syncing Content in InDesign
When you need to use a piece of content in different formats and places in InDesign, reach for the Content Collector.
This article appears in Issue 10 of CreativePro Magazine.
If you work with long documents and struggle with the task of coordinating the same content in multiple places with different formatting, this article is for you. I’ll show you how to use some obscure but powerful InDesign features that can save you gobs of time and toil over the long run.
Running Heads or Footers in Multiple Shades
Let’s say you want your page footer set in black most of the time, but reversed when it appears over an image or a dark background rather than pristine paper. Or perhaps you need different colors or styles for the same footer in different sections of a long document. Or the project is an InDesign book (INDB) with separate chapter documents that each use a different color of the same running head.
Do it once
Here’s the problem: You never want to have to update the same text in multiple places. Each additional copy multiplies the possibility of a typo or a missed update when something changes. And let’s square our shoulders, jut out our chins, and acknowledge the awful truth: Something always changes.
So, you want every instance to stay linked to the original source text, but you want it to keep its own style: reversed (paper) instead of black, say, perhaps with a heavier font to allow for ink bleed. That means using a different paragraph style, but if you simply link the child text frame to the parent, any update will cancel the custom styling in the copy.
Your regular footer on most pages might look like this on the parent page:

But on certain pages, such as a chapter opener, you might need it to reverse out of a color flash:

There might be several variations, and you don’t want to have to change all of them individually.
A seldom-used feature of InDesign, Place and Link lets you use the same text in multiple places, with all instances linked to one original. First, let’s look at the mechanics of how the feature works by default, then delve into the magic bits.
Place and Link basics
In my example, I set a company name in Posterama 1919, Black, 24 pt and named its paragraph style Parent Text.
Choosing Edit > Place and Link (or just pressing B) brings up a large and mysterious panel, once called the Content Conveyor but now nameless. The Content Collector tool is enabled, meaning that anything I click will be copied to the huge “clipboard with benefits” that takes up most of the panel. You have to look closely at Figure 1 to see that the far-left icon, a box of beans with an arrow pointing inward (![]() ), is highlighted. That’s the Content Collector. Hovering over the text frame creates the fat blue outline indicating it will be copied when I click.
), is highlighted. That’s the Content Collector. Hovering over the text frame creates the fat blue outline indicating it will be copied when I click.
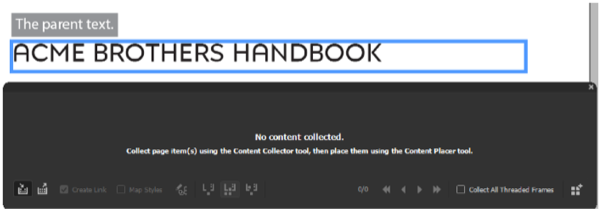
Figure 1. The ominous-looking Content Conveyor ready to collect objects from the page
A copy of the text frame is now in the hopper, ready to be re-used. Click the second-to-left icon, the one with more beans and an outward-pointing arrow (![]() ), or press B again to enable the Content Placer tool. (Pressing B toggles between the Collector and the Placer.)
), or press B again to enable the Content Placer tool. (Pressing B toggles between the Collector and the Placer.)
Now click the Create Link checkbox as shown in Figure 2, and the middle one of the three weirdly incomprehensible “leaky bucket” icons in the middle of the bottom row.
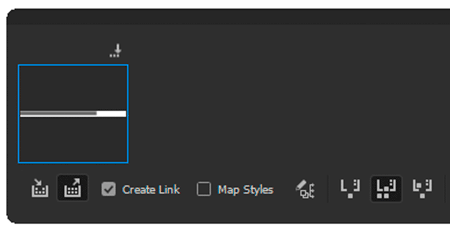
Figure 2. Ready to place a linked object
This changes the operating mode of the Content Placer so it will keep a copy in the hopper after it has placed something. Officially, this mode is called Place Multiple And Keep In Conveyor. With the loaded Place cursor, I click a little lower on the page to get a linked child text frame—a duplicate of the parent—with a whopping link icon you can’t miss (Figure 3).
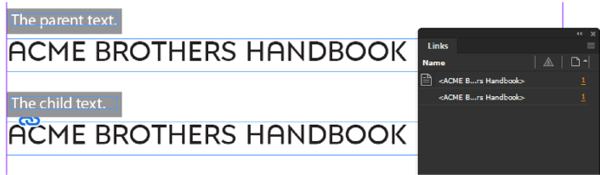
Figure 3. The big link icon shows that the second frame is a child object. Note that the Links panel shows both frames, even though only one of them is genuinely linked.
The Links panel now shows the two text frames as linked objects, indicating they are on page 1 of the document.
Suppose the second frame is on another page, and it needs to be red Posterama 1984 instead of the old-fashioned 1919. I make a new paragraph style called Child Text and apply it to the child text (Figure 4).
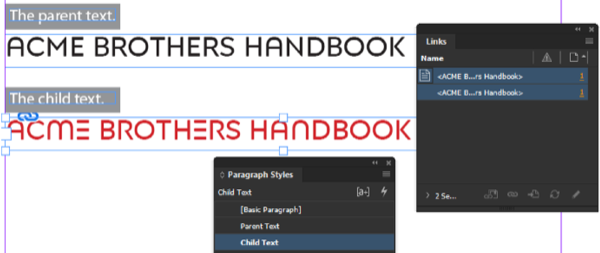
Figure 4. The Child Text paragraph style applied to text in the linked text frame
If I now decide that the company name would read better if it were abbreviated, I can make that change in the parent text and click out of that frame. InDesign immediately displays a warning triangle onto the child frame and its instance in the Links panel (Figure 5).
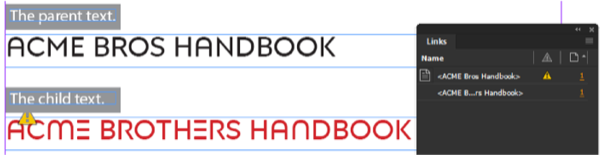
Figure 5. The child frame is now out of date, indicated by the yellow warning triangle.
To update the now out-of-date child frame, I can click the yellow triangle on the text frame or the Update Link button in the Links panel. However, when I do so, InDesign warns me that I’m about to do something I may regret (Figure 6).
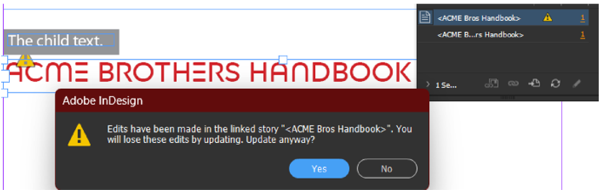
Figure 6. InDesign predicts heartbreak but is willing to let me go ahead.
Being a devil-may-care type, I click Yes, and it’s at once obvious that InDesign’s unwelcome skepticism was justified. Figure 7 shows result: The text has updated, but so has the paragraph style. It’s now back to the original Basic Black style of the original. Coco Chanel would be glad, maybe, but I’m not.
At least the Links panel seems happy. Why does it look so smug?
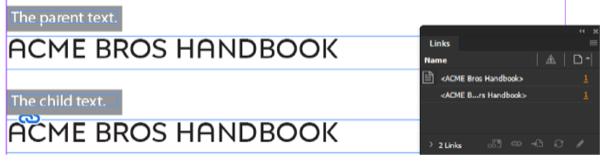
Figure 7. The child text updates and reverts to its original paragraph style, Parent Text.
Here’s where the magic happens
What I want is for the text in the child frame to update to match the parent, but keep its carefully crafted paragraph style that I spent hours agonizing over until it felt right.
What I need to do is click the Map Styles checkbox in the Content Conveyor and click its neighbor, another indecipherable icon called, according to its tooltip, Edit Custom Style Mapping (Figure 8).
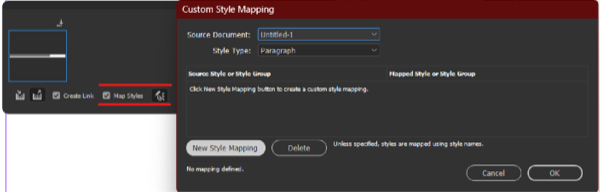
Figure 8. Turn on Map Styles and open the Custom Style Mapping dialog box to map the Parent Text style to something different when placed in a child frame.
If you do a lot of work with styles, this dialog box should look familiar, because it works much the same as the Nested Styles dialog box. You click the New Style Mapping button and a line appears with two columns: a Source Style menu on the left, and a Mapped Style menu on the right. Our original is Parent Text, so I choose that for the Source Style (Figure 9).
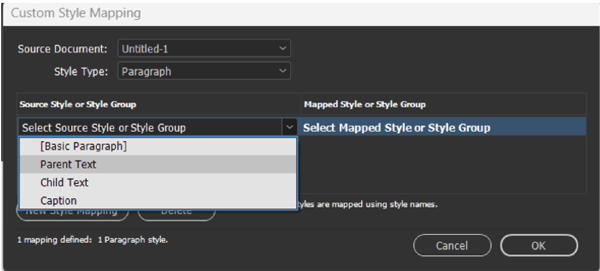
Figure 9. The paragraph style of the parent frame is Parent Text, so choose that in the left column.
Then I select Child Text for the Mapped Style in the right column. Notice that, unlike the Nested Styles dialog box, Custom Style Mapping has no New Style option. So, any style you’re going to map must be set up in advance, as Figure 10 shows.
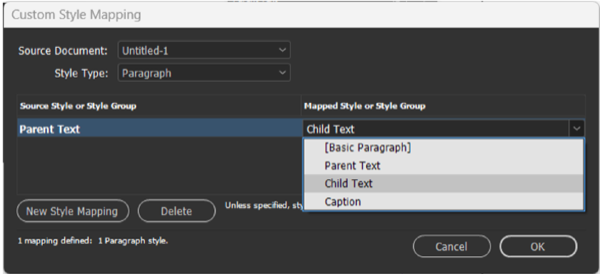
Figure 10. What’s missing? A New Style option like the one found in the Nested Styles dialog box and elsewhere in InDesign.
With the style mapping in place, I can simply delete the first child text frame and place a new one with the Content Placer tool. Alternatively, I could select the first child text frame and use the Link Options command in the Links panel menu to set up the style mapping. (More on that incredibly powerful command in a bit.)
In either case, I now have a child text frame containing text formatted with the Child Text red paragraph style (Figure 11).
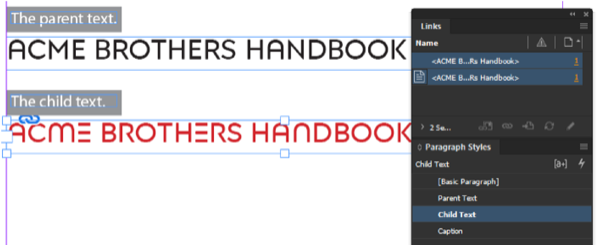
Figure 11. With the style mapping in place, a newly placed child text frame arrives already styled with the Child Text paragraph style.
To test out the style mapping, I can edit the parent text like before, click the yellow triangle to update, and this time only the text changes in the child frame. The paragraph style doesn’t, which is exactly what we want (Figure 12).
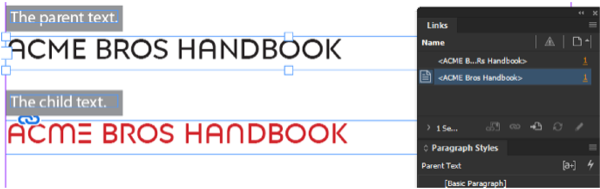
Figure 12. Now the text updates properly without losing its applied paragraph style. Joy, rapture.
But wait! There’s more! If we want to set up another linked frame with unique text formatting, we can add a third paragraph style, Grandchild 1, and map Parent Text to that in the Custom Style Mapping list (Figure 13). This time, I’ll use Posterama 1945 with a gray paragraph shading and white text.

Figure 13. Change the Mapped Style, and the next time you place the item it will have this new style without affecting the one you placed earlier.
Note that the text we already placed doesn’t change. This mapping will only take effect on the next click of the loaded Place cursor. So, another click on the page with the Content Placer (Figure 14), and voilà!
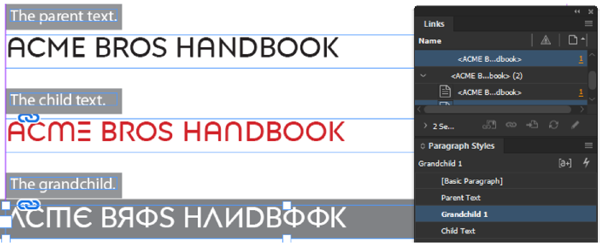
Figure 14. The grandchild shows its independence from its ancestors.
The grandchild text has the new mapped style, independent of the child or the parent. To those of us beyond a Certain Age, this sounds depressingly familiar, but here it’s a Good Thing. I can edit the text in the original frame without affecting how its descendants are styled.
Links to the child and grandchild frames show as out of date once the parent text edit completes. In the Links panel, the descendants show the new text while the original doesn’t (Figure 15).
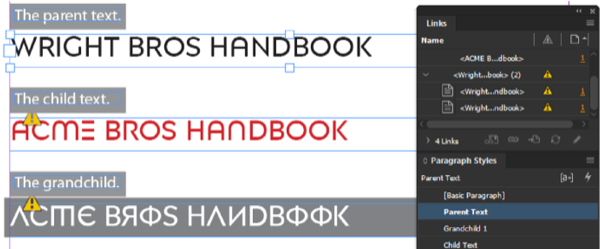
Figure 15. With the change to the parent text, the linked text frames show as out of date. Oddly enough, the original in the Links panel doesn’t update. It still shows ACME instead of Wright.
When I update the links, all the text frames show the new copy but retain their colors and fonts (Figure 16).
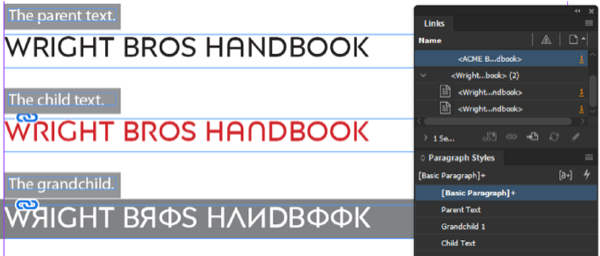
Figure 16. All is well after the links are updated.
This technique works within a single document or across multiple documents in a book or a collection of booklets that share common styles.
Should you ever wish to make a child frame completely independent from its parent, simply right-click it in the Links panel (or go to the panel menu) and choose Unlink. The link adornment will disappear from the child frame and the content will no longer be listed in the Links panel.
Link Options: Your Superpower for Controlling Linked Content
There is so much more to linked content than just synchronizing text. You can also sync any combination of frame attributes—or leave them independent in the child frame(s). The key to unlocking the true power and flexibility of linked content is an innocuous-sounding command in the Links panel menu called Link Options (Figure 17).
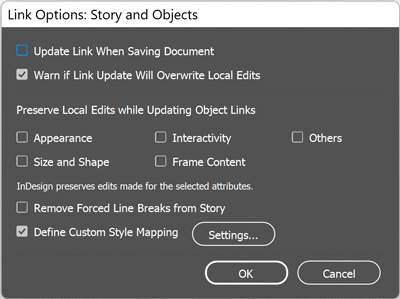
Figure 17. The Link Options dialog box
In the Link Options dialog box you can define custom style mapping for existing linked frames. Remember earlier in this article where I deleted a child text frame after changing the custom style mapping in the Content Collector? If for any reason, I didn’t want to delete the frame I could instead change the style mapping in Link Options. It gives you access to the same Custom Style Mapping controls that the Content Collector does.
Cool, right? But that’s just the tip of the iceberg. You can also sync or preserve all kinds of frame attributes when you sync the frame’s content by selecting options under Preserve Local Edits When Updating Object Links. In fact, there are five categories of frame attributes you can preserve (or sync) when updating links.
- Appearance: The frame’s stroke and fill color, stroke weight and options, effects, and corner options (but not nonprinting options or overprinting)
- Size and Shape: Text frame columns, scaling, rotation, skewing, and path shape
- Interactivity: Animation, timing, buttons and forms, and object states (but not hyperlinks applied to frames)
- Frame Content: The text or image in a frame, items in a group, Media panel settings, and HTML code
- Others: Hyperlinks, text wrap, most items in the Text Frame Options dialog box, and Object Export Options such as alt text and PDF tags
If you just change attributes on the parent frame that you’ve selected to be preserved in the child frame’s Link Options, the link will not appear as Modified in the Links panel.
Some of the categories are not clearly defined and documented, so you may have to do a little testing to get the right mix that preserves the attributes you want to keep while syncing the rest.
Bonus tip: You can also access Link Options by right-clicking an entry in the Links panel.
Everything but the Kitchen Sync
I hope this article has given you an exciting glimpse into the potential for linked content to change your workflow for the better. It’s a bit of a mystery why so many InDesign users have never touched the Content Collector or are even aware of the ability to link content. Maybe it’s because those features were lost in the shuffle when they were added back in CS6 along with a boatload of other major additions such as Alternate Layout, PDF forms, EPUB export, Auto-Size text frames, and many more. In any case, if you work with long documents I strongly encourage you to check out InDesign’s tools and features for working with linking and syncing content within a document. In your quest to discover the perfect workflow, they may be… the missing link.
Commenting is easier and faster when you're logged in!

Recommended for you

Make a Quick Grid from Objects On Your Page
How to use the Content Collector and Content Placer in InDesign to organize obje...

Work Faster with Long Documents
InDesign has a number of great features to help make book and other long documen...

A Script to Convert GREP Styles to Character Styles in InDesign
Use this free script to replace GREP Styles with locally applied Character Style...