
How to Create Amazing Animations in InDesign
How to add movement and interactivity to your layouts
This article appears in Issue 79 of InDesign Magazine.
Ask a random group of InDesign users if they know how to create animations in InDesign and the most common response will probably be, “Animations? InDesign creates animations?”
It’s not surprising that few people know about InDesign’s animations features. When they were first added to CS5, animations could be exported as Flash SWF files. When Steve Jobs decided that SWF would not be supported on Apple’s mobile devices, InDesign’s animation features began collecting dust in the corner.
Until the release in June 2014 of InDesign CC 2014, that is. With animations converted to HTML5 output and supported in fixed-layout ePub export, InDesign’s animation features got a new lease on life.
With the release of Publish Online (Preview) in CC 2015, animations got another boost. Now animations, along with other interactive elements created in InDesign, can be easily shared with others on any platform.
In this article, we take five “amazing animations” that push working with animations just a little further than the InDesign defaults. These lessons start easy and get more advanced.
1. Super-fast Spin Rotations
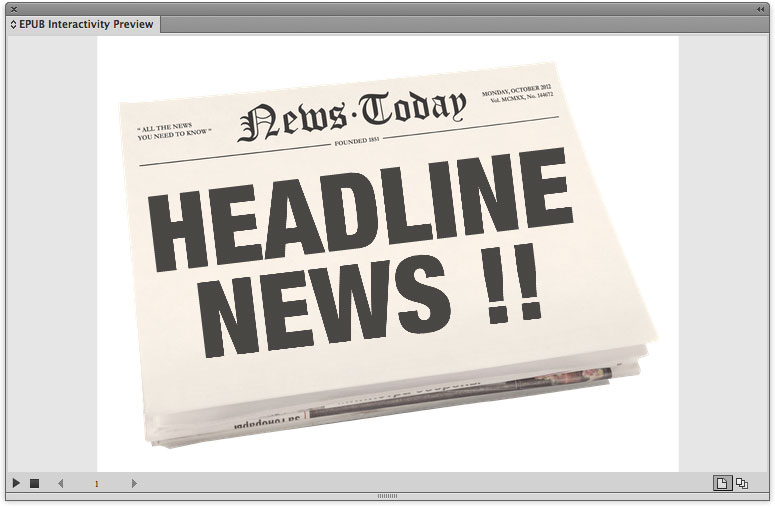
Back in the 1940s, many movies used the spinning newspaper effect to propel the story or give historical background to events. It was used effectively in classics such as Citizen Kane. Today it can be used for many corporate announcements.
The animation starts with a headline that scales up from 5% while simultaneously spinning five times. The cool trick is to rotate the objects more than 360°. This makes the object spin faster than it would if you just set the animation to play several times.

We’re showing the effect with super-fast spins, but it can be used with fewer rotations to introduce any object onto the page.
1. Set the text, and convert it to outlines. Position the outlined text on the page where you want it to spin. (You may want to save a copy of the actual text on the pasteboard in case you need to modify the text later.)

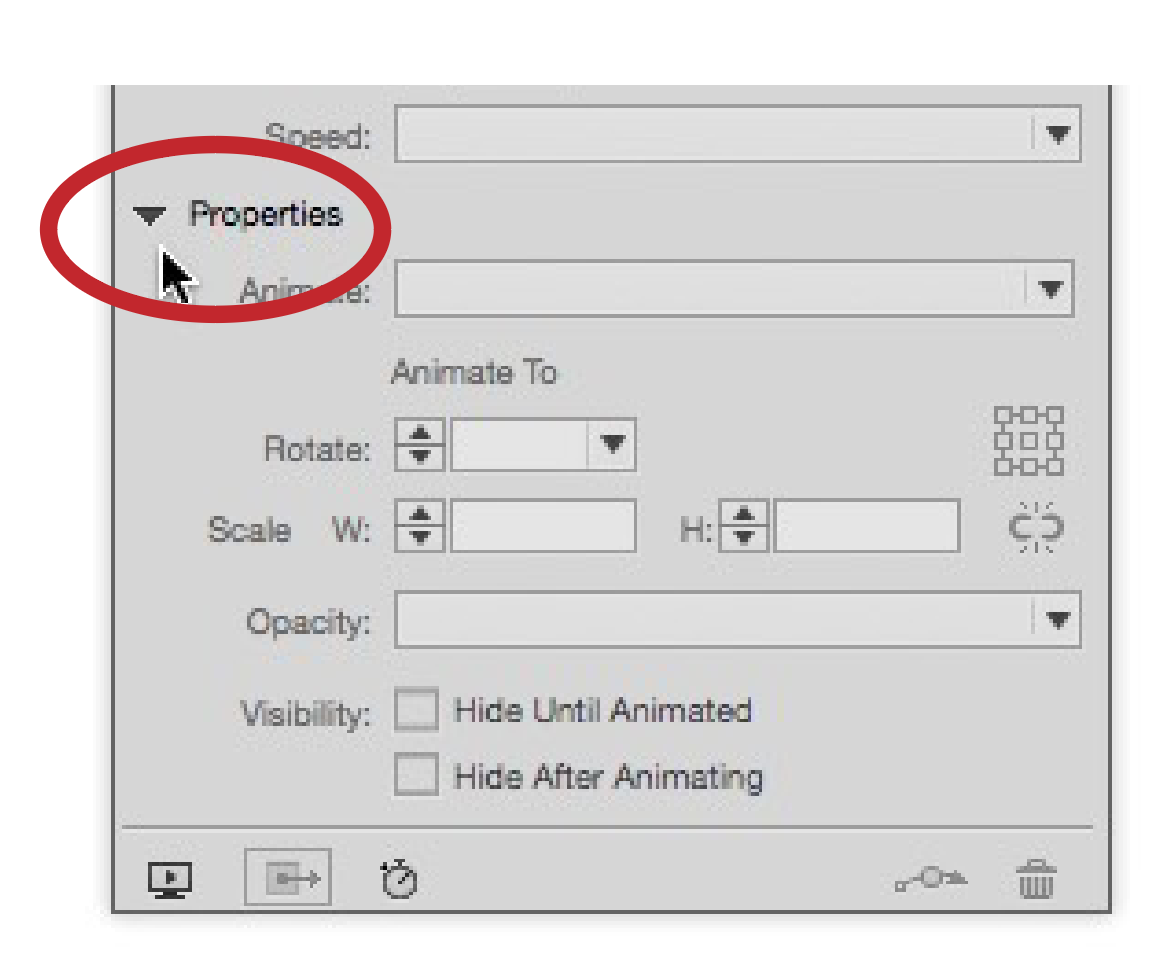
2. Open the Animation panel (Window > Interactive > Animation). Click the Properties triangle to open the Properties area of the panel. (It’s a good idea to keep the Properties options open during all your animation work.)
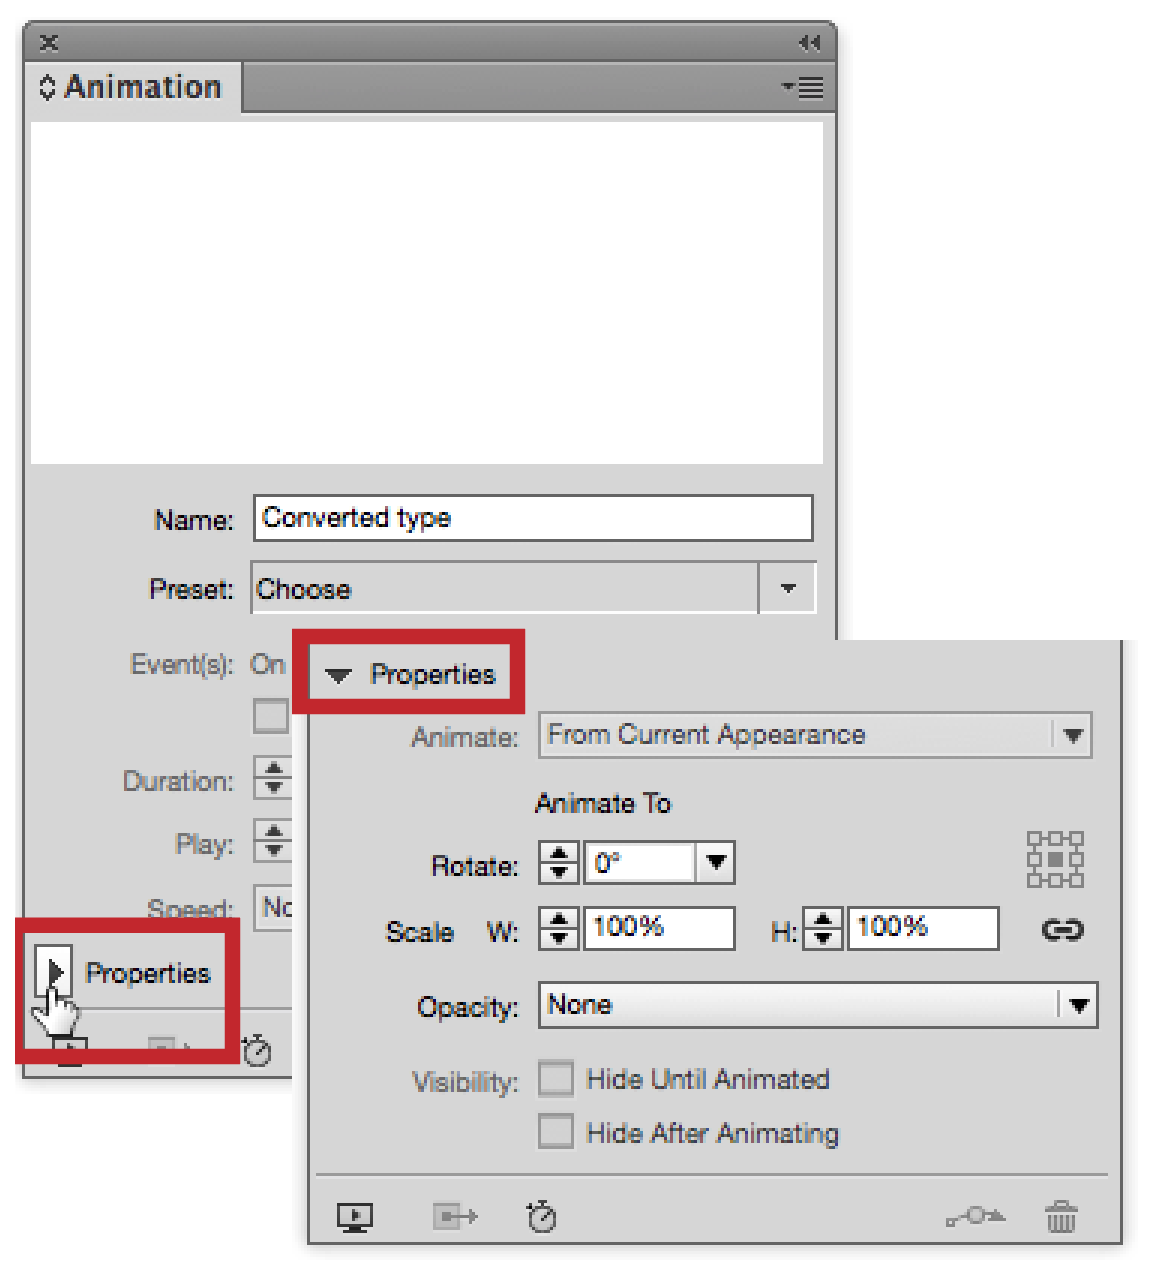
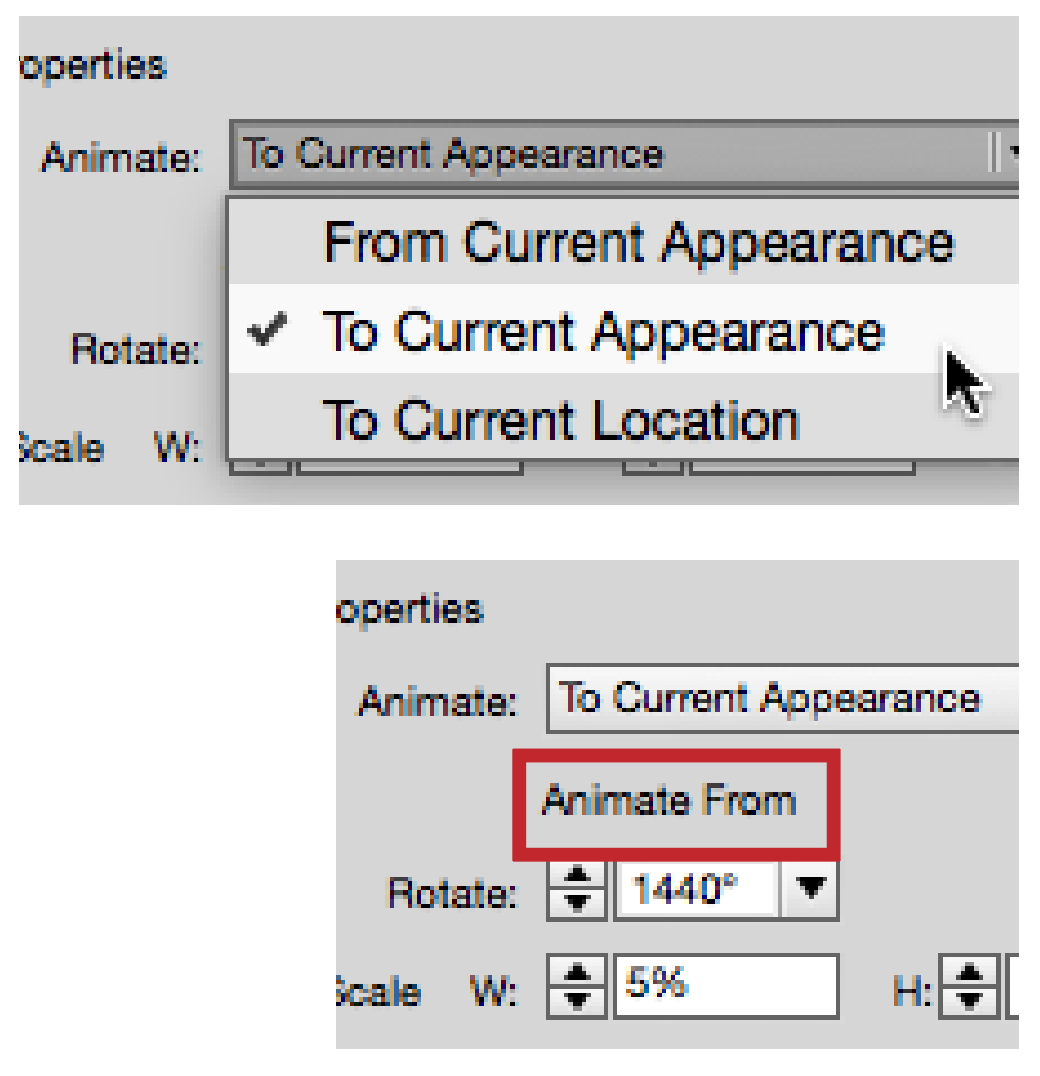
3. Select the text outlines, and enter 1440 in the Rotate field to spin the text four times. You can also enter 360*4, press Enter or Return, and let InDesign do the math. This sets the rotation and opens up the rest of the animation controls.Positive numbers spin counter-clockwise. Negative numbers spin clockwise.
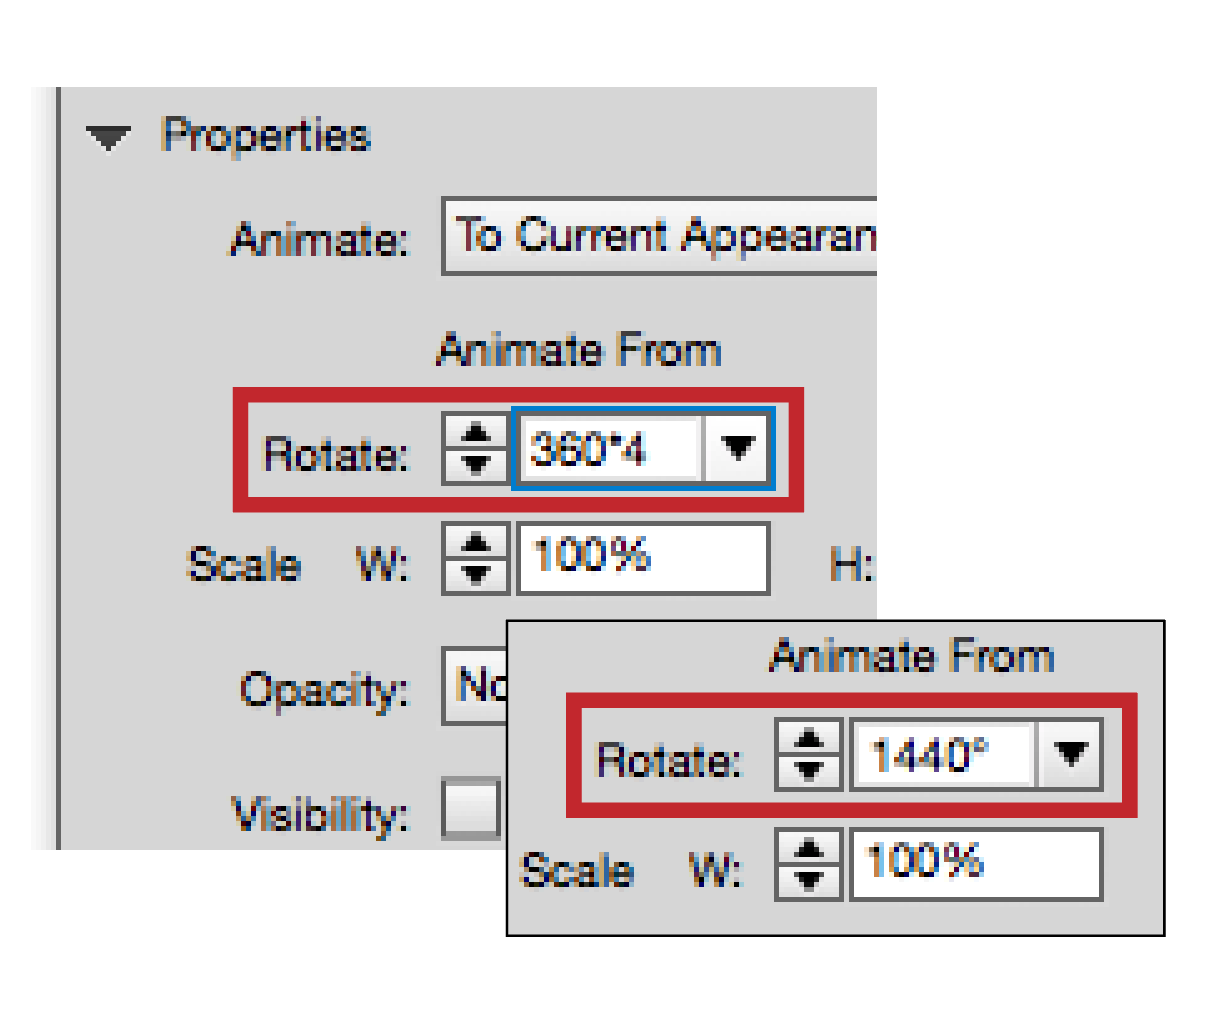
4. We want the text to start small and scale up as it spins. Change the Scale W and H fields to 5%. However, there is a problem with the settings as they appear right now. Instead of starting small and zooming up in size, the text will shrink as it spins. Fortunately, we can fix that in the next step.
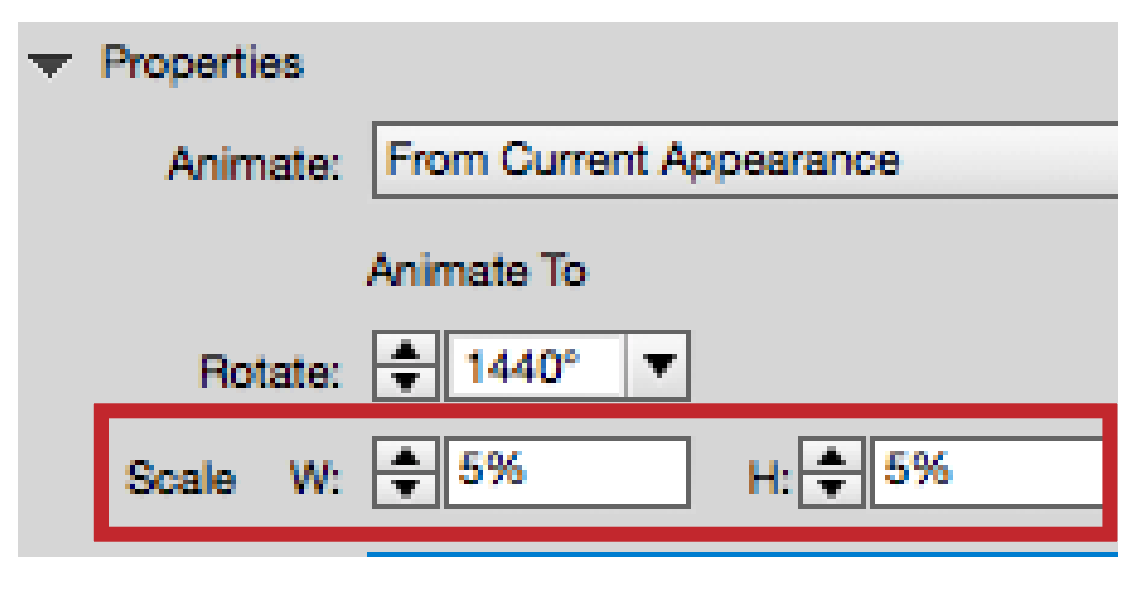
5. Choose To Current Appearance from the Animate menu. Notice that the label below now says Animate From. This indicates that the text will start at 5% of its current size and scale up.
6. Open the EPUB Interactivity Preview (EIP) panel, and click the Play button to preview the animation. The text spins and zooms into view.
Extra! Extra!
2. Custom Blinks and Pauses
You might think that setting an object to continually blink on and off would be a question of simply setting it to appear and then repeat over and over using the Loop setting. While looping is part of the answer, the challenge is to get the object to pause longer between blinks. The ordinary interface controls don’t allow you to set a pause between each time the animation repeats.
Fortunately, we stumbled onto the solution by use of a “null” object. This is an object that has no fill or stroke, but does have an animation applied to it. In this case, we’ll use the technique to make eyes that blink, but you can use it to add a pause to any animation that repeats.
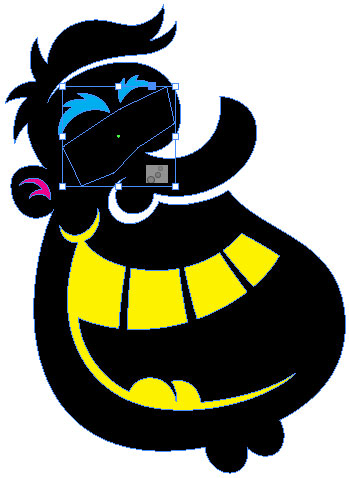
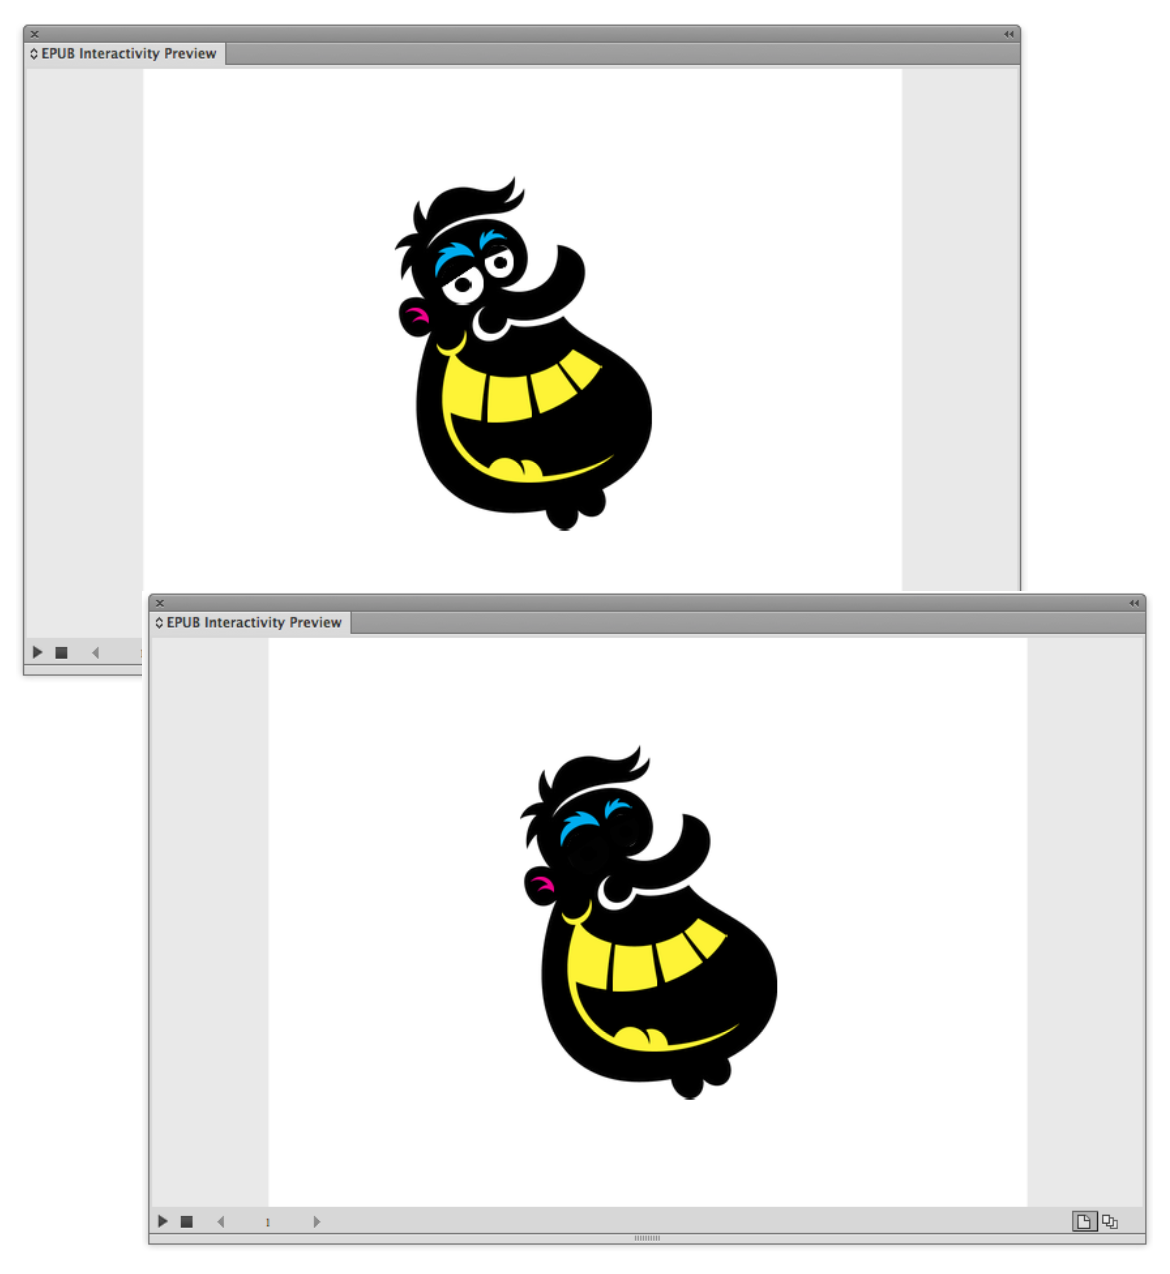
- Create the object that will be the “off” state of the blink. Here, the eyes will be visible and the black polygon will be the mask that appears and disappears to hide them.

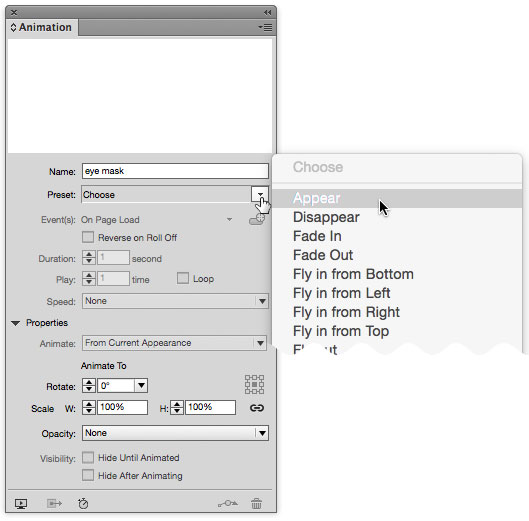
- Select the masking object, and apply the Appear preset from the Animation panel Preset menu.
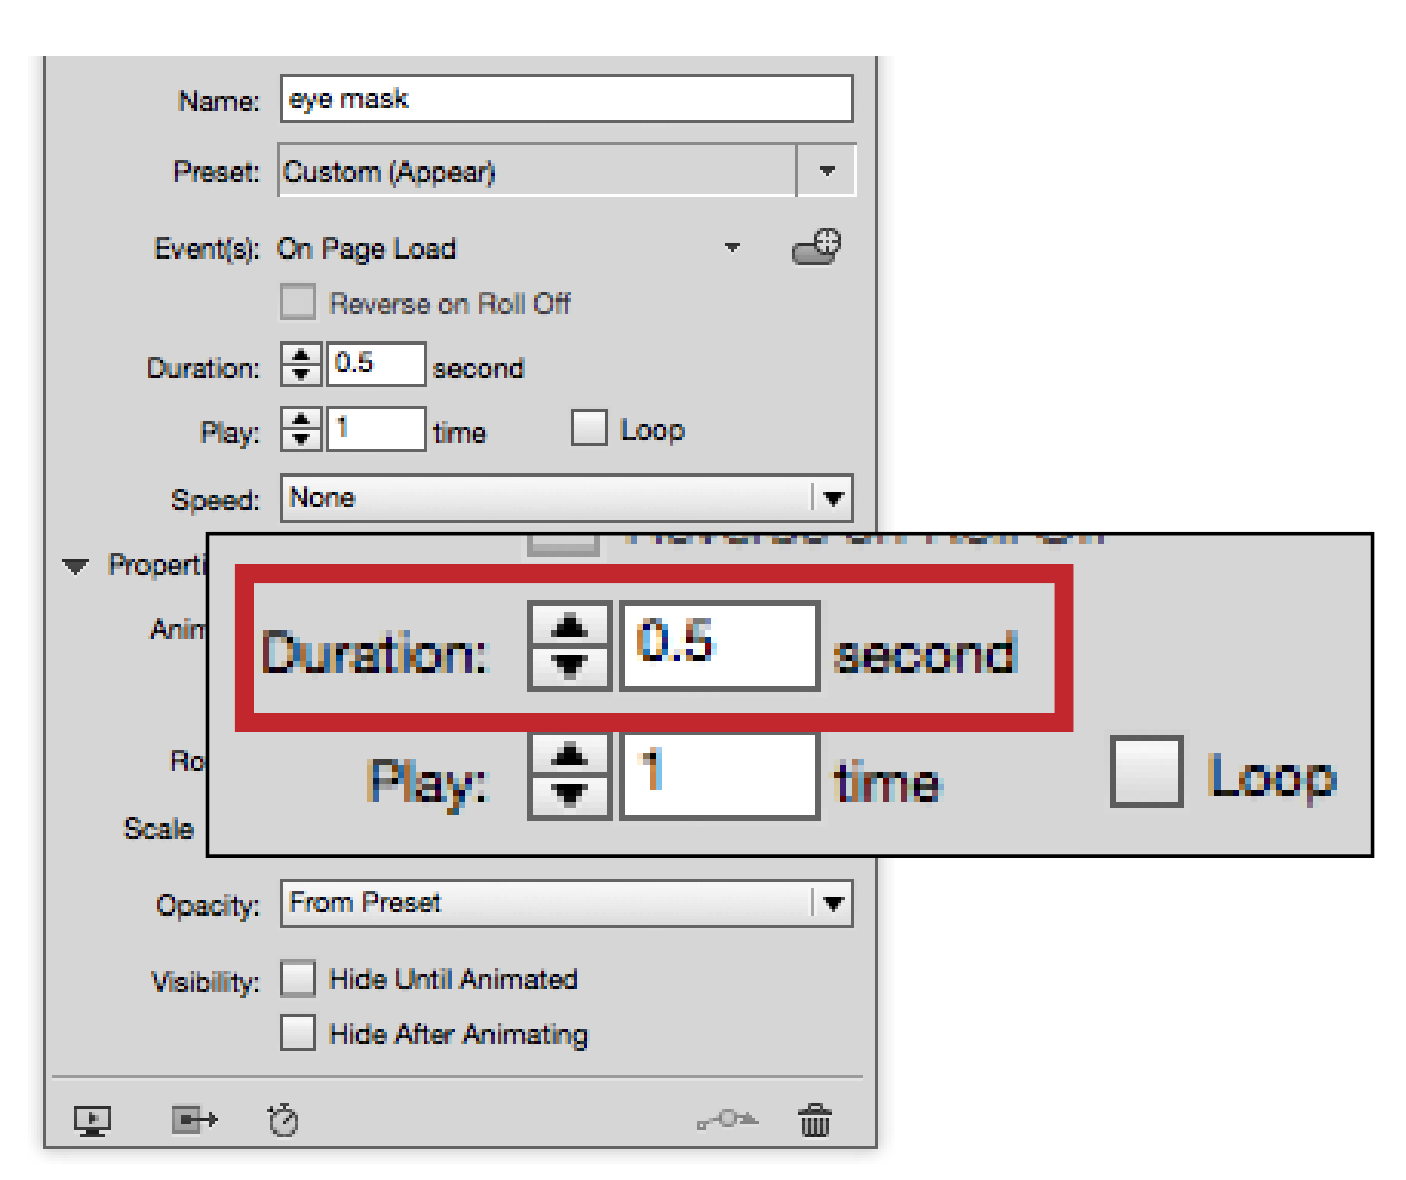
- Change the Duration to .5 seconds. The Opacity menu in the Properties area shows that a short fade from a preset causes the object to appear. Although there’s a Loop setting in the Animation panel, this isn’t the loop we’ll use, because it would cause the eyes to blink too quickly.
- Move the mask over the object that will appear when the mask is hidden. A simple background for the area around the object makes it easy to fill the mask with a single color and position it correctly.
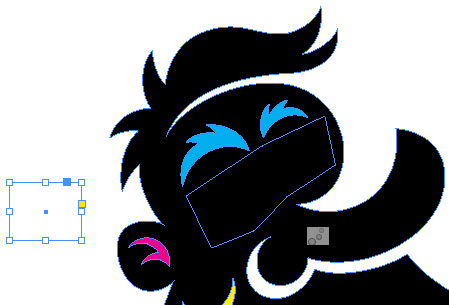
- Draw a small rectangle with no fill or stroke somewhere on the page. This is the null (empty) object that will create the pause between the blinks.
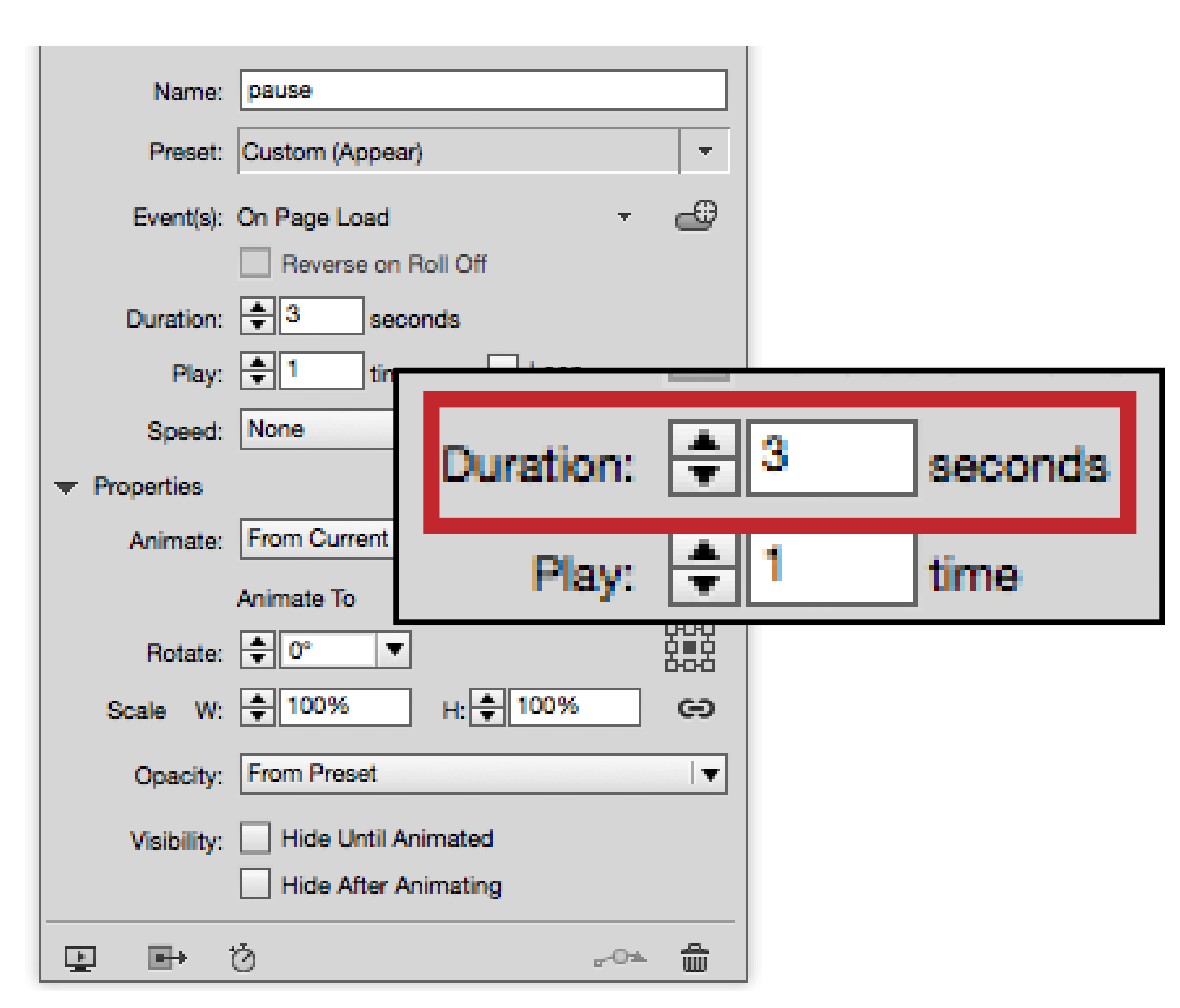
- Apply the Appear preset to the null object. Set the Duration to 3 seconds. It actually doesn’t matter what animation is applied, as the object is invisible. It’s the time the animation takes up that we care about.
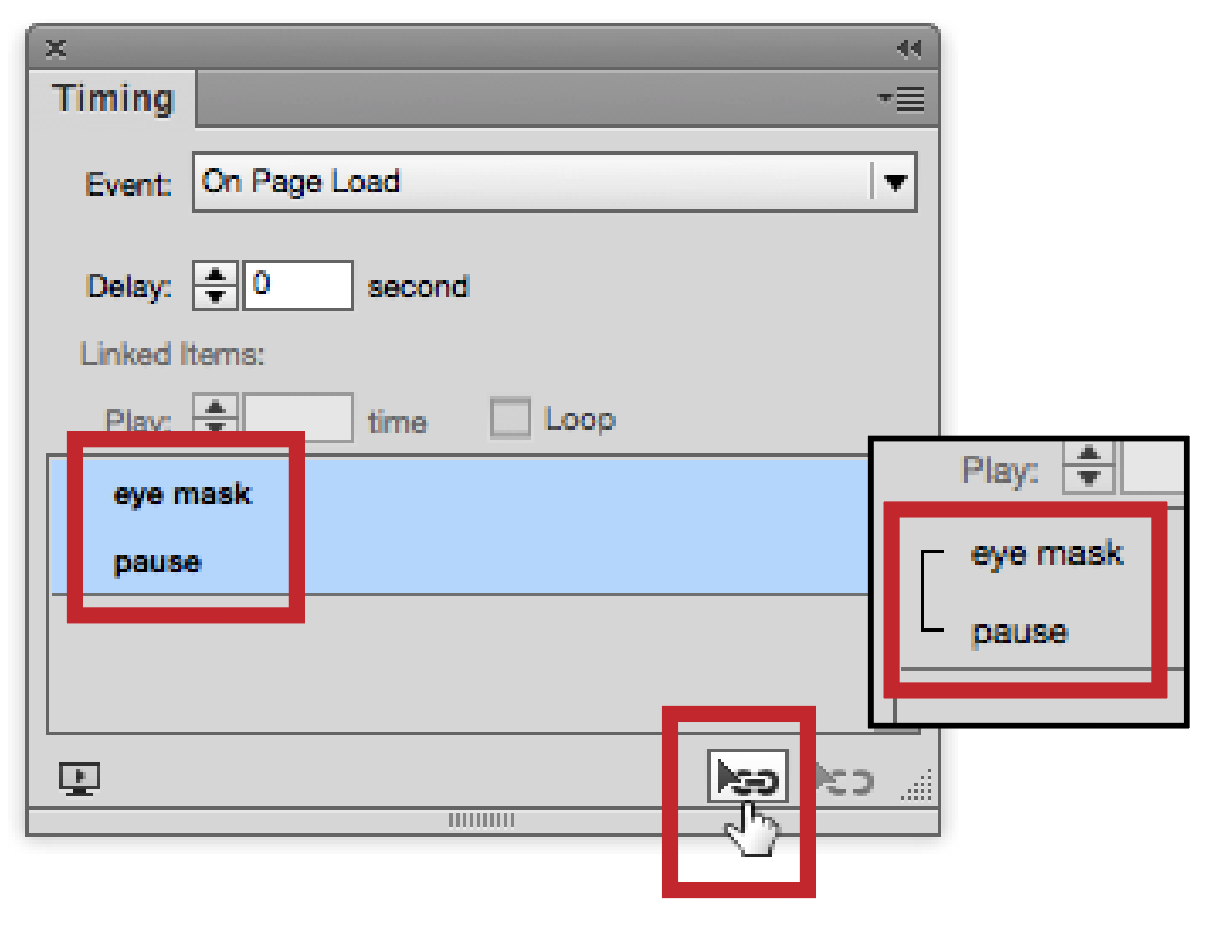
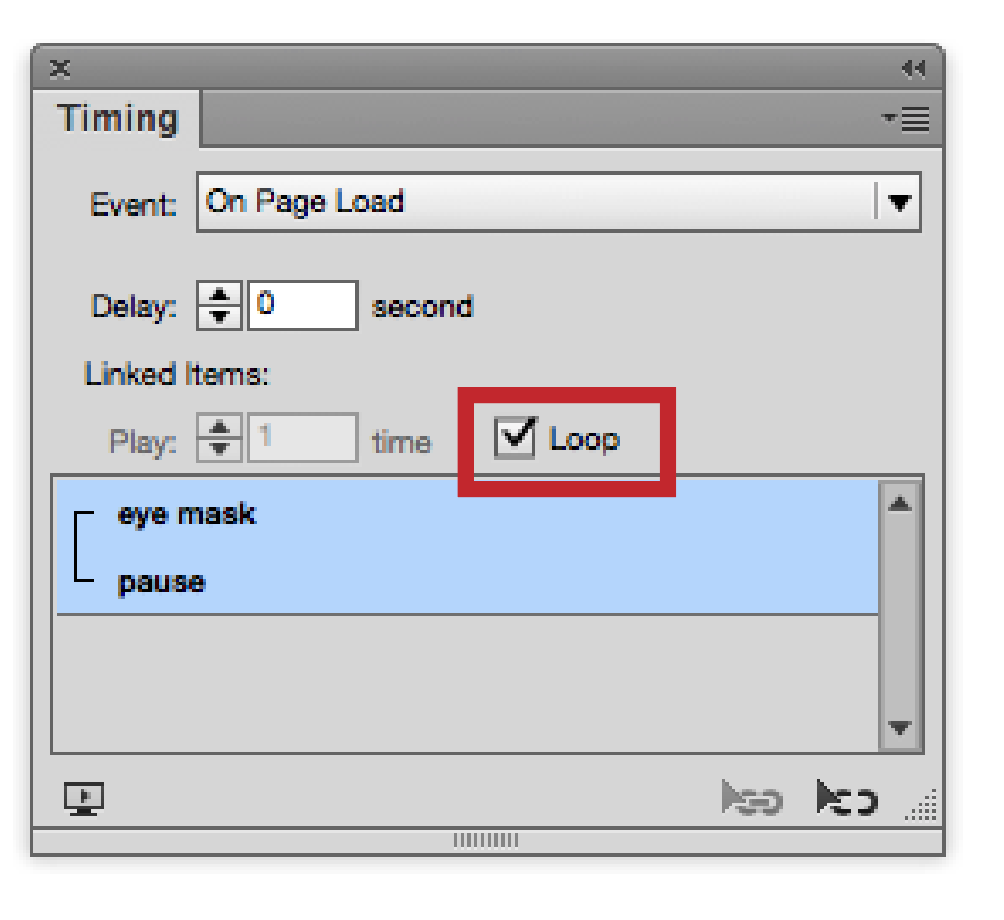
- Hold the Shift key, and click to select both the mask and the pause objects in the Timing panel. Click the Play Together icon. The bracket indicates they will start playing at the same time.
- We now need the blinks and pauses to repeat. Select both objects in the Timing panel, and select the Loop setting so the group repeats. However, the group doesn’t restart until the null object has finished. That creates a 2.5-second pause.
- Preview the animation in the EIP panel. The mask quickly turns on and off, with a longer pause for the eyes to be visible.
Optional: Originally we thought we could increase the pause between each blink by increasing the Duration. However, this made the mask fade in and then pop off—not realistic. If you don’t mind this look, you don’t have to use a null object. But we prefer the eyes to appear at just half a second—the blink of an eye.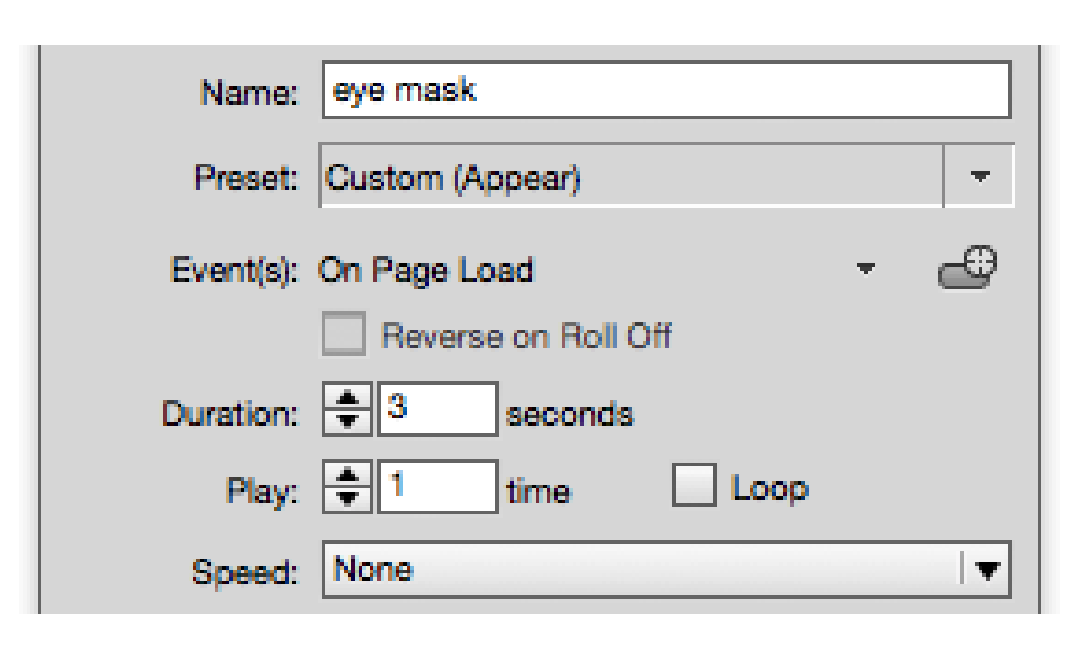
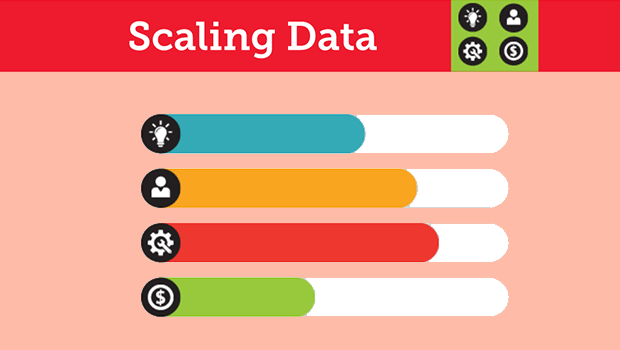
3. Animating a Bar Chart
Few things beg for animation more than business graphics. Adding movement to otherwise static data points can help engage the viewer and increase attention.

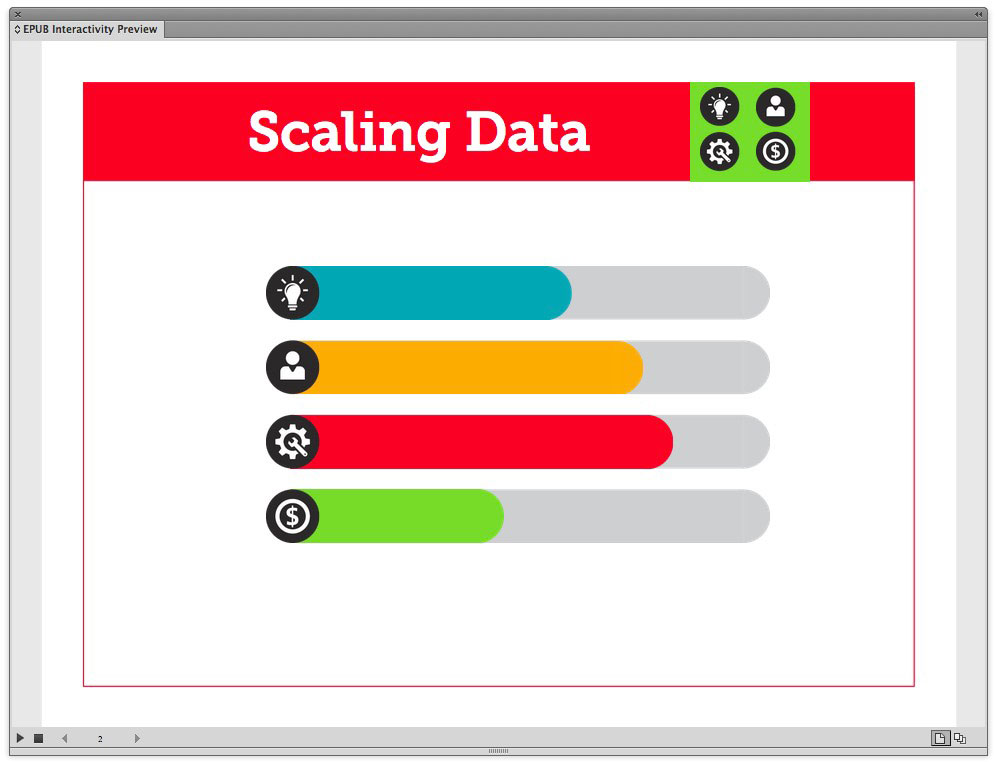
There are many options for animating your business presentations. Here we’ll show you how to create horizontal bar charts that appear to draw themselves on the page.
The key to this effect is to use non-proportional scaling. In this example, only the horizontal scaling is set to zero, with Animate set to To Current Appearance. This causes the bar to appear to grow.
This technique can be used to create the effect of any bar or line drawing itself, whether presenting business graphics or animating part of an illustration.
- In the Animation panel, click the triangle next to Properties to open that section of the panel.
- Select the first bar that you want to animate. Click the Link icon to the right of the Scale fields so that you can scale nonproportionally. Set the Horizontal scaling to zero.
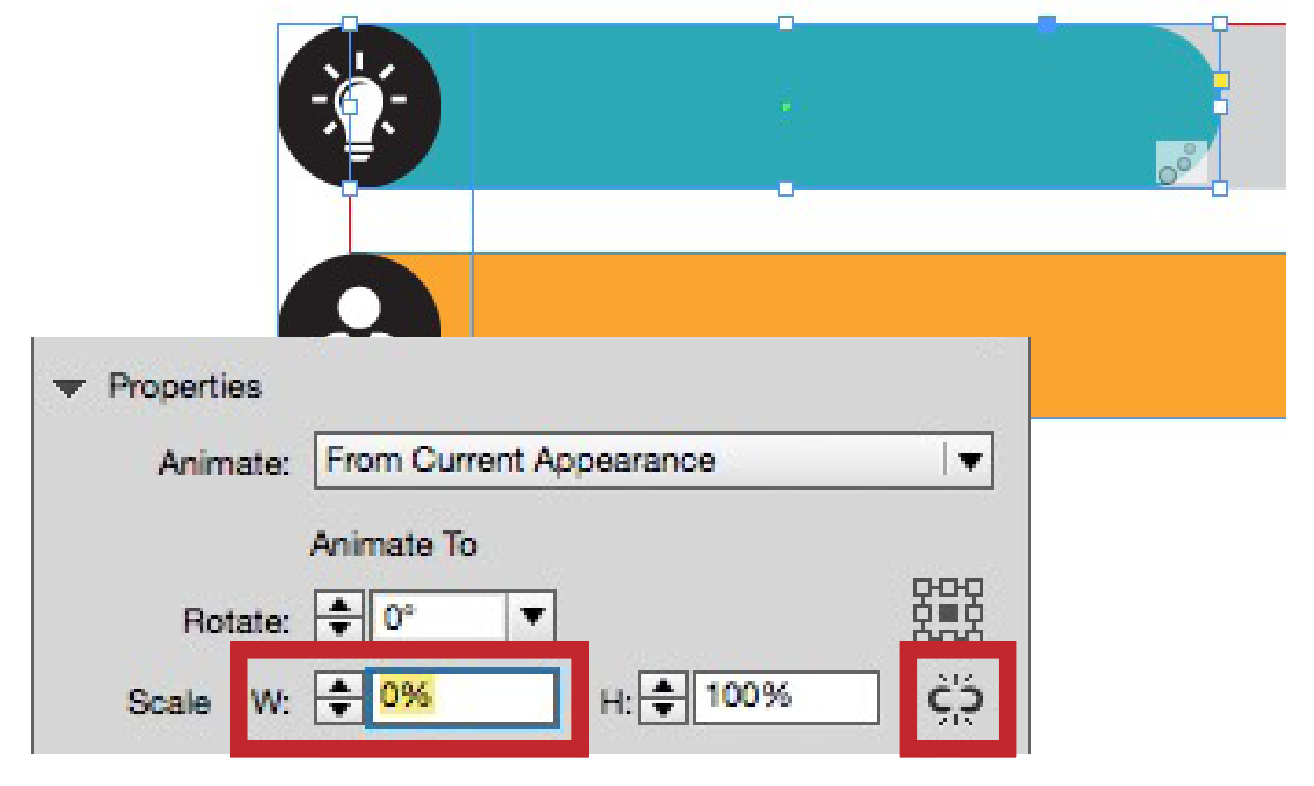
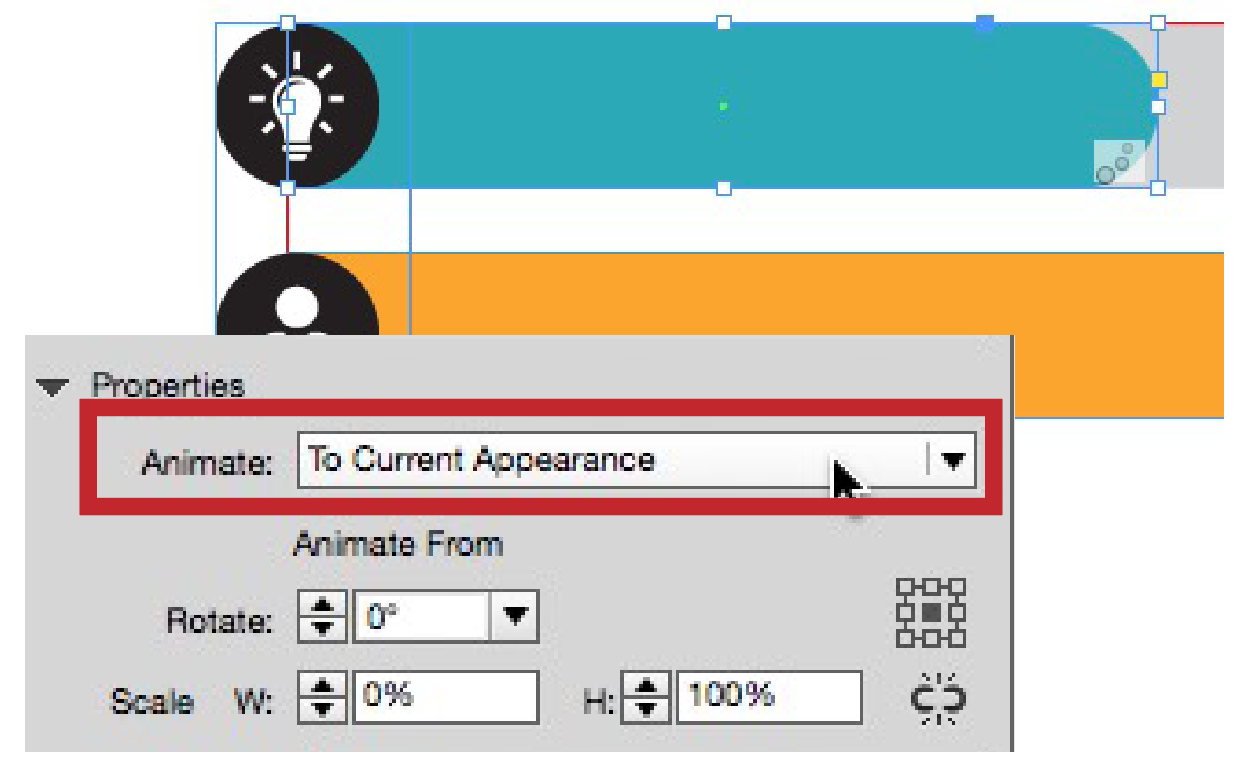
- Change the Animate setting to To Current Appearance. Notice that the settings below now say Animate From.
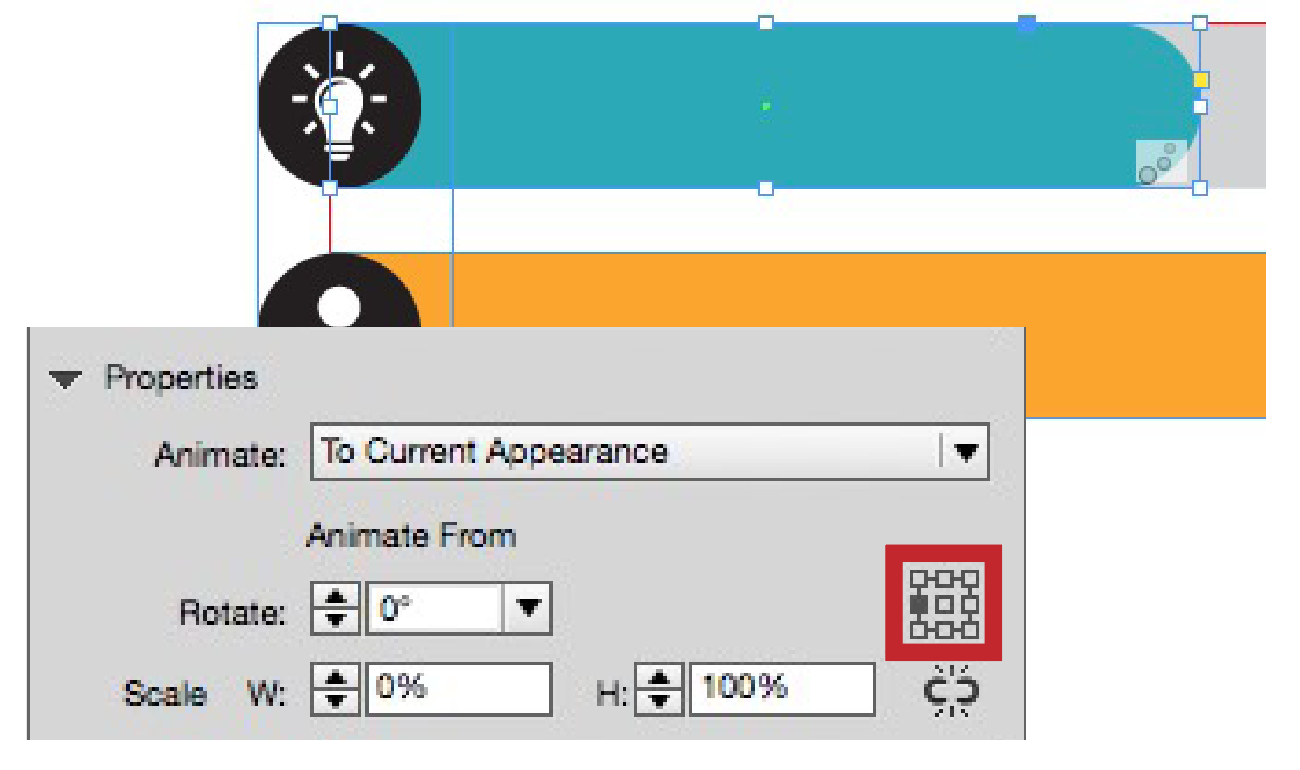
- In the origin point proxy, select the point from which you want the bar to “grow;” in our example, the left center point.
- Test the animation in the EIP panel. If correct, you can save time in animating the other bars by saving the settings. From the Animation panel menu, choose Save, and name the preset.

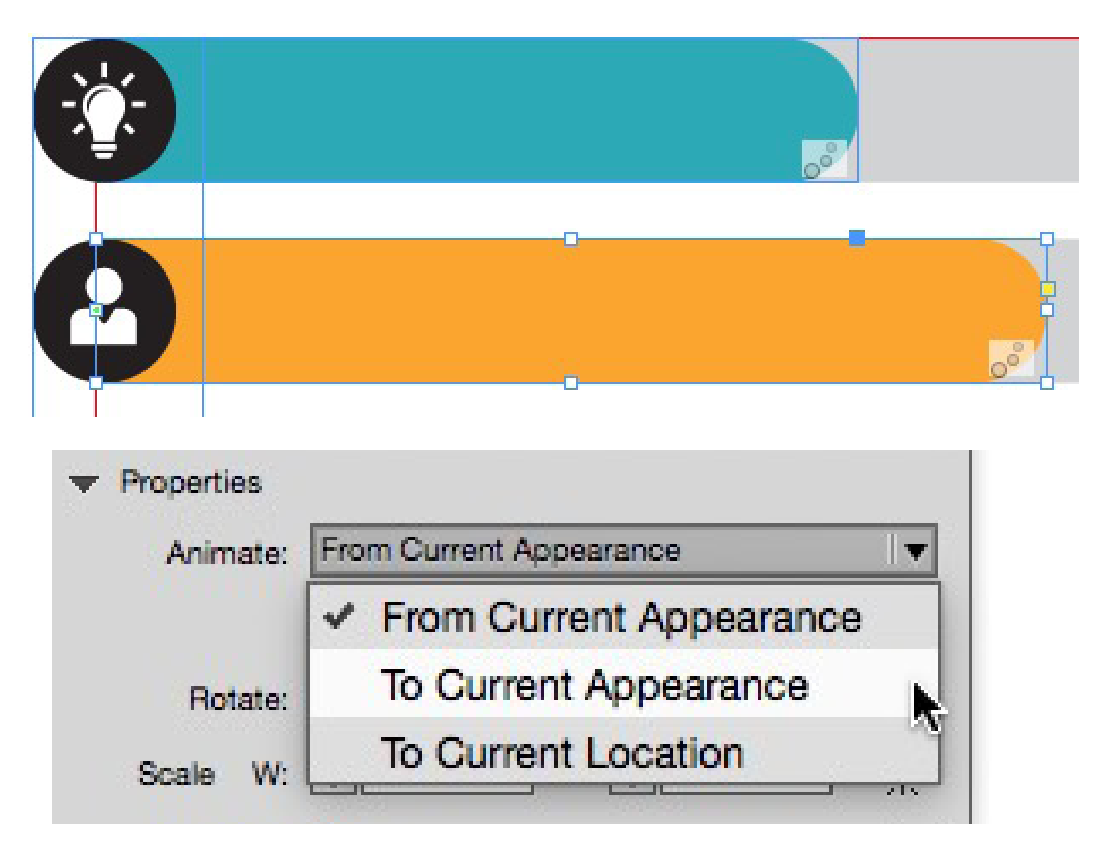
- Select the next bar in the chart, and apply the preset. You will have to change the Animate setting to To Current Appearance, which is not saved with the preset. All the other settings will be applied.
- Check the sequence of the bars in the Timing panel. Or, if you want them to all play at the same time, select them and click the Link icon.
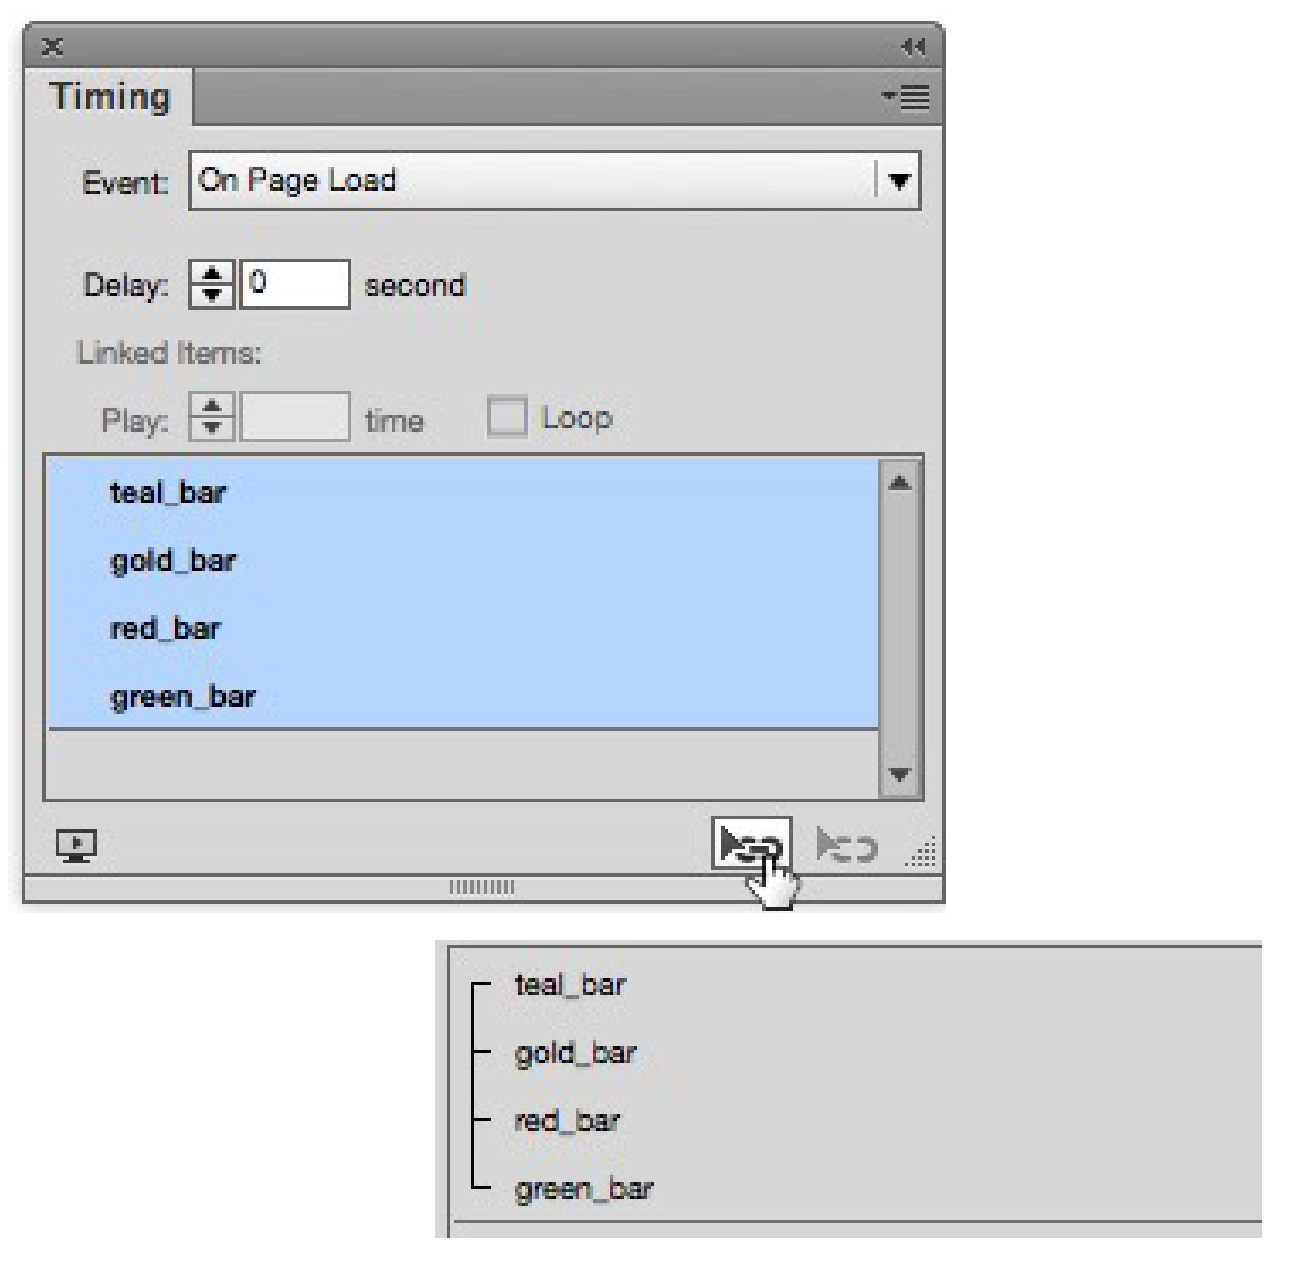
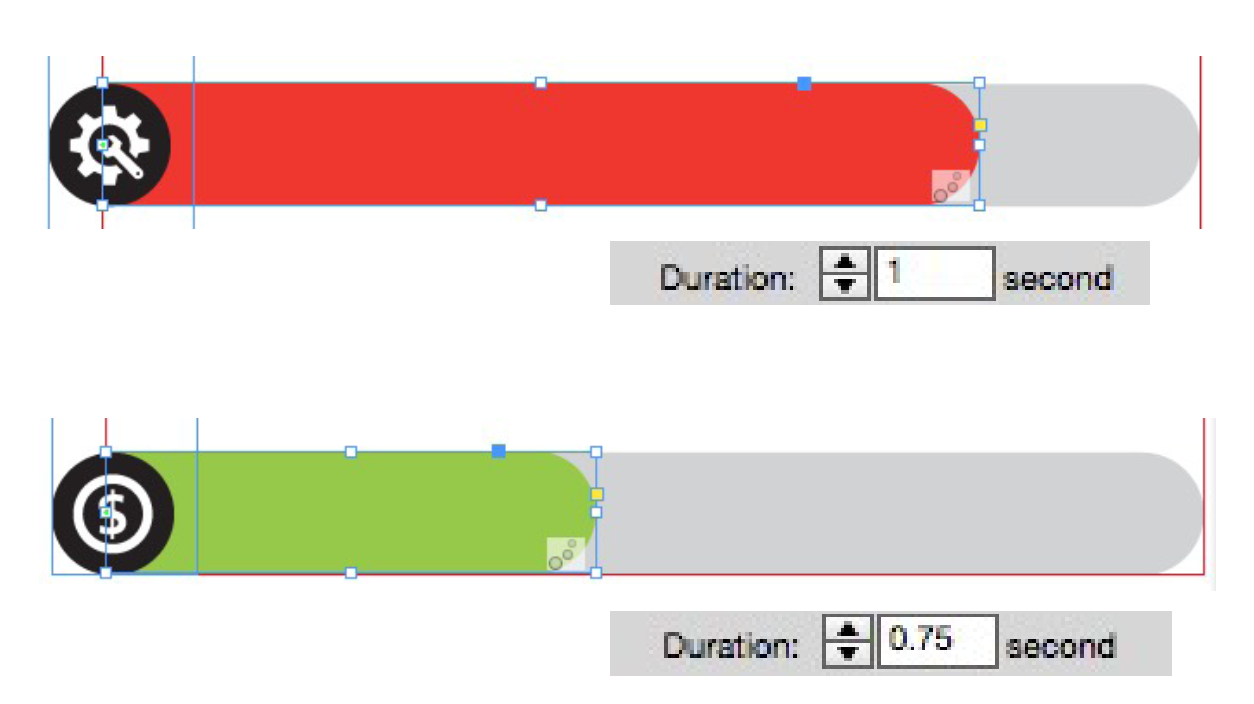
- If the bars vary greatly in length, you may want to adjust the duration. For example, a long bar playing for 1 second will move faster than a short bar set for 1 second. Set the shorter bars to play for a shorter duration so the relative speed of all bars appears to be the same.
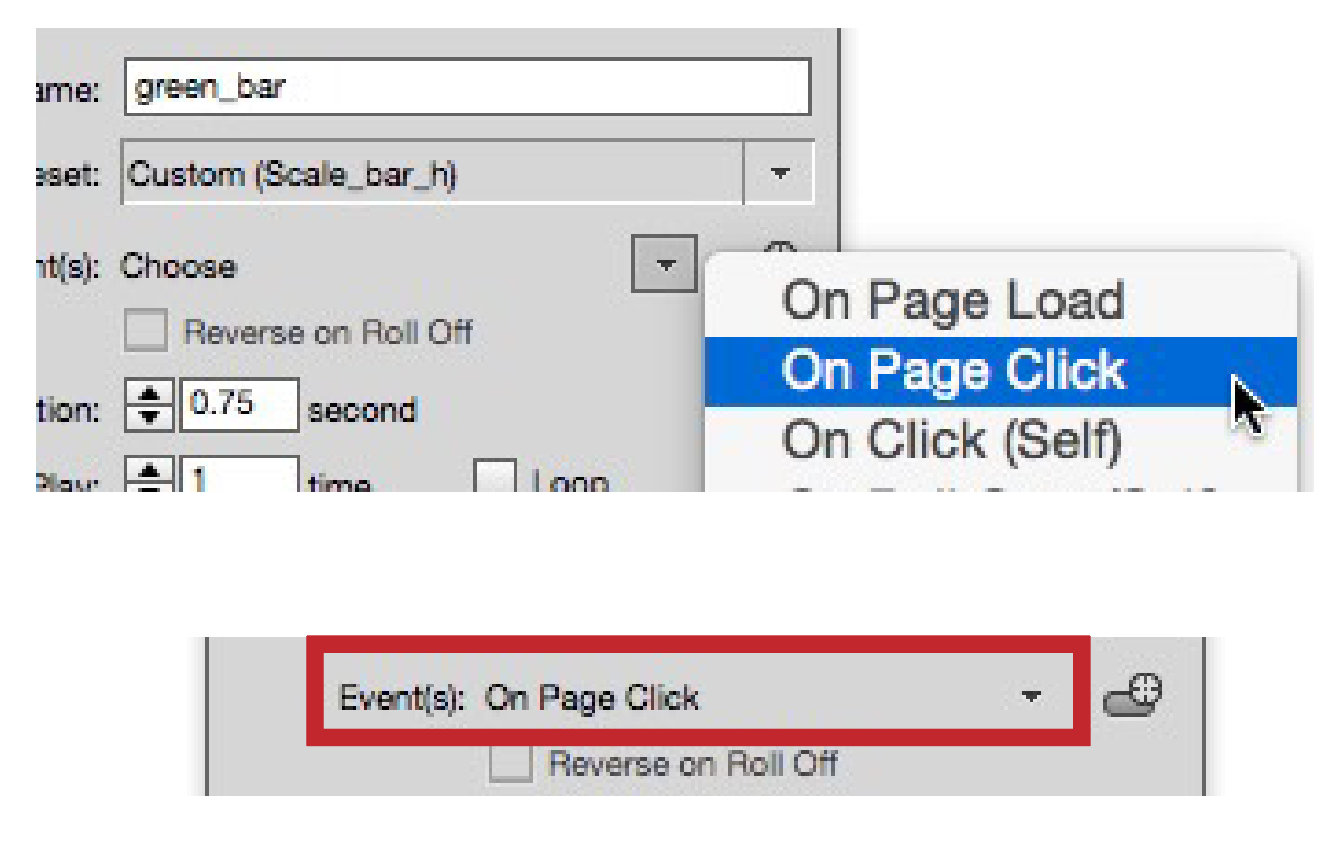
- If your chart is part of a presentation, you can control when the graph starts to animate. In the Animation panel, change the Event(s) setting from On Page Load to On Page Click. (You can select all the bars at once.) The animation will not begin until you click the page.
- Test the animation and sequencing in the EIP panel.
4. Pop-up Window and Close Button
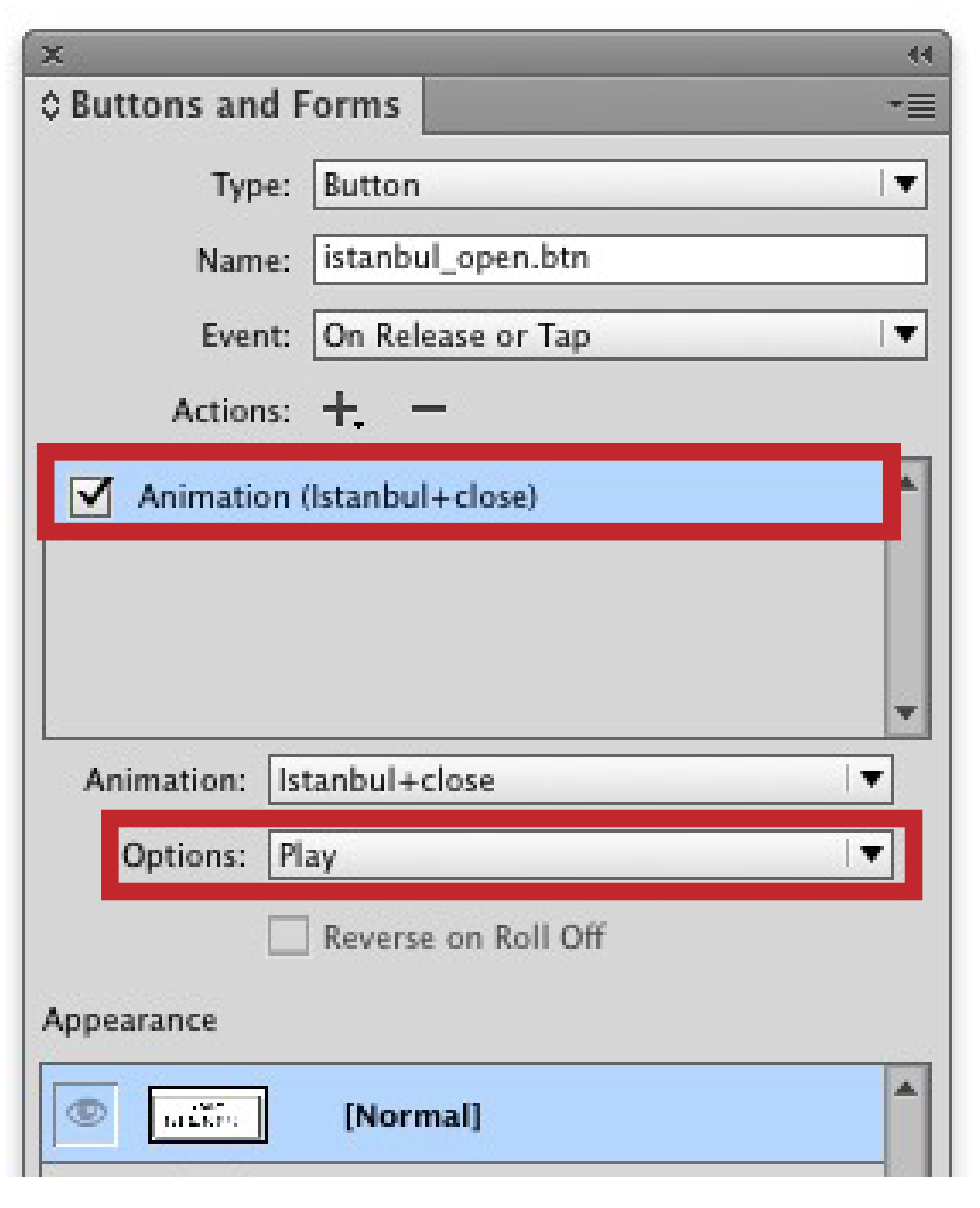
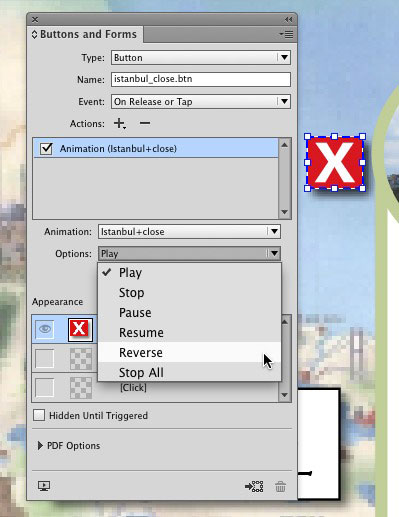
Buttons can be used to trigger animations. Once you set a button action to “Animation,” you have options to not only Play the animation, but to also Stop, Pause, Resume or even Reverse the animation. There are all kinds of effects that can be created with these, but one of our favorites is to make a button that triggers a pop-up window and includes a button that closes the window.
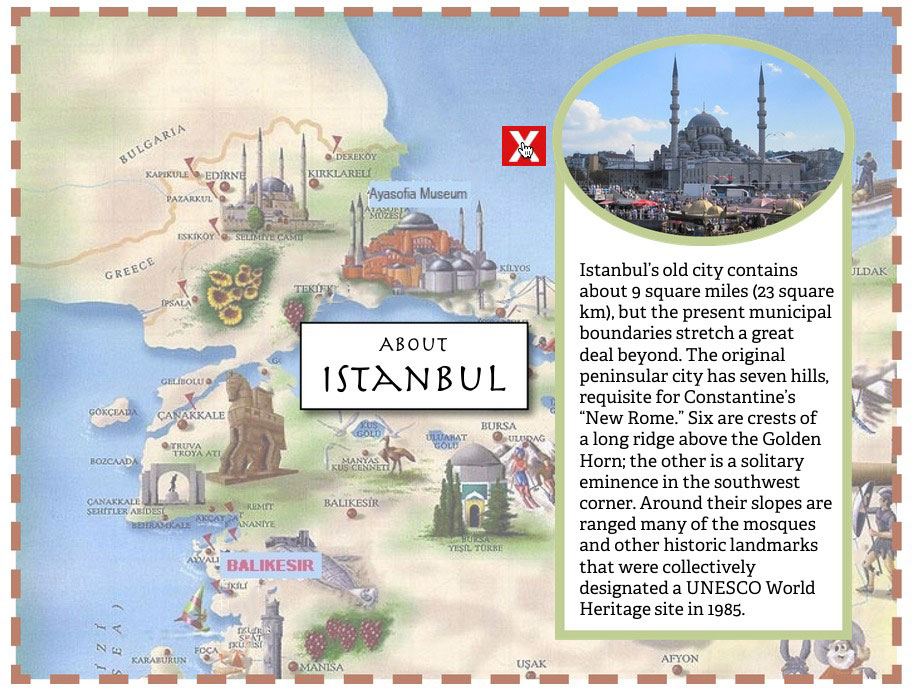
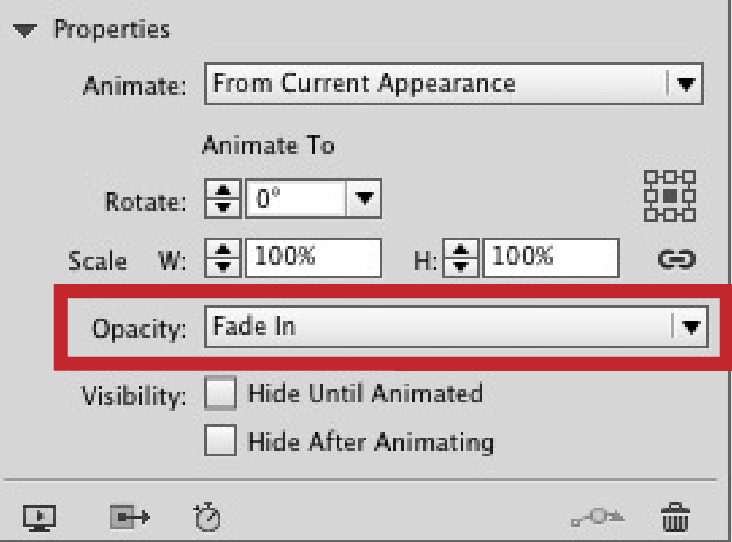
To create this effect, start with the pop-up window object, and group it with a close button object. You can apply any animation to the group, but it’s often best to use a simple effect such as Fade In. Set the trigger button to play the animation. The close button object is then set to the action “Animation” also, but instead of it being set to play, set it to Reverse. When clicked, it closes the pop-up window with a Fade Out animation.
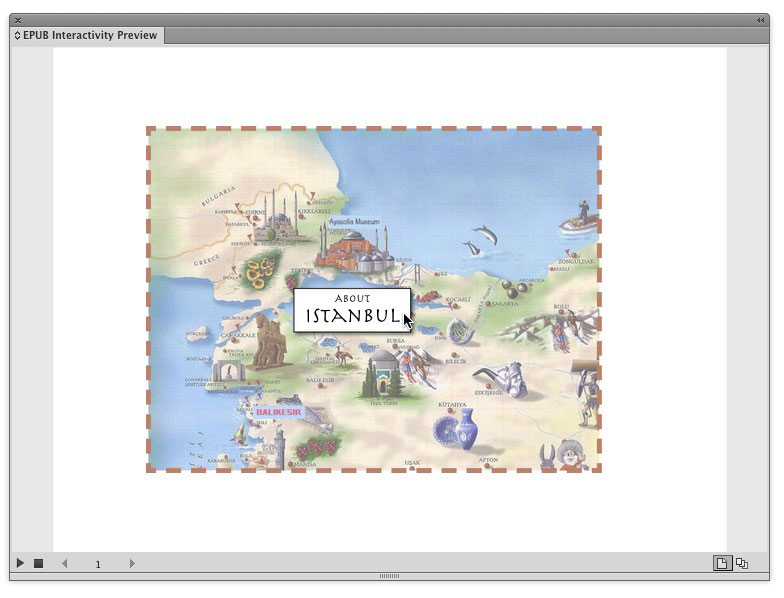
Use this effect when you need a pop-up window. It’s great for adding information to a layout that doesn’t take up space, and it adds a useful touch of interactivity. It’s great for adding things like recipes in cookbooks, too, as shown in the second page of the example animation online.
- Create the pop-up window object. Create a close button, and position it next to the pop-up window. Group the objects, and position them where you want them to appear when the pop-up window is opened.
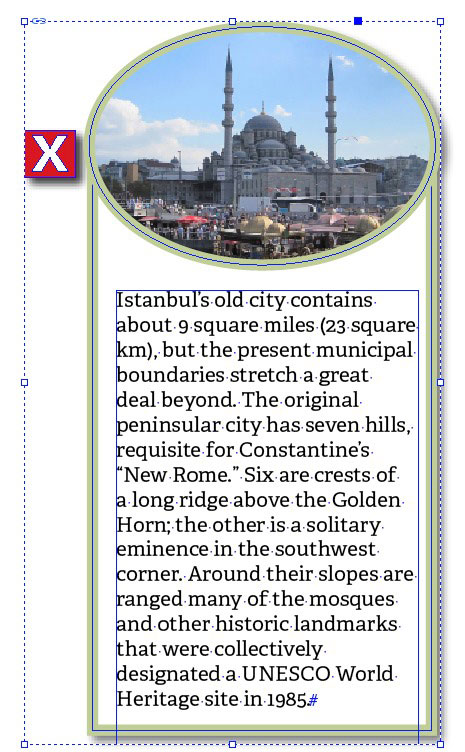
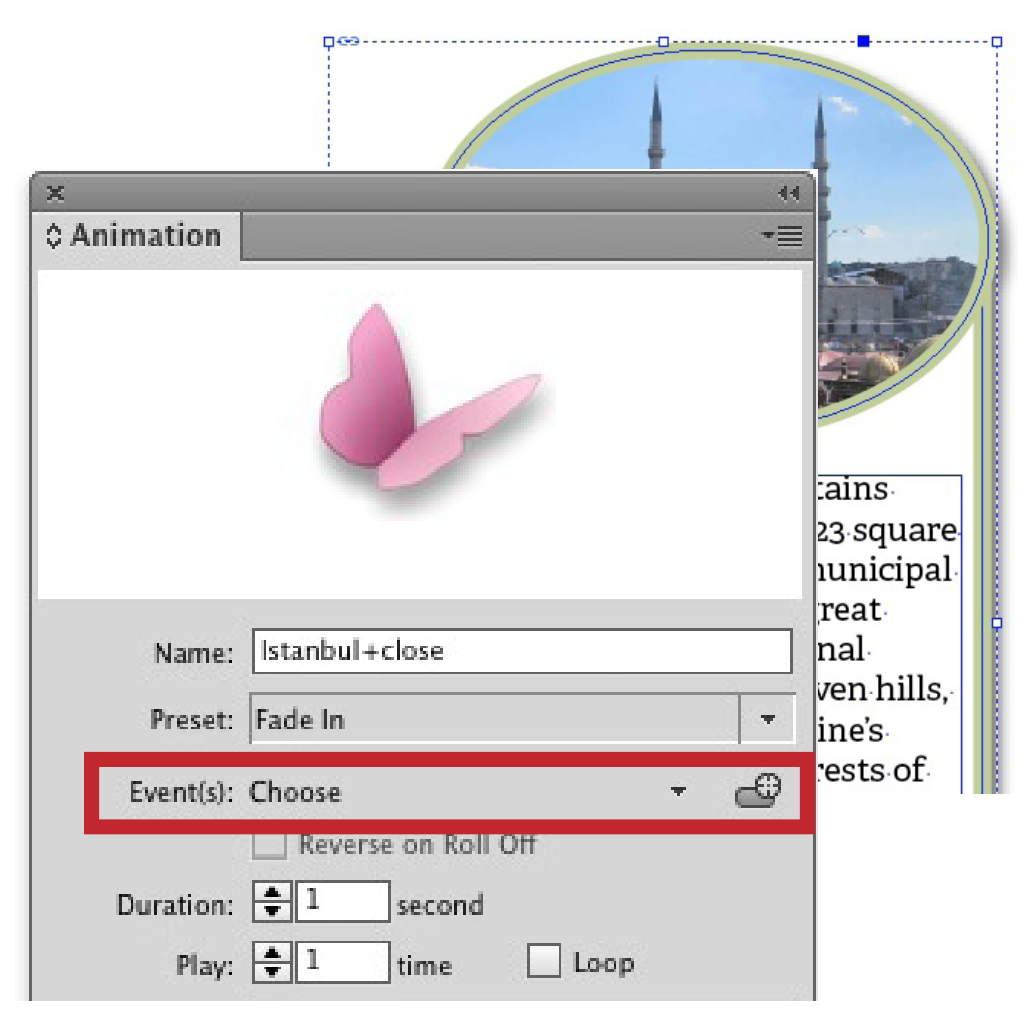
- Select the group containing the pop-up window, and apply an animation, such as Fade In or Appear. Deselect the Event(s) setting On Page Load (our button will trigger the event). The menu will now say Choose.
- Create the button that will be used to open the pop-up window, and position it in your layout.
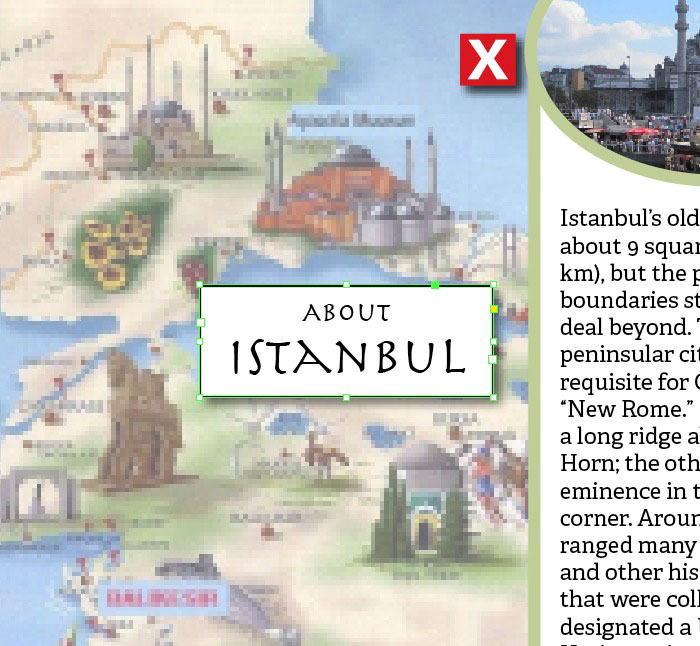
- Select the object, and convert it to a button by clicking the Convert To Button icon in the Buttons and Forms panel. From the Actions Pop-up menu, choose Animation, and then make sure that Play is chosen in the Options menu.
- Next, go back into the pop-up window group, and double-click to select the close button. Convert it to a button in the Buttons and Forms panel, and set the action to Animation and the Options field to Reverse.
- Test the animation in the EIP panel. Reposition objects on the layout if needed.
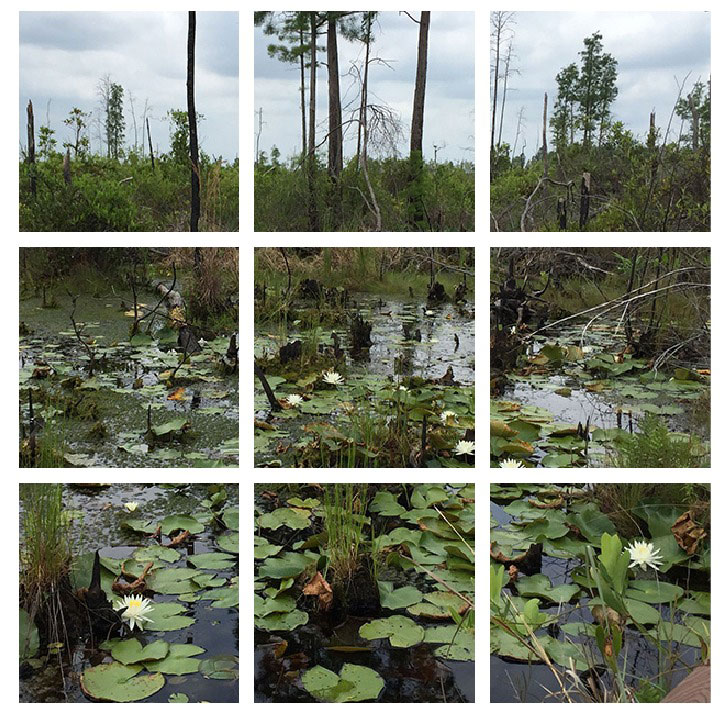
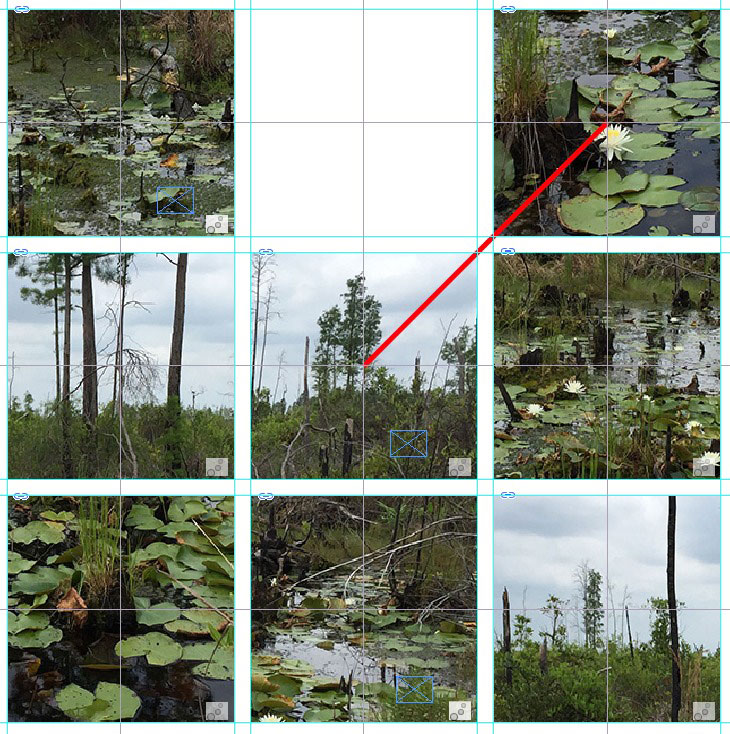
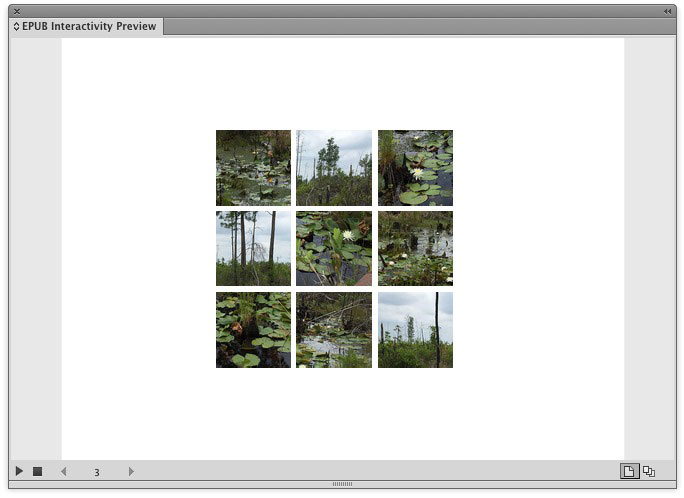
5. Moving Mosaic Tiles
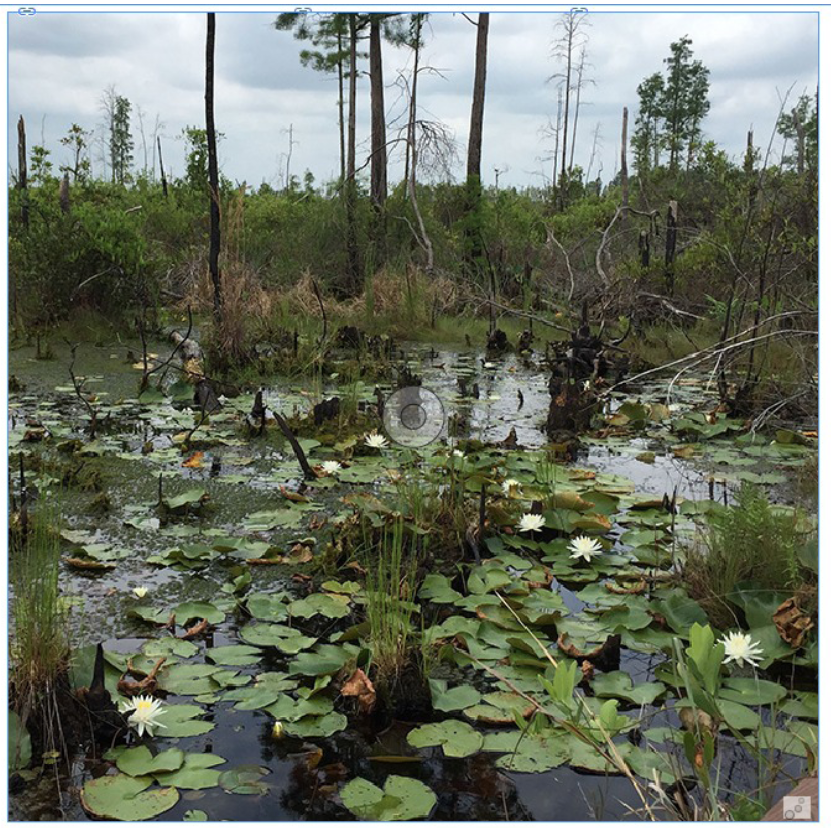
This exciting effect gives the appearance of moving puzzle pieces. With this effect, you create tiles of an image that begin in an out-of-order arrangment, then fly into the center, and finally fly out of the center into the correct order.
The use of built-in InDesign scripts help prepare the image. Custom motion paths give the tiles their movement, and linking the animations in the Timing panel causes them to move simultaneously. For added impact, the whole image fades in at the end.
You can use this effect for any type of image, and you can change the sequence of movement. For example, all the tiles could start in the center, and then move out into position.
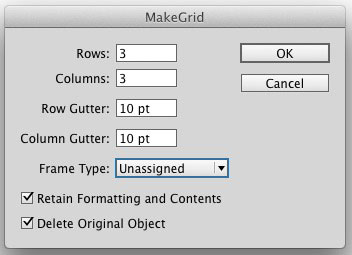
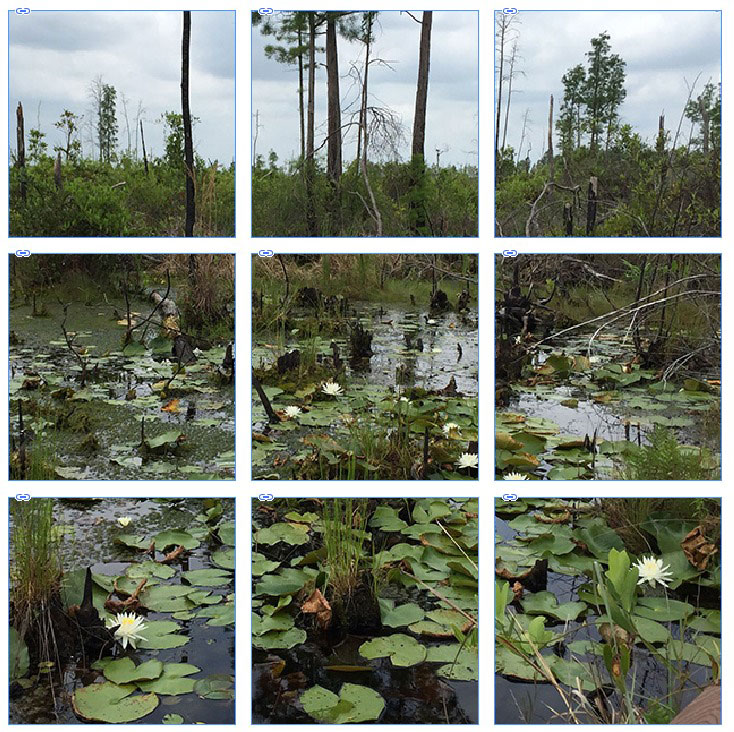
- Divide an image into a grid using the MakeGrid Script (Window > Utilities > Scripts).
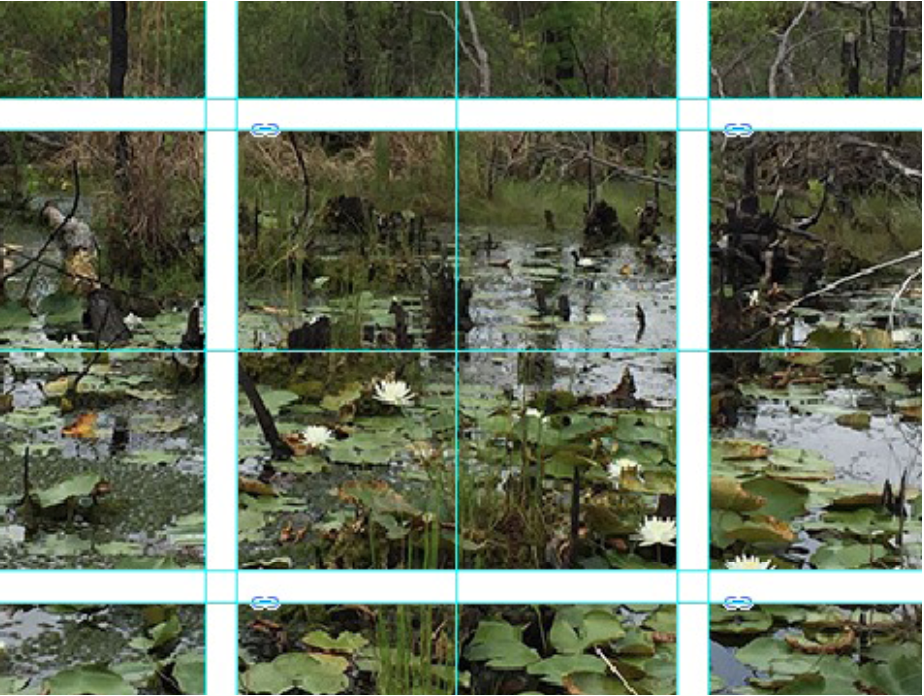
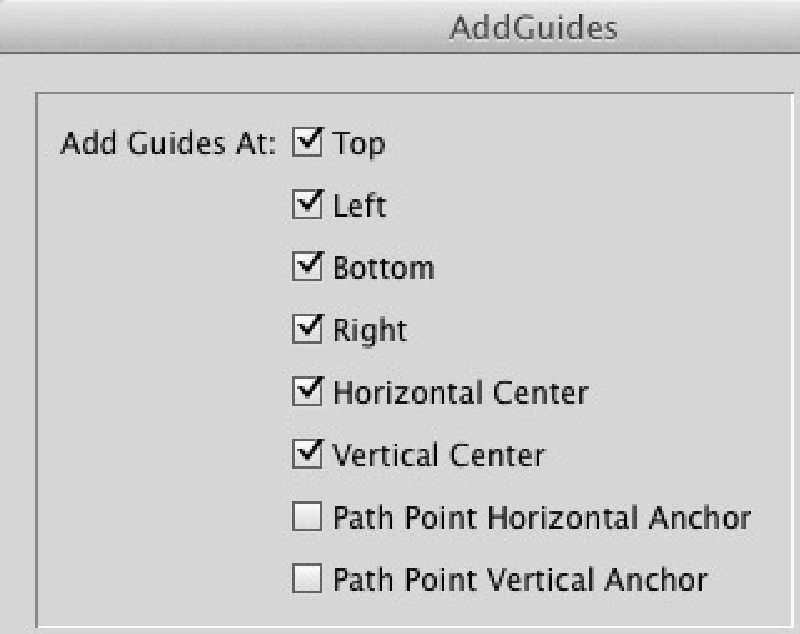
- Position guides at the center and edges of each tile using the AddGuides Script.
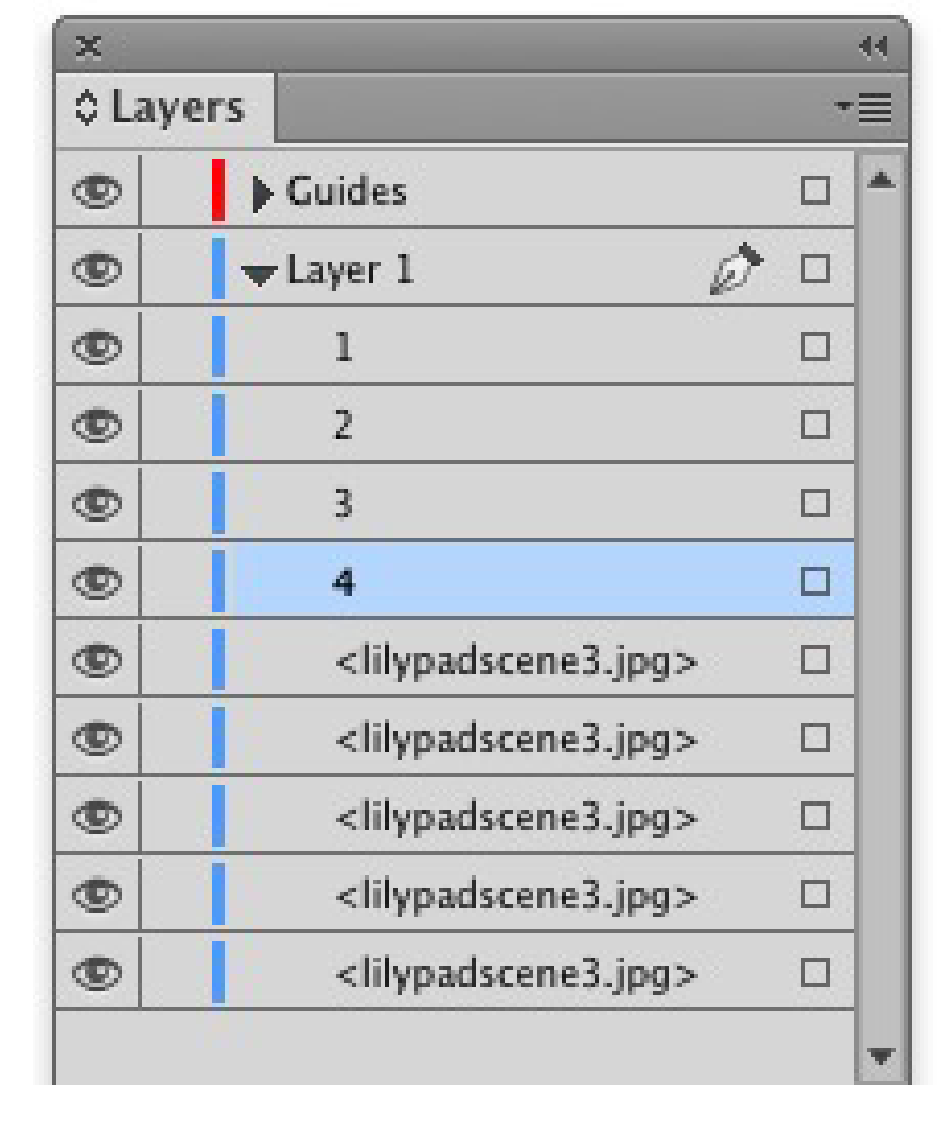
- In the Layers panel, number each tile in sequence.
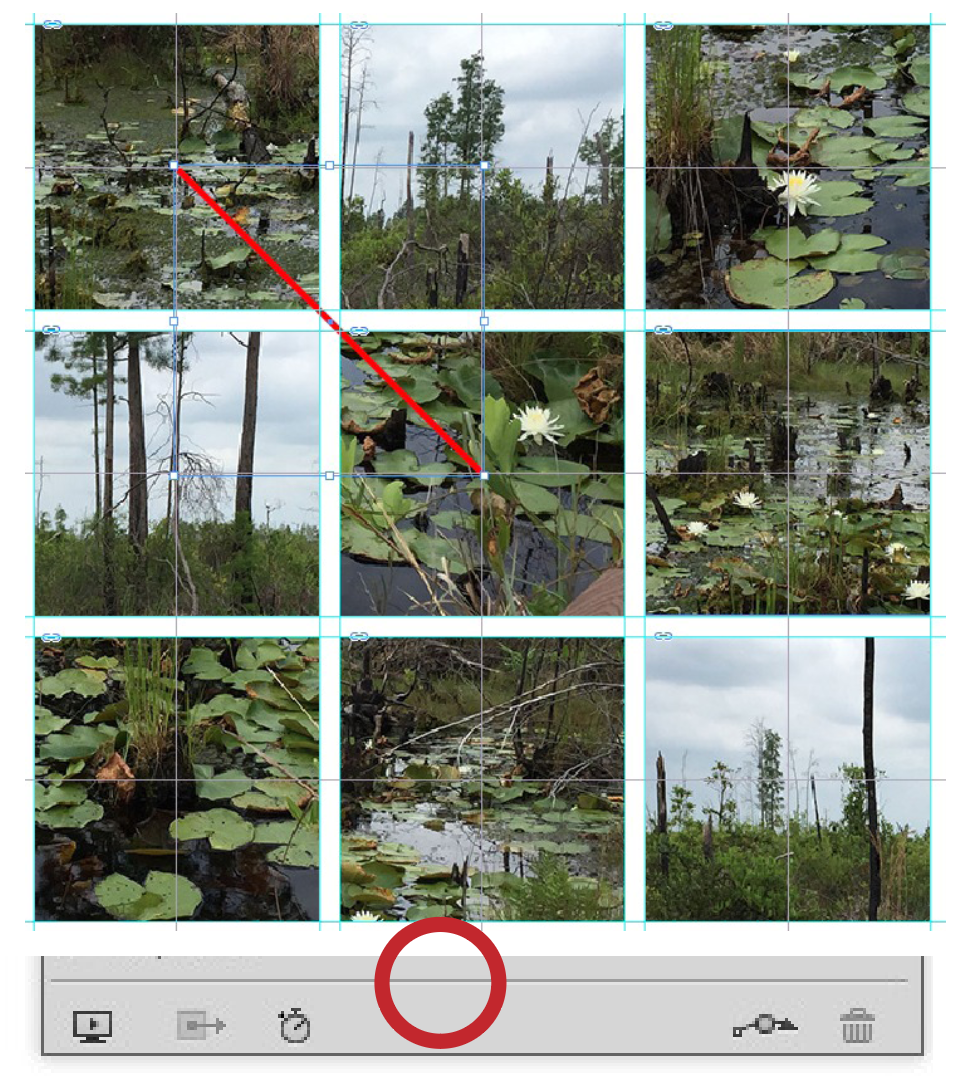
- Move the tiles out of sequence, to the position they will start in. For each tile, draw a path from its center to the center of the center tile, and then click the icon at the bottom of the Animation panel to convert to a motion path.
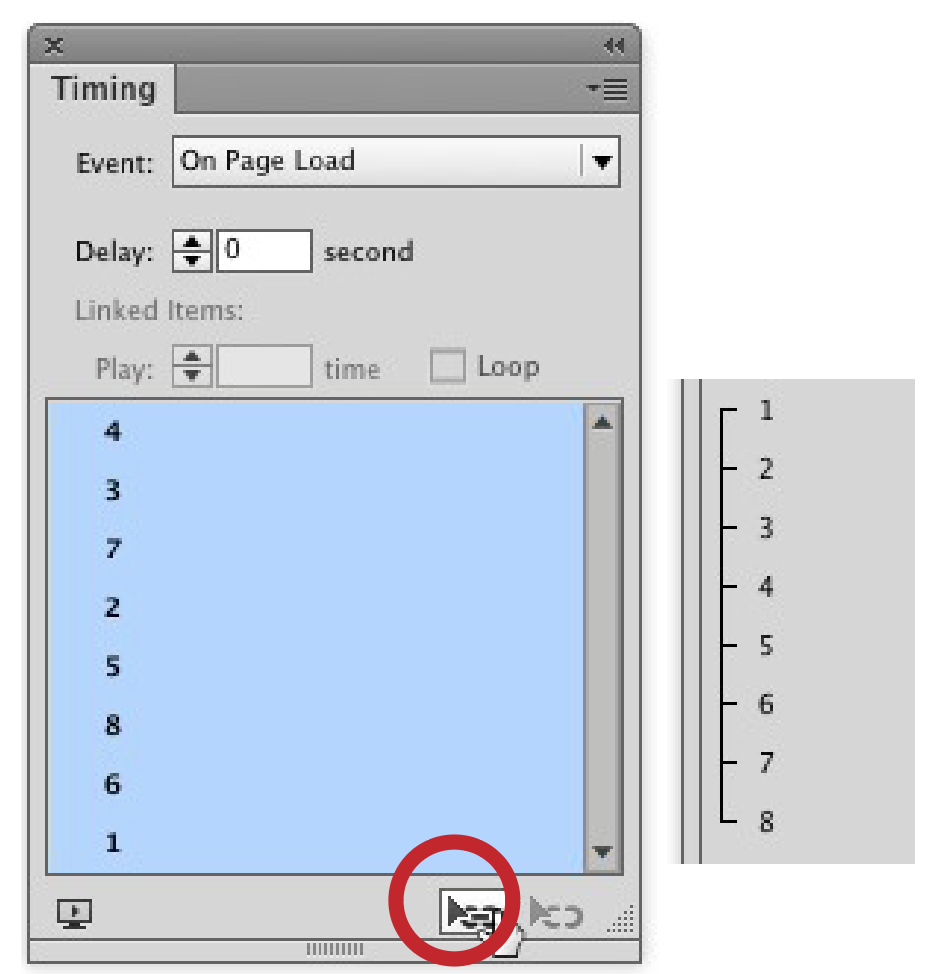
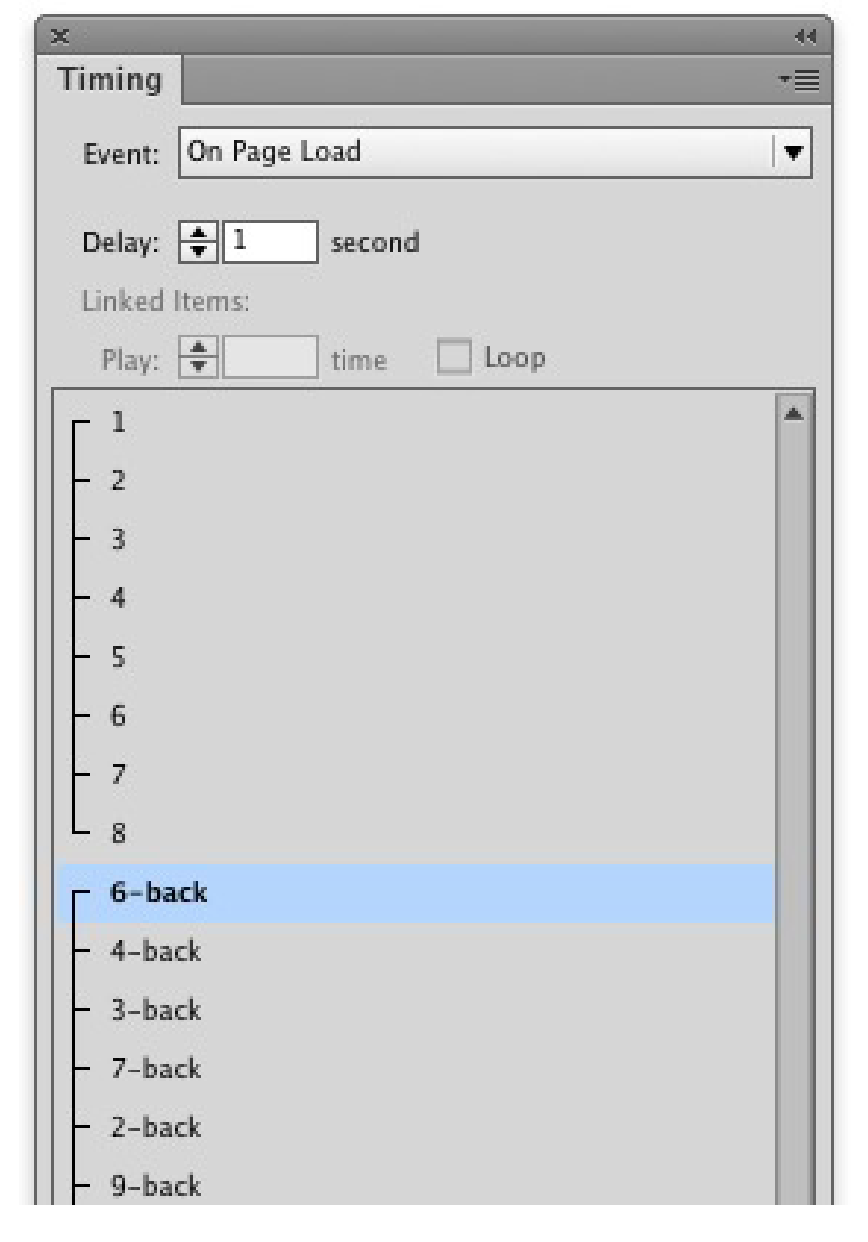
- Link all animations in the Timing panel.
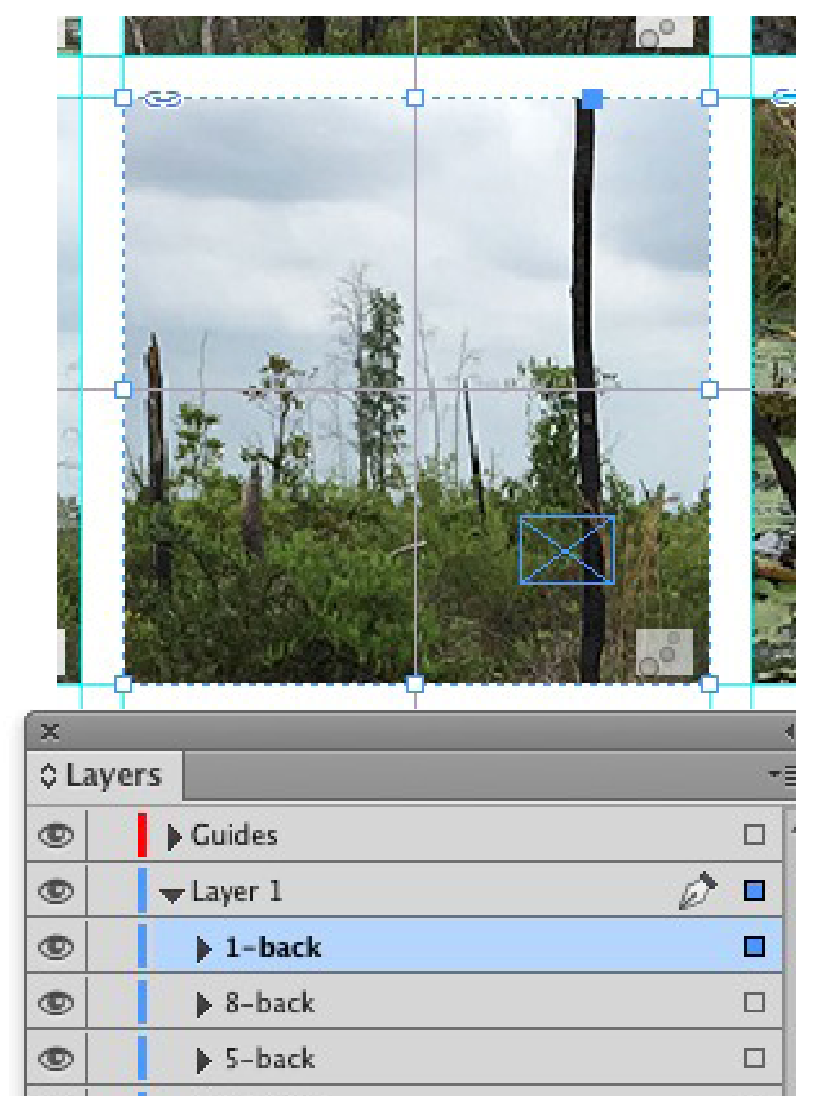
- Move one tile to the center. Draw an empty rectangle on top, and then group it with the tile. This creates a new object you can animate. Name it, based on its number, using the Layers panel.
- Draw a path from the center of the tile to the center of where it will move to. Create a motion path. Then move it back to its original out-of-sequence position. Repeat for each tile.
- In the Timing panel, link the animations from step 7, so they all occur at the same time. Set a delay on the first item in the second group to pause the tiles when they are all in the center.
- Optionally, add the final image and set it to Fade In, so that after the tiles move to the correct position, the entire image appears.
- Test in the EIP panel.
Commenting is easier and faster when you're logged in!

Recommended for you

Fun with Keynote Animations
If you work on a Mac, there is a good chance you have Keynote already installed....

CreativePro Video: Create a Color Palette From a Photo
In this week’s CreativePro video, Nigel French demonstrates how to make a color...
Creating an Animated Bar Chart in InDesign
Editor’s Note: this post was excerpted from Diane’s handout from Cre...