
Print Versioning Workflows
James Wamser offers a guide to producing custom print products with black plate changes.


This article appears in Issue 138 of InDesign Magazine.
Customization is an important part of many print workflows nowadays, as documents are produced for specific groups, with different prices, languages, and so on. But how do you achieve customization in an efficient manner? One way that has stood the test of time is to set all the variable content so it prints only in black ink. Then your print service provider can simply output different black plates for each version to print over the common content (which prints on the other color plates).
In this article, I’ll walk you through the details of setting up your InDesign files so your printer can make black plate changes with a minimum of expense, effort, and errors.
The Basics of Black Plate Changes
For customization jobs involving black plate changes, keep these commonly recommended best practices in mind:
- Keep things simple by using just one InDesign file. That way, you know your common CMY content is consistent across all versions.
- Likewise, when possible, submit just one PDF to your print service provider with all the custom content in spot color inks. Having just one file to track and process makes everything go faster and smoother. As you’ll see later on, however, sometimes you will need to send a separate PDF for each version.
- Communicate clearly to your print service provider whether you’re doing one or more versions, so they can process your files correctly. You don’t want them simply converting all spot colors to process.
- Name the spot color swatches in your InDesign file for the versions. For example, you might name two custom black spot colors US Prices and UK Prices.
How Exactly Does This Work?
When you’re using black plate changes for versioning, your print service provider
may use a program called PitStop to process your PDF in the following way:
- Move all the elements to a base layer.
- Move only the spot color content to a separate layer.
- Save multiple PDF files (the base and the version change) that will be used to make printing plates.
You can do something similar using Acrobat Pro, which has some very powerful features called Preflight Fixups. For example, you can use Fixups to remove all objects containing a spot color or all objects that contain only CMYK. You can also use a Fixup in Acrobat Pro to move objects containing a spot color to a specific layer in the PDF (see “Custom Fixups”).
Custom Fixups
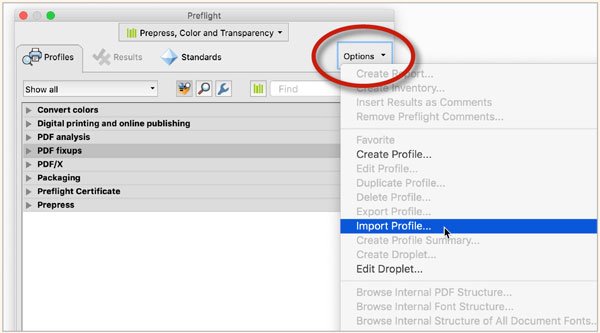
If you’re interested in exploring what you can do with Preflight Fixups I have created a number of them that you can download here. To import the Preflight Fixups into Acrobat, open the Preflight panel (Edit > Preflight). Click Options, and choose Import Profile.

When Not to Use Black Plate Changes
Not all customization jobs are suitable for black plate changes. The following situations call for a different solution:
- Custom 4-color content will appear in each version.
- Each version will be printed in a different trim size or stock.
- All the custom content appears in just one place that could be printed separately and later bound with the rest.
- You’re working on a variable-data project where the text changes for each printed piece.
As always, talk to your print service provider to determine the best approach for a particular project.
Use Spot Colors for Prices
As mentioned earlier, you should use a spot color for versioning that involves prices. Here’s why: Prices (or other small bits of data) are typically found in either tables or text frames that contain other information, such as product details, for example. Because you can’t move just one cell in a table (or one string of text in a frame) to a different layer, using a spot color in conjunction with InDesign’s Conditional Text feature is often the best way to go. Here’s how to do it:
- Create a new spot color swatch, and give it a name that clearly specifies which version the swatch is for. Also, use a different color, like cyan or lime green, so it’s easy to tell at a glance which spot color was applied to all the prices in InDesign (Figure 1). When your print service provider prints the job, they can simply map this spot ink to black.

Figure 1. You can use any color for your custom content—as long as it’s defined as a spot color which can be mapped by your printer to black ink.
- Create a new character style, and choose the swatch you created in the previous step for the Character Color. Make sure the Overprint Fill option is turned on (Figure 2). Otherwise, the text may knock out the background and cause light leaks around your tiny characters.
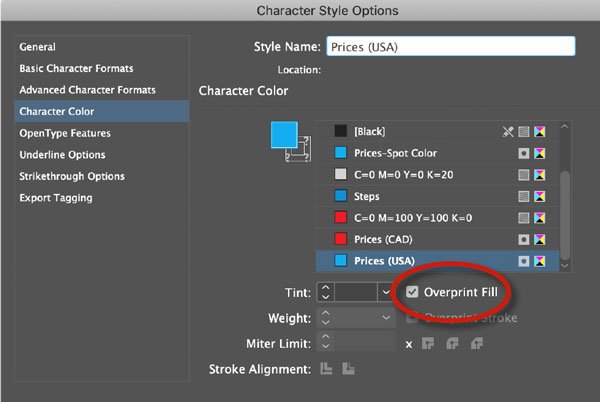
Figure 2. It’s important that you make sure your spot color content is set to overprint—otherwise it may knock holes in your underlying content.
- Verify the spot color was correctly applied. Open the Separations Preview panel (Window > Output > Separations Preview). You should see the spot color that InDesign applied to the prices. To verify the prices spot color was applied, click the Eye icon to show/hide the prices (Figure 3).
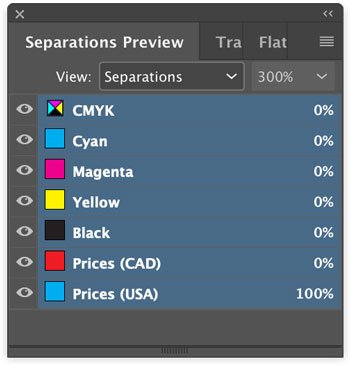
Figure 3. Use the Separation Preview panel to confirm spot colors were applied to the right content.
- Create text conditions for each version. This allows you to have both prices in the same table cell or text frame without interfering with each other. Open the Conditional Text panel (Window > Type & Tables > Conditional Text). Use the New Condition button to create conditions for each version of your document (Figure 4).
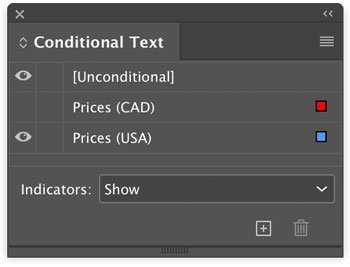
Figure 4. Conditional Text allows you to have content from different versions occupy the same space in your layout, showing only the version that you want at any time.
- Apply conditions to the text using Find/Change. In the Text area of the Find/Change dialog box, leave the Find What and Change To fields blank. In Find Format, choose one of your versioning spot colors. In Change Format, choose the text condition that corresponds to the spot color. Make sure the Search is set to Document, and click Change All (Figure 5). For more on using Conditional Text with Find/Change, see this article.
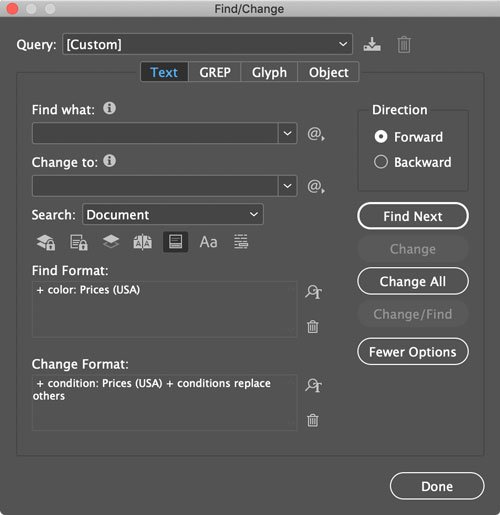
Figure 5. Use Find/Change to apply conditions based on corresponding spot colors.
- When you’re ready to send your document to your print service provider, use the Conditional Text panel to display the correct content, then export a separate PDF for each version.
Use Spot Colors for Large Scale Text Changes
If the versioning involves a wholesale replacement of entire passages of text (e.g., you’re producing English and Spanish versions), then do the following:
- In InDesign, put all the English elements on a layer, all the Spanish elements on another layer, and all the common elements on a base layer.
- Turn on all the layers before exporting your PDF. (Don’t worry that the content is overlapping.)
- When you export to PDF from InDesign, select Create Acrobat Layers in the General section of the Export dialog box. You will need to export to Acrobat 6 compatibility or later (Figure 6).
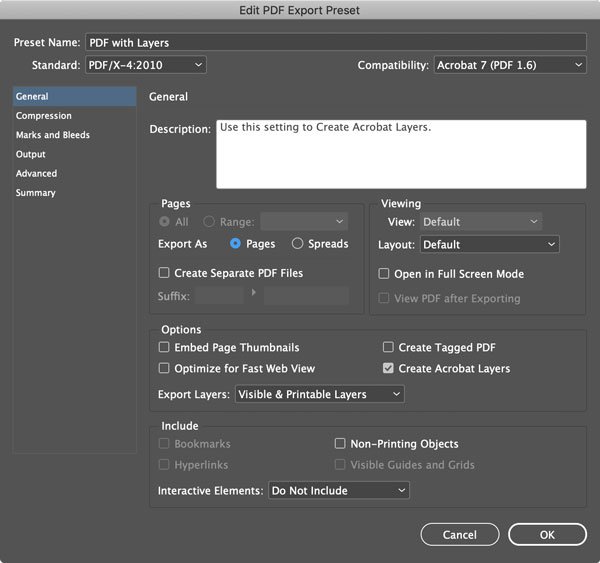
Figure 6. Acrobat 6 compatibility or later is required to include layers in exported PDFs.
Proof Versions in Adobe Acrobat
After you export your PDF from InDesign, proofing enables you to confirm that the content for each version is on the correct layer in the PDF before you send it to your printer. To perform this last optional step:
- Download and install the Preflight Fixups that I mentioned earlier.
- Open your PDF in Adobe Acrobat, and open the Preflight panel (Edit > Preflight).
- Click the Select Single Fixups button.
- Click Create Layer for Spot Color and CMYK.
- Open Layers (View > Show/Hide > Navigation Panes > Layers) to see the new Layers in your PDF.
- Click the Visibility icons (the eyeballs) to show/hide the Prices–Spot Color layer and Common 4-Color layer, so you can proof each version individually.
Black to Basics
Follow the above steps and you’ll be on your way to perfect results when creating custom document versions via black plate changes. Before you embark on that journey, however, talk to your print service provider to confirm that they can meet your needs and that you fully understand their process and requirements. When you’re both clear on each other’s needs, you can avoid problems and get your job done right and on schedule.
Commenting is easier and faster when you're logged in!

Recommended for you

Designing with Column Rules
Creative techniques for designing with InDesign’s column rules feature.

Exporting Graphics From InDesign
How to export graphics for websites, PowerPoint, or Word documents efficiently f...
Regarding Transparency
The essential guide to getting the best results with blending, opacity, and effe...