
InReview: MasterPlan WORK
Keith Gilbert reviews an impressive solution offering a birds-eye view of the status of a publication, any time, anywhere.


This article appears in Issue 114 of InDesign Magazine.
Many designers are faced with the tedious and time-consuming task of distributing previews of work-in-progress files or finished layouts to various stakeholders, collecting feedback on those files, and incorporating suggested changes into the layout. Everyone does this a little differently, depending on the size of the workgroup, how formal the proofing and approval process is, how geographically spread out employees are, and many other factors.
MasterPlan WORK is a companion product for InDesign that is intended to streamline the process of distributing layouts and getting approvals. MasterPlan was designed for designers and publishers who design and lay out multi-page, design-intensive books. But it could also be useful for those producing periodicals or other publications that have a fixed page count for each issue.
Editor’s note: MasterPlan consists of two related but distinct products: MasterPlan WORK and MasterPlan LIVE. This is a review of MasterPlan WORK. MasterPlan LIVE will be reviewed in a future issue.
How It Works
To begin, each designer in your group would install the MasterPlan app on their macOS workstation. Yes, this app is Macintosh only. The developer has no plans to develop a Windows version. However, the app is only used by the designers in the workflow. All of the approvers, reviewers, proofreaders, and others on the team can use Windows or macOS computers, or even tablets.
Once you install the app, and do some initial configuration, you’re ready to begin a project. A project is typically a single book or a single issue of a periodical.
To begin a project, you run the MasterPlan app, and then choose Set-up > Create a New MasterPlan. Then you enter the name of the job (such as the name of the book or the issue
of the magazine), a unique 4-digit job number, and the total page count of the finished job (Figure 1).
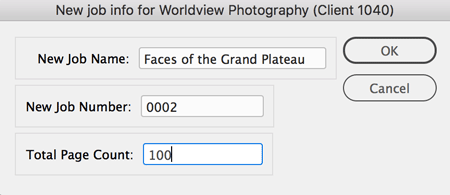
Figure 1. Creating a new MasterPlan project requires you to enter a job name, unique job number, and the total page count of the completed job.
After entering this information and clicking OK, MasterPlan creates a Web view of the job, launches your browser, and shows you a view that contains a thumbnail for each spread of the job. However, at this point, MasterPlan hasn’t yet talked with InDesign to build the thumbnails, so each thumbnail is populated with the MasterPlan logo (Figure 2).
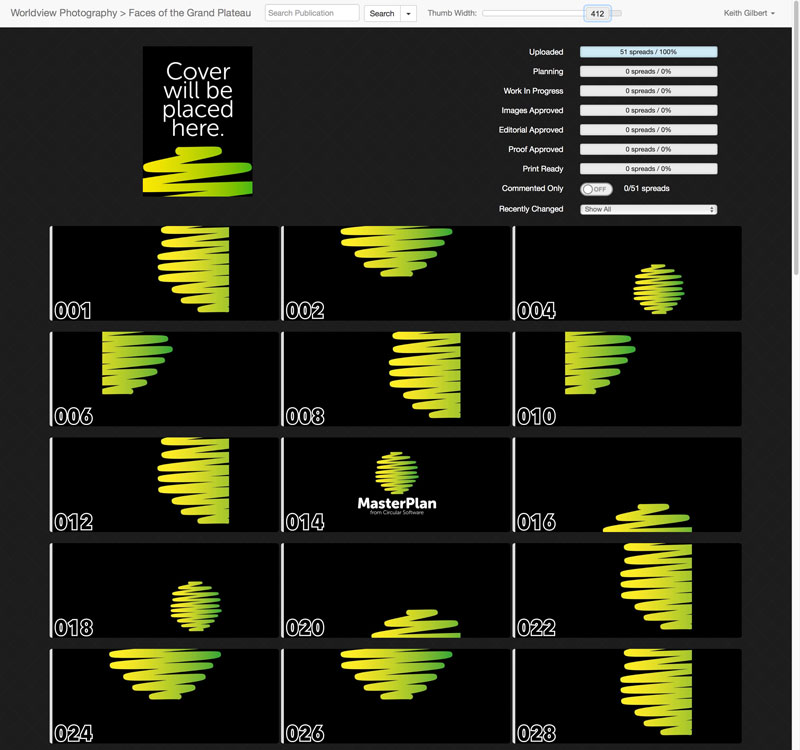
Figure 2. When a new MasterPlan is first created, each thumbnail is populated with the MasterPlan logo.
Next, you open or create an InDesign file that contains the pages of your book or periodical. Then, in the MasterPlan app, you choose Work > Add MasterPlan Stamp to InDesign. This adds the MasterPlan Stamp on the pasteboard, to the left of page 1 of the file. The stamp is placed on its own locked layer, so is unlikely to get in the way. This stamp contains the job number, and MasterPlan uses this stamp object to keep track of things (Figure 3).

Figure 3. The MasterPlan stamp is placed on the pasteboard next to page 1 of each InDesign file.
Once all that is done, you can go about your work in InDesign, and each time you make a change to a spread and then save the InDesign file, an image of the spread is automatically uploaded in the background to the MasterPlan webpage (Figure 4).
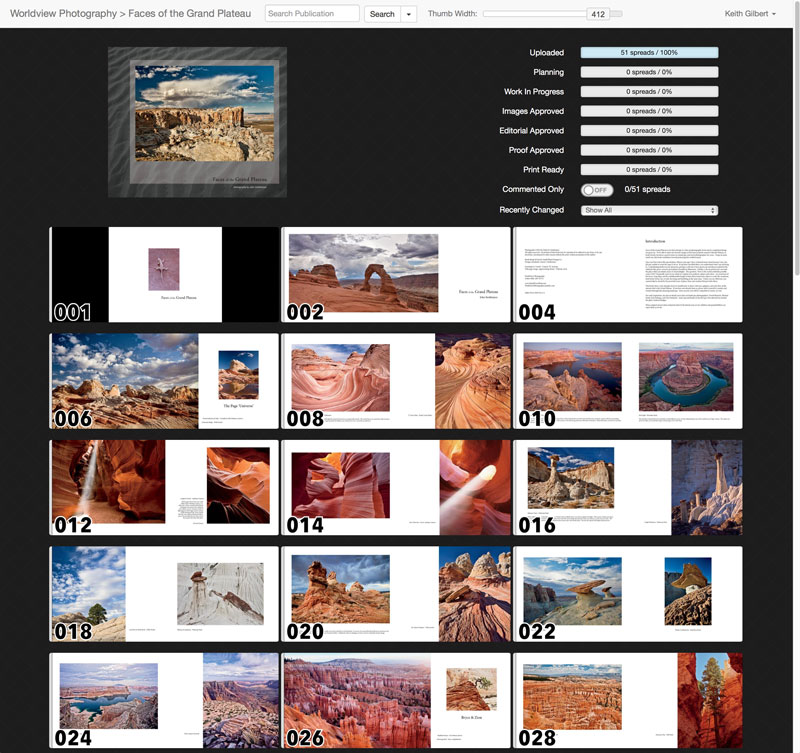
Figure 4. The MasterPlan project, populated with spreads from the InDesign layout. The number on each spread corresponds to the InDesign spread number, so spread 010 contains InDesign pages 10 and 11.
A Seamless Workflow
The next step is when the power of MasterPlan becomes apparent. The publication designers can work on the InDesign layouts over a period of days or weeks, and as the publication begins to come together, all the parties involved in the workflow have a bird’s eye view of every spread right at their fingertips, thanks to the webpage created by MasterPlan. When a reviewer clicks on a thumbnail in the MasterPlan project, a large high-res version of the spread is displayed, suitable for proofing (Figure 5).
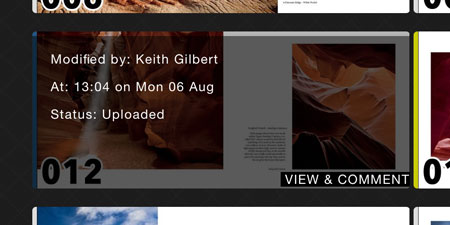
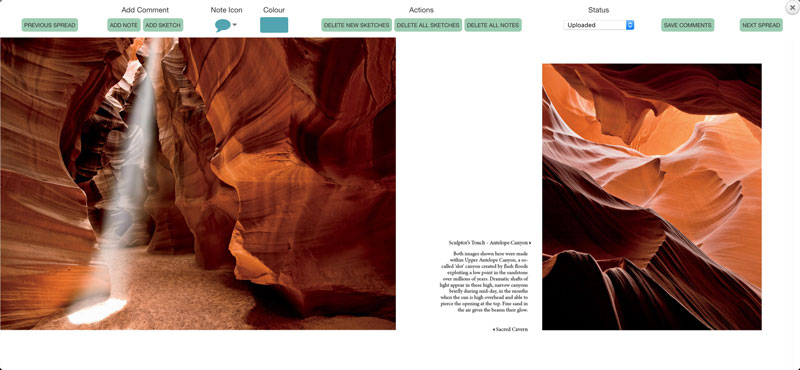
Figure 5. When a reviewer hovers a cursor over a spread thumbnail and clicks View & Comment, a large, high-res version of the spread is displayed.
To make all this work, all that’s required of the designer is:
- The initial job setup, as described above.
- Running the MasterPlan app whenever they are working in InDesign.
- Saving the InDesign file after a spread is updated.
Note that for performance reasons, only the current spread is uploaded to MasterPlan when a change is made to the spread and the file is saved. If you change three spreads and then save the file, only the last spread image will be uploaded. This requires that you get in the rhythm of saving the file before leaving each spread. If you forget, you can always choose Work > Upload All InDesign Spreads in the MasterPlan app to force an upload of an image of each spread to MasterPlan.
A key to working with MasterPlan is to keep an eye on your notifications. Each time that MasterPlan does any of its background operations, it sends you a notification so that you know what is going on (Figure 6).
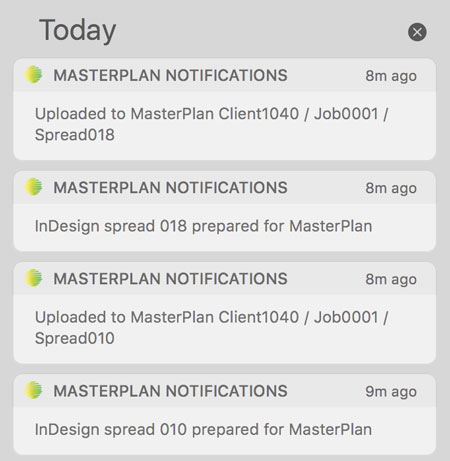
Figure 6. The MasterPlan app uses macOS notifications to keep you apprised of what it is doing in the background.
Workflow Accommodation
MasterPlan is designed to be flexible enough to accommodate almost any workflow. For example, in some organizations, some staff members are dedicated to checking and approving images, some make editorial decisions, and some proof the text. In other organizations, all three of these tasks are done by the same person at the same point in the workflow. By default, MasterPlan features six different statuses that can be assigned to each spread, as shown in Figure 7.
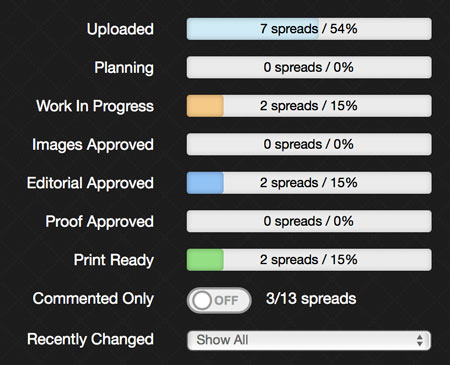
Figure 7. The six default categories available in MasterPlan. The names and colors of these categories can be changed to suit your workflow and organization.
To adapt to different workflow and organizational lingo, the names and colors of status categories can be changed by a user who has Admin privileges on the MasterPlan system.
When you assign these categories to different pages, the page thumbnails are color coded for easy identification. In addition, you can click on a status category to display only the pages in that category. So for example, you can quickly view only the pages that have images and editorial approved. You can view a live MasterPlan project and try this for yourself.
Hovering over a thumbnail in the MasterPlan project reveals the status, as well as who modified the InDesign spread last, and when (Figure 8).
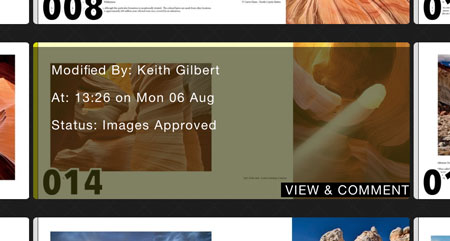
Figure 8. When you hover your cursor over a thumbnail in the MasterPlan project, you can see who made the most recent modification to the InDesign spread, and when.
Commenting
Once your reviewers get accustomed to looking at your layouts on the screen, they are bound to have edits, revisions, and comments that they want to make. MasterPlan provides a much better workflow than sending comments and revisions via email.
When a reviewer is viewing a spread, a bar across the top of the screen displays tools for adding notes and sketches to the layout (Figure 9).
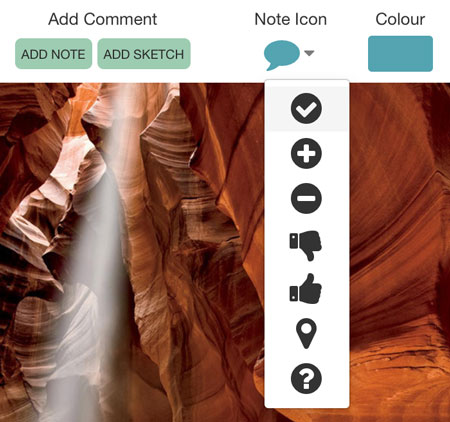
Figure 9. Reviewers can add eight different note icons, text comments, and freeform sketches to spread images.
The user can choose a color and an icon, and then click on the page and add a text note. Sketches are free-form drawings created with the mouse. These notes and sketches are then saved with the spread image in the MasterPlan project. You can tell at a glance which spreads contain notes or sketches by toggling the Commented Only switch. An icon is also displayed on the Spread thumbnail to indicate that a comment or a note is present (Figure 10).
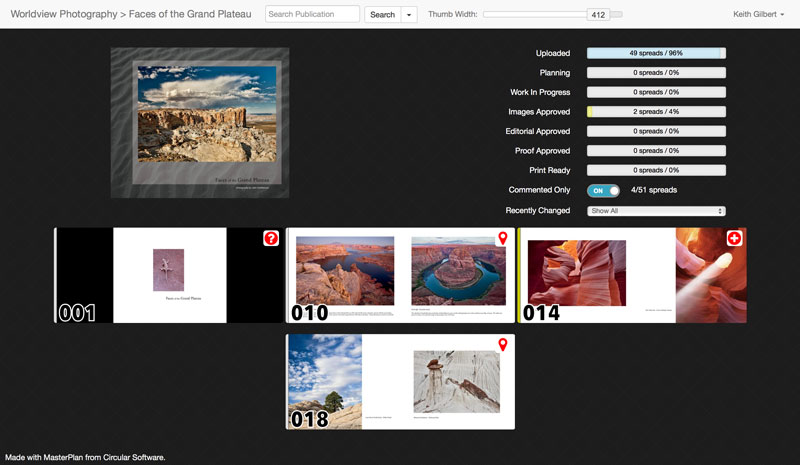
Figure 10. The spreads filtered so that only those with comments or notes are displayed.
Back in InDesign, the designer can open the layout, go to the MasterPlan app, and choose Work > Pull Comments into InDesign. All the notes and sketches in the MasterPlan web view of the project arrive in the correct location in the InDesign layout. These notes and sketches are placed on their own InDesign layer, which is locked by default and set to non-printing. But for text changes, the designer can unlock the notes layer and copy and paste the text from the comment into the layout (Figure 11). I find this so much easier than trying to flip back and forth between the comments in a PDF file and an InDesign layout!
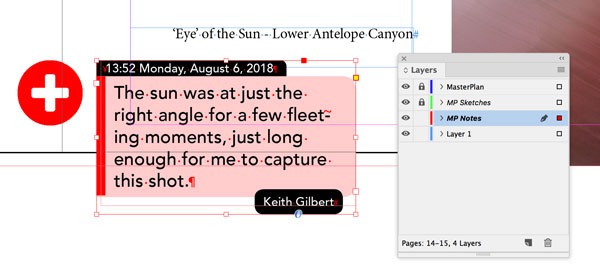
Figure 11. A text note after being pulled into InDesign from MasterPlan.
While this is a really powerful and welcome feature, MasterPlan doesn’t attempt to create or enforce any sort of commenting workflow beyond what I just described. It is up to you to think about assigning colors to different roles or different types of comments, and deciding when to remove the comments from the MasterPlan project.
MasterPlan WORK also offers Slack integration a job level so users can receive notifications via mobile device, web browser, or desktop app. They can see instant comments and thumbnails of changes (Figure 12). And an added bonus is the ability to snooze or switch off notifications so they don’t clog your email inbox.
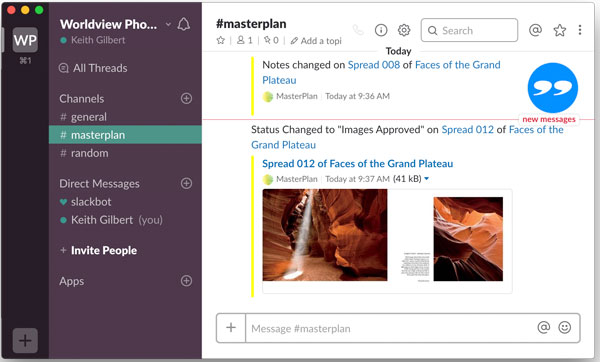
Figure 12. Slack integration offers a clear upgrade over email notifications.
Pricing
At the time of this review, MasterPlan WORK is free for up to three concurrent InDesign jobs, and up to three connected InDesign users using the MasterPlan app.
Paying $10 per user or job per month gets you:
- The ability to share layouts to only your team and trusted users
- The ability to restrict commenting to specific pages and/or users
- The ability to host the page images at your location or embed them into your own site
- The ability to create custom status categories and colors
- A top-level overview of all current jobs in a MasterPlan dashboard
- Access to one-to-one setup sessions
The best way to understand the pricing model is to enter your number of users and jobs at circularsoftware.com/subscribe and view the resulting price.
Things I’d Like To See
Whenever I review a product I inevitably start thinking of a list of things that I’d like to see added, and MasterPlan is no exception. While writing this article I had several long conversations with Ken Jones at Circular Software. He is keen to get feedback and work with customers to extend the product’s capabilities. In addition, MasterPlan offers an interface to programmers (called an API) that can be used by third-party developers to extend the capabilities of MasterPlan and supply additional automation. You can learn more about the API here.
At the top of the list of enhancements I’d like to see would be the ability to handle documents with covers, front matter, and back matter. Currently MasterPlan assumes you are working on the interior of a book, with the pages numbered sequentially from page one to the end. This can be divided up between users (for example, one user working on a layout with pages 1–17, another working on 18–19, another creating 20–48). But layouts with nonconsecutive page numbers, or front- or back matter won’t work. MasterPlan assumes consecutive numbering starting at page 1 (Figure 13).
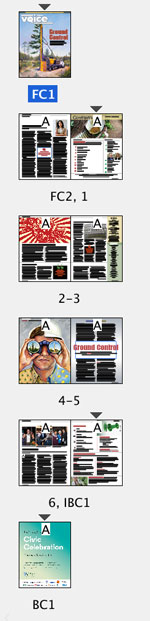
Figure 13. To use MasterPlan with this layout, the front cover pages (FC1 and FC2) and the back cover pages (IBC1 and BC1) would need to be placed in a separate InDesign file. You could then use MasterPlan with all the interior pages starting with page 1.
I’d also like to see MasterPlan gain the ability to work with non-spread documents, or allow reviewers to view spread documents in a single-page view.
Being able to pull comments into InDesign is great. But the comments have to be removed manually from MasterPlan in the browser. I’d also like to see features for managing or at least automatically deleting notes and sketches from a MasterPlan project after they are pulled into InDesign.
Who’s It For?
I see three ideal use cases where MasterPlan would be a helpful addition to a small- or large-group workflow:
A workflow where designers need to frequently gather and incorporate comments and markups from a group of reviewers such as editors, art directors, and proofers.
Periodical or book publishers who want to be able to quickly get a birds-eye view at any time of the status of a publication so they can see which spreads are completed, which are in progress, which have been proofed, and so on. (Similar to a flat plan.)
Users who want to use MasterPlan LIVE, a companion product that provides an easy way to allow the public to view and search all of your layouts, or just selected layouts, through a Web browser. MasterPlan WORK and MasterPlan LIVE work well together. (MasterPlan LIVE will be reviewed in a future issue.)
If any of these describe you, I’d encourage you to give MasterPlan a try. I think you’ll find it to be a flexible-yet-powerful tool that can help streamline your workflow.
Commenting is easier and faster when you're logged in!

Recommended for you

Ten Essential Techniques for Building Long Documents in InDesign
Mike Rankin covers the most important tips and and third-party add-ons to make f...

InDesign Magazine Issue 93: Editorial Tools
We’re happy to announce that InDesign Magazine Issue 93 (January, 2017) is...

InDesign Magazine Issue 99: Automated Publishing
We’re happy to announce that InDesign Magazine Issue 99 (July 2017) is now...