


Creative Cloud libraries are great for sharing assets like color swatches with colleagues (or just for reuse in other applications in your own workflow). Unfortunately, you still can’t save a gradient swatch to a CC library.
Just try selecting one, and the the Add Swatch to CC Library sadly fades to gray.
This means that there’s no quick and easy way to use all the cool gradients that come with Illustrator in InDesign.
But this old school method still works:
1. Create a new Illustrator document in CMYK color mode (this trick won’t work if you have an RGB Illustrator document).

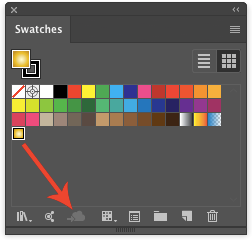
2. Use the color libraries button at the bottom of the Swatches panel to locate the gradient(s) you want.

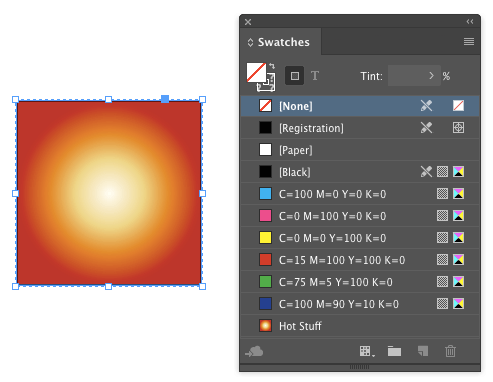
3. Apply the gradient(s) to objects on the artboard.

4. Copy and paste the object(s) into InDesign. The gradients are added to the Swatches panel. Unfortunately (there’s that word again), the new gradient names are generic. So you you’ll have to rename them manually to something more descriptive. But at least you’ll have them at your disposal to format objects in your layout.

Want to get a gradient from InDesign into Illustrator? Here’s how:
1. Copy the object formatted with the gradient in InDesign and paste it into Illustrator.
It will come in as a clipping group.
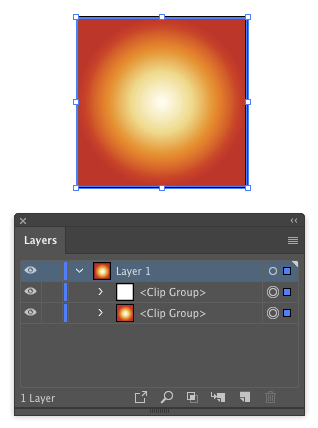
2. Double-click it with the Selection tool to enter Isolation Mode. You should see the gradient in the stroke/fill proxy in the Toolbar.

3. Click the New Swatch button at the bottom of the Swatches panel and given your imported gradient a name.

This article was last modified on December 12, 2024
This article was first published on February 13, 2018
Commenting is easier and faster when you're logged in!

Recommended for you

How to Save the Planet with InDesign
InDesign’s dark user interface has created a lot of controversy since its...

Interview with Monika Gause, Print Designer and Illustrator Expert
Q&A with Monika Gause, who is presenting at the 2026 Design + AI Summit for Crea...

How to Make Patterns in Illustrator
Patterns can add branding, texture, tone, style, and even greater meaning to a d...