

Since InDesign animations are supported in fixed-layout EPUB and Publish Online (and the dream that they may work in some future version of PDF), I thought it was a good time to offer up some tips for working with motion paths. These are the paths you use to determine exactly where an animated object goes. They’re sort of like train tracks, in that the object will always stick to the path.
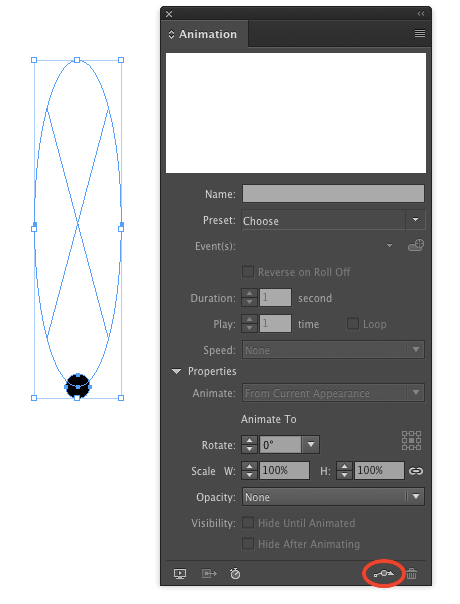
1. Make a motion path from scratch. Draw a vector object with any of the shape tools or the Pen tool. Select both the object you want to use for the motion path and the object you’re animating. Make sure the object you want to use for the motion path is on top of the other object in the stacking order. Then in the Animation panel, click the button to convert to motion path.
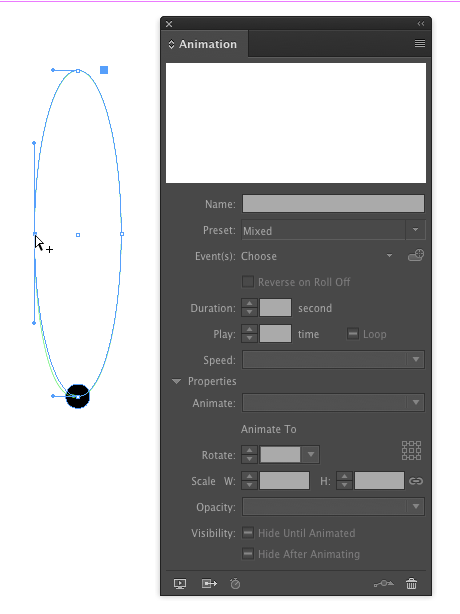
2. Editing a motion path. Since it’s just a vector object, you can select a motion path with either the Selection tool or the Direction Selection tool and reshape the path to change the movement of the object. You can also use the Pen tool to add or remove points.
3. Reversing a motion path. Want to make your animated object go in the opposite direction? Select the motion path and choose Object > Path > Reverse Path. You should see the arrowhead on the path flip direction.

4. Transforming a motion path. Select the motion path with the Selection tool, then use the Control panel to flip, rotate, scale, or skew the motion path (you will see the attached object move to stay with the motion path).

5. Make a copy of a motion path. Option/Alt-drag the motion path to duplicate it as a regular path, which you can then apply to another object.

This article was last modified on July 20, 2021
This article was first published on April 13, 2017
Commenting is easier and faster when you're logged in!

Recommended for you

Animating Images With Plotagraph Pro
Plotagraph Pro is an innovative app that allows you to selectively animate still...

A CS5 Treat: The Animation Sandwich
By combining CS5's new animation features with regular InDesign drawing techniqu...

Holiday FX: Animated Snow
In the comments for Holiday FX: Let It Snow! James Fritz mentioned that it would...