
10 MORE Essential Tips for Adobe Camera Raw
Use these tips to get more out of the Adobe Camera Raw dialog in Photoshop.
This article appears in Issue 32 of CreativePro Magazine.
Adobe Camera Raw has changed a lot over the past decade since we published “10 Essential Tips for Adobe Camera Raw.” Most of those items still apply, just in a different interface. Now, Camera Raw incorporates even more features, so it’s time to identify ten more essentials to know as you’re working on images. Check back in 2034 to see what changes will happen over the next ten years!
- To reset the values in a panel, such as Light or Color, hold Option (macOS) or Alt (Windows); the name changes to include “Reset.” Click that to put the sliders back to zero.

- As you’re making adjustments, press the \ (backslash) key to view the original version of the image to see what’s changed. But you don’t always want to go all the way to the beginning. To view before/after views of your current edit, click the Before/After views menu or press the Q key, and choose from a side-by-side view, a vertical split view, a top/bottom view, and a horizontal split view.

- For quick processing, click the Presets button in the toolbar at right (or press Shift+P). Move the mouse pointer over the options to preview the effects and then click the one you want. Of course, the presets listed here are just starting points. You can create a new preset based on your own settings for use with other images.

- It’s good practice to look at the Histogram while adjusting Light levels, but you can be more direct: Position the pointer over the Histogram itself and drag to adjust the amounts. The affected setting is shaded and marked (such as Highlights) just below the graph.

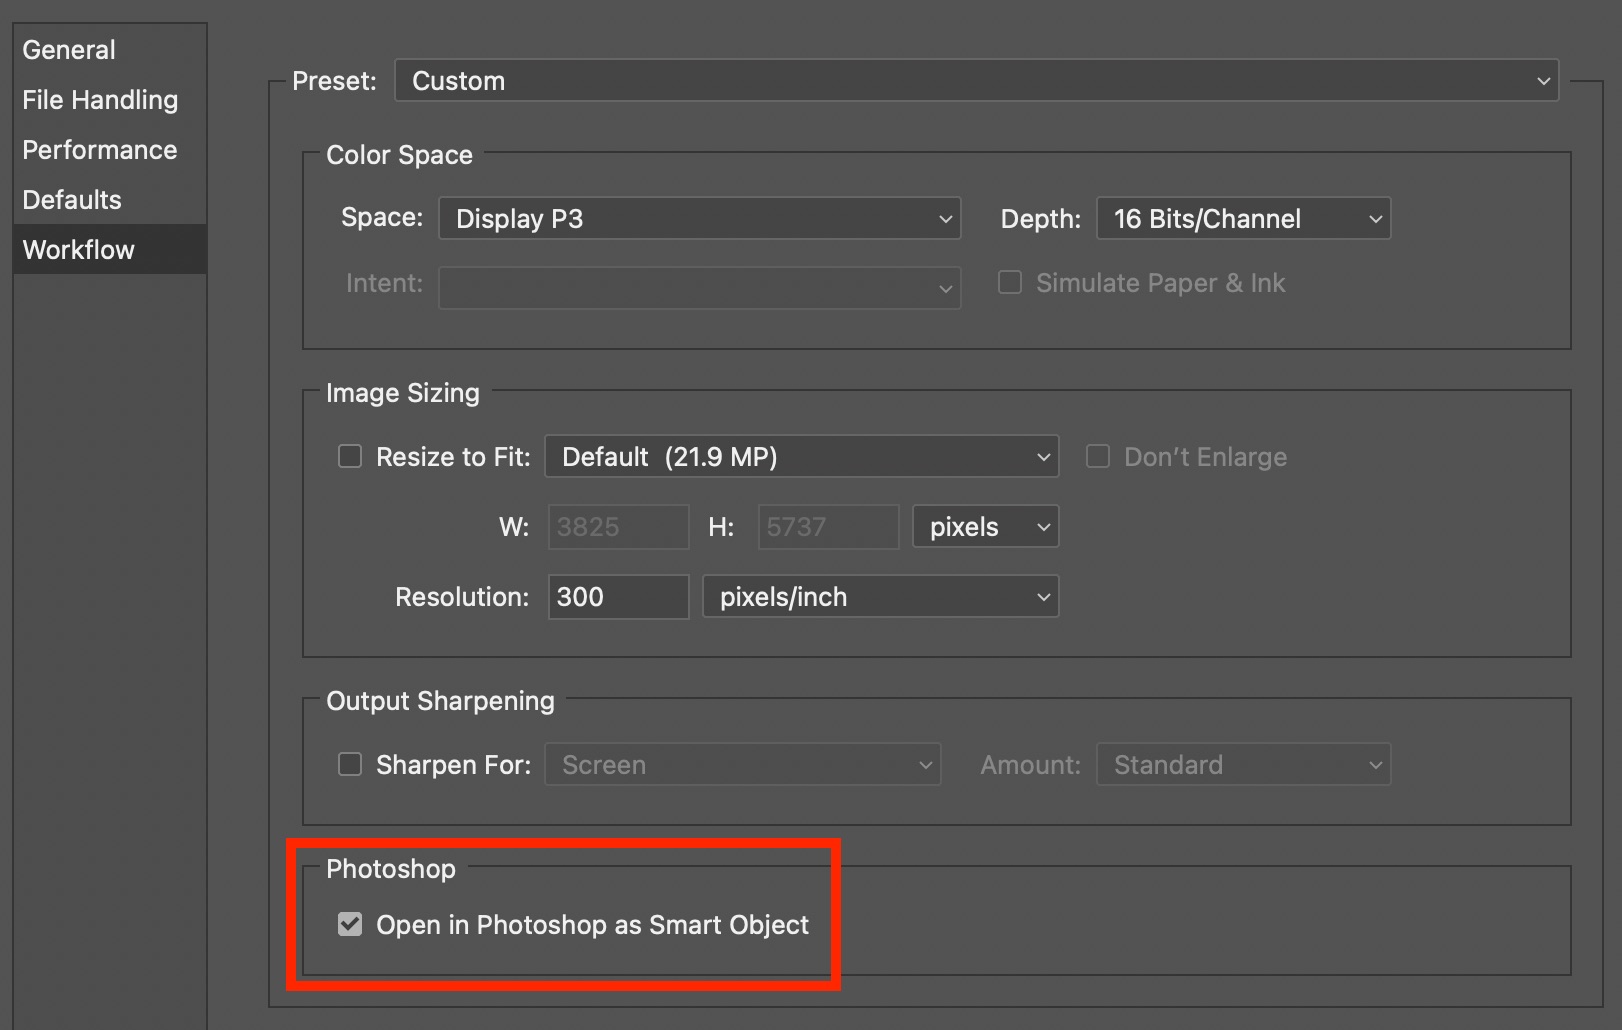
- Normally when you’re finished working in the Camera Raw dialog box, you click Done and the image appears as a Background layer in Photoshop. To open it in Photoshop as a Smart Object instead, click the Preferences button (the gear icon), select Workflow from the headings at left, and then turn on Open in Photoshop as Smart Object.
- Clicking the image preview toggles the zoom setting between Fit (which displays the entire image) and 100%. Depending on the screen you’re working on or your personal preferences, you may prefer a different default zoom level, such as 50%. Click the Preferences button (the gear icon) and, in the General settings, locate the Zoom and Pan options. From the “Default image click zooms to” menu, choose a new standard level. That preserves the default between Camera Raw sessions.

- If the image needs to be straightened, switch to the Crop tool in the toolbar and then double-click the Straighten tool. It will attempt to straighten the image automatically. You can also adjust the Angle slider if you need to tweak the result.

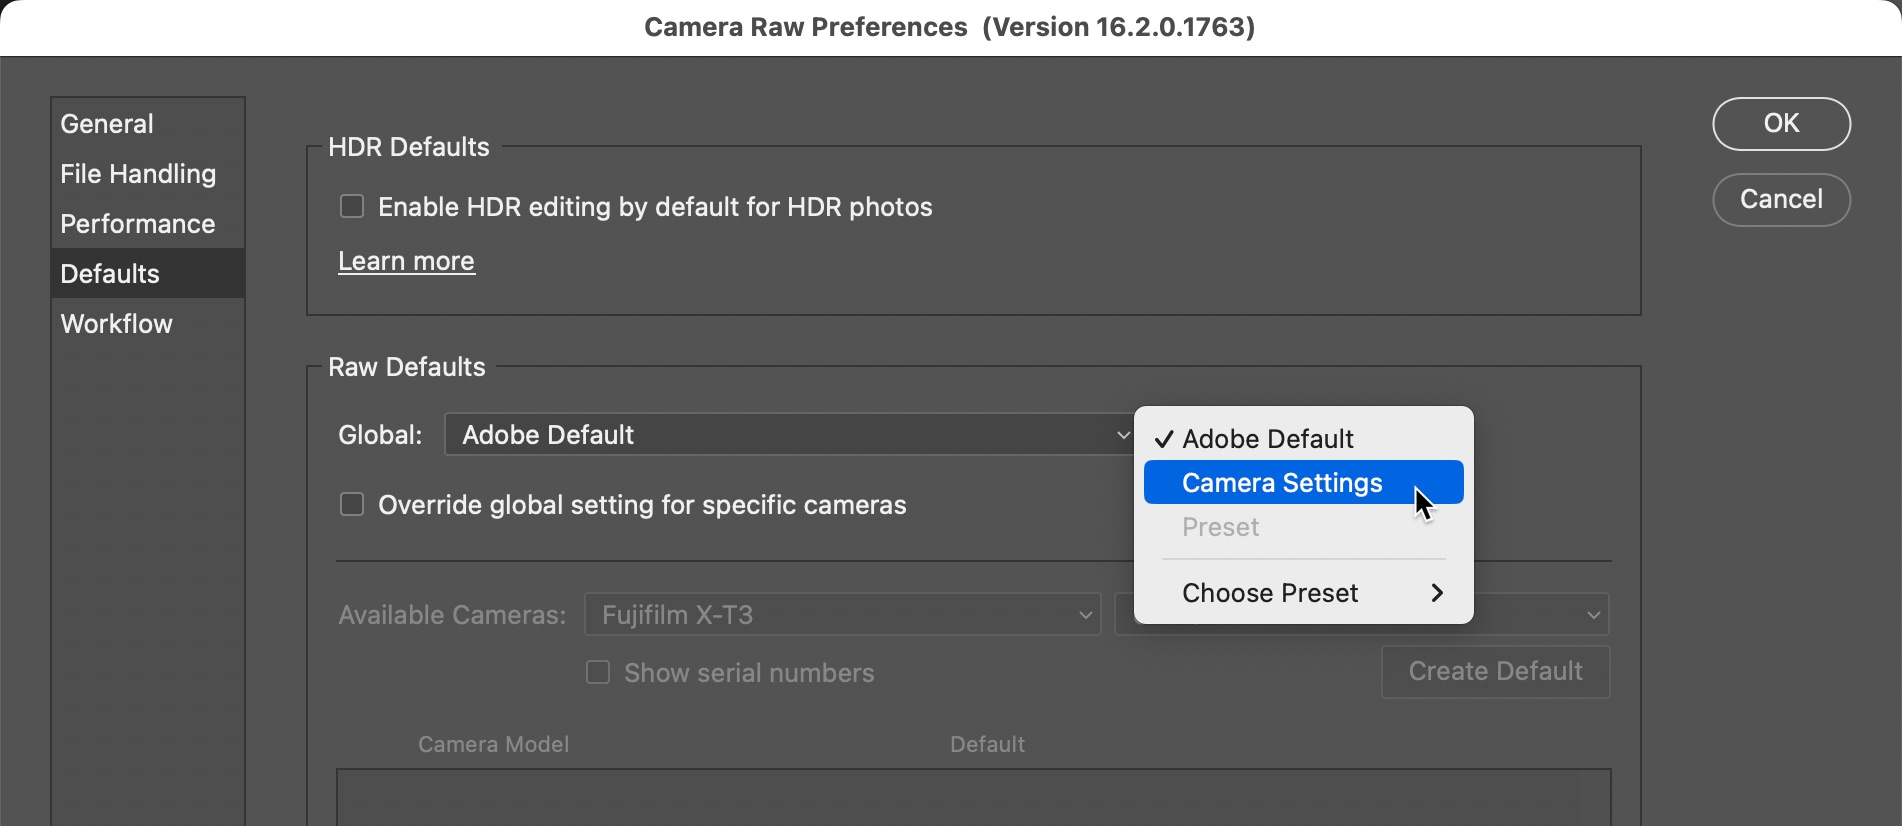
- When you captured a photo, you may have chosen a camera-specific image profile, such as Fujifilm’s Acros black-and-white treatment. Camera Raw typically opens the raw file using its own standard profiles, though, since the raw file includes all of the original data. To honor the camera’s settings, go to the Camera Raw preferences (click the gear icon), choose Defaults in the sidebar, and under Raw Defaults choose Camera Settings from the Global menu.
For more control, you can apply profiles (or presets) specific to the camera used. Activate “Override global setting for specific cameras,” choose one of your cameras from the list (which represents the image(s) currently open), pick a setting, and click Create Default.
- Camera Raw was once a transitional processing step before opening a file in Photoshop, but now it’s a more robust editor with the capability to clean up spots and blemishes. Click the Healing tool in the toolbar at right, pick a mode (Content-Aware Remove, Heal, or Clone) and adjust the size of your healing brush, and then click or drag to stamp out those pesky imperfections. Click the Visualize Spots checkbox for a stark view that makes it easier to spot those pesky spots.

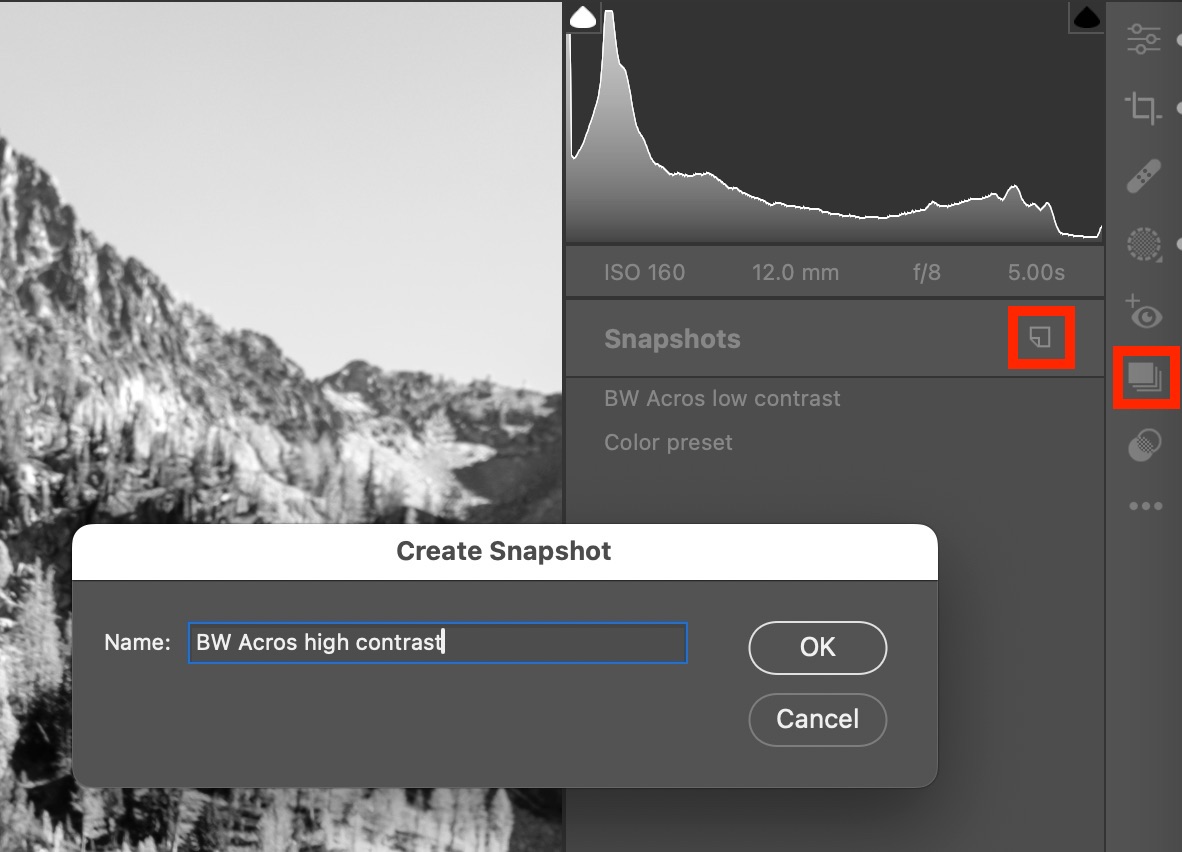
- Do you like to experiment with different looks? Camera Raw supports snapshots, where you can save variations or steps along your editing workflow and easily return to them. Click the Snapshots button in the toolbar, and then click the Create Snapshot button. Give the snapshot a name and then click OK.
To return to a saved snapshot, select it from the list in the Snapshots panel. If the list starts to get cluttered, click the Trash icon to the right of a snapshot name when it’s highlighted.
Commenting is easier and faster when you're logged in!

Recommended for you

FAB Futures Award 2008 — and the Winner Is…
The winners of the internationally renowned creative awards program in the Food...
New Type Walking Tours for 2006
The walking tour of typographic London, introduced by Typevents in the autumn of...
How to Place and Link Duplicate Text in InDesign
Learn how to place duplicate linked text in InDesign so that any updates in the...