
Working with Dielines for Creative Folded Brochures
Learn the right way to prepare eye-catching brochures that your printer and your clients will love.

This article appears in Issue 148 of InDesign Magazine.
Raise your hand if you’re bored with Tri-Fold brochures! Yep, me, too. Hey, Tri-Folds have their place—in fact, I’d consider them the workhorse of the folded brochure category—but sometimes you have the fortunate opportunity (and a pinch of extra budget) to do something different. Really different. Different is awesome, but different also means we have to snap out of production autopilot and think really hard about file setup for a non-standard print format. Personally, I think it’s well worth the effort and fun to challenge your brain both visually and technically. Do it right, and you’ll get a great portfolio piece out of it, too. For this lesson, I’m going to jump ahead in the creative process and choose a creative fold for us to work with. And, in a fun twist, I’m going to give you free access to the dieline as well. I’ll also talk a bit about terminology and cover the technical guidelines for working with dieline files in InDesign.
Terminology Time: Dieline vs. Template
First things first, let’s determine what we’re working with. The term dieline is technical, and it specifically references the line art that is placed as a layer in the art file and used to guide the creation of a metal “die,” which will cut or score the sheet. We would probably use that term if we were laser cutting as well, even though no metal die is made. The line art file will be used to guide the laser. Dielines are made when you need to cut unique shapes or create scores that cannot be achieved with a guillotine cutter or an inline scoring/slitting device. A template is a production-ready file. In the world of folded materials, a folding template would have the fold marks and guides already in place, and the
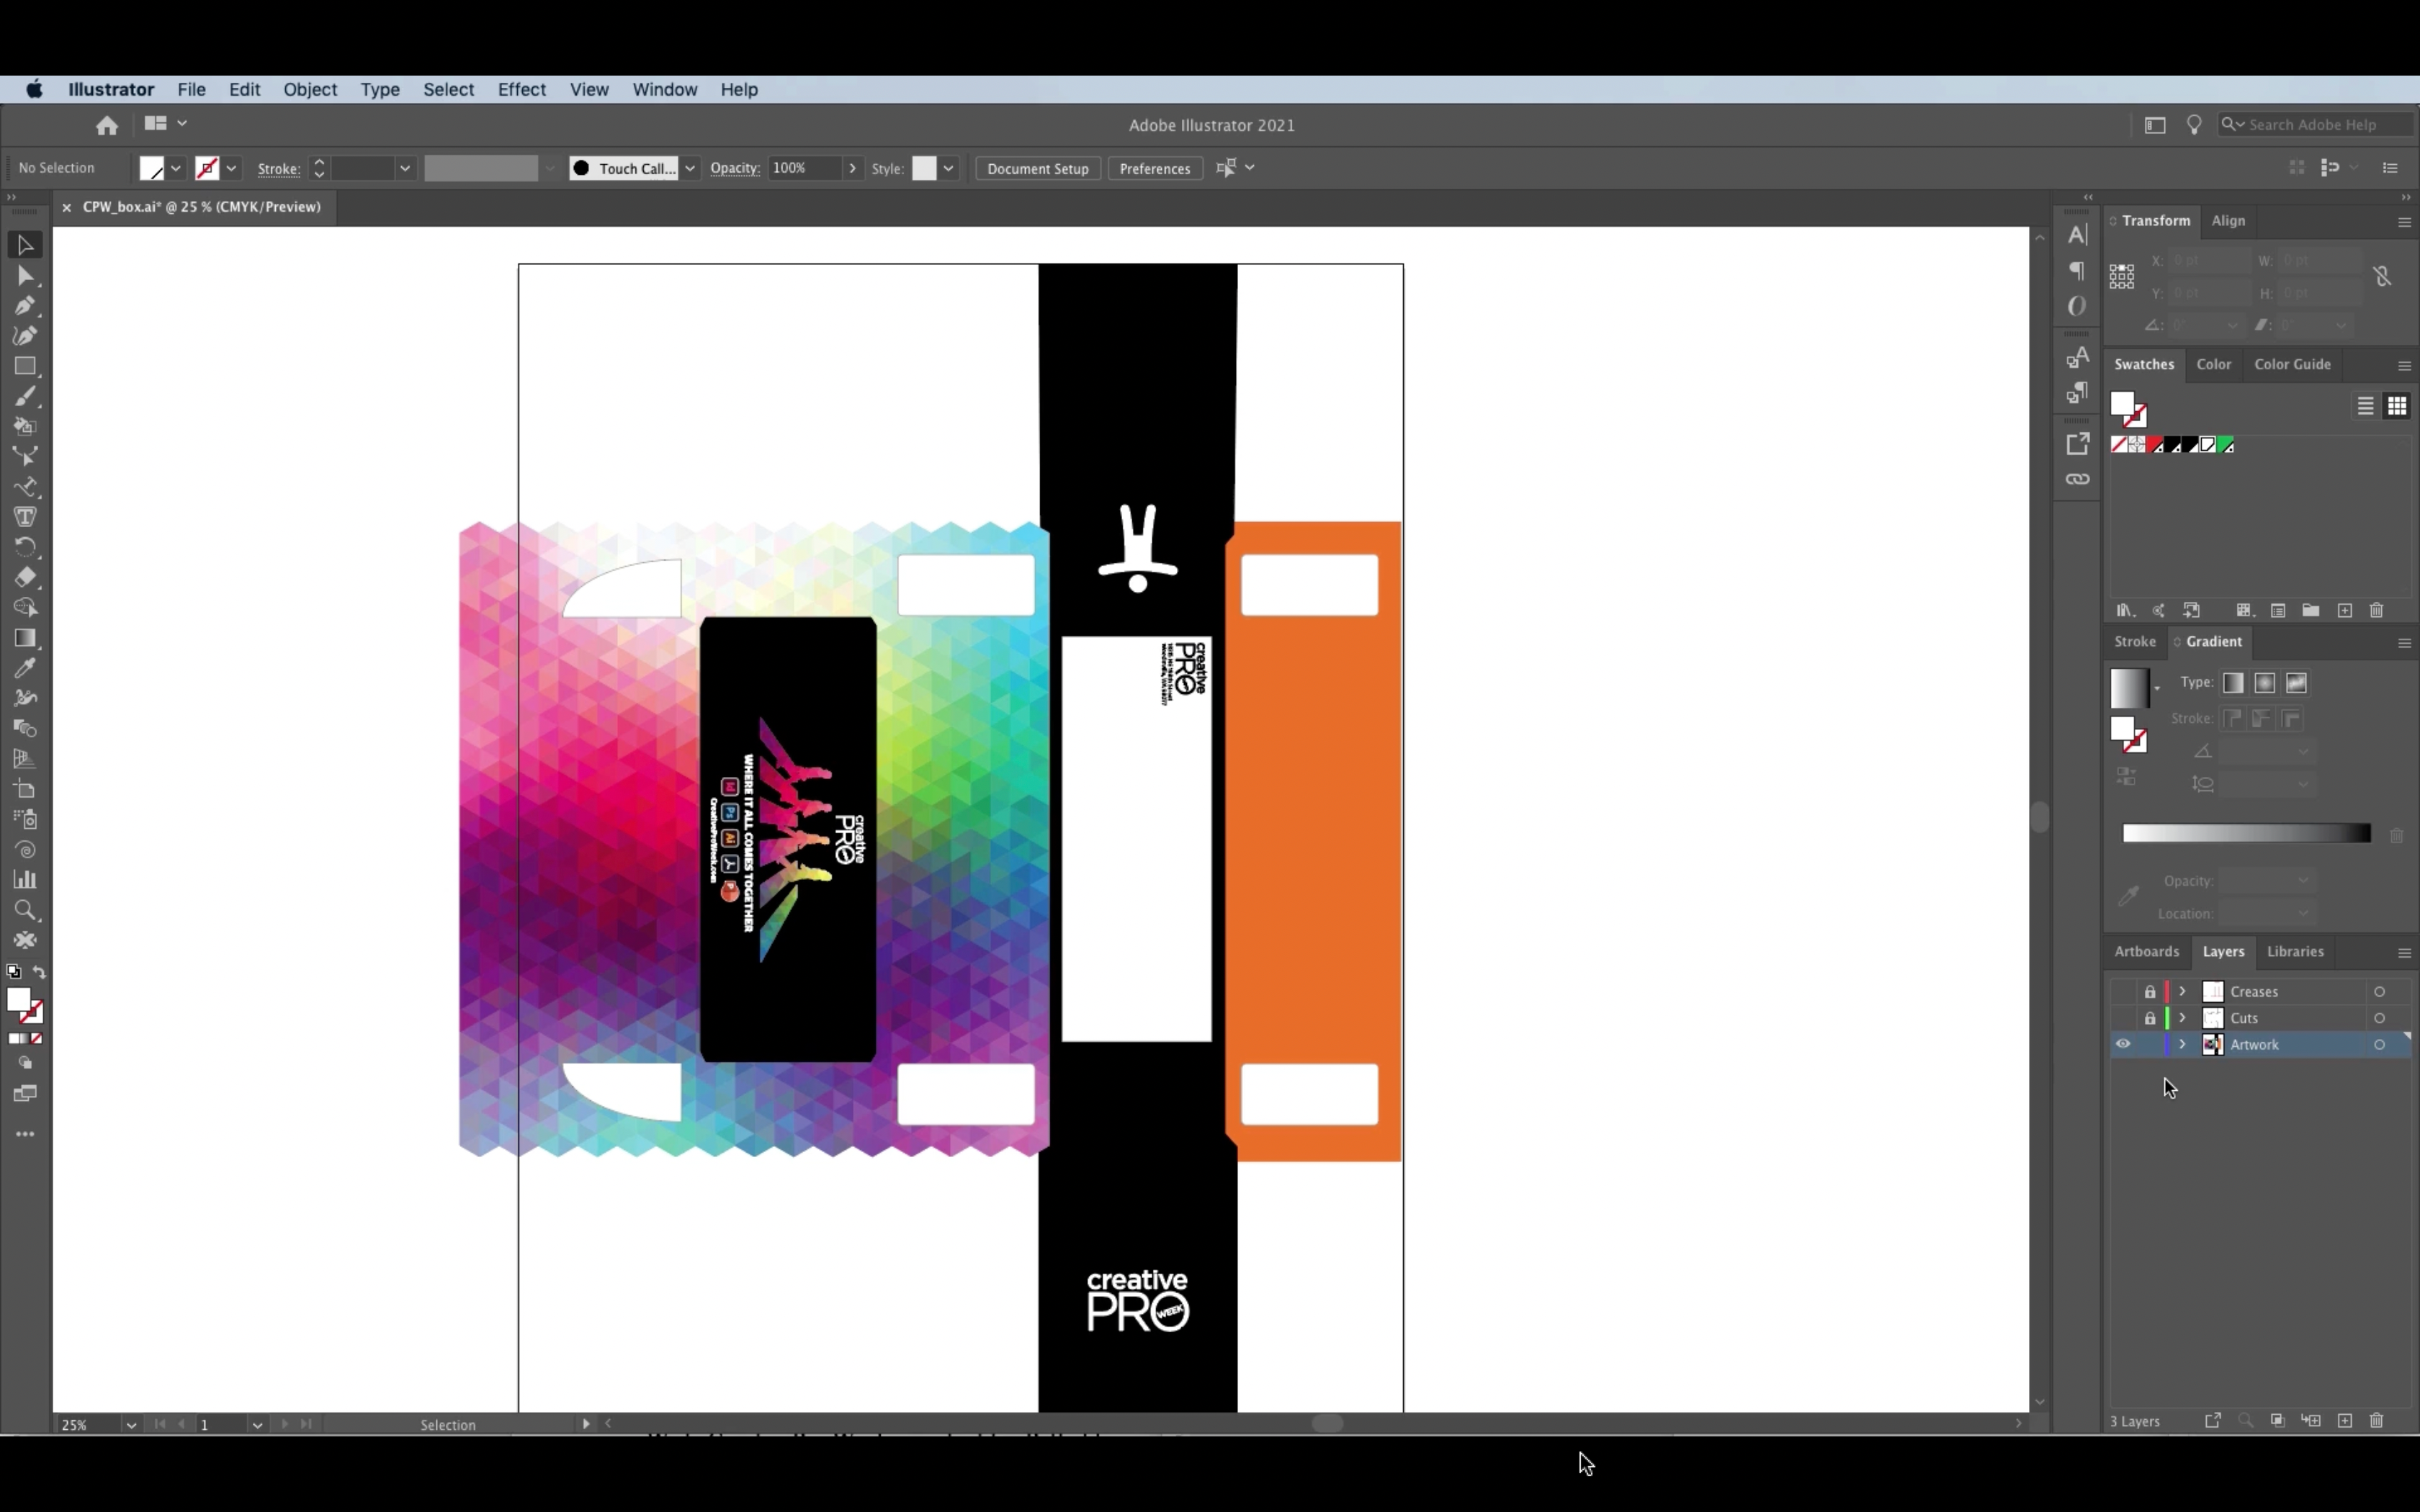
file would be created to trim size, and so on. You would open the file, place your art, pull your bleeds, and send it off to print. The template file would be printed, guillotine trimmed, and folded like any normal print file. So, the template is the ready-to-use production file, and the dieline is the (optional) art layer for specialized cutting or scoring. With that said, you’ll hear these terms used interchangeably because template is a more generalized and mainstream term that most people understand, whereas dieline is an insider’s production term. For this exercise, we’ll be working with the placed dieline for a Rectangular Folded Cross, which is a wonderful, plus-shaped specialty format with panels that fold in from all four sides (Figure 1).
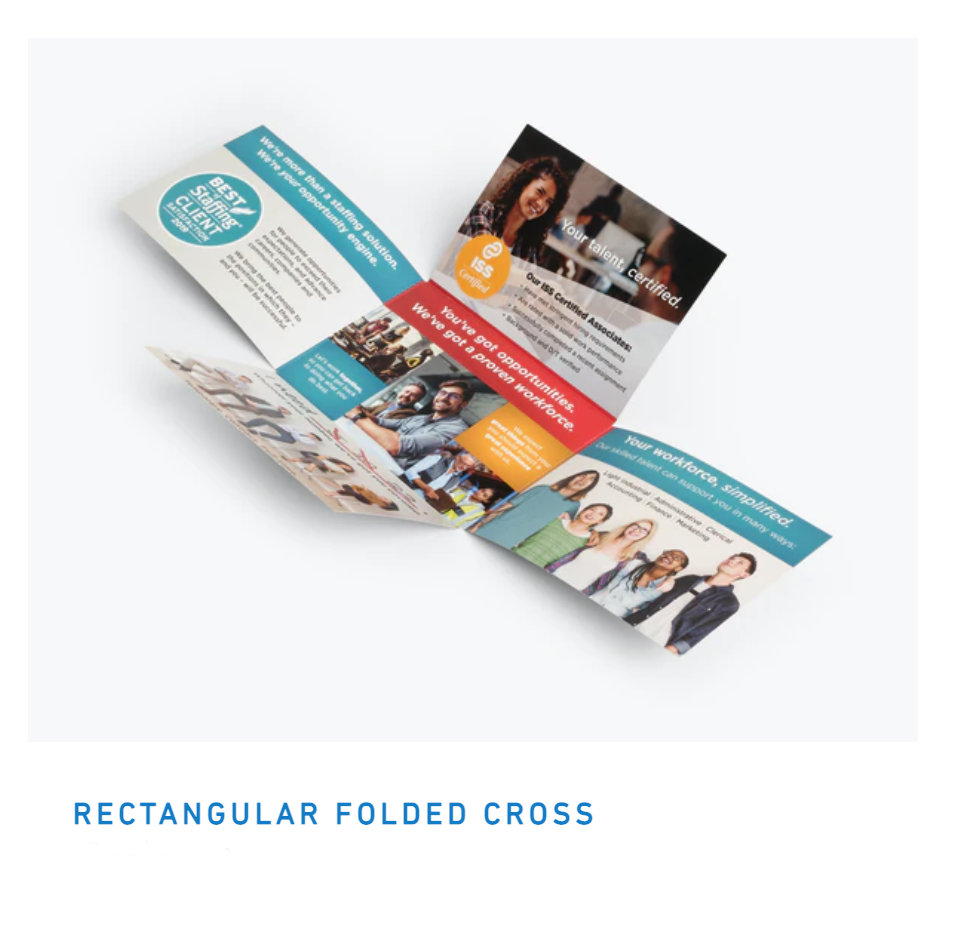
Figure 1. The Rectangular Folded Cross is the creative specialty format we will use as a reference in this tutorial.
Foldfactory designer folds at smartpress
Choose from 30 high-impact folded brochure formats for marketing, promotion, and events. Download free layout guides with dielines included, and use the instant pricing calculator for budget planning.
Getting the Dieline
For this exercise, you can go to the Foldfactory Designer Folds line at Smartpress.com and click the Rectangular Folded Cross. Scroll down the product page a bit, and you’ll see the Project Resources section and a link entitled Rectangular Folded Cross Layout Guide – IDML, which you can download immediately for free (Figure 2). You will not be asked to provide an email or any information before download. This will be your reference file.

Figure 2. Above: Look for this box on the Rectangular Folded Cross product page at Smartpress.com. Below: Download the IDML version of the reference template for this exercise, and open it in InDesign.
 If you would like to use a dieline of your own for this exercise, go for it! However, you should download the Rectangular Folded Cross production file because it offers a good example that you can use as a reference. We’re going to recreate this file in InDesign.
Join Fold Club – Get Templates!
Create a FREE Fold Club account at Foldfactory.com. It’s fast and easy, and you get unlimited access to our award-winning Template Builder to download instant InDesign templates for Tri-Folds, Roll Folds, Gate Folds, Accordions, and more! Just enter the size you want, and you’ll have a ready-to-use folding template in seconds. Fold Club members also enjoy unlimited access to our downloads page, which currently offers 16 exciting dieline downloads, including the Twist Fold, the Swirling Accordion, the Stacked Tulip, and more!
Setting Up Your File
Designers often float a dieline on a larger page with crop marks, but that’s not how printers want the file to be set up. They want the file set up to trim size (i.e. the InDesign page or Illustrator artboard exactly fits the bounding box of the art). So, the first thing we need to do is to figure out the exact width and height dimension of the dieline we’re working with. In the layout guide we downloaded, click the little eye icon in the Layers panel to make all of the notes and extra guides disappear. Then unlock the Dieline layer so you can click on the dieline to get the dimensions in the Info panel. In the reference file we’re using, the dieline dimension is 17.9375 × 12.6875 inches (Figure 3).
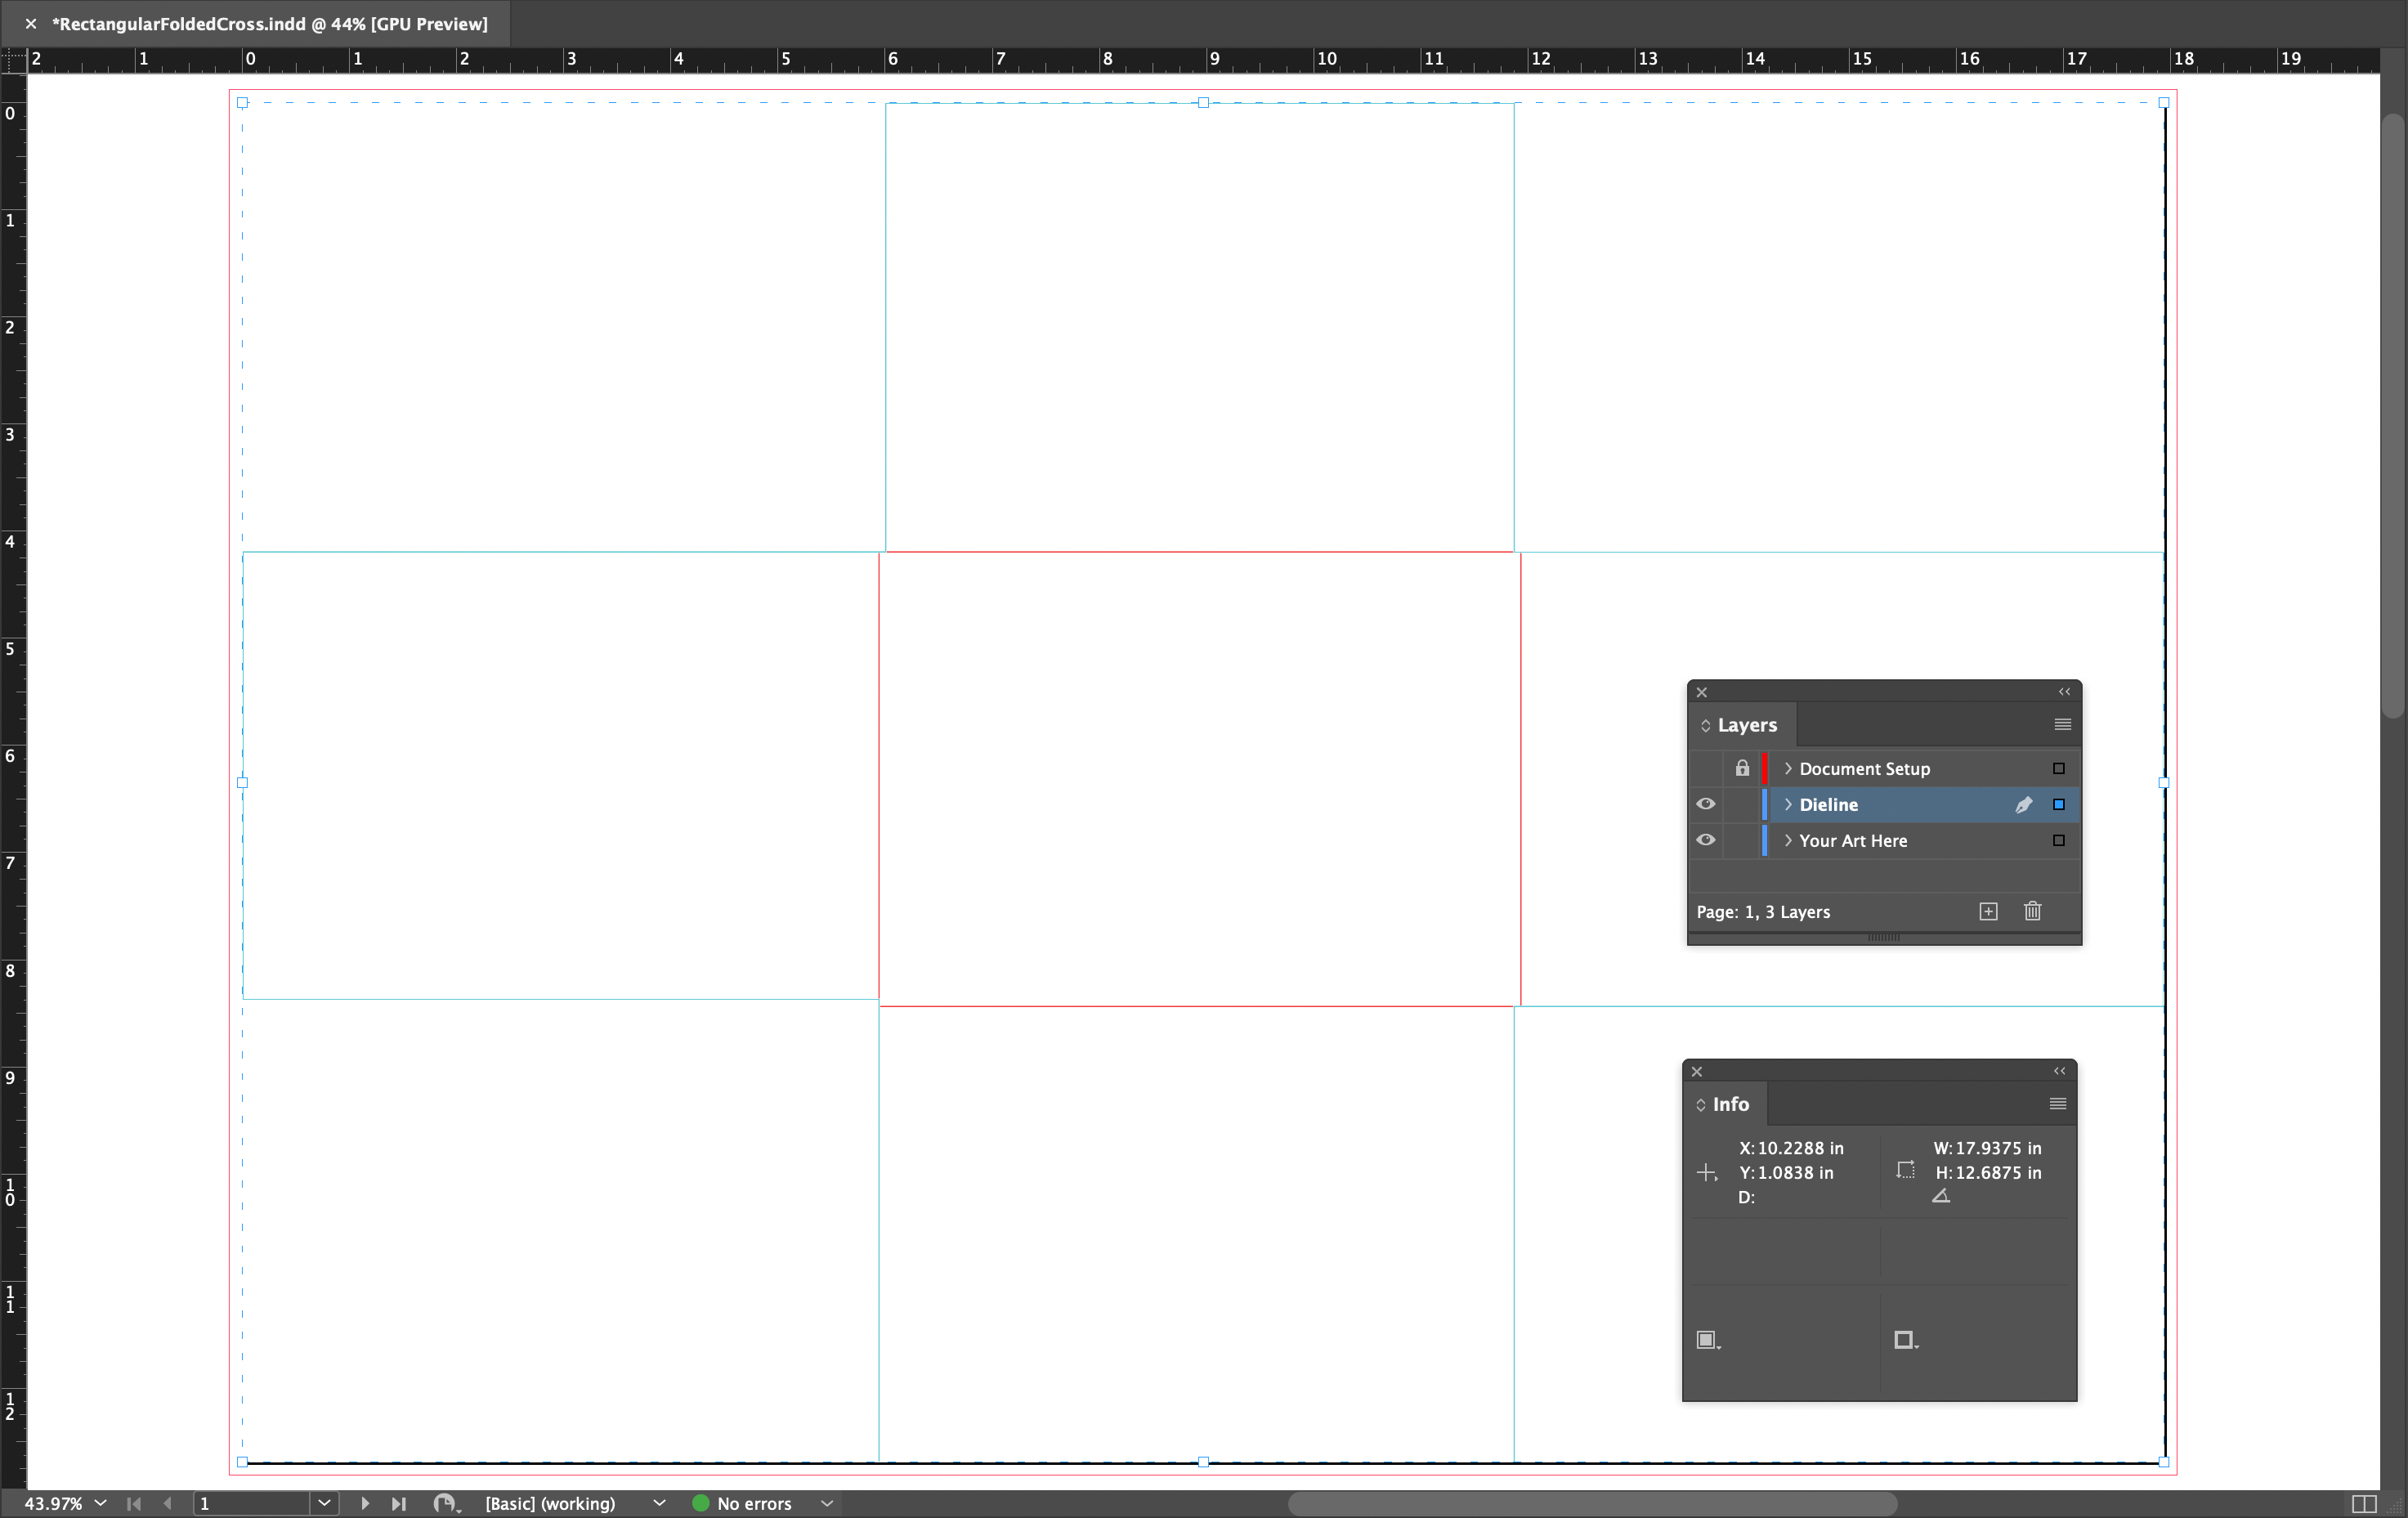
Figure 3. To see the exact dieline dimensions in the downloaded file, hide the Document Setup layer, unlock the Dieline layer, and check the Info panel.
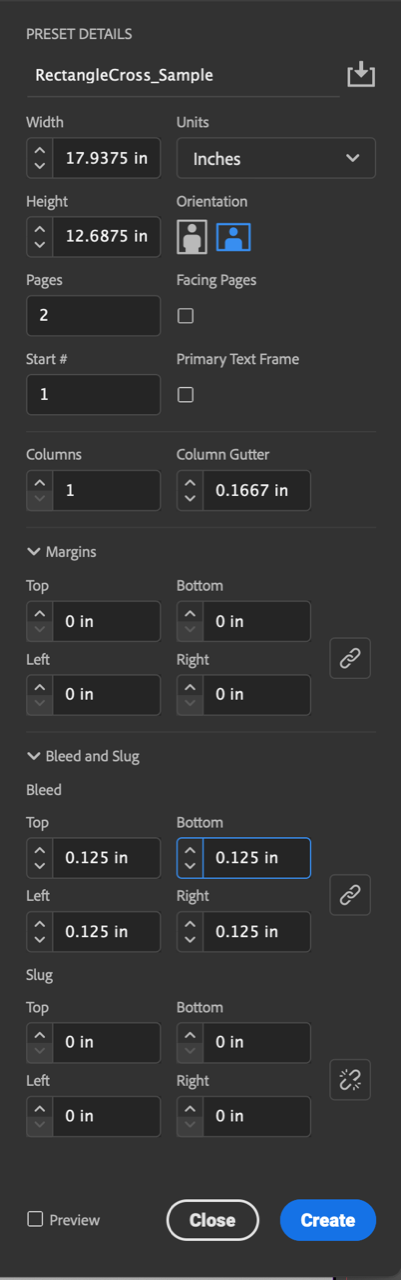
Figure 4. These are the file presets if you’re working with the Rectangular Folded Cross dieline.
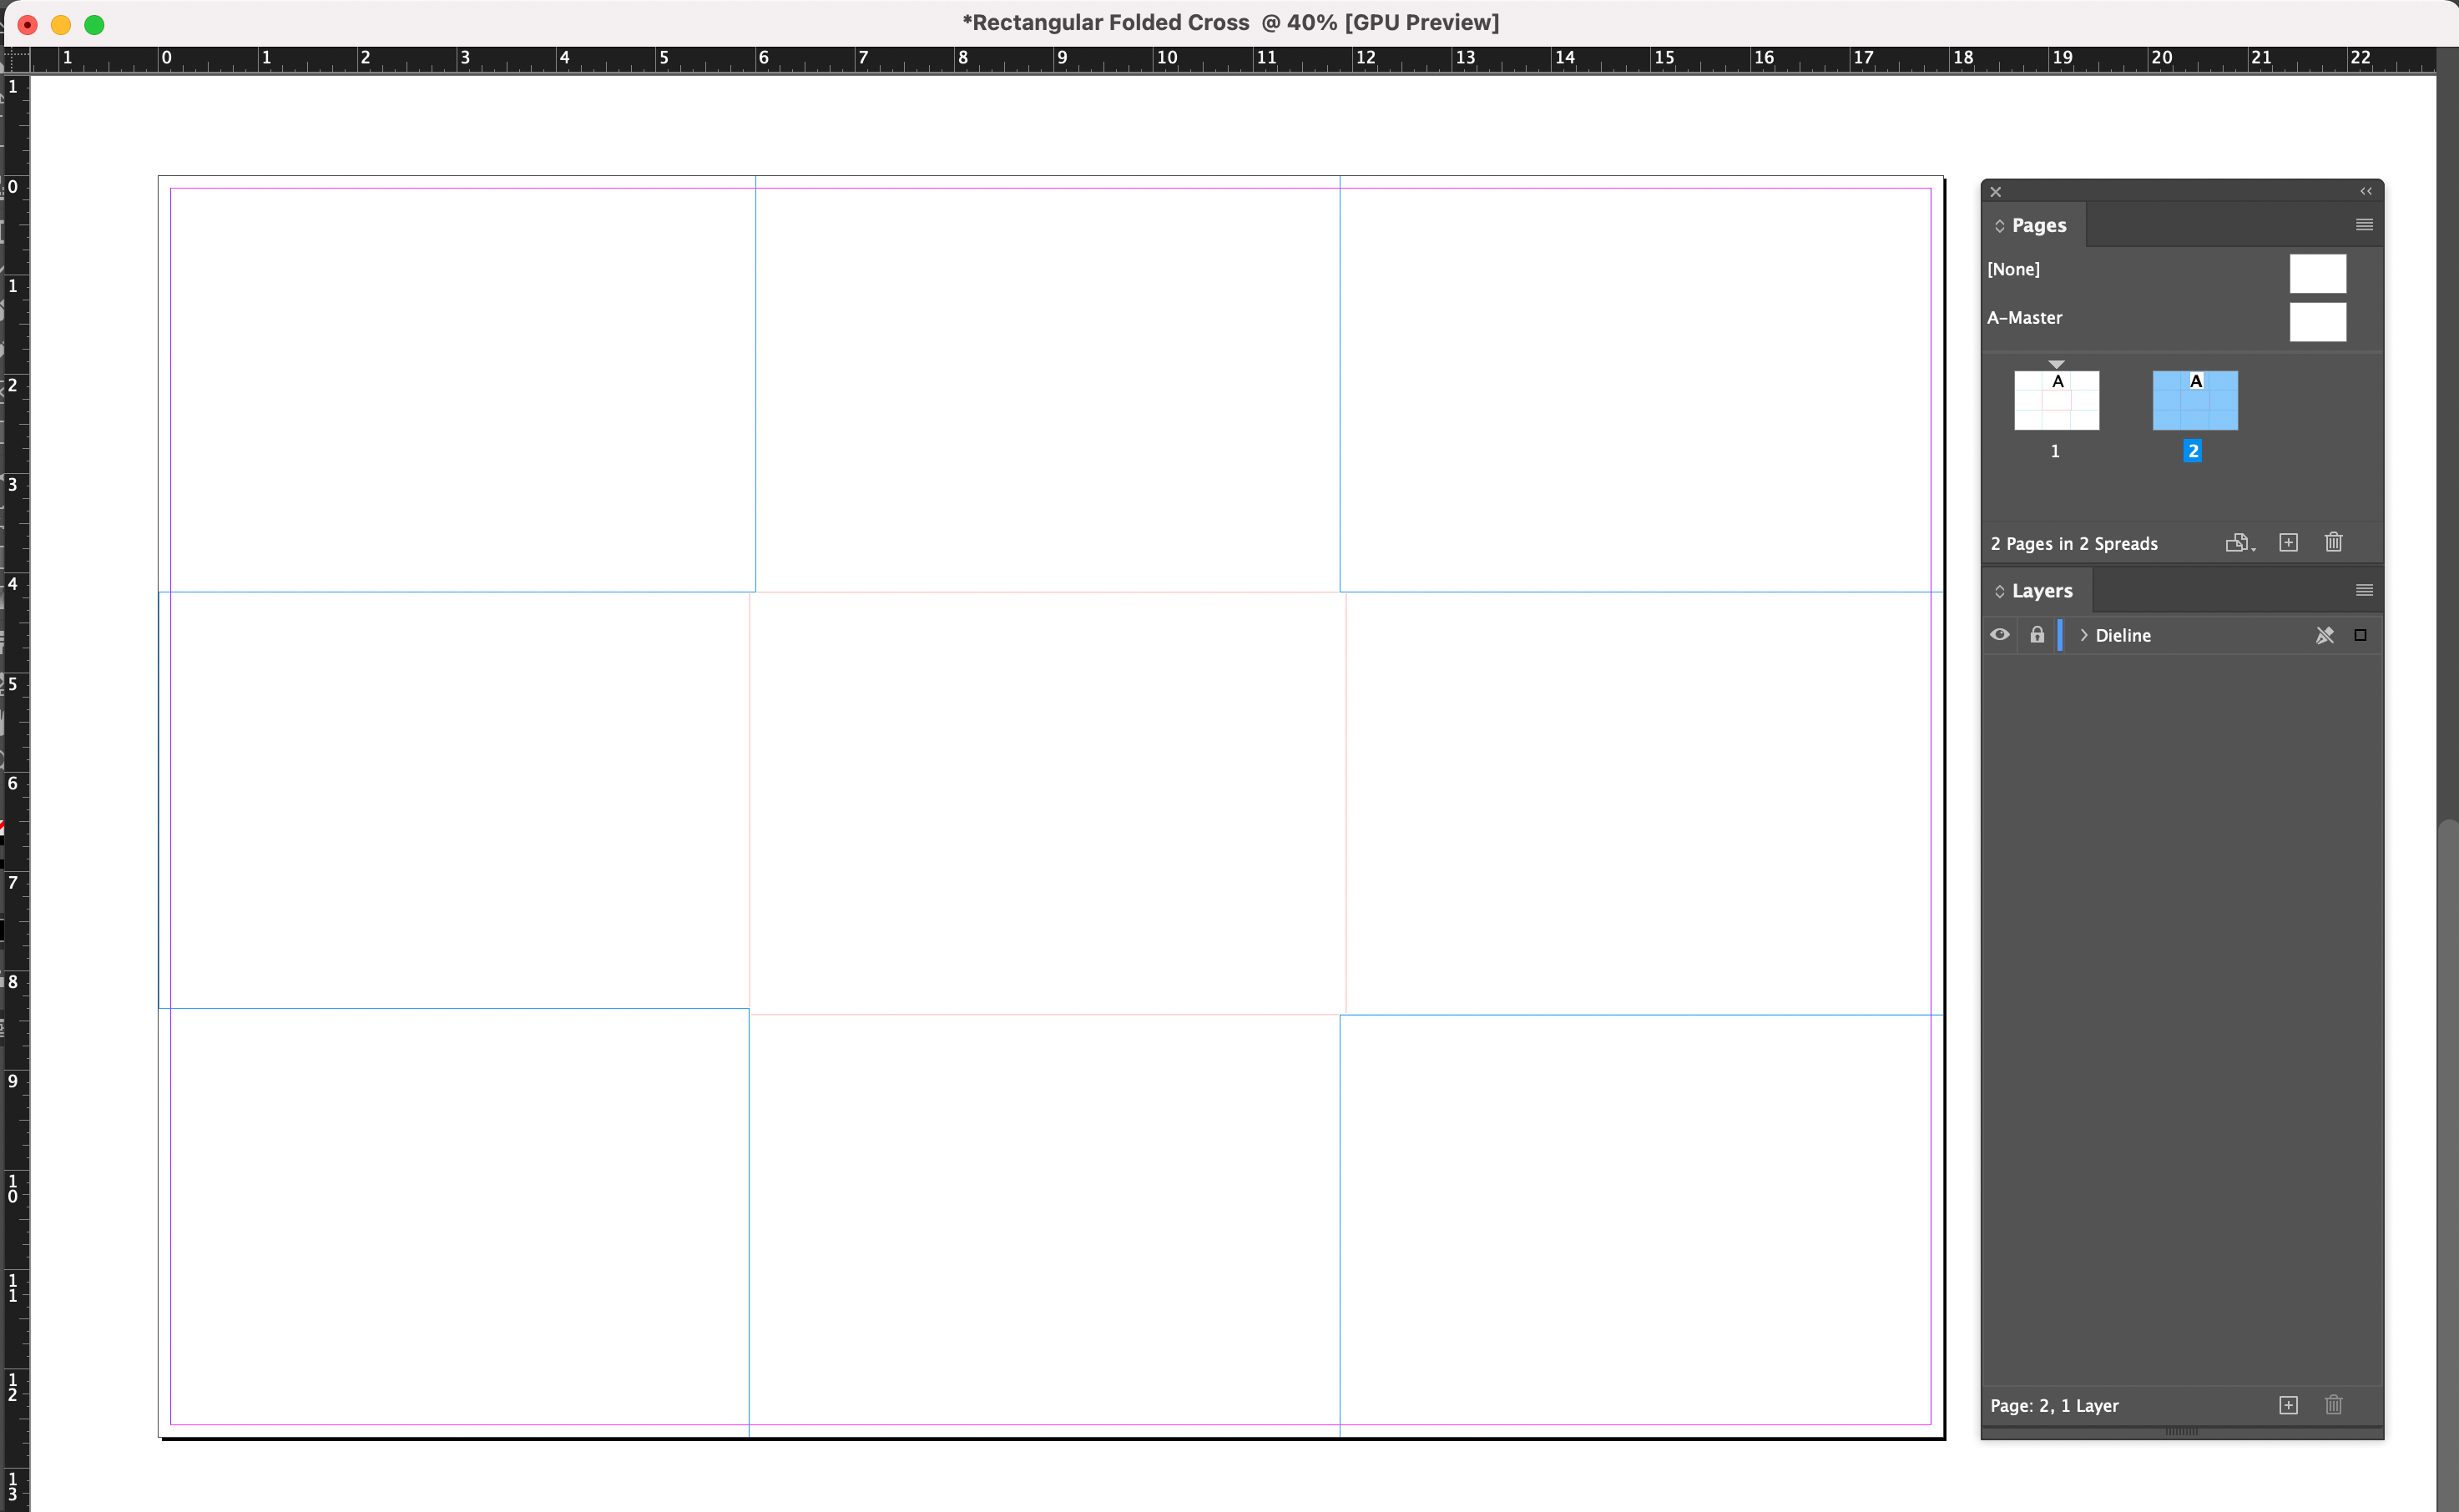
Figure 5. Files with placed dielines should be built to trim size, rather than floating on a page.

Figure 6. Non-printing layers should be labeled as DNP (Do Not Print), with the Print Layer setting turned off.

Figure 7. Proper layer set up is critical to communicating with your printer. The Dieline layer should be locked in place.
Meet Fantastic Fold
Adobe has released the beta version of an exciting new tool for visualizing folded items at FantasticFold.com. Once you’re signed in with an Adobe ID, you can upload dielines in SVG format, accompanying artwork in PNG, and combine them to make a 3D model. From there, you can view and manipulate the object in three-dimensional space, seeing exactly how your folds will look and work. You can even create an animation to demonstrate your fold with flair. And your designs can be imported into Adobe Dimension for further enhancement. To see an example of Fantastic Fold in action, check out this video where David Blatner folds a box for mailing out CreativePro Week swag.
Swag box artwork in Illustrator. Note the separate layers for dielines and artwork.
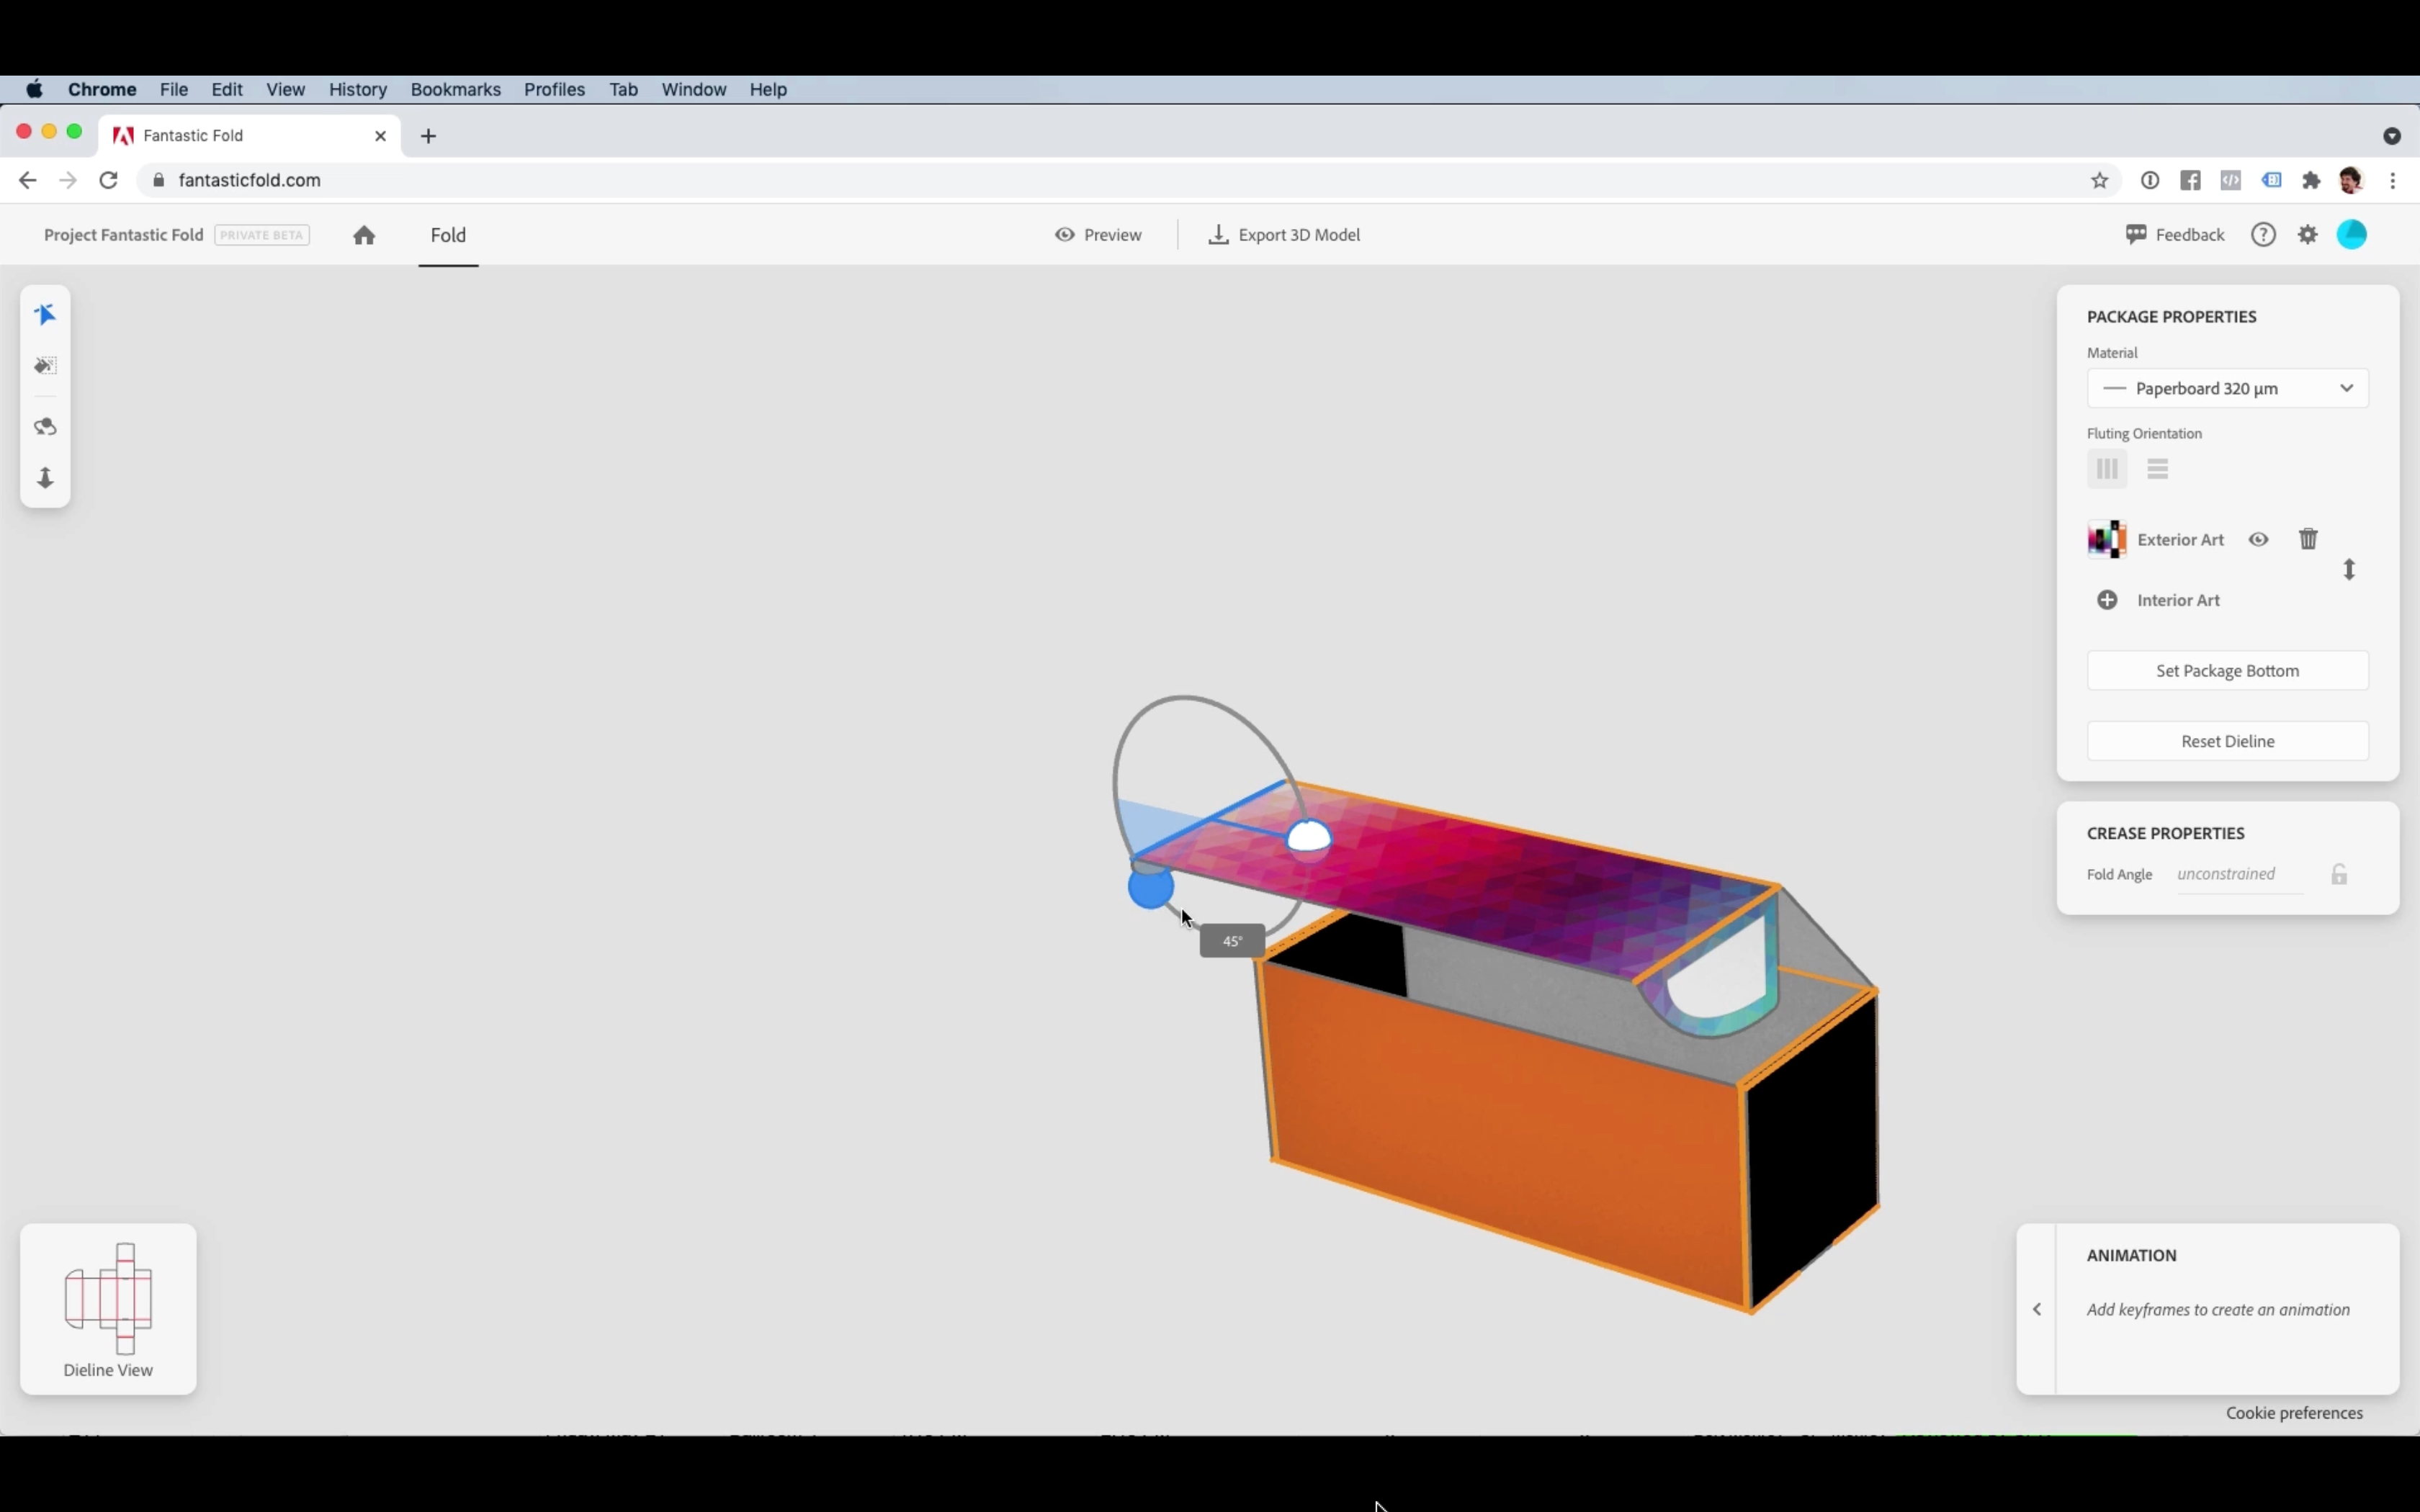
The 3D box model in Fantastic Fold
Dieline Best Practices
If you are creating a dieline in InDesign or Illustrator, the way you communicate in the file is important. Think of the dieline as a series of cuts, creases/scores, and possibly perforations. Although there is some variation in the industry regarding symbolism in the dieline files—for example, some use dotted lines to indicate scores, some use solid lines—in general, the way to avoid confusion is through proper labeling of layers and color swatches. If you unlock and click the dieline in the Rectangular Folded Cross reference file, you’ll see that the stroke weight is .25 pt. That’s the weight you should be using. You’ll also notice that the score/crease lines for folding are red, and the cut lines are blue. If there were perforations needed, those lines would be in a different color. That’s because we need to let the printer know what we want them to do. Smartpress uses solid lines for all dieline art. You can use dotted lines for the scores if you want. You can use different colors than they do, too. The key is in scrupulous use of the Swatches panel. Here’s the rule: Each function in the file (cut, crease, perf) has its own unique spot color labeled precisely what it is for. For example, the spot color for the crease line should be called Crease, and that spot color can only be used for coloring the stroke of the crease lines in the dieline (Figure 8).
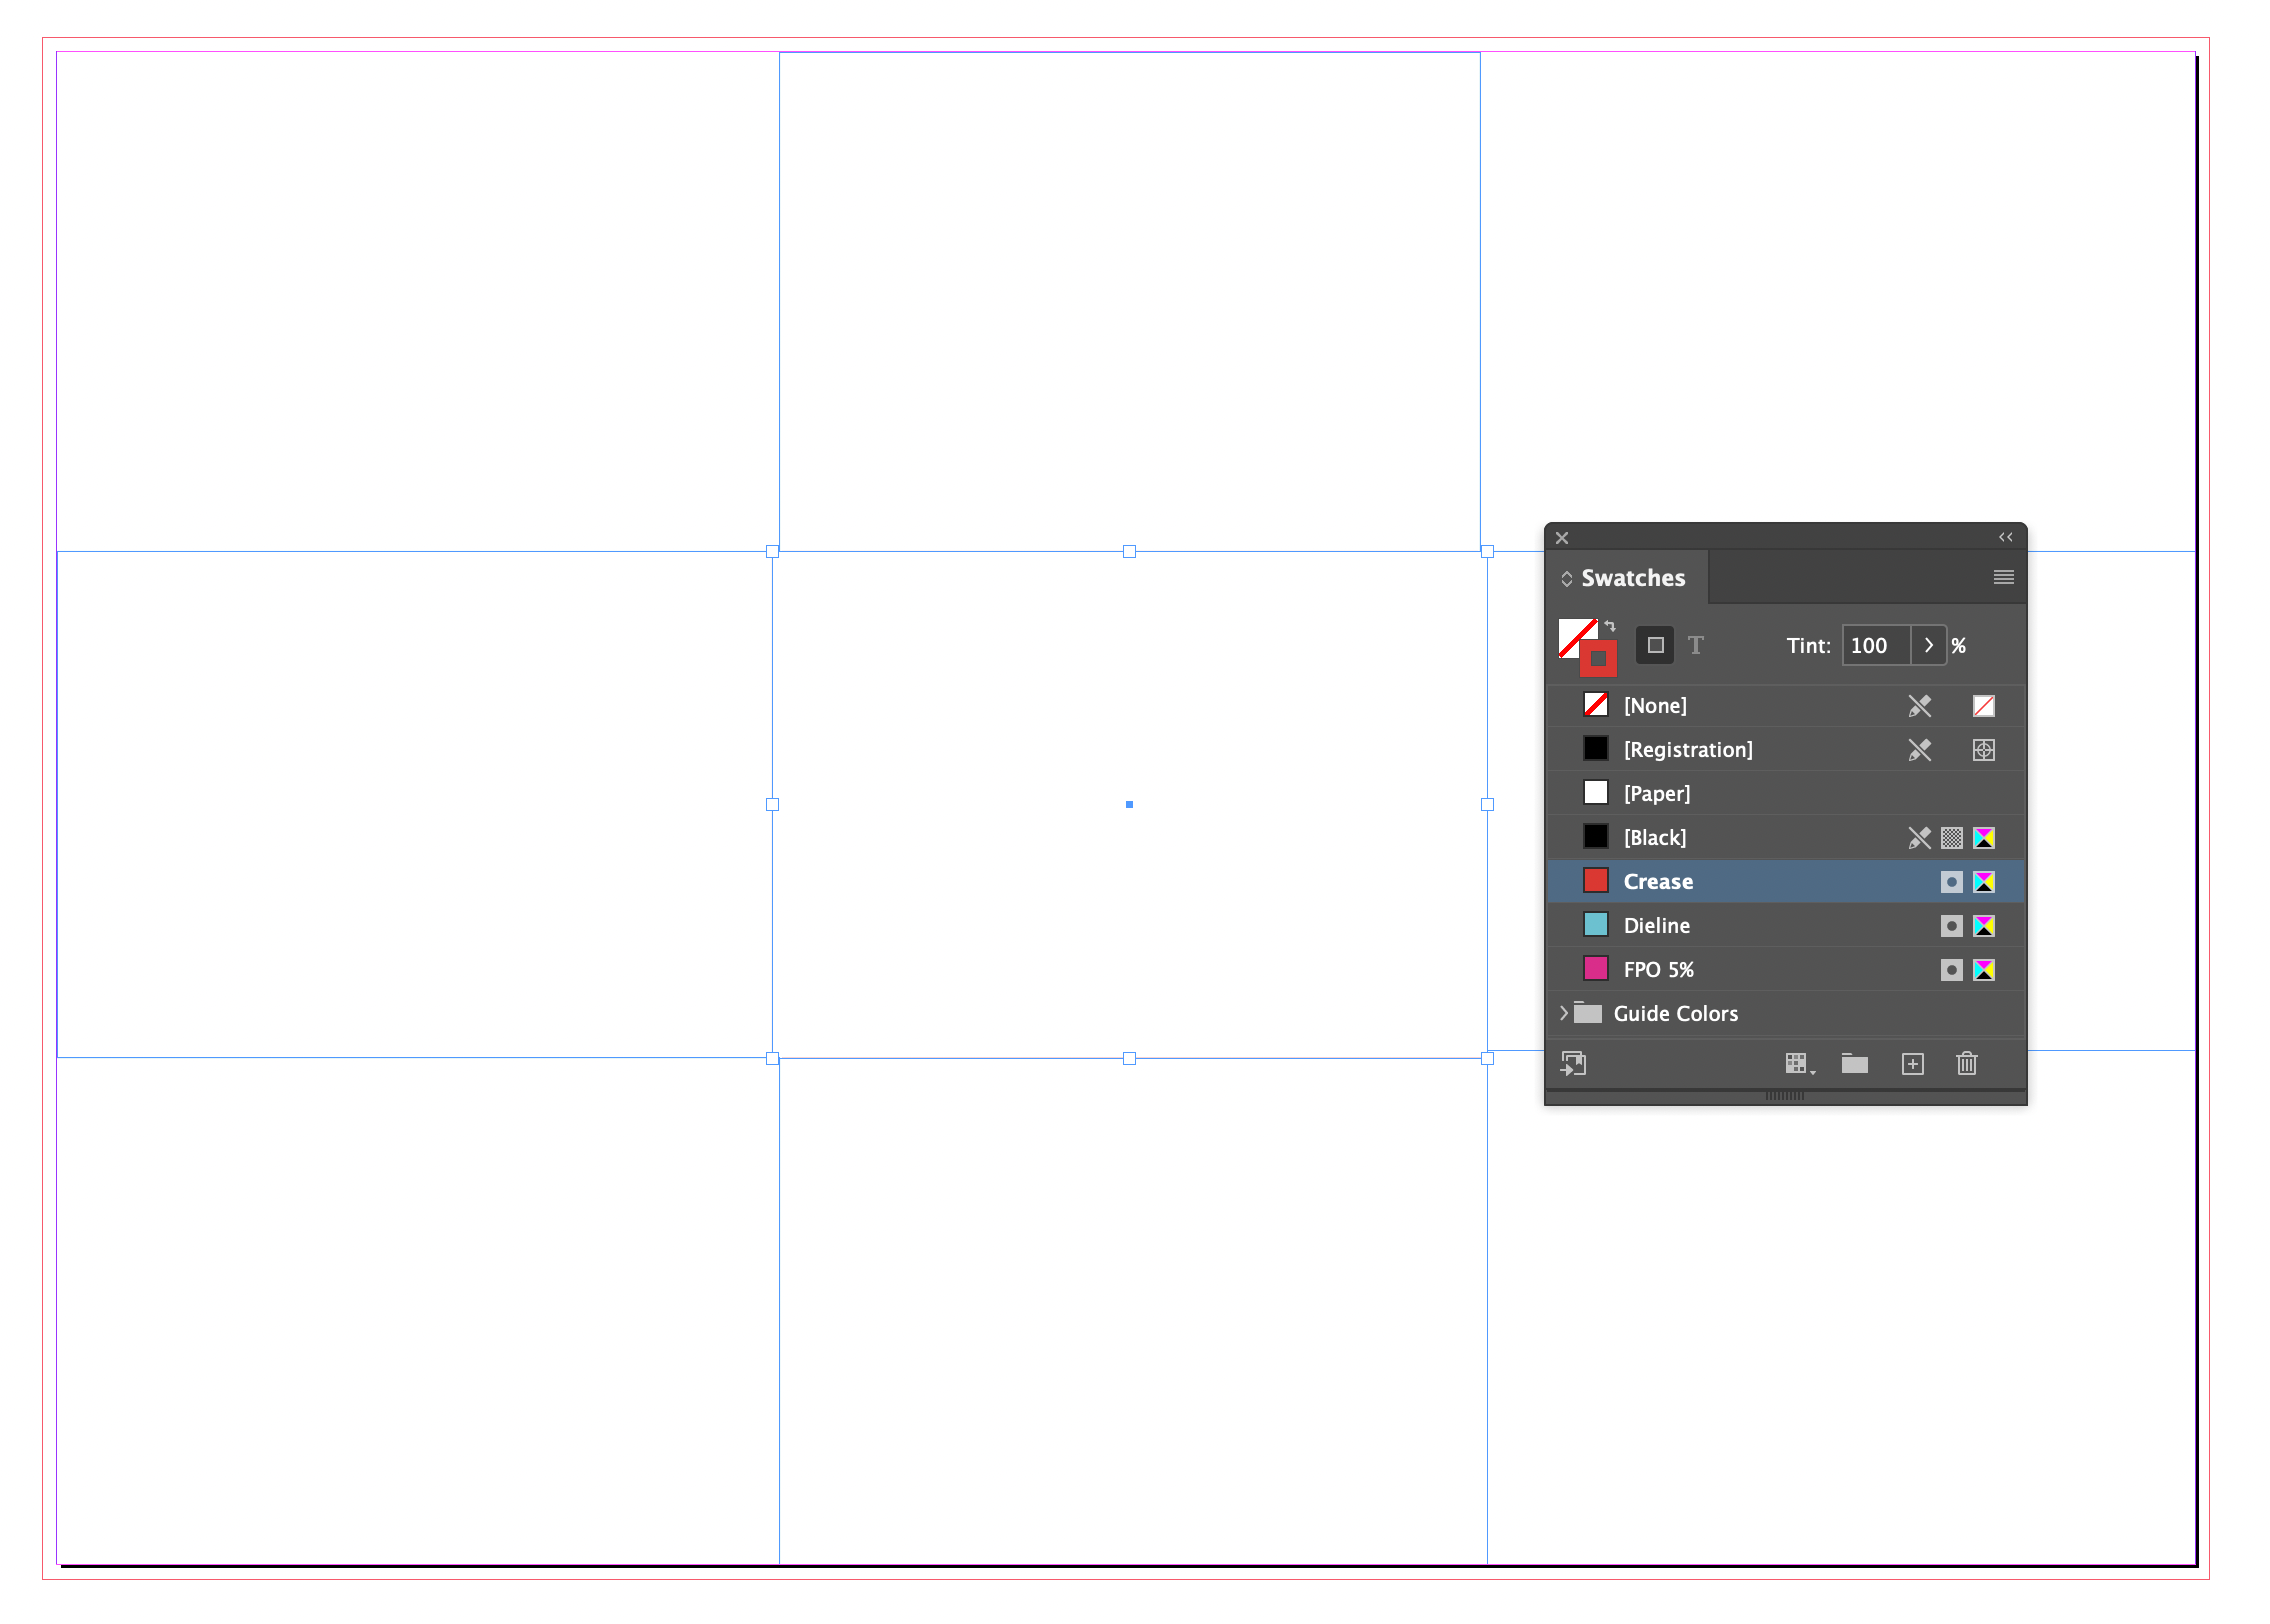
Figure 8. Create dedicated spot colors for use in the dieline only, and apply those colors to the dieline art to indicate a singular function (i.e. crease, cut, perforate)
Checking Your Work
Now that you have a production-ready file, you can work your layout to your heart’s content. Pull any color, text, or image that should bleed at least 1?8 inch past the edge of the cut line in the file. This will be obvious at the document edges since we added the bleed guide during file creation. For the irregular edges that are on the page, you will need to pull the bleeds to 1?8 inch past the cut line as you work. One of the things I like to do when I’m working with a dieline is to make a mini mock-up. In fact, I make two: one when the document is blank so that I can fold it down and visualize while I design the layout, and the second when I finish the layout so that I can check my art placement. Shrink it to fit the page, carefully cut it out, and fold it down. When the art is in, you’ll need to back up the two sides and glue them together. It’s super helpful. If you’re fortunate enough to have access to a printer with a larger sheet size, then a full-sized mock-up would be ideal.
Acquiring Dielines and Templates for Creative Folds
Looking for creative formats to work with? Printers are always great resources for dielines and templates, so consider reaching out to your favorite print provider to ask for help. Trust me, they would much rather provide the proper file to you in advance, than to try to fix your DIY dieline when the file hits production and the deadline is tight. And, of course, I have some free resources for you, too! Check out the sidebar on free resources for information about how to get nearly 50 creative dielines for high-impact folded brochures, plus unlimited custom template downloads for everyday classics like Tri-Folds, Gate Folds, Accordions, and more.
Fold Without Fear
I hope this exercise has given you a sense of adventure and the desire to try something new in your print design projects. Remember that you don’t have to do something over-the-top to make a big impact. There are lots of smaller details you can add to your work that can provide huge bang for the buck, but I guess that’s a fun InDesign exercise for another day. I’ll be back!
Commenting is easier and faster when you're logged in!

Recommended for you

Creative Folding for Every Budget
Whether you’re a high roller or watching every penny, you can find an eye-catchi...
InDesign Magazine Issue 148: Designing for Social Media
Issue 148 has articles on designing for social media, dielines for creative fold...

3 Ways to Make Die Lines in Adobe Illustrator
Best practices for defining the shapes of custom die cut stickers.