Using Photoshop Guides in InDesign
How to turn Photoshop guides into a frame of the same size in InDesign.

On the InDesign Macintosh Adobe User to User Forum, Alan Thompson asked, “Is there an easy way (or any way) for me to see the guides I put in my Photoshop document in InDesign? I have are large TIFFs with guides drawn at specific ‘crop’ places so when I place in InDesign I can get my exact ‘crop’.”
InDesign can only see the pixels, the paths, and the alpha channels in a Photoshop PSD file, it can’t “see” the guides you may have drawn. But another user, Scott Falkner, suggested what may be the best approach: You can create paths in Photoshop, then use InDesign’s ability to convert clipping paths to frames. Here’s how:
In Photoshop, select the Rectangle tool (the one that creates vector paths, not the Rectangular Marquee tool). Make sure the Paths button (not Shape Layers or Fill Pixel) is selected on the Options Bar. This will create a path aligned with the guides. Drag a rectangle between your guides.

Open the Paths panel (Window > Paths). From the panel menu, choose Save Path, and give it a name. It’s not necessary to explicitly create a clipping path because InDesign can read all saved paths in the file.
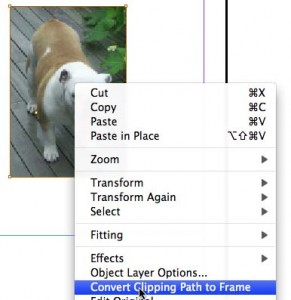
In InDesign, choose File > Place to place the image. Select the image, then choose Object > Clipping Path > Options. Choose Photoshop Path, and select the path you saved. Preview the result, the click OK. Right-click on the picture and choose Convert Clipping Path to Frame from the contextual menu.
The result is a frame exactly aligned to the Photoshop guides with the file.
This article was last modified on July 8, 2022
This article was first published on January 18, 2009
Commenting is easier and faster when you're logged in!
Recommended for you

The Text That Wouldn’t Move Contest Answer and Winners!
It’s time to reveal the solution—and the winner—for this month’s InD...

Free PDF Export Presets for MagCloud Publications
MagCloud is a print-on-demand service from HP. While it’s simple to use fo...

Scanning Around With Gene: Oh Yeah? Then Show Me Your Badge.
Aside from the cheap disposal variety handed out at trade shows and conferences,...


