Using Envelope Distort in Illustrator
Learn how to mold vector artwork to fit any shape in Adobe Illustrator

With Illustrator’s Envelope Distort features, you can mold your artwork to fit any shape. It’s as though the art were made of clay, and you reshape it to perfectly fit a special container. I love using this feature to create one-of-a-kind headlines and display text. Artwork treated this way can be seen on T-shirts, signs, posters, album covers, and logos. Let’s learn all the ways you can apply Illustrator’s Envelope Distort to your art.
Starting Out with Artwork or Text
Start by selecting artwork on your artboard. I typed two words as point-text using Cooper Black, a bold display face. I framed the text top and bottom with rounded-corner rectangles. I then grouped the three objects and selected them, though grouping is not required before using Envelope Distort.
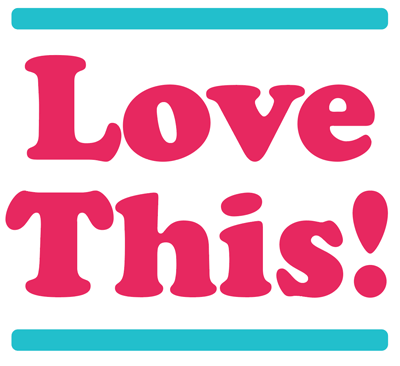
Figure 1 – My simple starting-point artwork
Distorting Artwork with a Warp Envelope
Select Object > Envelope Distort > Make with Warp. The Warp Options dialog box appears with a selection of 15 envelope shapes in the Style menu. Controls for all predefined warps are the same: Direction, Bend amount, and Distortion amounts along the horizontal and vertical axes of the envelope. Adjust any envelope using positive and negative values with the Preview box checked to see the effects on your artwork.
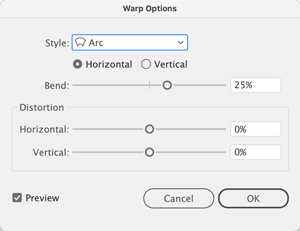
Figure 2 – The Warp Options dialog box
Here’s my word art with the settings from Figure 2: The envelope style, Arc, is set to a 25% Horizontal Bend with no distortions:

Figure 3 – Arc warp applied
Editing the Envelope
Click OK in the Warp Options dialog box once you’re satisfied with the settings. Your artwork now appears inside an Envelope shaped as you specified. This envelope is a mesh object: Its anchor points and segments can be edited using the Direct Selection tool. Click an anchor point or any of the envelope’s path segments to reveal control handles. By editing parts of the envelope directly you can further distort the artwork.
Editing the Original Contents
To resume editing the artwork directly choose Object > Envelope Distort > Edit Contents. You can now modify paths the usual way and use the text tools to edit live text in the artwork.
Return to editing the envelope by choosing Object > Envelope Distort > Edit Envelope.
Resetting, Releasing and Expanding Envelope Distortions
You can return to the Warp Options dialog box by selecting Object > Envelope Distort > Reset with Warp. However, be forewarned: Any manual edits you applied to the envelope directly will be reset, and Illustrator will re-apply the last used Warp Options.
To return your artwork to its pre-distorted state, select Object > Envelope Distort > Release.
Surprise! The final shape used for the distortion is rendered as a 20% gray mesh object on top of your artwork. You can set this mesh aside to use in the future, more on that below. Undo the Release step to restore the envelope and re-apply the distortion.
To permanently apply your envelope distortions to the artwork, choose Object > Envelope Distort > Expand.
Using a Mesh Envelope
As you saw a moment ago, Illustrator used a mesh to create the warp distortion envelope. You can start with this option by selecting your original artwork and choosing Object > Envelope Distort > Make with Mesh. Specify rows and columns to give yourself a lot of control over the art; each segment of the mesh and every intersection will have their own control handles.
Here’s live text distorted with a 4 x 4 mesh:
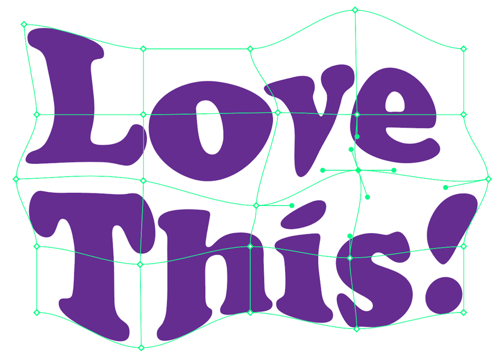
Figure 4 – Mesh envelope with a selected intersection that was edited using the Direct Selection tool
You can add or remove columns and rows to the mesh by choosing Object > Envelope Distort > Reset with Mesh.

Figure 5 – Reset Envelope Mesh dialog box
Maintain Envelope Shape is set by default, but some control handle edits may be discarded, and you might notice your artwork change as soon as the Reset dialog box appears. Cancel or click OK once satisfied with your mesh option changes.
The Expand and Release options under Object > Envelope Distort work the same as with the Warp distortion. When releasing the distortion Illustrator converts the envelope to a mesh object and restores the artwork to its original undistorted state.
Applying a Custom Shaped Envelope Distortion
When you have a special shape that you’d like your artwork to conform to, place it on top of your artwork, select both, and choose Object > Envelope Distort > Make with Top Object.
You can use Mesh objects – like the ones Illustrator creates when releasing distortion envelopes – or single-path shapes. A compound shape cannot be used as a distortion envelope.
Finally, you can start with a rough shape, then use Object > Envelope Distort > Reset with Mesh and it will be converted to a mesh, maintaining the shape outline and enabling you to add rows and columns for precise manual edits.
Have fun molding your artwork!

Figure 6 – A hexagon drawn with the Polygon tool was placed over this live text and used as the envelope distortion.
This article is for CreativePro members only. To continue reading, please log in above, or sign up for a membership today! Thanks for supporting CreativePro!
Commenting is easier and faster when you're logged in!
Recommended for you
How to Create 3D Artwork With Project Neo
Learn how Adobe’s Project Neo allows users to create 3D vector images, integrate...

Creating Color Variations with Illustrator’s Dynamic Symbols
Steven Gordon shows how to use the power of dynamic symbols to quickly develop a...


