Turn Any Object Into a Transparency Mask

A mask covers your face so you can’t see it, right? And masking tape covers something so that when you paint over it, the thing under the tape (usually a wall or a window) doesn’t get painted. Digital masking tape is the same: It covers or masks something so you don’t see it.
Last year I pointed out Pariah Burke’s trick for masking things with text. But I had completely forgotten about it until this morning when I needed something like it… but in this case, masking with a non-text object. So, just in case you didn’t see his post, or, like me, you didn’t put it in your brain in the “this works with anything, not just text” category:
You can make any object or text or path into a transparency mask in InDesign. For example, here are two pictures, along with some text and a starburst polygon:

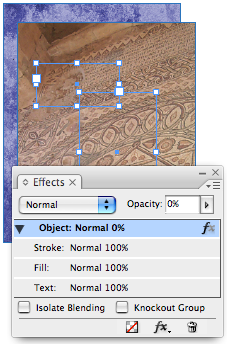
The trick to making the text and starburst into masks is first to set their opacity to zero percent in the Effects panel (Transparency palette in CS2) so that they disappear:

Then group those objects with what you want to apply the mask to (in this case the brown mosaic photo), and turn on the Knockout Group checkbox in the Effects panel.

That’s it! Knockout Group means “make the objects in the group opaque to each other,” but it also appears to mean “apply transparency effects to the group as a whole” so InDesign applies the zero percent opacity to the mask objects and the objects they’re grouped with.
Okay, I sound like I think this is logical and proper, but the truth is, I’m quite astonished this works at all.
This article was last modified on December 18, 2021
This article was first published on January 22, 2008
Commenting is easier and faster when you're logged in!
Recommended for you

How to Type Special Characters Quickly
Learn how to include any glyphs, including punctuation and other special charact...

InDesign Template: Price List & Order Form
Suitable for a wide range of businesses, these stylish documents can be easily a...

A Question of Character: Finding What You Need in Your Fonts, Part 2
In the previous installment of this column, I talked about the first generation...


