
When I was approached with the request to share my process of creating mesh effects in Adobe Illustrator, my mind went blank because there are so many facets and layers to the process.
Everyone’s understanding and practice with Illustrator tools is different because many of us do not use the same equipment or hardware in our daily work. Your setup can have a big effect, making the process easier or harder.
The Working Environment
For creating gradient mesh effects, I find it easiest to use the mouse and keyboard combo, instead of a drawing tablet. Within Illustrator I prefer a simple interface, with all tools and windows docked. The less clutter, the better because you need a clean line of sight to devote your attention to meshing mayhem.
Dual monitors would be helpful so you can have the Navigator panel open on one to view your progress in real-time and not clutter up your workspace. And, maybe the most important tip of all, do not rush through the process. Good meshes take time.
When it comes to subject matter, anything can be meshed. It all depends on the look you want your artwork to have and how much time you want to dedicate to it. Here are some pointers to remember when you’re ready to start meshing things up.
Setting Up the Document
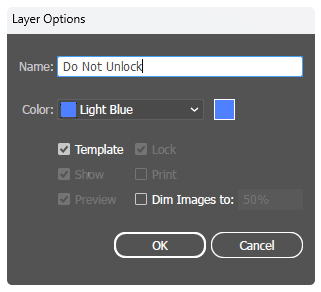
As a starting point, placing a high-resolution image (300 DPI) is best, of course. Do not scale the image when you import it into Illustrator, leave it at 100% scale. Then, resize your artboard to fit the placed image. You can do this easily by double-clicking the Artboard tool in the toolbar and in the resulting dialog box choose Preset: Fit to Artwork bounds. Then in the Layers panel, double-click the layer to access the Layer Options. Turn on the Template option and set it to 50% opacity. Name the layer something to distinguish it from your artwork.
Start with a Simple 2×2 Mesh
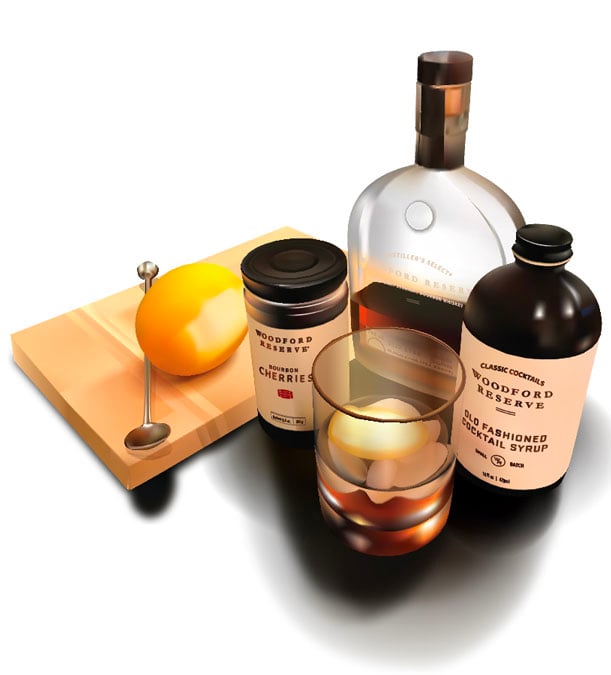
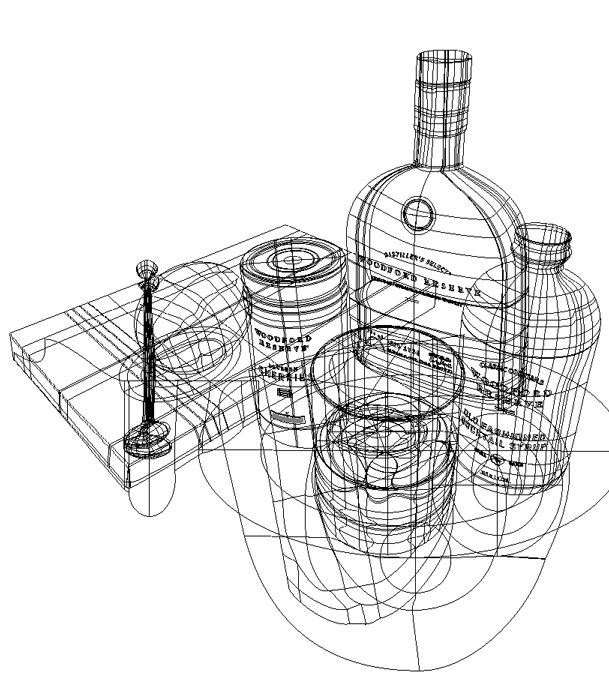
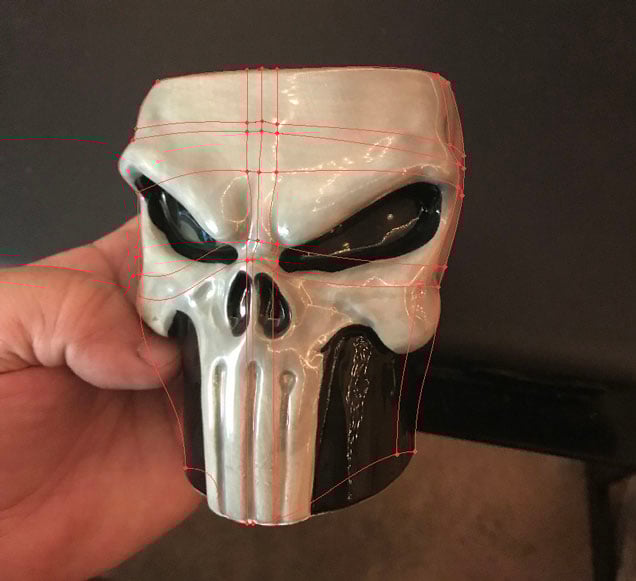
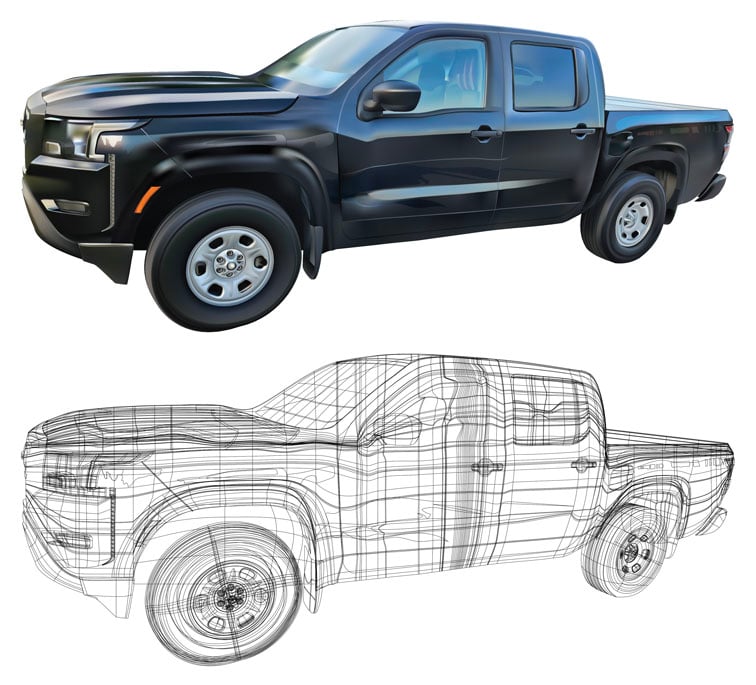
The most common process to create meshes is with the use of a rectangle, starting off with a basic 2 row, 2 column mesh, placing it over the subject matter and using the Direct Selection Tool and Anchor Point Tool to manipulate the anchors and handles to fit the outline of the subject.

In some instances, the use of the Ellipse Tool is preferred. Use the Ellipse for objects like a CD or a tire, where the circular gradients meet at the center. Do not use the Ellipse for objects with more complex curves like an apple.

Where to Place the Mesh Lines
The most important question at this point is where to place the mesh lines. Look for the most visible contours, color contrasts, and imperfections in the subject matter. These are the indicators of where the mesh lines should go.
Adjust the initial 2×2 mesh lines to trace the most prominent of the three aforementioned items (contours, contrasts, and imperfections). Once the initial 2×2 is in place, start adding and adjusting additional mesh lines.
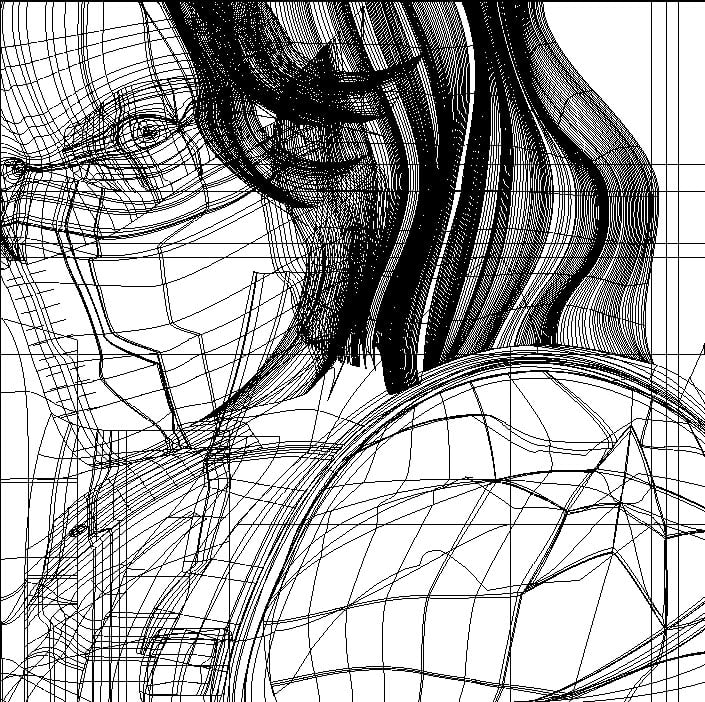
Use Columns for Hair
The creation of hair can be intimidating, but very doable with the right mesh lines following the right contours. I don’t use a grid of mesh lines for hair. Instead, I start with a series of columns following the contours of the hair, and then add 3-4 additional rows to add contrast to the columns.

Take Advantage of Multiple Meshes
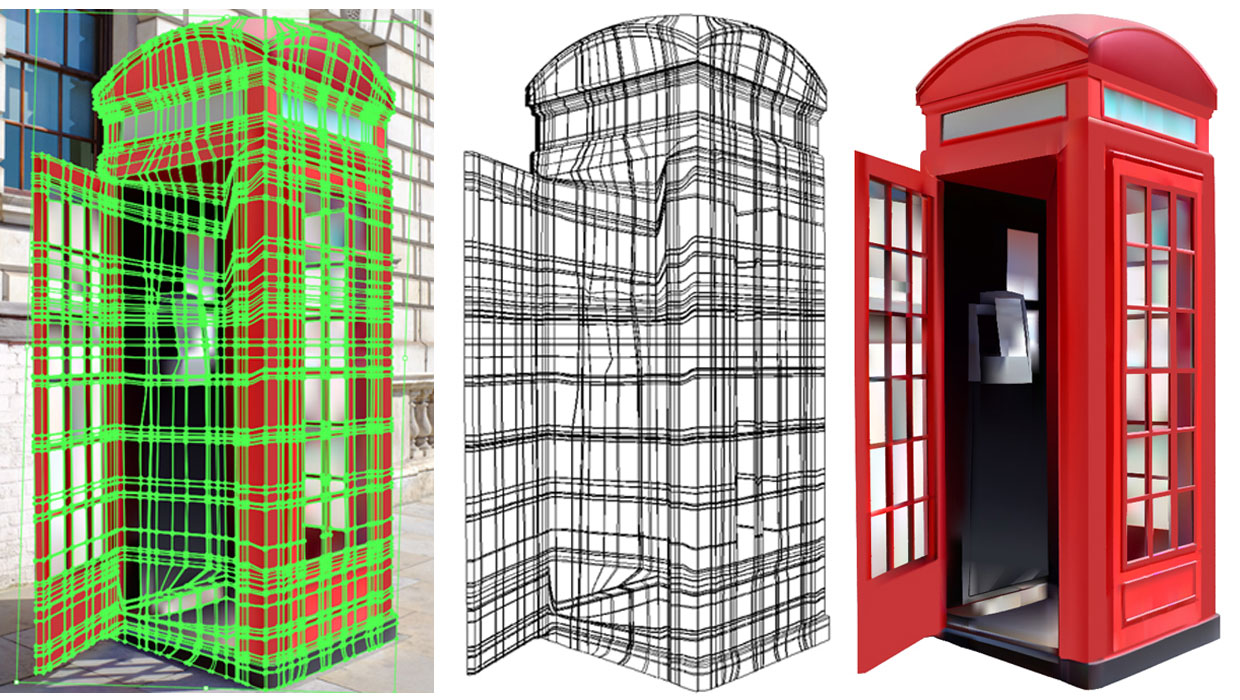
For me, the most difficult challenge is to create a complete object with a single mesh. I call it being a “glutton for punishmesh.” It’s not impossible, but it might make you question your sanity. So, remember that using multiple meshes is usually the best option, especially for complex objects.
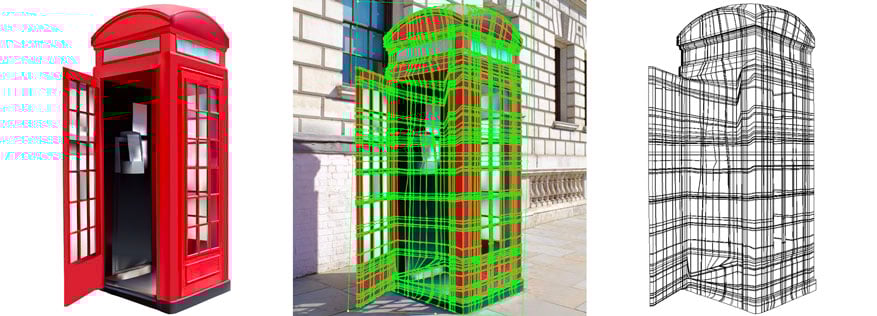
Put Overlapping Meshes on Separate Layers
The majority of my gradient mesh work makes use of multiple layers. If two items on the subject are overlapping each other, then I’d put them on two layers in the Illustrator file. This makes the process of editing and blending much easier. No one sees what happens behind the scenes, so it really isn’t necessary to sample colors at every single mesh point, at least I don’t.
Making a Mesh of Things
I have found that many Illustrator users avoid working with meshes due to their time consuming, demanding, and intricate nature. But for me it is rather therapeutic and soothing, seeing how items come to life on the 2D artboard. I highly recommend it if you want to push the limits of creativity—or test the limits of your patience. In any case, have fun making a mesh of things!
This article was last modified on December 11, 2024
This article was first published on December 11, 2024
Commenting is easier and faster when you're logged in!

Recommended for you
How to Add Texture to Illustrator Artwork
Add character, style and a unique look to your illustrator creations

How to Choose a Different Artboard in an AI File
Need to switch from one artboard to another in the same AI file? This simple tri...

How to Create Dotted Lines in Illustrator
Learn how to create a dotted line in Illustrator by setting the gap amount and h...