
Tips and Tricks: Spring 2023
Make your work go faster and get better results with these quick tips.


This article appears in Issue 20 of CreativePro Magazine.
Even though we use our creative apps day in and day out, we all love to learn new tips along the way, right? These tricks can be time-savers, or they can automate boring processes. They can even help make our designs look better! So whether you want to handle text better in Photoshop, maintain image quality in InDesign, or enhance visual interest in your PowerPoint slides, I’ll bet there is a tip or two here that will make your day just a little bit easier.
Find Similar Images Within an InDesign File
By Tony Harmer Got an image that you’ve used too many times before or that just isn’t doing it for you anymore? With either Selection tool, right-click the frame and choose Find Similar Images. InDesign will initiate a search of Adobe Stock based on that image and display the results in the CC Libraries panel (Figure 1).

Figure 1. The original placed image (left) and the similar image found from Adobe Stock (right)
Create a Full-Bleed Image in PowerPoint
By Richard Goring Don’t just use solid fills as the backgrounds of your PowerPoint slides! Make them more eye-catching with the use of full-bleed images that you control.
- Insert and select the image, then choose Format > Crop.
- Use the handles to drag the crop area to the edge of the slide.
- Select Crop again, and drag the white handles (Figure 2) to make the image larger so that it fills the crop area completely.

Figure 2. The black grab handles indicate the bounds of your image. The white grab handles are used to resize it.
Photoshop Type Tricks
By Julianne Kost
Adding a New Type Layer: If you’re struggling to create a new type layer very close to another type block, try Shift-clicking with the Type tool. Adding the Shift key prevents Photoshop from auto selecting nearby text. Repositioning Type: When you’re editing type, you can position the pointer slightly outside of the type’s bounding box to toggle the icon to the Move tool. This enables you to reposition the type in the image area without first having to commit to the type. Previewing with Placeholder Text: Click with the Type tool in the image area to automatically display placeholder text to preview font, size, color, and other attributes. The placeholder text is replaced as soon as you start to type. To disable this feature, choose Preferences > Type > Fill New Type Layers with Placeholder Text.
Limit a GREP Search to a Specific Location in InDesign
By Erica Gamet You can control where to focus a GREP search by indicating a location in your expression. For instance, you may want to find text that matches your query only when it occurs at the beginning of a paragraph, end of a paragraph, or end of a complete story. Using these options in your search string confines your search to the precise area you want. Most of these options appear under the Locations submenu, which will appear in the menu marked by the @ symbol in two places: in the Find What section when using Find/Change (Figure 3) and in the To Text field within the GREP Style section of a paragraph style definition.

Figure 3. Precisely target your GREP searches and styles with locations.
View or Print a List of All Keyboard Shortcuts in Photoshop
By Jesús Ramirez Photoshop allows you to save an HTML file that contains a list of all keyboard shortcuts, even the custom shortcuts that you have set. You can view that file on your browser, or you can print it (Figure 4).

Figure 4. This generated HTML file lists all Photoshop keyboard shortcuts in your current set.
Automate Repetitive Tasks with Actions in Illustrator
By Von Glitschka Not all functions in Illustrator let you add a keyboard shortcut to get the job done. In those cases, actions are your best bet. Actions allow you to record a sequence of multiple keyboard commands, dialog box entries, or menu choices, and you can even assign a keyboard shortcut to the action to save time. Consider creating an action for anything you do routinely in Illustrator. To create an action, select New Action from the Actions panel menu (Window > Actions). In the dialog box, name your action, assign it to an action set, assign a function key, and click Record (Figure 5).

Figure 5. When you create a new action in Illustrator, you set its options before you begin recording the series of commands.
Mind Your Modes when Using Colors from a Library
By Bart Van de Wiele Creative Cloud Libraries support RGB, hexadecimal, and CMYK colors. Just remember that a color’s name is not necessarily an indication of its mode. Hover your pointer over a Library item to see the name of the color, its hex value, and the actual color values. In Figure 6, the gray color was originally defined as CMYK but was converted to RGB so it could be used in a Publish Online project. Because the name of the swatch was never changed, you might think it was CMYK, but it isn’t. Notice the actual RGB color values at the bottom of the yellow pop-up.
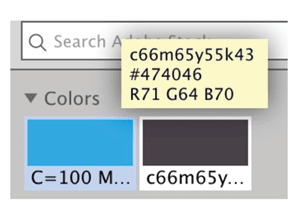
Figure 6. Swatches display color information in a Creative Cloud Library, including swatch names that might not reflect the reality of their color mode.
Increase Your Undo Quota in PowerPoint
By Jole Simmons This has happened to all of us: You’re cruising through a PowerPoint deck, only to realize there was something you did way back in the process that needed to be fixed. Maybe it was a bunch of things. So, you undo, undo, undo… only to hit a point where you can’t undo anymore. That’s because PowerPoint’s default undo limit is 20. To increase it, choose PowerPoint > Preferences > Edit and change the default 20 to 150, the maximum value (Figure 7). You’ll thank me later!

Figure 7. Maximize the number of undos in PowerPoint preferences, so you can retrace your steps no matter how far back they go.
Keep Word from Ruining Anchored Images in InDesign
By Julie Shaffer Have you ever placed a Word file into InDesign only to see that all the anchored images came in as embedded images with low resolution? What’s going on here? By default, Word compresses images to 220 ppi at their size in your document. That resampling might keep the overall file size small, but it doesn’t always translate well into InDesign, especially when we need to use the images for print production.
- There’s no way to restore the original image quality after this downsampling has occurred. But you can prevent it from happening again, by changing your Word settings and advising clients and colleagues to do the same.
First, locate Word’s Image Size and Quality settings, a section within a larger group of advanced preferences:
- In macOS, choose Word > Preferences, then choose Edit under the Authoring and Proofing Tools.
- In Windows, choose File > Options. In the Options dialog box, choose Advanced.
Under Image Size and Quality, select All New Documents and enable Do Not Compress Images in File (Figure 8).
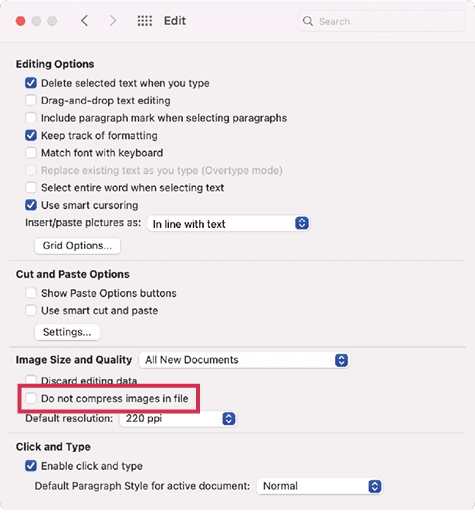
Figure 8. Turn off image compression in Word to prevent anchored images from being downsampled.

Figure 9. Import options for placing anchored images along with text from Word
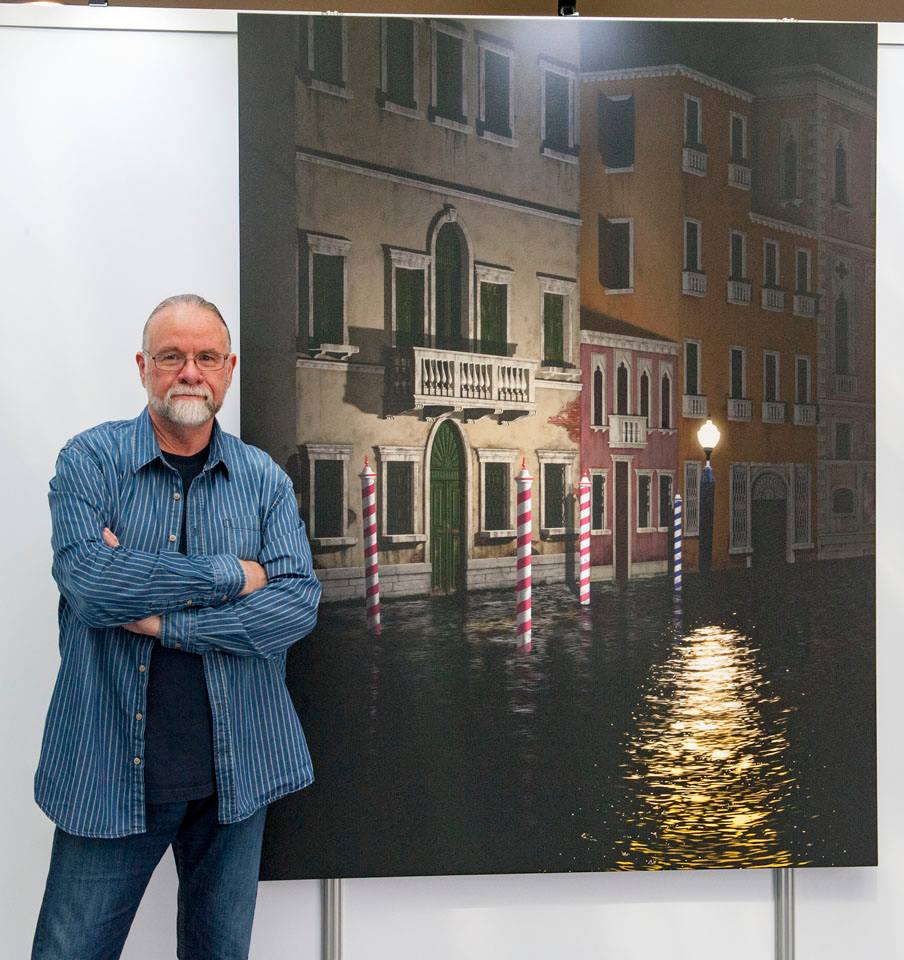
Keep Color Originals Archived Within a Grayscale PSD
This Photoshop technique allows you to convert an image to true grayscale that will print using only black ink, while still having a CMYK or RGB backup version preserved within a Smart Object. This lets you revert a grayscale composition to its original color—something that would otherwise be impossible. By Bart Van de Wiele
- Create your document in RGB mode.
- Select all the layers in your composition.
- From the Layers panel menu, choose Convert to Smart Object.
- Choose Image > Mode > Grayscale.
- When Photoshop asks you to rasterize everything, choose Don’t Rasterize (Figure 10).
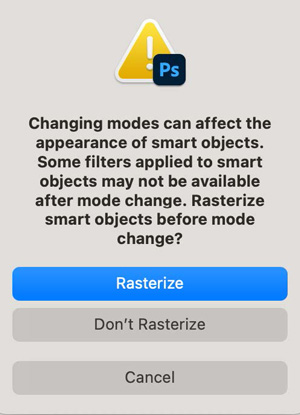
Figure 10. By not rasterizing, you can preserve the original color information in the Smart Object.

Figure 11. Discard the color information to ensure the grayscale version of the image will print using only black ink.
- Choose Image > Mode > RGB.
- When Photoshop asks you to rasterize everything, choose Don’t Rasterize.
Commenting is easier and faster when you're logged in!

Recommended for you
CreativePro Week Conference Speaker Spotlight: Bert Monroy, the Digital Art Pioneer
Welcome to our Speaker Spotlight series, designed to highlight some of our Creat...
Photoshop Downloadable: Top Tips Ebook
A compendium of CreativePro tips, tricks, and techniques for Adobe Photoshop
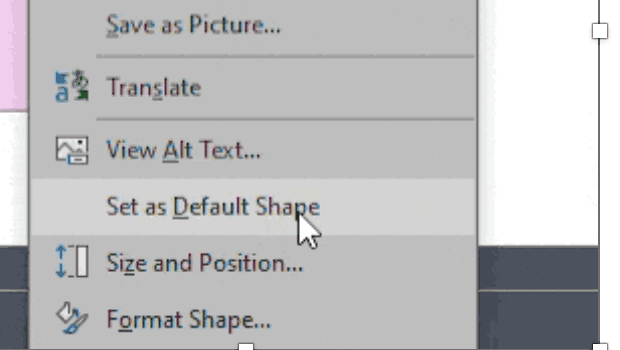
How to Set Default Shapes, Lines, and Text Box Styles in PowerPoint
One way to make working in PowerPoint smoother is to set default shapes, lines,...