


Did you ever resize a multi-column text frame to balance out the depth of the text? Sure, that’s the quick and obvious solution, but you’ll just have to do it again if the text is edited to be significantly shorter (unbalanced columns redux) or longer (overset city!). And it can be a pain to deal with if you have lots of unbalanced columns in a long document. A better solution is to have InDesign do the work for you automatically, no matter how the text content changes.
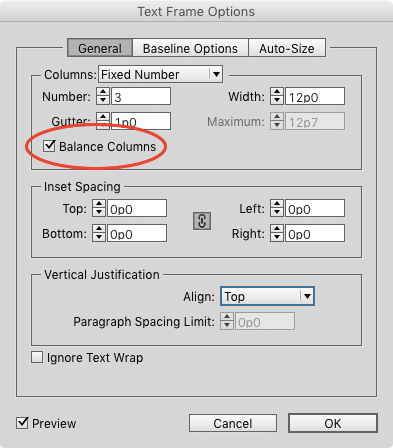
To set a text frame so columns stay balanced, select the frame and open the Text Frame Options dialog box by pressing Command+B (Mac) or Ctrl+B (Windows). In the General tab, select Balance Columns.
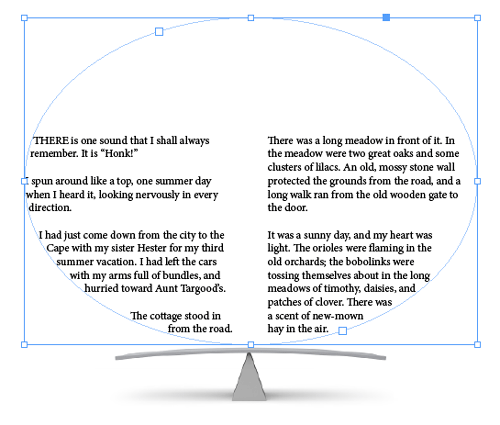
Voilà. Now InDesign will handle the balancing of text, so you can spend time balancing other stuff, like piles of rocks, your checkbook, your tires, or your breakfast.

It even works with threaded frames and non-rectangular frames.
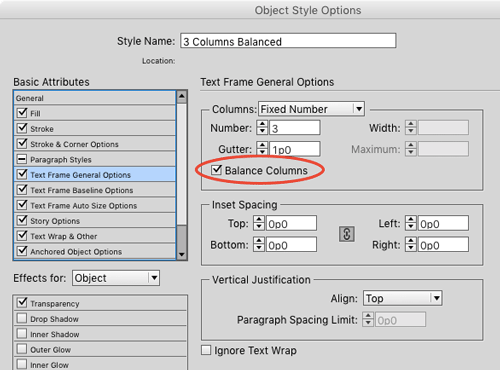
Bonus tip: Use the Balance Columns option in object styles and master page items to control the balancing of text throughout your document.
This article was last modified on March 31, 2023
This article was first published on November 17, 2015
Commenting is easier and faster when you're logged in!

Recommended for you

Tip of the Week: Placing Snippets
This tip was sent to Tip of the Week email subscribers on March 12, 2015. Sign u...
CreativePro Tip of the Week: Identifying Fonts in Photoshop
This CreativePro Tip of the Week on identifying fonts in Photoshop was sent to C...
InDesign Magazine Issue 130: Accessible PDF
We’re happy to announce that InDesign Magazine Issue #130 (February 2020) i...