
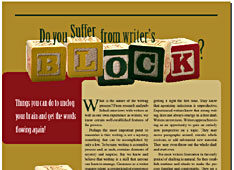
The Creative Type: Making Headline Graphics in InDesign
Before you start manipulating the text, however, you need a plan or, in this case, a template to follow. We’ll use a grid and a curved line segment. First, choose View > Show Document Grid. Next, select the Pen tool and click an anchor point under the first letter. Then click and drag another anchor point under the last letter. As you drag them, direction lines will display. Use them to shape the curved line segment, as shown in Figure 3. If your path has a fill color, select the Fill box on the Toolbox and click the None button. If a stroke isn’t applied to your curved line segment by default, click on the Stroke box in the Toolbox and then select a color from the Swatches palette-it makes no difference what color you choose.

Figure 3: Create a curved line segment to use as a guide for the transformation of your text.
To transform the text, select the first character with the Selection tool and then select the Free Transform tool. Position the tool over the bottom-middle anchor point of the selected character. When the double arrows appear, click and drag the character down to the curved line segment, as shown in Figure 4.
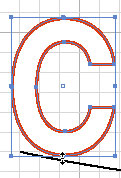
Figure 4: Using the Free Transform tool, drag the path straight down to the curved line segment.
Now select the next character with the Selection tool. Then transform it the same way using the Free Transform tool. Repeat this process until all the characters are sitting closely on top of the curved line segment.
You’ll notice that not all the bottoms of the characters are sitting flush on the curved line segment. Some further tweaking is required for this to happen. With the Direct Selection tool, click and hold on an anchor point of a character that needs adjusting. Now press the Shift key and drag the anchor point down until it lines up with the curved line segment, as shown in Figure 5. Release the mouse and then release the Shift key. Continue this process until all the characters sit evenly on the curved line segment. Then delete the curved line segment you created as a guide. Lastly, you can add a few personal touches to the headline, as we did to ours, shown in Figure 2.

Figure 5: Some further tweaking is needed to get the characters to sit flush on the curved line segment.
This article was last modified on December 11, 2025
This article was first published on June 7, 2002
Commenting is easier and faster when you're logged in!

Recommended for you
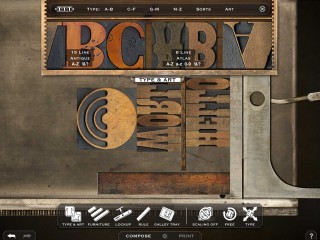
Letterpress Printing on the Mac and iPad
If you’ve ever wanted to work with movable type and make great letterpress...
Automatically Transfer Photos from a Phone to a Computer with Lightroom
Follow this guide to transfer images easily and automatically from a phone to a...

Image Source Invites You To Listen To Its Images
Image Source, the world’s leading independent producer of royalty free sto...