
Over the last year or so, I’ve been working with Digital Publishing Suite (DPS) output almost exclusively. The increase in demand for DPS related services seems to have coincided with the availability of unlimited Single Edition apps as part of Creative Cloud. While there are a number of ways of using DPS to add interactivity to iPad apps, the one native feature in InDesign that I’ve found to be the most powerful and versatile is the Multi State Object(MSO). Originally introduced for SWF output, Multi State Objects are a great way to add interactivity to any DPS publication.
What I’d like to do here is give you an introduction to MSOs by showing you how to create a simple slideshow. Before we get started there a few things to keep in mind. I’m focusing on DPS here, not SWF. If you’re still using CS5 or CS5.5 you’l need visit Adobe’s download page to download and install the Folio Producer Tools and the Folio Builder Panel. In CS6 you can use help>updates to download and install everything you need in one fell swoop. Once installed, you’ll find them under Window>Extensions in CS5 and CS5.5. In CS6 they’ll be under the Window menu.
With the tools installed, let’s get started with a new document. For now, let’s focus on the iPad and create a new document using Digital Publishing as the intent and choosing the iPad preset. For CS5 and CS5.5 choose web as the intent and 1024px by 768px as the document size.

As you can see in this screenshot, I’ve placed six identically sized images into my document. I also have a few panels open that I’ll need along the way; The Align panel, the Object States panel and the Buttons and Forms panel (in CS5/CS5.5 this is just the Buttons panel).
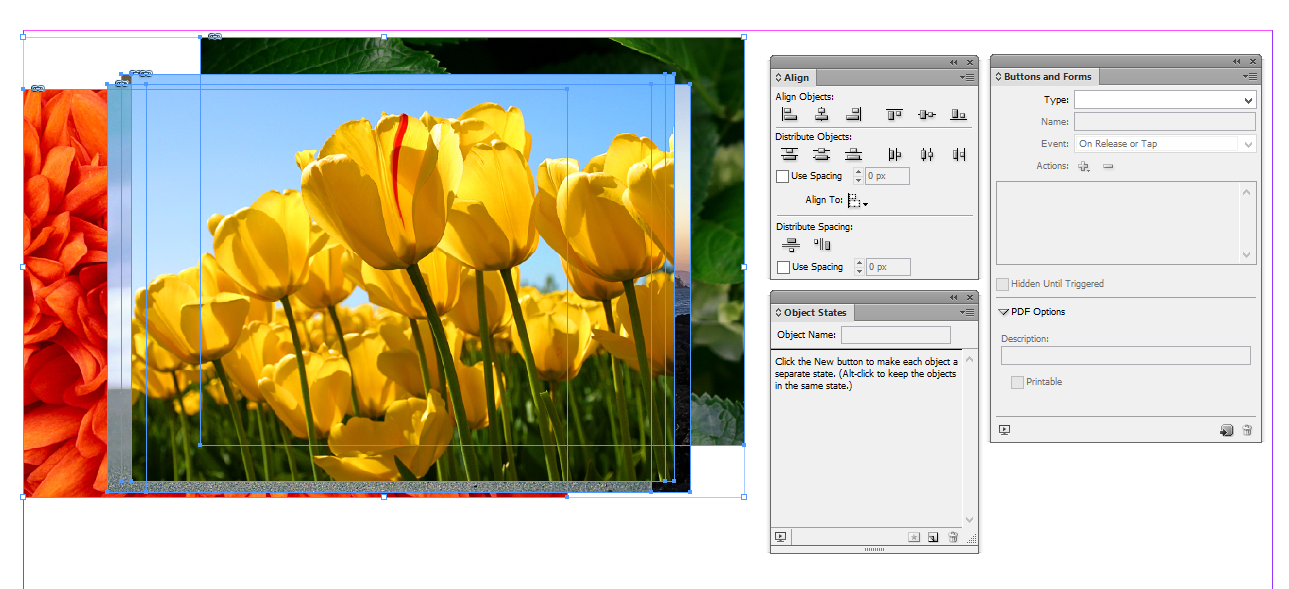
Because we want the photos to appear to change without any movement, I’ll select all six and use the Align panel to make sure they’re all perfectly aligned by clicking the align left and align top buttons.

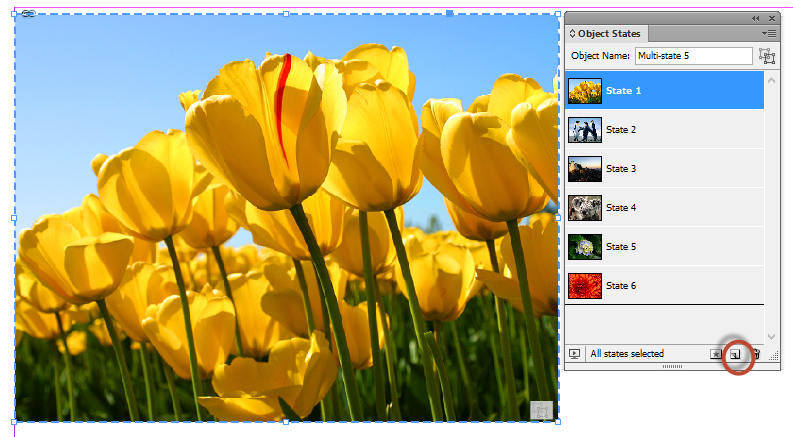
With the images still selected, click on the new Multi State Object button in the Object States panel. A dashed line appears around the selection and you can now see all six photos as separate states in the Object States panel. If you don’t see all of them, enlarge the panel a bit.
We’re going to need some buttons for the user to tap on. For the purpose of this exercise let’s just place copies of those images and scale them way down and position them under the photos. The Align panel can be useful here to make sure the buttons are evenly spaced.
With all of the new images selected, click on the Convert to Button button in the Buttons and Forms panel.

We now have six buttons but we still need to tell each one what we want to happen when the button is tapped. This has to be done for each button individually so deselect all but one.
In the Event dropdown be sure that On Release or Tap (in CS5/CS5.5 it will be On Release) is chosen and click the Add Actions button (it’s the plus sign). Choose Go To State.

Because we only have one MSO on the page, it will be automatically selected as the target object. The State dropdown is where we’ll choose which state to display when the button is tapped. Having thumbnails of the states makes this a pretty simple task.

With all six button having been assigned an action we’re ready to set up our slideshow for DPS. With the Folio Overlays (Overlay Creator in CS5/CS5.5) panel open, select the MSO and the Slideshow option will automatically be available.

We’ll leave all of the defaults selected but I’ll call your attention to the Cross Fade option. This adds a very nice fade effect as the images change. Feel free to experiment with this. Click on Preview on the bottom of the panel and choose Preview on Desktop.
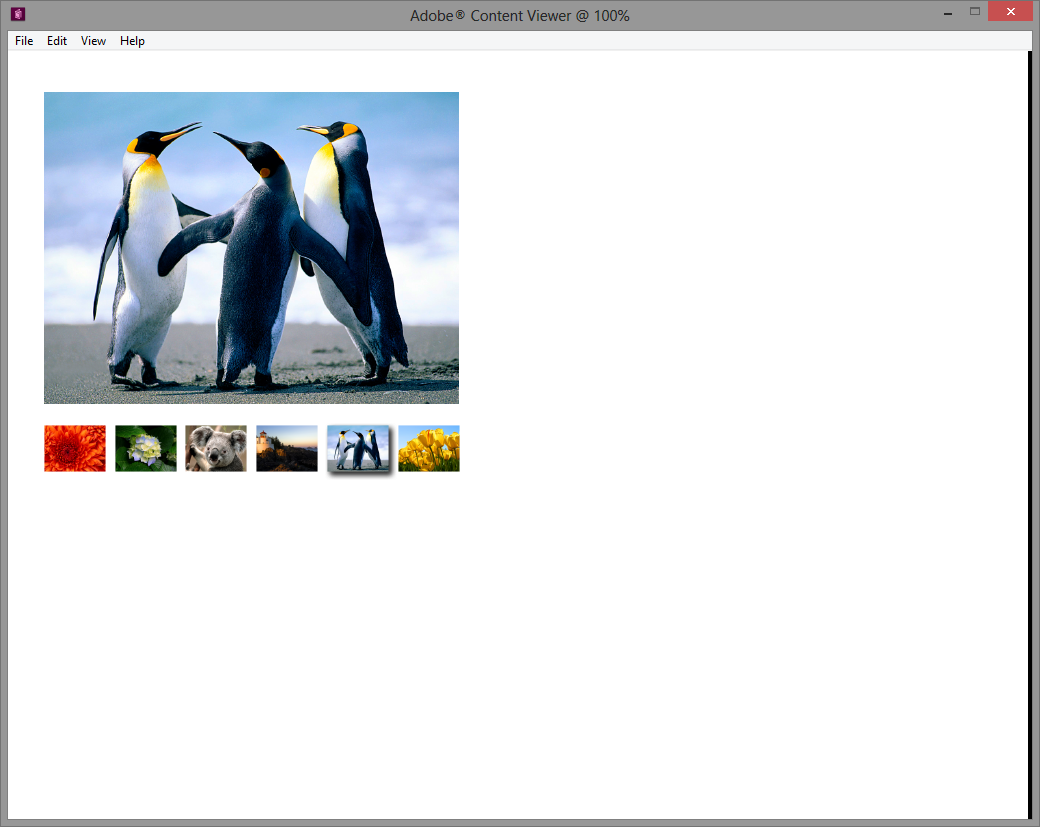
This will launch the desktop version of the Adobe Content Viewer (installed as part of the tools) and give you a preview of what your file will look like on the iPad. By clicking the buttons you can simulate the actions that a tap will be create on the iPad. I’ll tap the fourth button and the corresponding image will appear.

We’re almost there but it would be nice for the buttons to display a bit differently when selected. Let’s go back to InDesign and select a button. You’ll notice that only normal is in use for the button’s appearance. Click on the click state to select it. You can change its appearance any way you’d like. I’m going to add a dropshadow. To make applying that to the remaining buttons easier I’ll save my settings as an object style.
Select the rest of the buttons, one at a time, target the click state and apply the dropshadow object style. You should see something like this:

Don’t worry about setting the buttons back to the normal state. It’s not necessary. Let’s preview our slideshow again. Click on the buttons and watch the images change. Notice how the button for the selected image now has a dropshadow.
That’s it. You’ve just created your first slideshow. With the basics out of the way, I’ll focus future posts on more advanced techniques for these features but I encourage you to dive in and experiment. Keep in mind that the slides don’t have to be pictures. Each state can contain images, text, movies, image sequence animations or any combination of them.
This article was last modified on December 21, 2021
This article was first published on December 26, 2012

Recommended for you

Taking Another Look at the Content Grabber
Not everyone is a fan of the content grabber, but it does have a hidden feature...

Deluxe Holiday Lights
It's time to celebrate the season by lighting up a document with InDesign CS5.

Can There Be Too Many Styles? (Yes, There Can)
This is a fictionalized version of my exploration of a recent client’s fil...
Comments are closed.