Simulating a coarse halftone effect
Versions: 4, 5
Operating systems: Macintosh, Windows
It seems like the more sophisticated technology becomes, the more designers and artists find themselves attracted to the “organic” look of old-style graphic techniques. Of course, Photoshop is excellent at simulating this kind of effect, and with it we can easily make an ordinary image into something much more sensational. In this article, we’ll show you a simple technique using bitmap conversion in the Mode menu to give almost any image the look of an old comic book or a grainy, blown-up newspaper photo.
Grayscale to bitmap
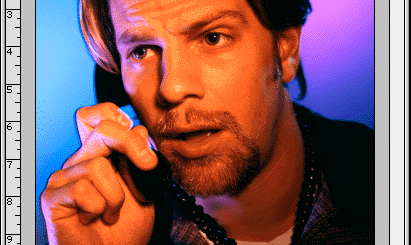
Obviously, this technique is meant to be used on photographic images, and it won’t work as well on images that contain areas of solid color, although there’s no reason why you shouldn’t experiment with the addition of color after you’ve created the halftone effect. To begin, open a high-resolution image like the one shown in Figure A.
Figure A: Any high-res photograph, like this one, works for the simulated halftone effect.

In order to convert a color image to bitmap, you must first convert it to grayscale. Choose Image>Mode>Grayscale, and when asked whether to discard the color information, click OK. This enables the Bitmap option in the Mode menu. Now choose Image>Mode>Bitmap. In the Bitmap dialog box, shown in Figure B, make sure your Output resolution is the same as your Input resolution, and in the Method section, choose Halftone Screen and then click OK.
Figure B: Use the Bitmap dialog box to choose the Halftone Screen method to convert the image to a bitmap.

The Halftone Screen dialog box, shown in Figure C, is displayed.
Figure C: The Halftone Screen dialog box allows you to adjust the frequency, angle, and shape of the halftone dots in your image.
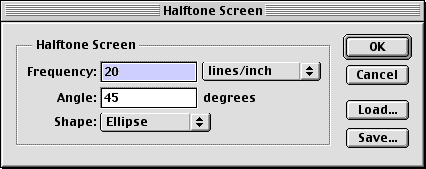
The lower the number you enter in the Frequency field, the bigger the dots will be in your image. The Angle option controls the orientation of the screen, and the Shape pop-up menu allows you to choose the shape of your dot. For our example, we used the settings shown in Figure C. You can experiment with different settings and use the Undo command to alter the effect until you get one that suits your image and needs.
Image size
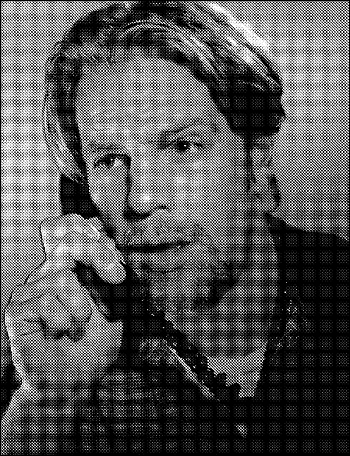
Figure D shows what the photograph looks like at print size. (If you’ve ever needed a good example of a moiré pattern, this is it.) In order to create the halftone effect, zoom in to enlarge the image and reveal the dots.
Figure D: Here’s the photograph displayed at print size after the halftone screen is applied. At this dimension, the coarse halftone effect we’re after doesn’t reveal itself.
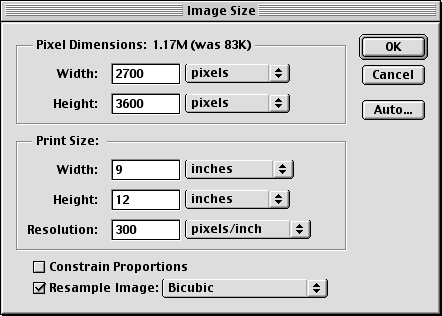
When the image is the size you want, use the Crop tool to crop out everything except the eyes, or whatever part of the image you like best. Now, choose Image>Image Size to display the Image Size dialog box. In this dialog box, shown in Figure E, resample the Width and Height to the dimensions you want, while leaving the Resolution at 300 ppi. (Note: Ordinarily, upsampling like this isn’t a good idea, but in this case, it’s okay because artifacts that appear in the image will only enhance the coarse effect.) Click OK, and then choose Print Size from the View menu.
Figure E: Use the Image Size dialog box to change the print size without changing the resolution.
Applying a filter
There’s one more step to this simple technique to make the halftone pattern a bit irregular. Choose Image>Mode>Grayscale and click OK, then choose Filter>Brush Strokes>Sprayed Strokes. In the dialog box that’s displayed, experiment with the Stroke Length and Spray Radius settings to change the shape and consistency of the halftone dots. This adds that really authentic newsprint feel.
Conclusion
It’s interesting to note how much of an effect the rough halftone screen has on our original photograph. This rather nondescript fellow on the phone turned out to have the eyes of a killer! Once again, the associations we all make when given certain visual triggers are extremely powerful, and Photoshop is the greatest tool ever invented to create these triggers in our images.

Copyright © 2000, Element K Content LLC. All rights reserved. Reproduction in whole or in part in any form or medium without express written permission of Element K Content LLC is prohibited. Element K is a service mark of Element K LLC
This article was last modified on January 3, 2023
This article was first published on August 4, 2000
Commenting is easier and faster when you're logged in!
Recommended for you

Design How-To: Using Ghosted Backgrounds
A beautiful technique that's unusually easy to design: ghost and repeat a foregr...

Out of Gamut: Photoshop, Previsualization, and Print Prediction
In my last column, I addressed the question, “How can I get Photoshop to m...

Create an Amazing Escher-Like Face in Photoshop
The technique of “unwinding” a face was first explored by the Dutch...


